Operations 32
o
For tower models, place the server on a flat, level surface with the access panel facing up.
o
For rack models, extend the server from the rack (on page
33
).
5.
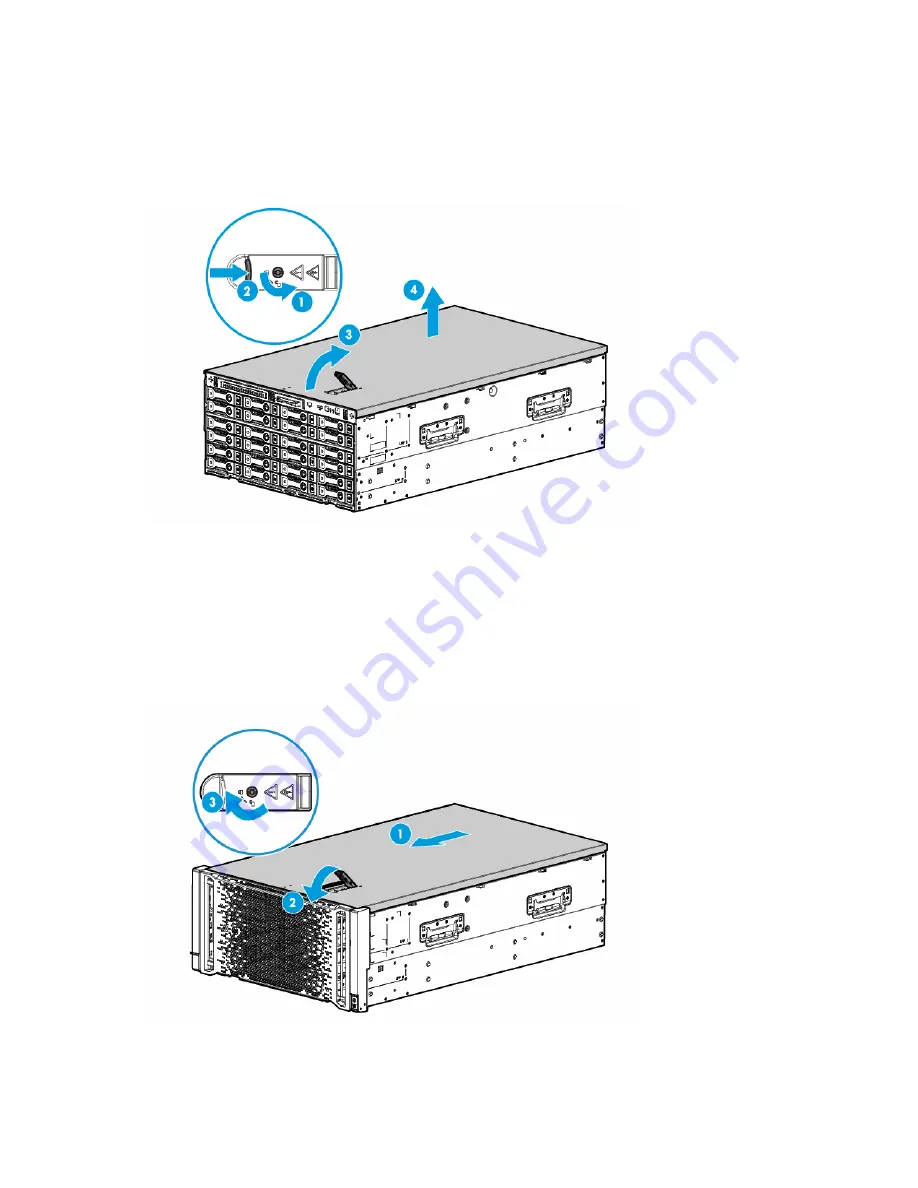
Open the access panel latch, slide the access panel to the rear of the chassis, and then remove the
access panel.
If the access panel latch is locked, use a T-15 Torx screwdriver to unlock the latch.
Install the access panel
1.
Place the access panel on top of the server with the hood latch open. Allow the panel to extend past the
rear of the server approximately 1.25 cm (0.5 inch).
2.
Push down on the hood latch. The access panel slides to a closed position.
3.
Use a T-15 Torx screwdriver to tighten the security screw on the hood latch.
4.
If the server is in a tower configuration, return the server to an upright position.
5.
If the server is in a rack configuration, slide the server into the rack.
Summary of Contents for ProLiant ML350 Gen9
Page 21: ...Component identification 21 SFF drives o Tower orientation o Rack orientation LFF drives ...
Page 40: ...Operations 40 o LFF model Use a flathead screwdriver to remove the blank from the box ...
Page 122: ...Cabling 122 LFF media cage data cabling Optical device cabling SFF configuration ...
Page 126: ...Cabling 126 HP Smart Storage Battery cabling Power supply backplane cabling GPU power cabling ...
Page 128: ...Cabling 128 Embedded SATA cabling LFF configuration SFF configuration ...
Page 131: ...Cabling 131 o SFF configuration o LFF configuration ...
Page 162: ...Support and other resources 162 ...
Page 163: ...Support and other resources 163 ...


