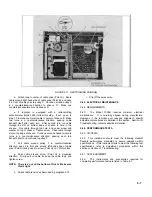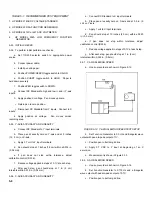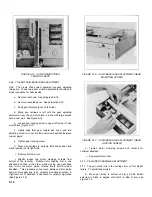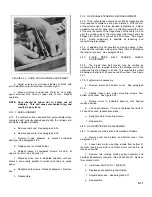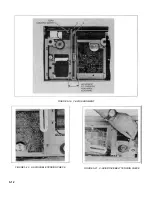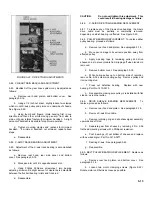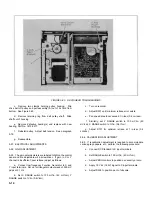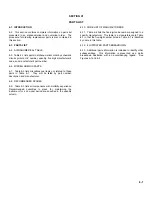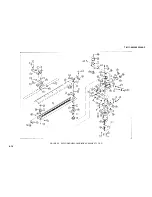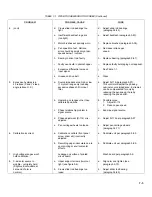
FIGURE 5-23. X-AXIS GEAR TRAIN BEARINGS
c.
Remove two clamps holding pulley housing. Slip
drive belt off pulley and pull assembly (A) out of its hold from
bottom. See Figure 5-23.
d.
Remove retaining ring from belt pulley shaft. Slide
shaft out of housing.
e.
Remove defective bearing(s) and replace with new
bearing, Part No. 1410-0277.
f.
Reinstall pulley. Adjust belt tension. See paragraph
5-76.
g.
Reassemble.
5-91. ELECTRICAL ADJUSTMENTS
5-92. GAIN ADJUSTMENT
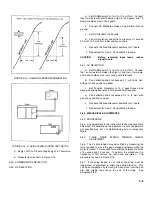
5-93. The gain potentiometers are labeled GAIN on the control
panel and are adjustable wit a screwdriver. If gain in X or Y
channel is insufficient (poor retrace) adjust as follows:
a.
Connect low frequency Function Generator to X and
Y input terminals. Set up for triangular output wave of 500 mV
pk/pk at 0.1 Hz.
b.
Set X RANGE switch to 100 mV/in. (40 mV/cm), Y
RANGE switch to 1V/in. (0.4V/cm).
c.
Turn on recorder.
d.
Adjust R237 until minimum retrace error exists.
e.
Pen speed should not exceed 1 in./sec (0.4 cm/sec).
f.
Similarly, set Y RANGE switch to 100 mV/in. (40
mV/cm), X RANGE switch to 1V/in. (0.4V/cm).
g.
Adjust R137 for optimum retrace at 1 in./sec (0.4
cm/sec).
5-94. CALIBRATION ADJUSTMENT
5-95. If recalibration adjustment is required to accommodate
various graph papers, etc., perform the following procedure:
a.
Connect DC Standard to X input terminals.
b.
Set RANGE switch to 100 mV/in. (40 mV/cm).
c.
Adjust ZERO controls to position pen exactly at zero.
d.
Apply 1.0 Vdc (1.25V) signal to X input terminals.
e.
Adjust R226 to position pen to full scale.
5-14
Summary of Contents for HP-7035B
Page 1: ...TECHNICAL MANUAL HEWLETT PACKARD MODEL HP 7035B ...
Page 9: ...FIGURE 1 4 DIMENSION DRAWING FIGURE 1 5 ACCESSORIES 1 3 ...
Page 12: ...FIGURE 1 7 TYPICAL FREQUENCY RESPONSE INPUT FILTER FIGURE 1 8 TYPICAL DYNAMIC RESPONSE 1 6 ...
Page 14: ...FIGURE 2 1 WING BRACKET INSTALLATION FIGURE 2 2 STACKED CONFIGURATION 2 2 ...
Page 16: ...FIGURE 3 1 FRONT PANEL CONTROLS 7035B AND 7035B 001 MODELS 3 2 ...
Page 20: ...FIGURE 4 1 BLOCK DIAGRAM FIGURE 4 2 DETAILED BLOCK DIAGRAM 4 2 ...
Page 48: ...TM 11 6625 2850 14 P FIGURE 6 1 EXPLODED VIEW CABINET 6 9 ...
Page 49: ...TM 11 6625 2850 14 P FIGURE 6 2 EXPLODED VIEW CARRIAGE ARM SHEET 1 OF 2 6 10 ...
Page 58: ...FIGURE 7 1 COMPONENT IDENTIFICATION FRAME 7 8 ...
Page 59: ...TM 11 6625 2850 14 P Figure 7 2 Component Identification Circuit Board 7 9 ...
Page 60: ...TM 11 6625 2850 14 P Figure 7 3 Schematic Model 7035B D 07035 92550 7 10 ...
Page 62: ...TM 11 6625 2850 14 P FIGURE 8 1 COMPONENT IDENTIFICATION CIRCUIT BOARD 8 2 ...
Page 66: ...TM 11 6625 2850 14 P FIGURE 8 5 EXPLODED VIEW CARRIAGE ARM 8 6 ...

