


40X ZOOM IR PTZ DOME CAMERA USER GUIDE
45
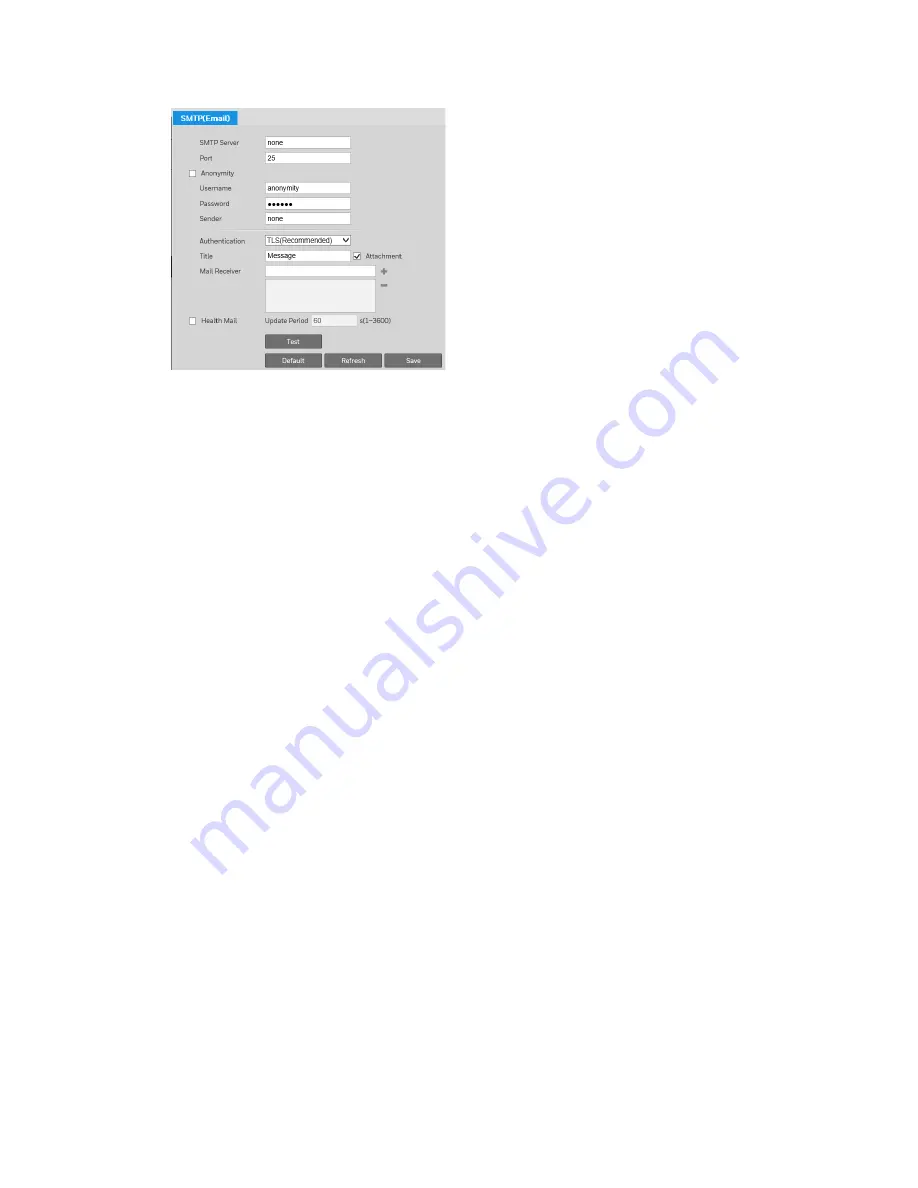
To set up email notifications:
1.
In the
SMTP Server
and
Port
fields, enter the SMTP server and port information.
2.
In the
User Name
and
Password
fields, enter the sender’s email user name
and password. Alternatively, if the server supports anonymous login, you can
select the
Anonymous
check box to log in without a user name and password.
3.
In the
Sender
field, enter the sender’s email address.
4.
From the
Authentication
list, select an encryption mode (
SSL
or
TLS
) or select
None
.
5.
In the
Title
field, enter the text that you want to appear in the subject line of the email.
6.
Select the
Attachment
check box if you want to enable snapshot attachments.
7.
In the
Mail Receiver
field, enter the recipient’s email address, and then click the
+
sign to add it to the list. You can enter up to three email addresses. To remove an
address from the list, select it, and then click the – sign.
8.
To have the system periodically verify that the email notification settings are
working, select the
Health Mail
check box, and specify the
Interval
.
9.
Click
Save
to apply the settings.
10.
Click
Test
to send a test email to verify that the settings are configured properly.
Configuring UPnP
You can configure Universal Plug and Play (UPnP) settings on the
Setting
Network
UPnP
page.