


Obstructions
Range
Floor Area
1
2
3
4
5
6
7
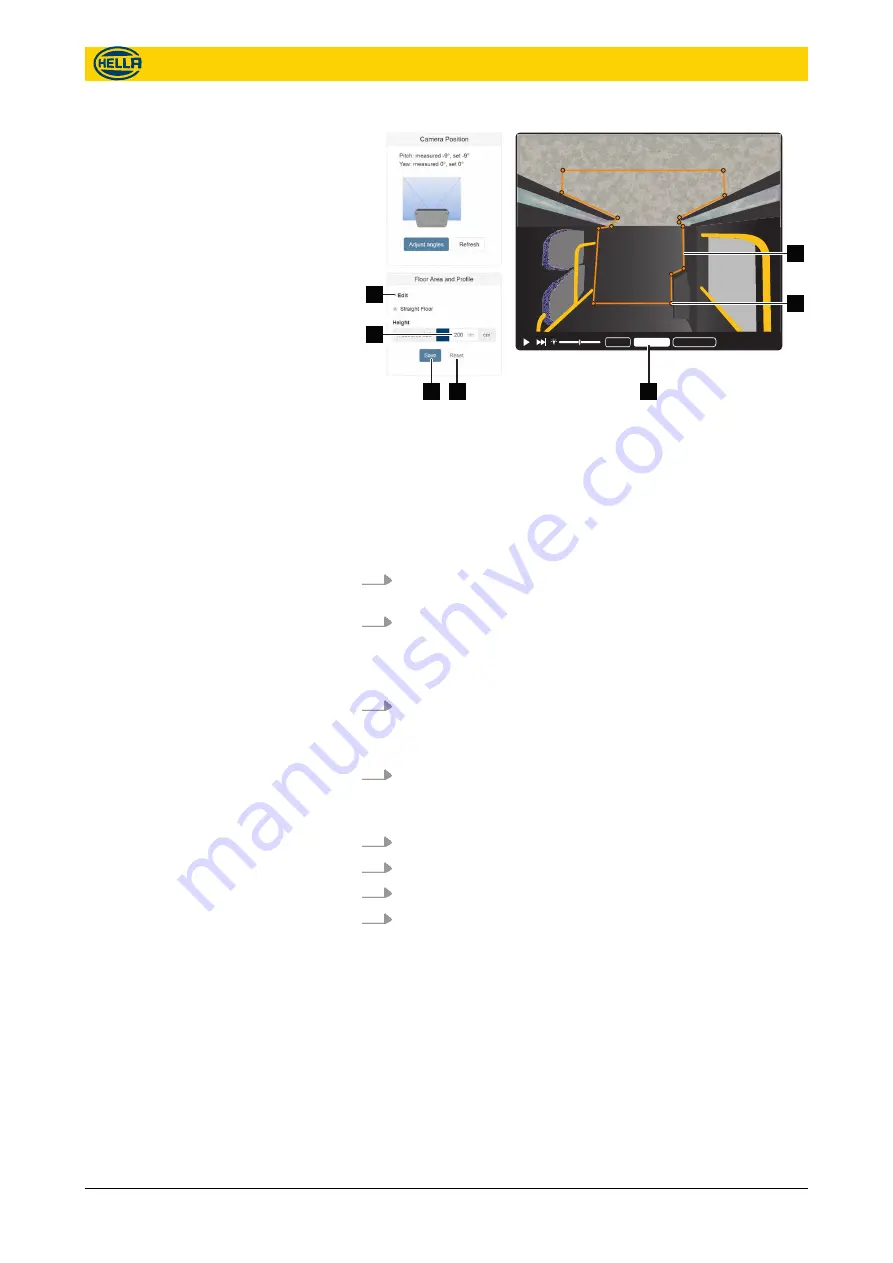
Fig. 29: Configuration options
1
Polygon line
2
Polygon point
3
Overlay views buttons
4
Reset button
5
Save button
6
Input field
7
Edit button
1.
Click in an input field or use the
[tab]
key to go to the next
input field or button.
2.
Edit the entry or choose from a list of values.
ð
If the entered value is outside the permissible value
range, the input field is outlined in red and in some cases
a corresponding error message will appear.
3.
Click the
“save”
button to apply the new settings. Click the
“reset”
button to revert to previous settings.
1.
Click the
“edit”
button.
ð
Editing is possible in the corresponding overlay view
showing in the camera view.
2.
Click and hold a polygon point to move it.
3.
Double click a polygon point to remove it.
4.
Double click a polygon line to add a new polygon point.
5.
Click the
“save”
button to apply the new settings.
6.3 Start Page - live view
The start page shows a camera view, the status of the device and
counting information.
Changing Values, Areas and Lines
Changing Values
Changing Areas and Lines
Configuration
Start Page - live view
32
09.06.2017
The reproduction, distribution and utilization of this document as well as the communication of its contents to others
without express authorization is prohibited. Offenders will be held liable for the payment of damages.
All rights reserved in the event of the grant of patent, utility model or design.
Summary of Contents for APS-R
Page 64: ......


