


Installation and initial operation
S. 27
Moreover, inform the customer that future changes to their Wi-Fi network (new router, changed password, etc.) can
impair the operation of
heatapp!
and many require an adjustment to the
heatapp!
set-up.
B
Connect the supplied plug power supply unit to the
heatapp! gateway
..
C
Plug the power supply unit into a power outlet.
5.3.3
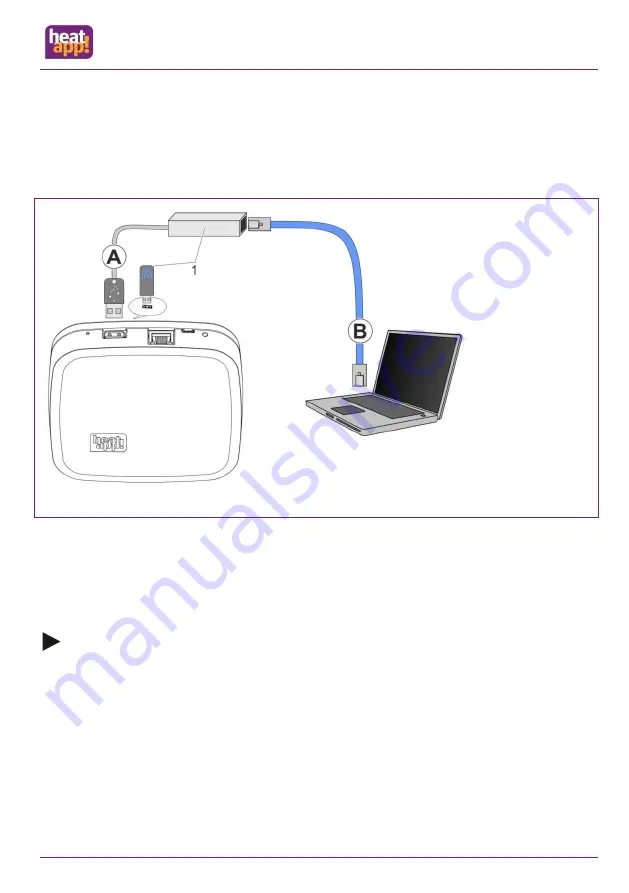
Initial operation / initial configuration
Fig.: 12 Initial set-up heatapp! gateway
1 heatapp! USB-LAN Adapter or heatapp! Installations-Stick
The initial set-up of the
heatapp! gateway
is performed based on a menu control system via the set-up assistant via the browser
of the connected PC / laptop.
DHCP must be activated in the network settings of the PC / laptop (automatic address allocation) and no proxy server must be
activated.
Note
Through updating of the device software by downloading via the Internet additional costs may be charged depending on the
customers actual internet tariff.
1.
Connect the
heatapp! USB-LAN adapter
from the installation kit to the
heatapp! gateway
and the PC / laptop:
A
Plug the
heatapp! USB-LAN adapter
into the USB port on the top side of the
heatapp! gateway
..
B
Start the PC / laptop. Connect the
heatapp! USB-LAN adapter
to the network port of the PC / laptop..
or
Plug the
heatapp! installation stick
into the USB port on the top of the
heatapp! gateway
. The displayed network
name is generated by the
heatapp! gateway
:
- heatapp! gateway[xxxxxxxx]