


102
Exchange of timing belt
3-8-2
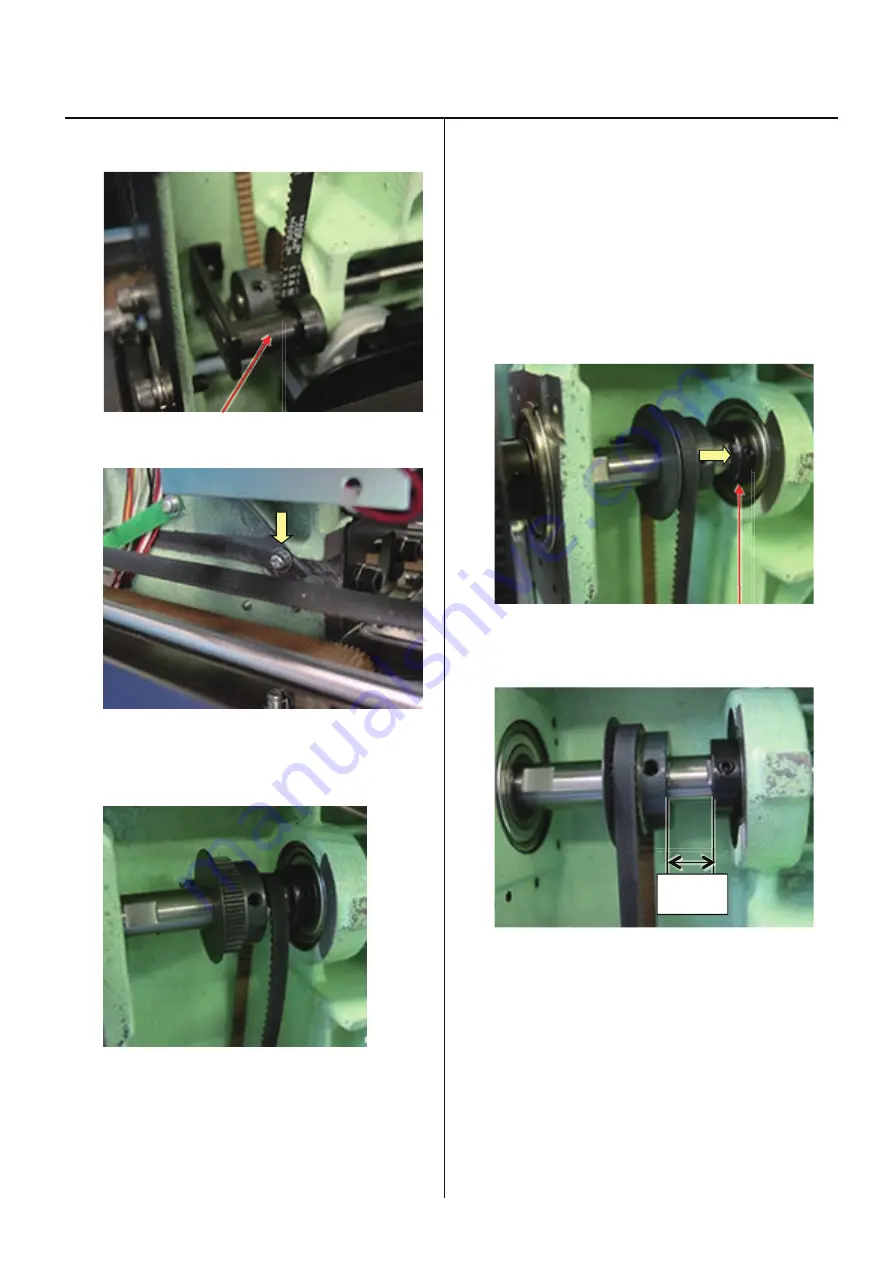
7. Remove Support roller shaft ass'y.
Support roller shaft ass'y
The fixing screw is located at the back of the machine body.
8. Remove timing belt from upper pulley, then pull out
upper shaft.
Install good timing belt.
9. Install parts in reverse order.
For installation and adjustment of each unit,
please refer to respective manuals.
Referring to [3-8-1 Adjustment of timing belt tension],
adjust tensile strength of timing belt.
<Important>
Pay attention to following (1) - (4).
(1)Please fix upper pulley, crank ass’y
on flat surface of upper shaft with screw tightly.
(2) Please push the Upper shaft to arrow marked direction
and make sure that Upper shaft collar are attached
without space from machine body.
Upper shaft collar
(3) Position of upper pulley is space from upper
shaft
collar.
(4)Confirm that belt is not interfere the pulley flange and
not come out from pulley groove.
10. Check and adjust following timing to finish
(1)Lowest needle point
(2)Upper shaft timing(L point, C point)
(3)Take-up lever timing
(4)Rotary hook timing
(5)
Needle height
(6) Height of pressure foot (7)
Jump device
12mm
Summary of Contents for HCH-701-30
Page 1: ...Maintenance Manual for Embroidery Machine HCH 701 30 Version 2 4 HappyJapan Inc ...
Page 132: ...128 Electrical connection diagram 5 ...
Page 133: ...129 Electrical connection diagrams 5 ...
Page 134: ...130 List of electrical connection diagrams 5 ...
Page 137: ...130c HCD81222 LCD CE MX 基板組 ...
Page 138: ...130d HCD8116 TP switch board ass y 3 82 7 32 7 387487 2487 ...


