91
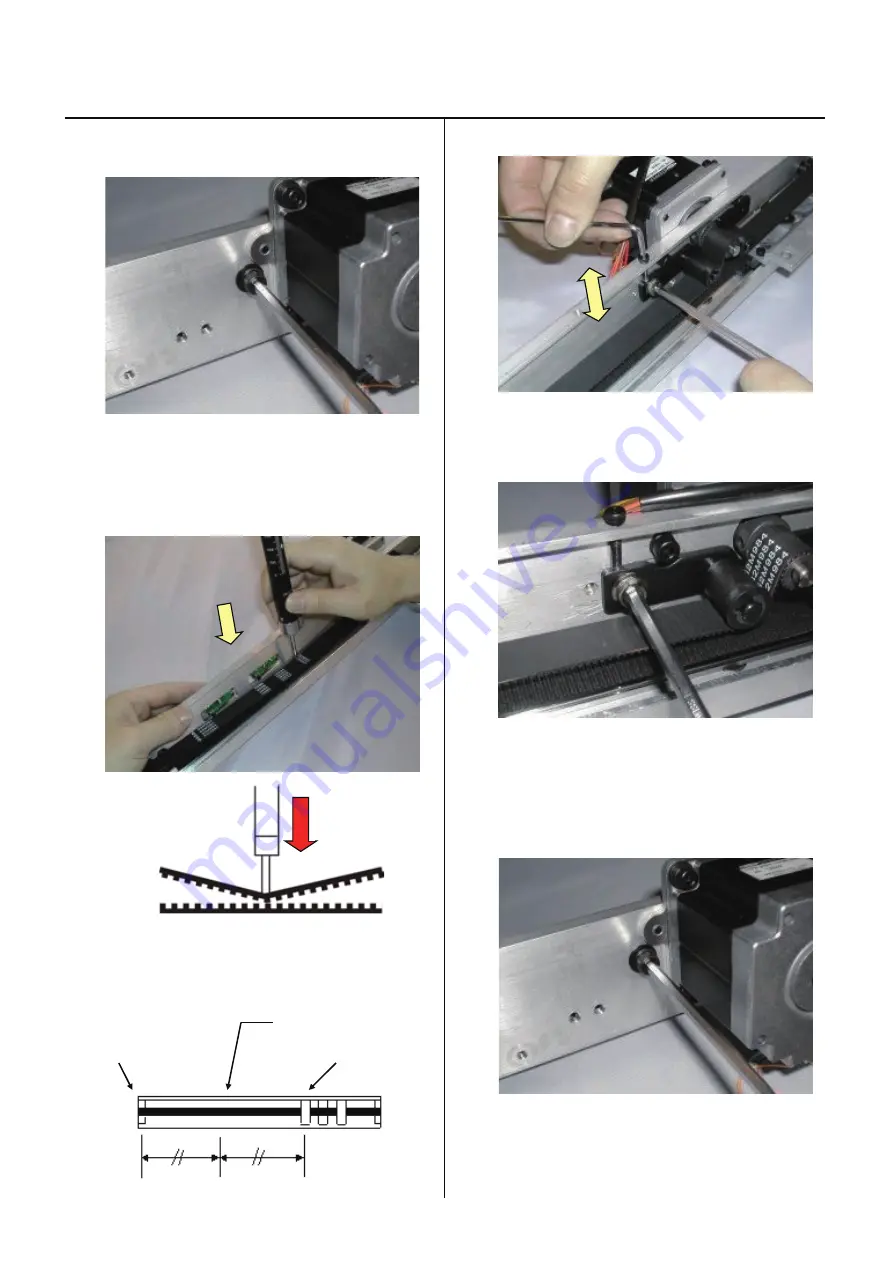
Adjustment of X carriage belt tension
3-7-1
7. Loosen fixing screw for tension pulley bracket slightly.
(rear side)
8. Adjust belt tension.
Use push and pull gauge.
<Adjustment value>
[200g] at the status of which both belt is touch
.
<Note>
Slide connecting plate to right as full as possible.
Gauge in the middle of idler pulley and tension pulley.
Measurement point
Idler pulley Tension pulley
Adjustment, tighten fixing screw for tension pulley bracket.
9. Tighten fixing screw for tension pulley bracket. (front side)
10. Tighten fixing screw for tension pulley bracket. (rear side)
11. Return things back to previous places in reverse order.
Summary of Contents for HCH-701-30
Page 1: ...Maintenance Manual for Embroidery Machine HCH 701 30 Version 2 4 HappyJapan Inc ...
Page 132: ...128 Electrical connection diagram 5 ...
Page 133: ...129 Electrical connection diagrams 5 ...
Page 134: ...130 List of electrical connection diagrams 5 ...
Page 137: ...130c HCD81222 LCD CE MX 基板組 ...
Page 138: ...130d HCD8116 TP switch board ass y 3 82 7 32 7 387487 2487 ...


