43
Subject to change without notice
D o c u m e n t a t i o n , s t o r i n g a n d r e c a l l i n g
If you define the WAVEFORM RATE as “Max. Sam-
pling Rate” in the ACQUIRE menu, two rows will
be affixed with a time stamp during the CSV export
because a minimum and a maximum value must be
assigned to this time value. To acquire an ampli-
tude value per time stamp, activate the WAVEFORM
RATE “Automatic” in the ACQUIRE menu.
Example: Curve with all visible channels
[s],CH1[V],CH2[V],CH3[V],CH4[V]
-4.99500E-07,-2.601E-03,2.566E-02,-1.003E-04,1.139E-04
-4.99000E-07,-6.012E-04,-5.434E-02,-1.003E-04,-8.611E-05
-4.98500E-07,-6.012E-04,-5.434E-02,9.973E-05,-8.611E-05
-4.98000E-07,1.399E-03,-5.434E-02,2.997E-04,-8.611E-05
TXT
TXT files are ASCII files that only contain amplitude values (no
time values). Amplitude values are separated by a comma. The
value pairs are listed as single values without identification.
Example:
1.000E-02,1.000E-02,1.000E-02,1.000E-02,3.000E-02
HRT (HAMEG Reference Time)
Files with this extension are reference curves of the time do
-
main. If the displayed curve is saved in this format, it can be
used in the reference menu. The HRT format also allows you
to generate files that can be reloaded into the oscilloscope via
reference menu.
You can use the
universal knob to select in the soft menu
POINTS whether to read out the display memory or the entire
acquisition memory.
Please note that the repeat rate has to be set to the
maximum sampling rate via ACQUIRE key when
reading out the entire acquisition memory. The
entire acquisition memory can only be read out in
STOP mode.
After you made all entries, press the menu key
STORE
to save
the selected curve(s) according to the settings.
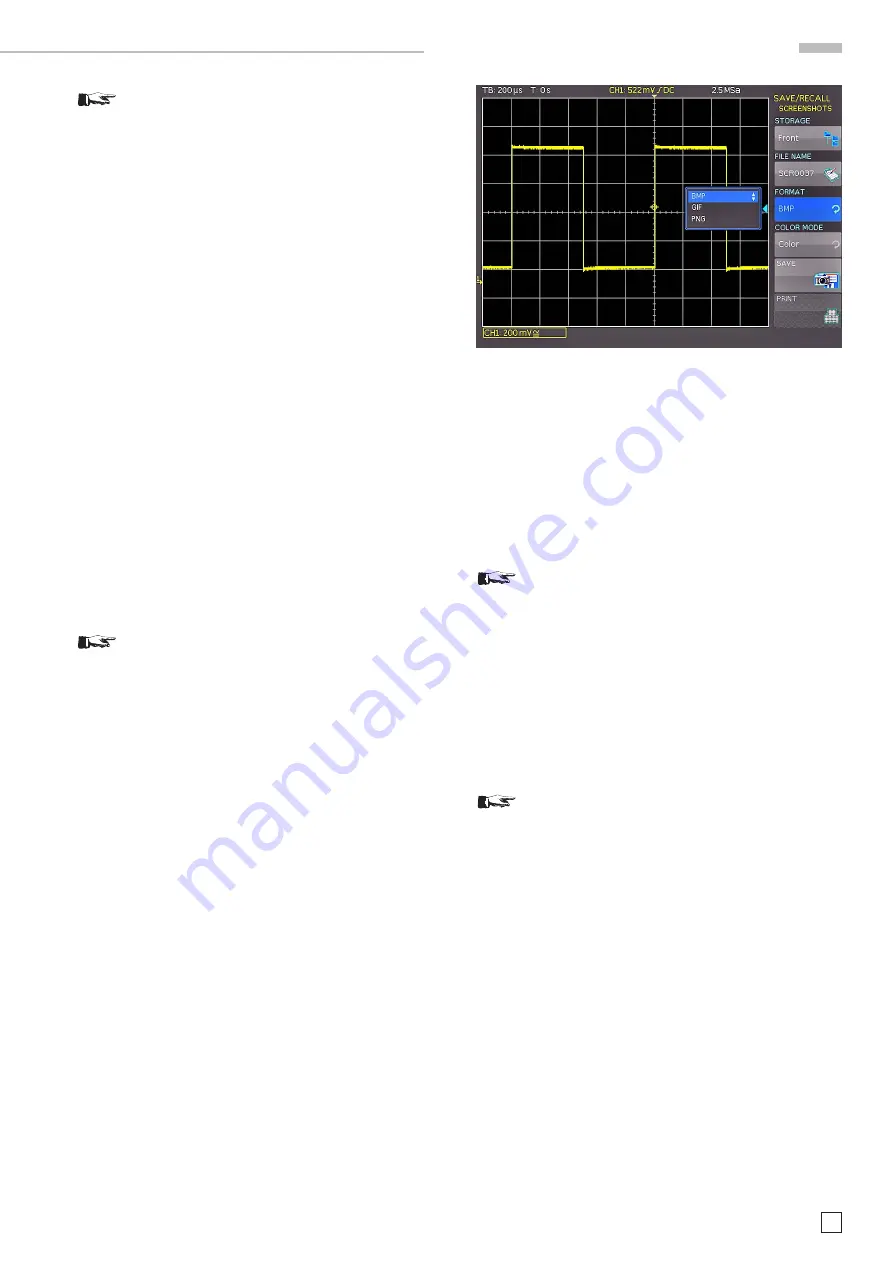
10.4 Screenshots
The most important format to store information for documen
-
tation purposes is the screenshot. A screenshot is an image
file which shows the current screen content at the time that
storage takes place.
The soft menu STORAGE allows you to use the USB connection
on the front or back of the instrument as storage location. Se
-
lecting the respective storage location is possible when a USB
stick has been recognized. If a
USB stick is connected, you can
also change, create or delete directories. Use the soft menu
key SORT ENTRIES to sort several settings files by name, type,
size or date. Press ACCEPT DIR. to confirm the target directory
and you will automatically return to the screenshot main menu.
The soft menu key
FILE NAME
opens the menu for the name
entry where you can use the universal knob to enter a name
and confirm your entry by pressing
ACCEPT
(SCR is the default
name). The screenshot main menu will display automatically.
The file format of a graphics file determines the color depth and
the type of compression. The quality of the various formats is
identical for the oscilloscope graphics. You can choose from the
following file formats in the soft menu FORMAT:
– BMP = Windows Bitmap Format
– GIF
= Graphics Interchange Format
– PNG = Portable Network Graphic
Press the soft menu key
COLOR MODE
to to choose from
GRAYSCALE
,
COLOR
or
INVERTED
with the universal knob.
If
GRAYSCALE
is selected, the colors are converted to gray
scales when the data is stored, if
COLOR
is selected, the data
is stored as it displays in the screen, and if
INVERTED
is ac
-
tivated, data will be stored in color with a white background.
To achieve prints with well-defined contrasts
when using the color mode INVERTED, you should
set the curve intensity (via INTENS/PERSIST and
universal knob) to approximately 70%.
If you press the key
SAVE
, the current screen will be saved
immediately to the selected storage location with the selected
name and format.
The soft menu key PRINT allows you to print a screenshot im
-
mediately to a connected printer (e.g. PCL or PCLX as „printer
language“). If a printer is detected, the soft menu key PRINT
will no longer be grayed out.
Press the RUN/STOP key to stop acquisition prior
to printing which will allow a correct printout.
The free software HMScreenshot (software module of the
HMExplorer software) enables the transfer of screenshots in
bitmap, GIF or PNG format from a HMO series oscilloscope
via RS-232 or
USB interface to a connected PC where the
screenshots may then be saved or printed. For additional
information on the software, refer to the internal HMExplorer
help at www.hameg.com.
10.5 Formula Sets
In the soft menu
FORMULARIES
you can import or export
formula sets. This allows the data exchange between different
storage media (internal memory / external USB sticks). The
exact procedure is described in chapter 9.2.
10.6 FILE/PRINT Key Definition
The FILE/PRINT key in the GENERAL control panel allows
you to save instrument settings, curves, screenshots and
screenshot settings simultaneously with just one key. As
Fig. 10.7: Menu for screenshots


