19
Subject to change without notice
A q u i c k i n t r o d u c t i o n
addition or subtraction of two activated sources. The formula
editor allows to predefine 5 possible mathematical functions,
it is called by pressing the MATH key (which lights up red) and
the MENU key
21
.
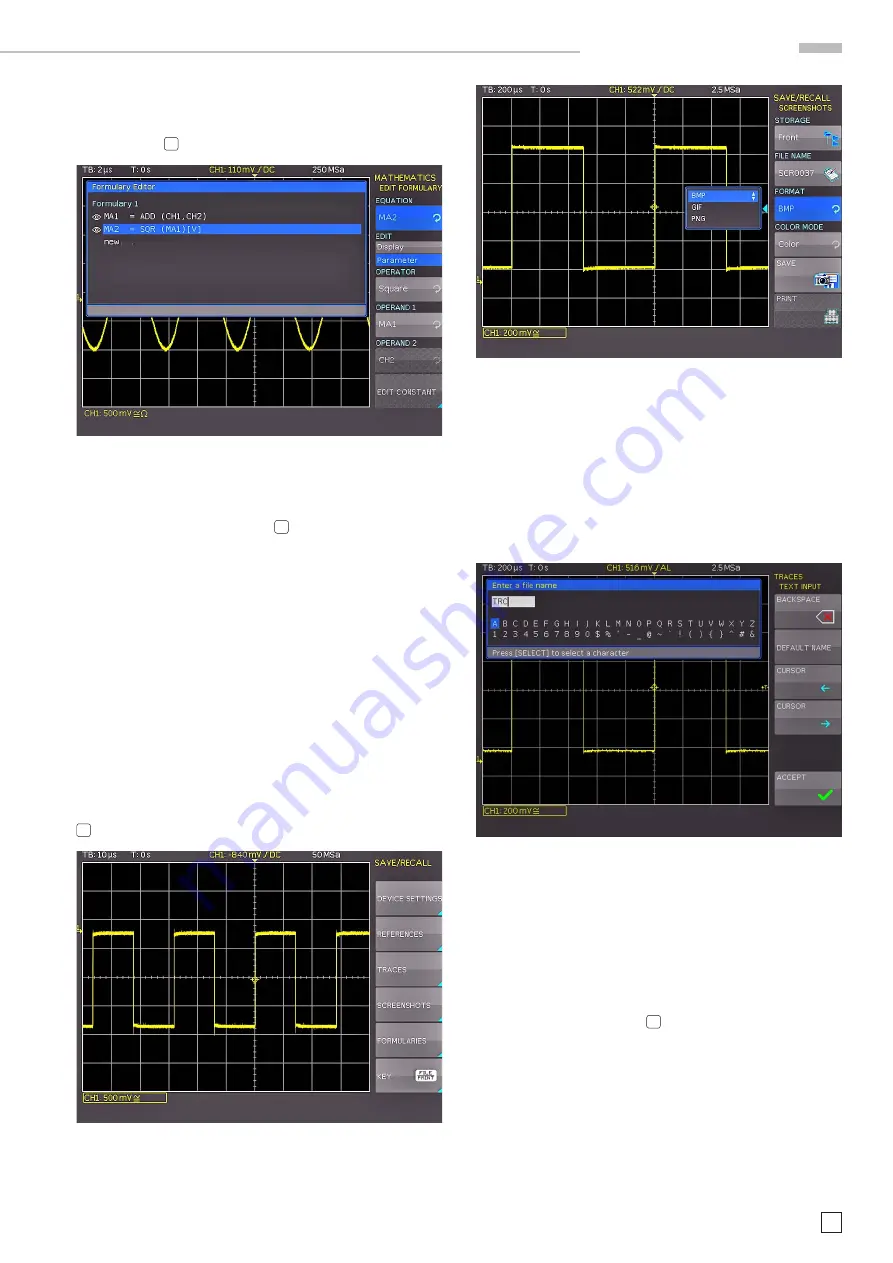
Fig. 3.12: Formula editor
In order to change the settings use the soft keys and the universal
knob. Here you can program and store the formulae most used.
As mentioned earlier these formulae can be quickly switched on
and off by pressing the MATH key
26
and using the appropriate
short soft menue.
3.7 Storing data
Your HMO can store 5 different kinds of data:
– Instrument settings
– Reference signals
– Signals (up to 24000 points)
– Screen displays
– Sets of formulae
Signals and screen displays can only be stored on USB sticks.
All other data can be stored either on a USB stick or in the
instrument’s non-volatile memories. In order to store data you
have to define the kind of data and the destination. First attach
a USB stick to the front panel connector. Press SAVE/RECALL
12
in order to call the respective menu.
Fig. 3.13: Save/Recall menu
Select the kind of data by pressing the respective soft key (in this
example
SCREENSHOTS
) in order to access the settings menu.
Fig. 3.14: Menu
SCREENSHOTS
Please verify that the USB connector into which you plugged
the USB stick (front or rear) is written in the top soft menue
(You can change the destination by opening the respective
menu if you press the softkey next to
STORAGE
). You can now
save a screenshot if you press the softkey next to SAVE using
the predefined name written in the menu below
FILE NAME.
You may name the destination memory with up to 8 characters;
in order to do this select the menu item
FILE NAME
and define
the name by using the universal knob (selecting a character
by turn the knob and enter by pushing the knob .
Fig. 3.15: Defining a file name
After the soft key next to
Accept
was pressed the oscilloscope
will have stored the name and return to the settings menu.
Here you can now store the actual screen display by pressing
the STORE
soft key. Alternatively, you can return to a lower
menu level (by pressing the lowest Menu OFF key) and select
the menu item key FILE/PRINT. In the following menu press
the soft menu key next to
SCREENSHOTS
: this will assign the
function screenshot to the key FILE/PRINT with the settings
chosen. This enables you to store a bit map file on your
USB stick
by just pressing FILE/PRINT
17
at any time and in any menu.


