TIMER
Recording
ķ
28
Programming with the user guide
and manual data entry, variant 3
❒
Preparation
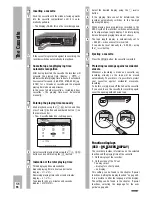
Switch the TV set on.
Select the AV programme position for the video
recorder on the TV set.
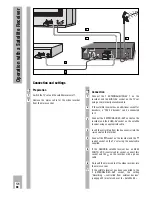
If the recorder is connected to a TV set with Mega-
logic functions, the TV set is switched on
automatically and the AV programme is selected
automatically when the
h
button is pressed.
Insert a cassette with sufficient playing time. Pay
attention to erase protection.
❒
Example
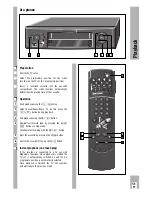
Use the buttons on the remote control for this
function.
Operation can be terminated at any time using the
A
button.
Call up the » Info « table using the
h
button.
Activate record programming using the
1
button.
– The » Record Programming « table appears.
– The data is also indicated on the display on the
recorder. Only the on-screen display is described
in the example.
If the first TIMER position is occupied, use the
DC
buttons to select the next free TIMER
position.
Programme a new recording by pressing the
G
button.
3
Ǻ
2
1
Ǻ
Ǻ
3
Ǻ
2
1
–
The following appear in the data line:
a TV station, the current date, the current time as
start time, the current time plus 1
hour
30 minutes as stop time and VPS/PDC on (*).
Alter data for recording:
B
PROGRAM
– the TV station,
B
DAY
– the date,
B
START
– the start time,
B
STOP
– the stop time,
›
SP/LP
– long-play recording,
Z
VPS/PDC (red)
– VPS/PDC signal on/off,
Z
ED/EW (green)
– daily or weekly recording at the
same time.
If the picture/sound signal is to be recorded from
an external device that has been connected to the
corresponding sockets instead of from the TV
programme, this programme source must be
selected using the
B
PROGRAM.
button.
The following messages appear in the data line
instead of the programme number and the station
identification:
– » HI « for a stereo system on the
ň
LR sockets;
– » A1 « or » A 2 « for example for a satellite receiver
on the EXTERNAL A 1 or A 2 socket;
– » CV « for a camcorder on the VIDEO IN/AUDIO IN
sockets.
The external applicance must be switched on for
the duration of the TIMER programming.
Confirm programming using the
G
button.
– The TIMER position is programmed. The remain-
ing playing time is indicated briefly.
Ń
!
The recorder is in record standby mode. All drive
mechanism functions of the recorder are now
“blocked”.
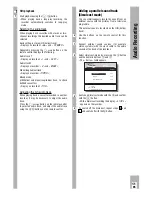
– Display on recorder: » TIMER «.
– The red display on the recorder lights up.
Ń
!
To programme further TV programmes, first press
the
¢
TIMER ON/OFF
button and repeat the operation
from step
of the example.
The recorder “messages” and their meaning, as
well as options for alteration can be found on pages
25 and 26.
Ǻ
1
5
Ǻ
4
GRUNDIG
TEXT-PROGRAMMING
■
- -
- - .
- - : - -
- - : - -
■
■
■
■
■
ɶʺ
:
Select timer
CLEAR : Clear timer
OK : Change timer
i : Return to Info menu
Timer
Prog.
Date
Start
Stop
GRUNDIG
TEXT-PROGRAMMING
■
10 CNN
01.
15:00
16:30
*
■
■
■
■
■
+/– :
Enter timer data
: VPS/PDC Off/On
: ED/EW/Normal
LP/CL : Long play / Clear timer
VPT : Program with TEXT
OK : Activate timer
i : Return to Info menu
Timer
Prog.
Date
Start
Stop
Summary of Contents for GV 740 HiFi
Page 1: ...VIDEORECORDER GV 740 HiFi...


