Playback
ķ
19
Adjusting picture/sound quality
Use the buttons on the remote control for these
functions.
❒
Picture/sound quality adjustment –
automatic
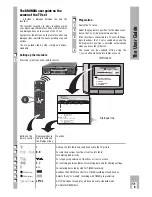
After a cassette has been inserted and playback has
started, the recorder automatically adjusts for the
best possible picture quality (auto tracking).
❒
Picture/sound quality adjustment –
manual
Press the
›
TRACKING
button.
– Display on recorder: »
TRACK
«.
Use the
F E
buttons to carry out the tracking
adjustment.
Store the setting using the
G
button.
❒
Optimising the picture/sound quality for
cassettes recorded on another recorder
If the picture jumps or scrolls when playing back
tapes recorded on another recorder, press the
›
CODE
button, the numbered buttons
8 5 1 1
and and
G
button.
– Brief display on recorder: »
ON
«.
❒
Optimising the picture/sound quality for
cassettes recorded on another recorder
If the picture jitters or appears uneven during the
playback functions freeze-frame or slow motion
advance and double speed forward playback, the
picture can be optimised.
During playback, press the
h
button followed by
the numbered button
2
.
– Display on recorder: »
JITTER
«.
Adjust the picture to suit your personal taste using
the
D
or
C
buttons and then press the
G
button.
❒
Optimising the picture definition
(crispening)
Automatic (Automatic Contour
Control ACC+)
The recorder automatically adjusts to the optimum
picture definition after the cassette has been insert-
ed and playback begins.
Manual
During playback the
DC
buttons can be used to
adjust the picutre definition to suit your personal
taste.
– Brief display on recorder : »
SHARPN
+
I
«.
2
1
3
2
1
Ǻ
Locating certain recordings Video
Index Search System (VISS)
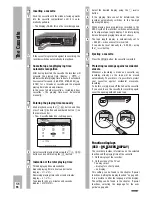
This system enables you to locate the beginning of
each of your own recordings quickly and accurately.
Use the buttons on the remote control for these
functions.
❒
Marking a tape position – automatically
The “marks” are placed on the tape automatically at
the beginning of each of your own recordings.
❒
Marking a tape position – manually
In addition to the automatic “marks”, you can place
“marks” on the tape with the push of a button.
While recording or playing back the tape position
that is to be “marked”, press the
›
INDEX MARK
button.
– Brief display on recorder: »
MARK
«.
– The mark is “put onto” the tape.
❒
Locating a tape position
The starting point is the current tape position.
The search can be carried out by up to 9 preceeding
or 9 subsequent marks.
Press the
›
INDEX
button.
Enter a number – for mark 1 to 9 – using the
numbered buttons
1
…
9
and then press the
Y
or
X
button.
– Brief display on recorder: »
INDEX
« and an index
number.
– The tape is wound to the selected mark and
playback is started from that point.
❒
Erasing a mark from the tape
Press the
›
INDEX
button.
Enter a number – for mark 1 to 9 – using the
numbered buttons
1
…
9
and then press the
Y
or
X
button..
– The tape is wound to the selected mark and
playback is started from that point.
– Brief display on recorder: »
INDEX
«.
While the »
INDEX
« display is flashing, the mark
can be erased using the
›
INDEX ERASE
button.
– Display on recorder: »
ERASE
«.
3
2
1
2
1
Ǻ
Summary of Contents for GV 740 HiFi
Page 1: ...VIDEORECORDER GV 740 HiFi...


