Recording
ķ
21
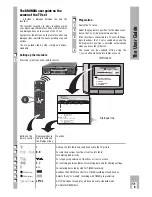
Entering a stop time
Ń
!
If no stop time is entered, recording continues to
the end of the tape.
The recorder switches automatically to rewind,
rewinds the tape to the beginnning and switches to
standby.
There are two options for entering a stop time:
Entering to the exact minute;
Entering in 30 minute steps.
Use the buttons on the remote control for this
function.
❒
Entering stop time to the exact minute
Press the
K
button during recording.
Enter the desired stop time as a four-digit number
using the numbered buttons
1
…
0
and confirm
using the
G
button.
❒
Entering stop time in 30-minute steps
Press the
K
button during recording.
Enter the desired stop time by pressing the
K
button repeatedly (max. 20 times= 600 minutes)
and confirm using the
G
button.
❒
Changing the stop time
If the stop time is to be changed during recording,
press the
K
button, enter the new stop time using
the numbered buttons
1
…
0
and confirm using
the
G
button.
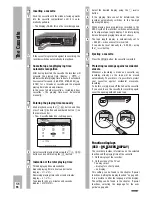
Assembling recordings with clean
joints (assembly editing)
During playback, locate the tape position at which
you wish to join the new recording. Then press the
W
/
Ó
button.
Switch the recorder to recording pause using the
K
/
ø
button.
Enter the desired programme as a one- or two-digit
number using the numbered buttons
1
…
0
.
Start the » new « recording using the
K
/
ø
button.
– During playback you will see seamless transitions
without flaws. This is called assembly editing.
4
3
2
1
1
2
1
2
1
Ǻ
Special features of audio
recording
❒
The different audio tracks of your
recorder
Your recorder has two different recording and
playback systems for the audio signal.
The hifi or helical track is for stereo and two-
channel recordings.
The mono or longitudinal track is for sound
reprodcution on standard VHS recorders and for
dubbing.
The sound is recorded on both audio tracks during
recording.
❒
Two-channel-sound TV broadcasts
Both sound channels are always recorded on the
helical track.
Sound channel 1 is recorded on the longitudinal
track.
The recorder automatically switches to sound
channel 1 for two-channel broadcasts.
The sound channel can be selected using the
¢
AUDIO
button on the remote control and checked
using the TV set.
With the remote control’s
›
AUDIO
button, the
sound channel can be selected. Control by means
of the television is possible.
❒
Stereo-sound TV broadcasts
Both sound channels are always recorded on the
helical track.
The mono sound is recorded on the longitudinal
track.
Basic position = stereo; the recorder display shows:
»
ɳ
«.
❒
Sound level control, automatic/manual
After the programme has been selected, the
recorder automatically adjusts the sound level.
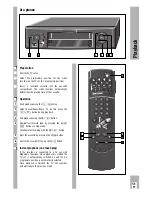
If you wish to control the sound level manually,
press the
›
MAN
button on the recorder.
– Display on recorder: »
M A N
« and »
LEVEL I0
«.
Use the
Ü *
buttons on the recorder to adjust the
sound so that the red mark (+1 dB) lights up during
the loudest passages.
2
1
Ǻ
➡
Summary of Contents for GV 740 HiFi
Page 1: ...VIDEORECORDER GV 740 HiFi...


