98
Program description - Base setup models | Helicopter models
BUT CAUTION: If you wish to operate two servos
with one control function, for example such as trans-
mitter control function 2 (roll) which is divided up into
control channels 1 & 2 for left and right roll servos
for the “3Sv(2Roll)” option in the »Helicopter type«
menu; then “map” the corresponding transmitter out-
puts, in this case for channels 1 & 2 (= inputs to the
receiver) accordingly.
Notes:
• The maximum number of lines (outputs) available
corresponds to the maximum number of servos
which can be connected to the receiver in ques-
tion.
• If you see the warning …
C A N ‘ T
R E C E I V E
D ATA
O K
… then there is no bound receiver within range. If
the case may be, switch your receiving system on.
• With the »Tx. output swap« option, which is avail-
able as standard on the
mc-20
transmitter, and
can be unlocked on the
mc-16
HoTT transmitter
at extra cost, see page 230, the transmitter’s con-
trol functions can be interchanged in any way; it is
also possible to assign multiple outputs to one and
the same control function. In the interests of clarity
however we strongly advise that you use only one
of these two options.
Channel assignment on second receiver
As already mentioned, the “Receiver channel map-
ping” menu point can be used to map (re-distribute)
the transmitter’s control channels in any way amongst
a maximum of two receivers; these are the eight
standard / twelve optional control channels of the
mc-16
HoTT transmitter, and the standard twelve
channels of the
mc-20
HoTT transmitter. In this
case the numbering of the outputs (servo sockets)
and the maximum number of lines (outputs) available
reflects the maximum number of servos which can be
connected to the receiver in question.
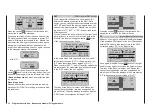
R e c e i ve r C H – B I N D 2
In Ch
1
In Ch
2
In Ch
3
In Ch
4
8
8
8
8
Out Ch
Out Ch
Out Ch
Out Ch
R e c e i ve r C H – B I N D 2
In Ch
In Ch
In Ch
In Ch
12
12
12
12
1
2
3
4
Out Ch
Out Ch
Out Ch
Out Ch
Note:
The upper screen-shot above shows the screen of
the standard
mc-16
HoTT eight-channel transmit-
ter; the lower one the screen of the
mc-20
HoTT
twelve-channel transmitter.
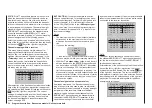
After selection of the desired output with the selection
keys of the left or right four-way button, the respec-
tive input field will be framed. Tap the center
SET
key
of the right four-way button. The current setting will
be displayed in inverse video. Now select the desired
input channel with the selection keys of the right four-
way button. For example, appropriate for the above
example with roll servos:
1
2
3
4
Out Ch
Out Ch
Out Ch
Out Ch
R e c e i ve r C H – B I N D 2
In Ch
In Ch
In Ch
In Ch
1
2
12
12
mc-20
HoTT transmitters feature a menu point in
which the transmitter’s control channels can be re-
distributed in any way you like within one receiver,
and also include an option to distribute the transmit-
ter’s control channels to a maximum of two receivers
in any arrangement you desire. These are the eight
standard / twelve optional control channels of the
mc-16
HoTT transmitter, and the standard twelve
control channels of the
mc-20
HoTT. This re-
distribution is termed “mapping” or “channel mapping”
(channel assignment) in the following section.
Select the receiver to be “mapped” with the selection
keys of the left or right four-way button then tap briefly
on the center
SET
key of the right four-way button.
Channel mapping within a receiver
This menu point provides a simple means of re-
mapping the transmitter’s control channels in any
way you like, in a similar manner to the channel as-
signment function termed “Channel mapping” in the
»Tele metry« menu, as described on page 244. This
means that you can re-distribute the transmitter’s
control channels, which are present at the receiver
inputs, to the selected receiver’s outputs / servo sock-
ets in any way you like:
R e c e i ve r C H – B I N D 1
In Ch
In Ch
In Ch
In Ch
1
2
3
4
1
2
3
4
Out Ch
Out Ch
Out Ch
Out Ch
After selection of the desired output with the selection
keys of the left or right four-way button, the appropri-
ate value field will be framed. Briefly tap on the center
SET
key of the right four-way button. The current
setting will be displayed in inverse video. Now use the
selection keys of the right four-way button to select
the desired input channel’s respective transmitter
output, see page 230.
Summary of Contents for HoTT MC-16 Series
Page 1: ...Programming Manual mc 16 mc 20 HoTT 1 en mc 16 mc 20...
Page 27: ...27 For your notes...
Page 53: ...53 For your notes...
Page 61: ...61 For your notes...
Page 65: ...65 For your notes...
Page 71: ...71 For your notes...
Page 103: ...103 For your notes...
Page 107: ...107 For your notes...
Page 111: ...111 For your notes...
Page 155: ...155 For your notes...
Page 165: ...165 For your notes...
Page 201: ...201 For your notes...
Page 229: ...229 For your notes...
Page 231: ...231 For your notes...
Page 261: ...261 For your notes...
Page 265: ...265 For your notes...
Page 301: ...301 For your notes...
Page 327: ...327 For your notes...
Page 328: ...328 For your notes...


