background image

85

Program description - Suppress models

Suppress models

Suppression of model memory locations

This option is available as standard on the 

mc-20

 HoTT transmitter only.

Use the 



 selection keys on the left or 

right four-way button to select the »Sup-

press models« option in the multi-function menu:

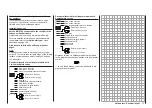
Model  select

Copy / Erase

Suppress  menus

Suppress  models

Base  setup  model

Model  type

Model  select

Copy / Erase

Suppress  menus

Suppress  models

Base  setup  model

Helicopter  type

Open this menu option with a tap on the center 

SET


key of the four-way button pad.
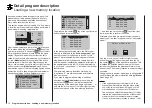
Model memories which are rarely needed or to which 
access is to be blocked for other reasons can be hid-
den from the model selection list. This also clarifies 
the overview layout for model selection.
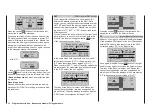
The model to be suppressed/displayed is selected 
with the selection keys of the left or right four-way but-
ton then its status is switched over with a tap on the 
center 

SET

 key of the right four-way button.

01

03

04

05

ULTIMATE

02

GRAUBELE

STARLET

BELL47G

R12

R12

R12

–––



free



Suppress:

TOG

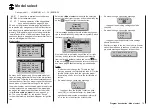
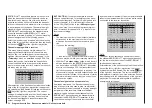
A model memory which is “stricken through” will no 
longer appear in the »Model select« menu:

03

04

05

STARLET

BELL47G

06

R12

–––



free





free



01

GRAUBELE

R12

07



free



mc

 

16 20

Summary of Contents for HoTT MC-16 Series

Page 1: ...Programming Manual mc 16 mc 20 HoTT 1 en mc 16 mc 20...

Page 2: ...automatic chargers 16 Recommended chargers accessory 16 Removing the transmitter s battery 17 Inserting the transmitter s battery 17 Battery operation timer 17 General charging notices 17 Opening the...

Page 3: ...he materials can be recycled according to their markings You make an important contribution to protection of the environment by utilizing facilities for reuse material recycling or other means of expl...

Page 4: ...age to housings and cables Do not use units which have been damaged or be come wet even after they are dry again Only those components and accessories which we recommend may be used Always use origina...

Page 5: ...ly this takes at least three seconds Do not switch your transmitter on again until this has occurred If you neglect this there is a risk that the transmitter will hang immediately after being switched...

Page 6: ...r details about interference filters refer to the Graupner RC main catalog or in Internet at www graupner de Servo interference filters for extension cables Order no 1040 The servo interference filter...

Page 7: ...or compliance with the as sembly instructions the operating instructions or the conditions and methods under which remote control components are installed operated utilized or main tained Therefore Gr...

Page 8: ...r your charger discharger Other handling notices The battery to be charged must be placed on a non combustible heat resistant non conducting surface during the charging process Combustible or readily...

Page 9: ...ls must be kept out of the reach of children Batteries must not get into the vicinity of babies or small children If a battery is swallowed immedi ately go to a doctor or emergency medical facility Ba...

Page 10: ...he renowned NAUTIC modules A further innovation is the channel sequencer available as standard only on the mc 20 HoTT which provides a means of automating servo sequences involving up to three servos...

Page 11: ...channel spread Intelligent data transfer with correction function Over 200 systems can be used simultaneously The HoTT technique of bidirectional communica tion between sender and receiver as well as...

Page 12: ...h speed 32 bit operating system with modern flash memory simple update capability via the USB port and the micro SD card Transmitters feature sockets for PC USB interface earphone SMART BOX DSC system...

Page 13: ...activated when the landing gear is down A num ber of functions which are normally independent of one another are to be put in their base settings by way of an Emergency switch This program automation...

Page 14: ...tion switches five 2 position switches two centre biased 2 position switches and two 2 position locking switches two momentary switches on the back of the transmitter two INC DEC buttons CTL 5 6 plus...

Page 15: ...GHz Modulation FHSS Antenna 2 diversity antennas about 145mm long about 115mm of this length encapsulated and about 30mm active Plug in servos 8 Sensor sockets 1 Temperature range 10 55 C Dimensions a...

Page 16: ...st be switched OFF during the entire charging procedure Never switch on the trans mitter when it is connected to the charger Even a brief interruption to charging can cause charging voltage to rise to...

Page 17: ...erating time since the transmitter s battery was last charged This timer is automatically reset to 0 00 when the transmitter is switched on and its battery voltage is significantly higher than when t...

Page 18: ...e side Important notices Ensure that the shorter screw in the battery well does not fall inside the transmitter Make no modifications of any kind to the cir cuitry as this will void the guarantee as w...

Page 19: ...gured for neutralized or non neutralized operation Open the transmitter To change the joystick s factory setting locate the screw shown in the figure below enclosed in a white circle Note The aggregat...

Page 20: ...bar outwards do not use force in order to lock it in place Install the second support bar in the same manner To remove the support bars first unlock one of the bars by lightly pressing it inwards and...

Page 21: ...module rotary control left side Lv1 right side Lv2 Loud speaker Connector sockets on the face side protected by a cover see beginning page 22 mc 20 left four way button ESC select confirm ESC touched...

Page 22: ...away the DSC socket is accessible The two pole DSC socket fitted as standard to mc 16 HoTT and mc 20 HoTT transmitters serves both as Trainer socket Teacher and Pupil and also as interface for flight...

Page 23: ...ansmitter s headset connector is accessible The jack is intended for connecting conventional ear plugs or a headset by way of a 3 5 mm TRS plug not included in the set An appropriate symbol will appea...

Page 24: ...You can remove the prepared memory card from the transmitter when required and insert it in a suitable card reader Connect the reader to your PC or laptop and copy the files previously downloaded from...

Page 25: ...ster at https www graupner de en service product_registration aspx to ensure that you are constantly in formed of important software updates This is the only means by which we can automatically keep y...

Page 26: ...witch and control switch assignments on page 68 SW17 PB19 when transmitter is closed see Physical control switch and control switch assignments on page 68 Lithium battery CR2032 not rechargeable Indep...

Page 27: ...27 For your notes...

Page 28: ...ymbols Circle with the finger around the circumference scroll change values Alternative values selec tion with the left four way button simultaneous tap on or CLEAR right four way button or Transmitte...

Page 29: ...t of the display SET key 1 After switching the transmitter on a brief tap on the SET key will cause a jump from the dis played base screen to the Multi function menu In the same manner a selected menu...

Page 30: ...the base screen SECRET MODE Language selection Firmware update Stick calibration etc Touch and hold the selection keys of the left four way button then momentarily touch the SET key of the right four...

Page 31: ...it to the right of column travel is concealed To reach this column use the pointing triangle at the bottom left of the screen to push the frame marker with the arrow key of the left or right four way...

Page 32: ...set values asymmetrically POS Only in Trim memory menu switch field symbol assignment of all types of switches within a menu change to the sec ond page menu continuation Function fields in the displa...

Page 33: ...O F F Only for a receiver that has already been bound Please select RF on or off RF RF must be OFF OK Request to switch off the RF section Warning notices Fa i l S a f e s e t u p t b d Failsafe has...

Page 34: ...on with RF switched off P l e a s e s e l e c t R F o n o f f O N O F F Now move to the HIDDEN MDE menu as de scribed earlier in this section Language change Use the selection keys of the left or righ...

Page 35: ...load section at www graupner de FILE LIST MC 20_1V234_France b MC 20_1V234_English MC 20_1V234_Dutch bi MC 20_1V234_Italiano MC 20_1V234_Spain bi MC 20_1V234_German b Now use the selection keys of the...

Page 36: ...ent setting per centages for joystick control functions which are not self neutralizing typically for the C1 throttle brake or throttle pitch stick For example if the throttle brake stick is in its qu...

Page 37: ...middle console and the two proportional rotary controls on the sides of the transmitter The calibra tion options for these proportional controls can be reached by repeatedly tapping on the or selec ti...

Page 38: ...dBm 33dBm RX dBm 33dBm RX VOLT 4 8V TMP L PACK 10ms R LOW V 4 6V 22 C which is described in more detail in a section by the same name on the next page Sensor Select Up to four sensors can be connected...

Page 39: ...6 0 00 0 0 0V BAT1 BAT2 0 0V T2 0 C T1 0 C E FUEL F ALT 0m 0m1 0m3 0 0A POWER 0 0V 0 If attached to the receiver this screen will display the data acquired by a General Engine module order no 33610 o...

Page 40: ...Air module order no 33611 Note The appropriate blade count must first be set in the module s telemetry menu before the correct speed can be displayed Vario 0 0 0m m s If attached this display will dep...

Page 41: ...2 L or H cell voltage of cells 1 max 14 L balancer connection 1 H balancer connection 2 Micro copter display 0mAh 0 00 0 0V 0km h 0 I Dir Alt 0m 0 0A 0m 0 This screen displays the data generated by a...

Page 42: ...gnal received by the receiver in see page 241 MAX the preset maximum altitude limit relative to starting location at which when exceeded will cause an audible warning to be sounded MIN the preset mini...

Page 43: ...scent decent rate in m 1s and m 3s current reception quality and the model s distance from its starting location The displayed items are as follows Value Explanation W N E S west north east south Kmh...

Page 44: ...L ELECT AIR VARIO GPS AIR ESC 0 0 0rpm 0 0A 0 0A 0 0mAh 0 0 C 0 0V 0 0V This screen displays the data generated by a brush less speed controller with internal telemetry Order No 33718 to 33770 and 338...

Page 45: ...onsumption display 0 0A 0 0A 0 0mAh This screen displays the actual current consumption the peak drain which has occurred in the present power on period and the capacity drawn from the battery connect...

Page 46: ...ssage C A N T R E C E I V E D ATA O K and in parallel to this the transmitter s basic dis play will appear similar to that shown below 01 0 00h Stp Flt 0 00 0 00 0 0V 4 1V Mx HoTT The symbol combinati...

Page 47: ...eceiver s antennas If the transmitter s antenna is brought too close to the receiver s antennas this will cause re ceiver over modulation and its red LED will il luminate At the same time the return c...

Page 48: ...a search keyword e g the article number print ed on the type plate located on the rear side of the transmitter Another press of the ENTER key on the PC or laptop will open the sought page Downloading...

Page 49: ...umbers of the associated firmware files also change Now save the compressed file in a folder of your choice and unpack it using a suitable program If a transmitter update fails to work as described in...

Page 50: ...ck the file Firmware_Upgrade_grStudio_ Ver XX zip in a suitable directory then execute the Firmware_Upgrade_grStudio_Ver XX exe pro Transmitter firmware updates gram file with a double click on its fi...

Page 51: ...rupted during the update process Do not terminate the update process before the progress bar has reached its right end and the Firmware Download Success message appears Click on OK Subsequently switch...

Page 52: ...un packed file HoTT_Software_VX The file match ing your particular transmitter starts with the transmitter designation e g mc 20_1vXXX_Eng lish bin or mc 16_1vXXX_English bin or Ger man bin or Now in...

Page 53: ...53 For your notes...

Page 54: ...small side chamfers when plugging in these connectors Never use force The supply voltage is bussed across i e common for all numbered connections The two vertical sockets at the extreme edge of the G...

Page 55: ...econds as an indication that the transmitter receiver system is again ready for operation Please note the following A receiver RESET will cause ALL receiver set tings except for binding information to...

Page 56: ...tteries have the same voltage and power rating Never con nect different battery types or batteries charged to significantly different levels to the receiver This can lead to effects similar to short c...

Page 57: ...os and other devices built in the past and most such devices currently still offered on the market have only a permissible voltage range of 4 8 to 6V Use of these batteries in conjunction with these d...

Page 58: ...good contact at both ends Receiver firmware updates 1 Installing drivers The driver software for the USB interface Order No 7168 6 is identical to the driver software for the interface installed in th...

Page 59: ...you wish to update If you are using one of the receivers supplied as standard in the RC sets this would be the folder 33508_08CH_RX mc 16 or 33512_12CH_RX mc 20 The file appears in the associated wind...

Page 60: ...l ised before it is used again and the display shown above makes this clear Hold the SET button on the receiver pressed in while you switch the re ceiver on if you are using a GR 16 or GR 24 re ceiver...

Page 61: ...61 For your notes...

Page 62: ...ent cut through it Caution If you wish to use the earlier adapter lead Order No 7168 6A and it is still fitted with a three core lead cut through the central red wire of the adapter lead before using...

Page 63: ...function in the Receiver Setup program First connect the receiver as described in point 3 Reading out receiver data and click on the Con nect button If the receiver has previously been initialised th...

Page 64: ...ts en tire range of movement 3 Mount servos on rubber bushes spacers with hol low brass bearings to protect them from vibra tion Do not tighten the fastening screws down too tight as this would negate...

Page 65: ...65 For your notes...

Page 66: ...utomatically speeds up indicated by a faster sequence of audible beeps a different beep indicates the centre position Since you can opt for the trim position of these two transmitter controls to be st...

Page 67: ...rol switches have been integrated into mc 16 HoTT and mc 20 HoTT software These software switches designated C1 C4 are merely defined by virtue of their contact state along the physical control s cour...

Page 68: ...elected switch into the desired ON position or as described at the right in Assignment of external switches to select a switch from the list of External switches This concludes the assignment The swit...

Page 69: ...I or off FX permanently All switches mentioned can have multiple assign ments Pay attention that you do not uninten tionally assign reciprocally conflicting functions to a single switch If necessary n...

Page 70: ...m function is configured as follows First put the motor into a safe idle speed Now if you push C1 trim in a single motion toward its Motor cut off direction until it is in its furthest travel position...

Page 71: ...71 For your notes...

Page 72: ...s can be programmed into each of the 20 respectively 24 model memory locations Except for C1 trim digital trim will be stored on a flight phase basis C1 trim permits easy location of a carburetor idle...

Page 73: ...nd without motor having up to 4 aileron elevator servos and up to 4 flap elevator servos Receiver power supply Free or aux function Free or aux function Left elevon Right elevon Free or aux function R...

Page 74: ...u Dual Rate and Exponential functions can be cou pled for roll nick and tail rotor and programmable in two variations in every flight phase There are 8 freely assignable linear mixers There are also 4...

Page 75: ...icopter models with 1 to 3 swashplate servos Receiver power supply Free or aux function Free or aux function Tail rotor servo gyro system Roll 1 servo Pitch axis 1 servo Free or speed governor or aux...

Page 76: ...r in the delivery is bound to this model This is indicated by the pictogram of a fixed wing model aircraft in the second column from left and the receiver identification displayed at far right in the...

Page 77: ...riate option 1 BD2 BD1 Mod name Stick mode module n a Base setup model n a DSC Output PPM10 HoTT Further details about binding a receiver can be found on page 87 or 95 The BIND n a warning closes auto...

Page 78: ...eir software structure as well as their hardware features these instructions always indicate the soft differences between the individual transmitter types at the start of a menu description as they ar...

Page 79: ...select menu with the selection keys of the left or right four way button then briefly tap on the SET key of the right four way button Attention Switch OFF the Receiver first If this message appears t...

Page 80: ...AUBELE to be erased NO YES 01 to appear A NO response will cause the process to be canceled and a return to the previous screen Selecting the YES response with the selection key of the left or right f...

Page 81: ...key a confirmation request will ap pear modell ULTIMATE export NO YES 01 SD CARD A NO response will cancel the process and return the screen to the originating screen If the YES response is selected t...

Page 82: ...switched on you should switch it off before doing this Select the model to be imported from the SD memory card with the selection keys of the left or right four way button EXTRA ALPINA COBRA BELL47G i...

Page 83: ...her confirmation request will follow Phase to 1 Normal to be copied NO YES 2 Launch A NO response will cancel the process and return the screen to the originating screen If the YES response is selecte...

Page 84: ...displayed is selected with the selection keys of the left or right four way but ton then its status is switched over with a tap on the center SET key of the right four way button Model select Base set...

Page 85: ...on the center SET key of the four way button pad Model memories which are rarely needed or to which access is to be blocked for other reasons can be hid den from the model selection list This also cla...

Page 86: ...left aileron right aileron full throttle idle left rudder right rudder elev down elev up left aileron right aileron elev down elev up left aileron right aileron full throttle idle left rudder right r...

Page 87: ...ote that any other switched on receivers already bound to the transmitter will fall into Fail safe mode during the transmitter side binding pe riod Binding multiple receivers per model Multiple receiv...

Page 88: ...ight hand four way button to move to the first Value field in the Module line before pressing the central SET button of the right hand four way button 1 bind bind BD1 GRAUBELE BD2 Rcv Ch Map R12 R08 M...

Page 89: ...SP channel SP Mod name Stick mode module Base setup model 1 BIND 6 You can now select 6 or 8 channels using the right hand Select buttons The procedure is concluded by again pressing the central SET...

Page 90: ...large model with two or more servos Assign each of the appropriate outputs servo con nections to one and the same input control chan nel In this case depending on left or right wing as the respective...

Page 91: ...can be observed 3 Place the model on a level surface pavement low cut grass or bare ground such that receiv er antennas are at least 15cm above ground lev el It may be necessary to put something unde...

Page 92: ...n label STO then selecting the appro priate ON OFF switch function in the right column If the percentage value specified for the middle column is greater than the current servo posi tion i e the curre...

Page 93: ...y tempo rarily increasing the travel for servo 1 in the Servo ad justment menu to over 100 then after storing the threshold change servo travel back to the original value Auto timer reset Base setup m...

Page 94: ...pitch throttle pitch tail rotor tail rotor pitch axis pitch axis roll roll pitch axis pitch axis roll roll throttle pitch throttle pitch tail rotor tail rotor throttle pitch throttle pitch roll roll...

Page 95: ...ing channel In the example shown in the figure below the marker frame is positioned above the column label BD2 because the binding channel in the column labeled BD1 is already in use by default for th...

Page 96: ...e right hand four way button to move to the first Value field in the Module line before pressing the central SET button of the right hand four way button 1 bind bind BD1 STARLET BD2 Rcv Ch Map R12 R08...

Page 97: ...ET SP channel SP Mod name Stick mode module Base setup model 1 BIND 6 You can now select 6 or 8 channels using the right hand Select buttons The procedure is concluded by again pressing the central SE...

Page 98: ...wer one the screen of the mc 20 HoTT twelve channel transmitter After selection of the desired output with the selection keys of the left or right four way button the respec tive input field will be f...

Page 99: ...at some dis tance from one s body 5 If necessary use the selection keys of the left or right four way button to reach the RF range test line in the menu then start range test mode with a tap on the c...

Page 100: ...ttle and pitch are separate and all mixers which have an effect on the throttle servo are switched off Cor responding parameter settings are made in the Heli copter mixer see text beginning page 188 r...

Page 101: ...position i e the current servo position is above the threshold the speed controller will initially reduce motor speed or close the carburetor s throttle servo only to the extent dictated by the value...

Page 102: ...ld change servo travel back to the original value Auto timer reset Base setup model Autorotation Auto C1 Pos 66 9 cut off SEL 100 125 18 Auto timer reset yes The yes no setting made in this line deter...

Page 103: ...103 For your notes...

Page 104: ...pilot The warning Throttle too high see page 33 as well as the cut off option in the Basic set tings model menu see page 92 are acti vated and the Brake settings sub menu of the Wing mixers menu begi...

Page 105: ...independent of flight phase In the majority of cases the default setting for input 1 will remain as it is and the brake will be operated by way of the non neutralizing C1 stick However use of input 7...

Page 106: ...ings in the Wing mixers menu This idle path ensures that all brake settings remain at neutral even with minor deviations from the limit of the brake flap control At the same time the effective control...

Page 107: ...107 For your notes...

Page 108: ...SEL Briefly tap the center SET key of the right four way button The current setting for number of pitch servos will be displayed in inverse video Now choose the variant needed with the selection keys...

Page 109: ...pronounced exponential setting Rotor direction After selecting the Rotor direction line with the selection keys of the left or right four way button the entry field will be framed 3Sv 2rol SEL Linear...

Page 110: ...with which the throttle servo can be limited independent of the pitch ser vo in the full throttle direction Since a given user s models will typically be oper ated with the same pitch min direction t...

Page 111: ...111 For your notes...

Page 112: ...iver outputs to which they are connected provided that no swapping of transmitter and or receiver outputs has been specified This means that even a change of stick mode will not effect the num bering...

Page 113: ...mple of a side dependent servo setting 50 and 150 Transmitter control travel Servo travel Column 5 lim The lim column is reached by moving the marker frame with the selection keys of the left or right...

Page 114: ...wn as flight phase dependent this is the left right function of the right hand stick and assumes the default Mode 1 trans mitter configuration GRAUBELE 01 2 22h Stp Flt 0 00 0 00 5 5V 3 9V M HoTT Basi...

Page 115: ...ll reset any change made to the active field back to 4 Column time The rate of control signal change with respect to the speed of stick motion can be influenced by the entries made in the time column...

Page 116: ...ght function of the left hand stick and assumes the default Mode 1 trans mitter configuration STARLET 02 2 22h Stp Flt 0 00 0 00 5 5V 3 9V M HoTT Basic procedure Use the selection keys on the left or...

Page 117: ...0s 4 0 0s 0 0s 0 0s 0 0s 0 0s GA PH PH GL St 8 Thr time Tail A simultaneous tap on the or keys of the right four way button CLEAR will reset any change made to the active field back to 4 Column time T...

Page 118: ...ddle positions While this may appear a bit awkward at first glance this is the only way to ensure a completely free selection from among additional operating elements while at the same time not requir...

Page 119: ...trol assignment window 0 0 0 0 GL GL GL GL normal fr Lv2 fr fr SEL In5 offset In6 In7 In8 typ Switch assignment If the input is to be actuated like a switch module the input can alternatively be assig...

Page 120: ...tion keys of the left or right four way button To set symmetric travel i e control side independent travel the respective operating element transmitter control or switch is to be put into a position i...

Page 121: ...or switch as necessary to the side to be set such that only the value to be changed is covered 0 0s 0 0s 0 0s 0 0s 0 0s 0 0s 0 0s 0 0s normal time In5 In6 In7 In8 Briefly tap the center SET key of the...

Page 122: ...two proportional sliders on the middle console designated Sl 1 2 in the menu two side mounted rotary sliders designated Lv1 and 2 in the menu In contrast to the two sticks which even for a newly initi...

Page 123: ...ate the chosen operating element or set the desired value with the selection keys of the right four way button 5 Briefly tap the center SET key of the right four way button to complete data entry 6 A...

Page 124: ...es pay attention to the de sired switching direction and also that all unused inputs remain free or are again reset to free This is necessary to ensure that inadvertent actu ations of these unused con...

Page 125: ...h that only the value to be changed is covered 0 0s 0 0s 0 0s 0 0s Gyro Lim 0 0s 0 0s 0 0s 0 0s normal time In5 Thro Briefly tap the center SET key of the right four way button to activate value setti...

Page 126: ...omply with the instruc tions accompanying the gyro otherwise there is a risk the helicopter will be impossible to fly On the mc 16 HoTT transmitter the obvious choice as transmitter control for the gy...

Page 127: ...m to fr Meaning and application of throttle limit As already mentioned under Throttle and in con trast to fixed wing models the power output of a helicopter s drive system is not controlled directly w...

Page 128: ...he trim lever of the throttle collective pitch stick trim only affects the idle range and the motor engine is stopped using the cut off trim function of the digital trims see page 70 Notes Take advant...

Page 129: ...the throttle limit control such that the latter provides sufficiently sensitive regulation of the idle setting and can also stop the motor In this case with a completely closed throttle lim iter in co...

Page 130: ...ases the control surface rate of travel over the control linkage continually decreases This effect can be counter acted with Expo values greater than 0 such that rotational angle travel increases over...

Page 131: ...tch has been assigned the respec tive switch will appear in the display together with a switch symbol indicating the switch s direction if actu ated e g in the Normal flight phase 100 100 100 Ail Ele...

Page 132: ...n entered for both the Dual Rate and the Expo function the effects of both functions will overlap for example as follows Servo travel Servo travel Servo travel Stick deflection Stick deflection Stick...

Page 133: ...133 Program description Dual Rate Expo Winged models Set the Expo values as necessary in the same man ner...

Page 134: ...ent is not linear as the rota tional angle of the output disc or lever increases the control surface rate of travel over the control linkage continually decreases depending on the position of the link...

Page 135: ...from the list of expanded switches The switch so assigned appears on the display to gether with a switch icon that indicates the switch s switching direction In the case of C or L switches the stick o...

Page 136: ...ues have been entered for both the Dual Rate and the Expo function the effects of both functions will overlap for example as follows Servo travel Servo travel Servo travel Stick deflection Stick defle...

Page 137: ...137 Program description Dual Rate Expo Helicopter models Set the Expo values as necessary in the same man ner...

Page 138: ...e curve is termed the Output and can be varied at the reference points within the range 125 to 125 The control signal altered in this way will then affect all subse quent mixer and coupling functions...

Page 139: ...lso an existing curve can be vertically repositioned with the keys of the left four way button within a range of 25 1 0 50 50 Trim offset normal Input Output Point Ch1 curve 1 0 0 0 Trim offset normal...

Page 140: ...ut Output Point Ch1 curve Curve Now press one of the Select buttons of the right hand four way button in order to switch from Curve off to Curve on or vice versa 1 50 0 0 on normal Input Output Point...

Page 141: ...ht phase if necessary Setting reference points By moving the transmitter control motor collective pitch stick you can reposition the vertical line in the graph between the two end points L and H The c...

Page 142: ...key of the left four way button terminates this trim point function Trim offset function When a value field is active i e in inverse video it is not only possible as previously described to jump to a...

Page 143: ...SET button of the right hand four way button once more 1 50 0 0 off normal Input Output Point Ch1 curve Curve Now press one of the Select buttons of the right hand four way button in order to switch...

Page 144: ...1 15 and the programma ble control switches C1 C4 If a switch is pressed the switch number is revealed by one of the display items changing from an OFF to an ON symbol or vice versa To improve the leg...

Page 145: ...smitter switches but also of choosing and assigning one of the C1 C4 con trol switches from the list of expanded switches as described in the section Physical control switch and control switch assignm...

Page 146: ...f tap on the center SET key of the right four way button the switch direction can by changed back and forth between normal and reversed with the selection keys of the left or right four way button SEL...

Page 147: ...cified in those menus which use switches by calling them up via the additional expanded switches selection menu M o v e d e s i r e d s w i t c h t o O N p o s i t i o n e x t s w i t c h S E T A brie...

Page 148: ...g i c a l s w i t c h SEL C o n t r o l L o g i c f i x s w C2 C3 C4 FX FXi L1 L2 L3 L4 C1 Potential applications for this Multiple functions which are normally independent of one another are to be pu...

Page 149: ...i e non inverted usage results in a certain switch activating a par ticular function when it is in its switched on state but inverted usage results in a certain switch activating a particular functio...

Page 150: ...cond stage you use the Phase assign ment menu to set up the required phase switch es 3 Once these are set you can then move to the flight phase dependent menus see the tables be low to start programmi...

Page 151: ...t specific model In some cases it may be desirable to use the Sup press codes menu see page 84 to remove non alterable menus from the multi function list while programming flight phases Two examples o...

Page 152: ...one model memory the transmitters mc 16 HoTT and mc 20 HoTT lets you program up to 7 discrete groups of settings for various conditions met during the flight The grouped settings are typically termed...

Page 153: ...r on C1 line of the Model type menu Pha1 Pha2 Pha3 Name motor Pha4 Pha5 Normal Launch Dist yes yes yes yes yes yes The motor connected to receiver output 1 will be controlled by the C1 stick throttle...

Page 154: ...ing between extremely different flight phas es such as between aerobatics and normal flight A simultaneous tap on the or keys of the right four way button CLEAR will reset the time in the currently ac...

Page 155: ...155 For your notes...

Page 156: ...ame The first line and thus the first flight phase is re served for autorotation flight see Basic settings model menu Accordingly the predefined name cannot be changed Use the selection keys to move t...

Page 157: ...without any time delay The arrow in the column labeled Sw time at the end of the Autorot line indicates that a delay can be set when transitio ning FROM autorotation INTO another phase Use the selecti...

Page 158: ...ngs model menu always takes precedence Ac cordingly as soon as the auto rotation switch in question is activated the following warning ap pears A B E F 1 Phase assignment prior combi Autorot Phase swi...

Page 159: ...ave the default phase name as 1 Normal for this switch position Leave this menu in the familiar way with a tap on the center ESC key of the left four way button Tips If you have named more phases than...

Page 160: ...0 Column ELEV In the column labeled ELEV a phase specific eleva tor trim setting can be stored Important notice Settings made in this column have an immediate effect on elevator trim and accordingly...

Page 161: ...for flight phase transitions In this menu which is available as standard on the mc 20 HoTT transmitter only you can now disable the transition delay set previously per flight phase and for individual...

Page 162: ...h assign ments on page 68 A simultaneous tap on the or keys of the right four way button CLEAR will reset the time back to 0 00 h Batt time This operating hours timer records the transmitter s total s...

Page 163: ...he expanded switches see the section Physical control switch and control switch assignments on page 68 and assign it to both these lines Alarm 12 34h 1 23h 0s 0s C1 SEL C1 Model time Batt time Top Cen...

Page 164: ...Batt time Top Centr Stop Flight A simultaneous tap on the or keys of the right four way button CLEAR will reset any settings made back to 0s Audible signal sequence 30s before zero Triple beep Single...

Page 165: ...165 For your notes...

Page 166: ...These timers are started and stopped via a switch or control switch To do so first use the selection keys to select the appropriate column via the switch icon at the bottom right Then set the switch...

Page 167: ...age 68 Preferably make use of a momentary switch which are included as standard equipment only in the switch panels of the mc 20 HoTT transmitters The lap count is in cremented each time by one lap wh...

Page 168: ...timers Lap display 0 00 0 00 0 00 0s 0s 0s Timer1 Timer2 Timer3 Lap time Tim tab Lap Display and use the switch assigned You assign this switch as described in the section Physical control switch and...

Page 169: ...nputs Control channels receiver outputs Elevator stick Rudder stick Right rudder elevator Left rudder elevator R u d d e r E l e v a t o r E l e v a t o r R u d d e r R u d d e r E l e v a t o r The m...

Page 170: ...104 the airbrake mixer control can be re programmed from control input 1 to 7 or 8 on the standard eight channel mc 16 HoTT transmitter and from 1 to 7 8 or 9 on the mc 16 HoTT transmitter with twelve...

Page 171: ...ons when switching between the flight phases Mixer neutral points Offset For all mixers on the Brake settings sub menu the brake offset to be set on the Model type menu is to be configured to the tran...

Page 172: ...l appropriate for each side regardless of the direction of rotation of the aileron servos While 0 corresponds to a normal linkage i e no differential 100 or 100 represents the split function For aerob...

Page 173: ...rake settings AI 0 Wing mixers RU normal Here you can set the degree to which the rudder follows commands acting on ailerons This is used in particular in connection with aileron differential to suppr...

Page 174: ...on the left or right four way button To ensure a sufficiently strong braking effect note that you should try to lower the flap as low as is me chanically possible From the second line on this display...

Page 175: ...ngs AI 0 Wing mixers EL FL 0 0 RU normal FL EL 0 0 This mixer is used to set elevator pitch trim compen sation when a flap command is given This typically enables you to adjust the model s airspeed au...

Page 176: ...sible to set the correct direction of differential regardless of the direction of rotation of the aileron servos While 0 corresponds to a normal linkage i e no trans mitter side differential 100 or 10...

Page 177: ...leron flap line of the Model type menu see page 104 of the standard eight channel mc 16 HoTT transmitter or 2 4AIL 2 4FL on the mc 16 transmit ter with twelve channels unlocked and the standard twelv...

Page 178: ...Off 0 are shown and one step to the right all options for the flap pair as well FL 0 100 fl pos EL FL 0 0 100 FLAP normal Diff 0 Ail tr AI 0 0 EL FL Off 0 Moving one further column to the right howev...

Page 179: ...he following control surfaces AI left AI2 left FL left FL right AI2 right AI right Since the options available on the wing mixer menu and its sub menus vary according to the number of aileron and flap...

Page 180: ...ing flaps If you have selected the Delta fl tail type and se lected the number of wing flaps in the Aile flaps line on the Model type menu following the instructions given in that section on page 104...

Page 181: ...of the servos to suit the ailerons A simultaneous tap on the or keys of the right four way button CLEAR will reset the given active inverse video field to its default value shown in the figure Ail tr...

Page 182: ...r way button CLEAR will reset the given active inverse video field to its default value shown in the figures Note By default NO transmitter control is assigned to input 6 on the Control adjust menu Ho...

Page 183: ...of the right four way button will store this position Tap on the center SET key of the right four way but ton with the elevator stick in its centered position to set the offset value back to 0 again...

Page 184: ...ake servo To activate two airbrake servos the best ap proach is to leave one servo on output 1 and to connect the second servo to a free output of your choice for example output 9 You then also as sig...

Page 185: ...onfigurable and can even be set to suppress differential entirely A value of 0 means that the aileron differential set at the transmitter remains fully in force An entry that equals the value set for...

Page 186: ...flap menu normal Here you can set the degree to which the rudder follows commands acting on ailerons This is used in particular in connection with aileron differential to suppress adverse yaw and thu...

Page 187: ...umn Values can be set in the range 150 The typical values configured for this mixer are single digit or low two digit values A simultaneous tap on the or keys of the right four way button CLEAR will r...

Page 188: ...how either SEL or the indicating a change to a second page is necessary 2 A brief tap on the center SET key of the right four way button will permit direct settings for linear mix er ratios Use the se...

Page 189: ...ed the Output and can be varied at the maxi mum of 6 reference points within the range 125 to 125 A control signal modified in this way affects only the collective pitch servos In the example to the l...

Page 190: ...ts already set with the selection keys of the left four way button and to make a change with the selection keys of the right four way button but also an existing curve can be vertically repositioned w...

Page 191: ...pical 3 point pitch curves for various flight phases such as hovering aerobatics and 3D flight The vertical bar depicts the current stick position Please note that trim values greater than 100 and les...

Page 192: ...instructions on page 200 at all times If the throttle is set too high when switching on the transmitter you will receive audible and visible warnings STARLET 02 2 22h Stp 0 00 0 00 5 5V 3 9 norm M Thr...

Page 193: ...on page 75 However if this connection is used there will be no throttle limit function because the throttle limit function can only be implemented via the C1 Thro mixer which is on the then unused out...

Page 194: ...d mc 20 HoTT lets you adjust the degree of throttle follow separately for roll and pitch axis controls This offers particular advantages in aerobatic flying e g when flying a roll here with moderate c...

Page 195: ...lider control 2 sets the maximum gain at the top end point of the slider the transition between these two values occurs roughly in the middle of the slider travel In contrast the PIEZO 900 PIEZO 2000...

Page 196: ...itch over the gyro gain from the transmitter also with gyro suppression dependent on tail rotor deflection if required Gyro gain Gyro Offset Important notice The value of this option is identical to t...

Page 197: ...rict ed even if roll and pitch axis commands are given separately Setting range 100 149 and off You can reset an altered value to OFF by simultane ously pressing the or buttons of the right hand four...

Page 198: ...ems have no need for an idle setting motor idling does not need to be cali brated Fine tuning of the throttle and collective pitch curve s however must take place as for glow pow ered helicopters The...

Page 199: ...ayed on the transmit ter s basic display by a horizontal bar next to the C1 trim lever position indicator Refer to the description of digital trim on page 70 of this manual The model should lift off t...

Page 200: ...over from idle to a flight setting with in creased system rotational speed must not take place abruptly This will cause the rotor to accelerate very quickly resulting in premature wear to the clutch a...

Page 201: ...201 For your notes...

Page 202: ...Pitch graph page and then use the stick to move the vertical line to point H Start by setting a value that is about 10 to 20 greater than your nor mal maximum value for collective pitch Initially how...

Page 203: ...ate all corresponding mix ers are switched off automatically Since the absence of torque in auto rotation also means the above mentioned thrust is superfluous however a different tail rotor configurat...

Page 204: ...ssively For safety s sake it may there fore be necessary to set an appropriate travel limit in the Servo adjustment menu page 112 For more complex applications mixers can be switched in sequence In th...

Page 205: ...se the selection keys on the right four way button to select the fr mixer input Additional column names now appear in the bot tom line of the screen 4 Tap the center SET key of the right four way but...

Page 206: ...ing models or 5 7 12 max for helicopter models do not forget to assign a transmitter control for each of these in the Control adjust menu S as switch channel Selecting S switch channel in the fr colum...

Page 207: ...igured a mixer can as shown in the example above route the signal from a flap control present e g on input 6 to control channel 11 while also applying the FLAP trim value set on the Phase trim menu pa...

Page 208: ...f we permit a mixer to affect the default software coupling of ai leron camber changing flap or collective pitch servos Fixed wing models Depending on the number of wing servos available on the Aile f...

Page 209: ...edge since slider control Sl1 in this example assigned to input 6 see previous page is at its forward limit The dotted vertical line in the middle of the diagram indicates the position of the mixer n...

Page 210: ...is naturally undesirable Accordingly you should reposition the mixer neutral point to 100 of control travel as described earlier L Mix 1 20 20 100 Offset SET STO 6 EL Mix input If the offset now 100...

Page 211: ...0 Input Output Point C Mix 9 Curve off Using the selection keys on the right four way button you can now change the point value within a range of 125 e g 45 50 1 8 10 50 Input Output Point C Mix 9 Cur...

Page 212: ...been vertically shifted within the 25 range by the trim offset func tion 35 30 2 8 10 30 Trim offset Input Output Point C Mix 9 35 80 2 8 10 80 Trim offset Input Output Point C Mix 9 You can also exi...

Page 213: ...button to move to the line below Mix input Select SYM if appropriate then press the central SET button of the right hand four way button The value fields are now highlighted Af ter you have moved the...

Page 214: ...control from control channel 9 so that any servo which may be connected to receiver output 9 can no longer be operated by this trans mitter control This is accomplished in the Mix only channel menu se...

Page 215: ...signing specific mixers only to specific flight phases Switch to your chosen flight phase and use the selec tion keys to page through this menu The mixers on the Free mixers menu are displayed in the...

Page 216: ...IX only you can utilize both its control function and its control channel entirely independently of one another for any special functions you need see the examples at the end of this section A further...

Page 217: ...would like to perhaps test the performance of a butterfly system with and without airbrakes sim ply set channel 1 to MIX only and program a free mixer C1 C1 so as to restore your ability to control th...

Page 218: ...ent menu see page 112 In the software the V tail mixer already mentioned is supplemented by other dual mixers for realization of the two aileron servos on receiver outputs 2 and 5 and for the flap pai...

Page 219: ...rudders In this case too trim from the rud der stick affects both servos If the rudders are also required to deflect outwards when the airbrakes are activated then you should assign the C1 stick trans...

Page 220: ...selection keys Simultaneously tapping both or selection keys on the right four way button CLEAR will reset the mixer ration in inverse video again to the 61 default value If the swashplate control sy...

Page 221: ...T key of the right four way button Now use the four way button s selec tion keys to make your choice from the four possible time delays 0 25s 0 5s 0 75s and 1s offered A simultaneous tap on the or sel...

Page 222: ...itter and the standard twelve channel mc 20 HoTT transmitter The lower display line designated with Teacher therefore indicates the function inputs with which control functions 1 4 stick functions for...

Page 223: ...nnection module for pupil transmitters This is to be connected to the transmitter board in accordance with the supplied installation instructions Information on the pupil modules required in each case...

Page 224: ...at the right next to the transmitter s On Off switch blinks and an acoustic signal sounds off at the same time then the connection between pupil and teacher transmitters is faulty The basic display al...

Page 225: ...and mc 20 HoTT mx 12 HoTT mx 16 HoTT mx 20 HoTT mc 16 HoTT mc 20 HoTT mc 32 HoTT mc 19 through mc 24 mx 22 iFS mx 24s Pupil transmitter with DSC socket Pupil transmitter with pupil module order no 32...

Page 226: ...f the teacher transmitter Afterwards assign the operating elements appropriately Important If you should forget to assign a transmitter con trol on the pupil side then the affected servo or servos wil...

Page 227: ...D SW 7 n a 12 8 Note The switch assignment just described also deter mines the transmitter used to issue the teacher and pupil functions respectively For this reason a pupil transmitter must NEVER be...

Page 228: ...F blinks on the transmitter s basic display accompanied by the audible warning signals the pupil signal has been lost but the trainer mode switch is set to the Teacher position In both cases your firs...

Page 229: ...229 For your notes...

Page 230: ...center SET key of the right four way button You can now use the right selection keys to assign your selected control chan nel to the desired output confirming this with the SET key 2 3 4 1 2 3 4 SEL...

Page 231: ...231 For your notes...

Page 232: ...p pair is to be trimmed as AI and or FL The CTL line specifies the control channel over which the given trim function is to be performed and finally a switch is defined in the ON OFF line by which thi...

Page 233: ...selection keys of the right four way button CLEAR Note Trim values retain their settings until the next closure of the ON OFF switch even then when the trim func tions in the Control line have been te...

Page 234: ...d line then tap briefly on the center SET key of the right four way button SEL Mixer None PH 1 L P 1 1 1 Move desired control adj then move the desired transmitter control SEL Lv1 Mixer None None None...

Page 235: ...d in the Mixer column is to be changed In all of these cases the current regulator position will be stored and automatically overridden i e adopted into the curve characteristic by the pre programmed...

Page 236: ...proximately in the middle of the display The trim range is about 30 of total control travel The right column dis plays trim memory content currently filled uniformly with 0 because values have not yet...

Page 237: ...237 Program description Trim memory Winged models sided restriction It is then prudent to check control linkages and make corrections as necessary...

Page 238: ...range is about 30 of total control travel The right column dis plays trim memory content currently filled uniformly with 0 because values have not yet been stored Therefore the display appears like a...

Page 239: ...239 Program description Trim memory Helicopter models sided restriction It is then prudent to check control linkages and make corrections as necessary...

Page 240: ...To be on the safe side keep them at least one meter apart Otherwise there is a risk of a faulty connection to the return channel and malfunctions will result When operating a powered tug for aero to...

Page 241: ...in inverse video change the value within the permissible adjustment range via the selection keys of the right four way button and adopt the value with another tap on the SET key A brief tap on the cen...

Page 242: ...temperature range during all flight conditions ideally between 10 and 55 C The receiver temperature limit at which a warning is issued can be adjusted in the sub menu RX SERVO TEST under ALARM TEMP 5...

Page 243: ...avel limit This option is provided for the adjustment of a side dependent limit limiting of the servo travel rudder throw of the servo connected to the control channel selected in the OUTPUT CH line T...

Page 244: ...e transmit ter to control channels 2 and 5 for distribution to the left and right ailerons The receiver s corresponding INPUT CH which must also be mapped would be the channels 02 and 05 in this case...

Page 245: ...was just set is shown in the bottom Position line RX FAIL SAFE INPUT CH 01 MODE FAI SAFE F S POS 1500 sec DELAY 0 75sec OUTPUT CH 01 POSITION 1670 sec FAIL SAFE ALL SAVE After a tap on the center SET...

Page 246: ...etermined by the percen tages entered in the lines TRAVEL and TRA VEL Select 00 if no mixer should be set TRAVEL proportion of the admix in With the settings of these two lines the percentage of the a...

Page 247: ...e servos CURVE 1 2 or 3 CH Select the desired control channel INPUT CH of the first servo The following setting in TYPE only pertains to the channel selected here TYPE Select the servo curve A EXPO 10...

Page 248: ...N servo travel on the side You adjust the maximum servo travel on the minus side of the control path for the servo test in this line 1000 s corresponds to the full throw 1500 s corre sponds to the neu...

Page 249: ...un absolutely syn chronized When only using digital servos we recommend setting the PERIOD line of the RX SERVO to 10ms in order to be able to utilize the fast reaction of digital servos With the use...

Page 250: ...n receiver pro grammed as SUMI so that in the event of a fail ure the model remains controllable when the SUMO satellite receiver no longer receives a sig nal Telemetry data such as the voltage of the...

Page 251: ...scribed receiver screens However to actually gain access to this data the selected sensor s must be connected to the receiver system and this receiver system must have an active telemetry connection I...

Page 252: ...termine which of the graphic displays described on page 38 as well as those described previously for sub menu SET TING DATAVIEW can be selected and which remain hidden Activate or deactivate the displ...

Page 253: ...Comments Since reception power is measured and presented in dBm reception power is increasingly worse the higher the bar is and vice versa refer also to Re ception power S dBm on page 242 about this T...

Page 254: ...ration of the time set to the left of the switch as long as the assigned switch is closed Simultaneously pressing the Select buttons or of the right hand four way button CLEAR resets the time value to...

Page 255: ...ay button will open the selected sub menu TEMP STRENGTH RX VOLT LOWVOLT Here after selection of the desired line with the selection keys of the left or right four way button and a subsequent tap on th...

Page 256: ...el is reset back to 5 6 or 7 The next step makes the control channels needed for the channel sequence available This is done in the SET column by changing settings from INACT to ACT and thus making th...

Page 257: ...ultaneous tap on the or keys of the right four way button CLEAR will reset the inverse video value displayed if the TIME field back to blank and erase the current sequence in this example only Step 1...

Page 258: ...vo middle at 0 In the next column to the right make a separate channel count specification for each of the two multi channels MUL4CH for the NAUTIC Multi Prop mini decoder order no 4142 N or MUL8CH fo...

Page 259: ...st servo travel move to the right beyond the Offset column following the right pointing arrow in the bottom left hand corner of the screen INPUT2 INPUT3 Multichannel 1 travel INPUT1 INPUT4 100 100 100...

Page 260: ...of the 2 16 C NAUTIC Expert Switch building block 1 4 K NAUTIC Multi Prop Mini Decoder light module and sound switch Two of these modules in parallel can be operated using the menu Multi channel on o...

Page 261: ...261 For your notes...

Page 262: ...limiters available in the SET column of this option s first display page see figure at left that can be switched ON or OFF individually In the first line on the setting page for a given ring limiter i...

Page 263: ...th a brief tap on the center SET key of the right four way button 0 R max X 0 CH 4 100 100 CH 3 1 lim If however the small diamond at the center of the circle in the figure above which represents the...

Page 264: ...l reset the changed value in the active value field back to its 0 default value When finished with these settings switch back to the first display page for this option then repeat this pro cedure as a...

Page 265: ...265 For your notes...

Page 266: ...un until it is stopped with a tap on the key of the left four way button Vol 15 A01 04 T01 04 A 0 1 m p 3 or the transmitter is switched off During ongoing replay the menu can be exited at any time an...

Page 267: ...d other players jump one title forward or back for each tap on one of the selection keys of the left four way button Analogous to corresponding keys on a MP3 and other players start and stop the MP3 p...

Page 268: ...dure Select the desired line with the selection keys of the left or right four way button then tap the center SET key of the right four way button The value in the field now displayed in inverse video...

Page 269: ...way button or its center SET key move to the next position in which a charac ter can be selected A simultaneous tap on the or keys of the right four way button CLEAR will place a space character at th...

Page 270: ...sic set tings model menu page 92 or 100 a separate specification can be made from among the four avail able modulation types which is specific to each model memory and will then provided at the DSC so...

Page 271: ...Contrast for the forward display of the transmitter mc 20 HoTT located between the switch panels is adjusted by selecting the Top LCD contrast line with the selection keys of the left or right four w...

Page 272: ...50V NimH battery or 3 40 and 4 20V LiIo LiPo battery Make sure that you do not enter a value which is too low so that you still have sufficient time to safely land your model in the event of a batter...

Page 273: ...pplied with every BT module and also on the Internet at www graupner de For this reason the following section only includes a brief descrip tion of the individual options The option Basic settings SEL...

Page 274: ...rrors For winged models the display takes place ac cording to the following scheme Bar 1 Throttle brake servo Bar 2 Aileron or left aileron Bar 3 Elevator Bar 4 Rudder Bar 5 Right aileron Bar 6 Camber...

Page 275: ...this value field has been activated with a brief tap on the center SET key of the right four way button 1 2 3 4 5 6 7 8 0 5s Servo test act off CLR act deact the motion cycle can be changed for the v...

Page 276: ...e CLR field at the bottom right of the display and thus erase the entered digits Make note of the secret code and keep it safe Otherwise the transmitter must be sent in to Graupner service for decodin...

Page 277: ...he menu by pressing the central ESC button of the left hand four way button Tip If you generally want to dispense with a programming lock that option should be removed from the multi function menu by...

Page 278: ...22 33s RFID firmware ver date time SD Card The current version number of the transmitter soft ware is shown in this line At the time these instructions were revised you can decide whether a current u...

Page 279: ...lure by a buffer battery for situa tions like a battery change see page 18 SD Card 1 234 2048MB ABCDEF12 2012 07 01 SUN 11 22 33s RFID firmware ver date time SD Card In this line the memory capacity o...

Page 280: ...the elevated ailerons increases with their deflection and therefore does normally require a greater path upward than downward Correspondingly when planning to operated sepa rately controlled flap ser...

Page 281: ...roach of a glider model in order to be able to appropriately control the spoi lers or a crow position using one of the other controls It may be more advantageous to either design the function of the C...

Page 282: ...to individually set the threshold for the battery warning Make sure that you do not enter a value which is too low so that you still have sufficient time to safely land your model in the event of a ba...

Page 283: ...setup model n a DSC Output PPM10 HoTT The Model name can now be entered here by a brief tap on the center SET key of the right four way button to switch to the character table 0123 456789 Mod Name GR...

Page 284: ...oth mechanical and electrical reasons For example if the sum of the values of the column Center and one of both columns of Servo travel exceed this limit the respective servo can no longer follow the...

Page 285: ...model is equipped with a motor contrary to the assumption of this section and therefore you have selected front back instead of none in the line Motor on C1 of the Model type menu page 104 Therefore...

Page 286: ...en stick travel and control travel see page 130 100 100 100 Ail Ele Rud DUAL SEL On the other hand if the maximum throws are OK and only the reactions around the center position are to strong for more...

Page 287: ...he very least in order to prevent such risks With electro gliders on the other hand the fail safe setting motor off can also be used for example for outlanding to reliably stop the motor or its propel...

Page 288: ...er flights that the model must be continuously corrected with the elevator while the motor is switched on this situ ation can be corrected by setting a free mixer and adjusting it accordingly For this...

Page 289: ...lay where the selected proportional control can be activated to watch the bars for channel 8 wander from one side to the other and back However if the proportional control is moved too fast in practic...

Page 290: ...the activated switch from its forward position back into its middle position Now move the marker frame to the left and into the column above the column now labeled with a second switch symbol instead...

Page 291: ...al In the Aileron flaps line you enter the correct number of aileron and flap servos in this example 2 AIL In the last line you leave the standard entries for the selection of Brake retracted front On...

Page 292: ...ion keys Following a brief tap on the center SET key of the right four way button actuate the desired switch e g 2 Phase assignment A B C D E F 1 normal 2 prior combi Both switch positions in other wo...

Page 293: ...with a brief tap on the SET key of the right four way button change the offset val ue for this Input 8 value field now displayed in inverse video until the spoilers are again retracted e g In5 offset...

Page 294: ...t with a brief tap on the center SET key of the right four way button the following window will appear SEL 0 C1 C2 C3 C4 Control switch STO SEL Move desired control adj Now simply move the respective...

Page 295: ...C3 C4 FX FXi L1 L2 L3 L4 C1 Now select the previously programmed control switch C1 then tap on the center SET key of the right touch pad Model time Batt time Top Centr Flight Alarm 0 34h 1 23h 0s 0s S...

Page 296: ...menu should remain un changed Then connect one of the two servos to Output 1 pro vided for this purpose by standard and the second to an arbitrary free receiver connection 5 12 max such as Output 8 S...

Page 297: ...7 In8 GL GL GL typ fr fr fr fr SEL GL 0 menu that Input 8 GL obal is set to free so the control function is separate from the control chan nel over all flight phases Alternatively you can set Input 8...

Page 298: ...ted to receiver output 8 as described on page 288 and continued in Examples 1 and 2 This is why none was se lected for the Motor on C1 line in the Model type menu This not only causes the column Motor...

Page 299: ...t phase name Briefly tap on the center SET key of the right four way button to activate the en try field then select the desired flight phase for this switch position in this example 2 Thermal with th...

Page 300: ...Speed 0 7 0 5 0 11 6th Step In the menu Wing mixers beginning on page 170 the flight phase name of the newly activated flight phase appears at the bottom edge of the display If the switch position is...

Page 301: ...301 For your notes...

Page 302: ...ttings sub menu of the Wing mixer menu Tail type Motor at C1 Normal Aile flaps 2AIL2FL Model type Brake Off In 1 90 SEL None STO The setting in the Brake Offset value field defines the neutral positio...

Page 303: ...s appearing in this line are based on the same data set as in the comparable position in the Phase trim menu which is why changes always take effect in both directions FL Since all inputs in the Contr...

Page 304: ...me column with a brief tap on the center SET key of the right four way button Pha1 Pha2 Pha3 Name ph Tim Pha4 Pha5 Now give Phase 1 the Normal phase that is also the phase which includes the previous...

Page 305: ...from SD All seven possible flight phases are listed in Copy from phase Select the flight phase to be copied e g 1 Normal 7 Copy from phase 3 5 2 4 6 1 normal Thermal Speed With a brief tap on the cen...

Page 306: ...e event that the assigned control proportional con trol or 3 way switch is in its neutral or middle po sition 9 fl pos AILE Thermal Diff 55 Ail tr AI 100 100 FL Enter in this line the share of influen...

Page 307: ...stand ard regardless of these settings The current positions of the INC DEC buttons CTL 5 6 which may be assigned to inputs 5 8 or 5 12 are stored in accordance with your preference entered in the Ty...

Page 308: ...see page 215 The input of a time delay in the time column most right should also be dispensed with initially Then in the menu Mix only Channel page 216 of the selected control channel 9 in this case i...

Page 309: ...proportional control in these examples Lv1 to channel 9 and the desired symmetric or asymmetric time span is set in the Time column for the amount of time in which the function should ultimately take...

Page 310: ...Free or aux function or left flap 2 elevator Free or aux function or right flap 2 elevator Free or rudder According to the assignment of the receiver outputs in the menu Model type page 104 None 2AIL...

Page 311: ...receiver outputs in accordance with the connection plan shown above the aileron function of the two exterior aileron servos will function correctly immediately but not the elevator function of the tw...

Page 312: ...th a setting of 0 Over the course of the further flight testing under certain circumstances it may be advantageous to experiment with differentiations deviating from zero With larger models rudders in...

Page 313: ...313 Programming examples Delta and flying wing MIX only channel only normal 1 2 3 4 5 6 Note This menu can be unlocked on the mc 16 HoTT transmitter as an extra cost option...

Page 314: ...aileron Free or aux function retracts Free or aux function mixture Free or aux function Free or aux function With the assignment of auxiliary channels at the transmitter we recommend making sure that...

Page 315: ...rse video value field in the Point line Finally round the characteristic curve by moving the marker frame upward select with a brief tap on the center SET key of the right touch pad then change the va...

Page 316: ...age alone In the pro cess the model can rotate and change directions as though it were controlled with the ailerons and eleva tor Therefore a correction over the transverse axis elevator and or the lo...

Page 317: ...e to property or even personal injury If you additionally program the fail safe positions of the rudders to that the model flies in gently sinking circles in the event of a failure there is a good cha...

Page 318: ...of the settings described in the following unchanged In the scope of the initial commissioning of a new transmitter in the selection menu Basic settings page 268 Battery type Battery warning Touch Se...

Page 319: ...and call it up with a brief tap on the center SET key of the right touch pad In the display which then ap pears use the key of the left or right touch pad Select model type to select the helicopter m...

Page 320: ...ng the Model name the settings adopt ed from Basic settings for Stick mode and DSC Output are to be checked and changed as neces sary for the given memory location Another option is to be activated in...

Page 321: ...m input serves as the throttle limiter Its effect is exclusively on output 6 where the throttle servo is connected The throttle limiter is assigned by default to the right side proportional rotary con...

Page 322: ...levers at positioned perpendicularly to the servo housing normally A hovering pitch value of 4 to 5 is now mechanically set at the control rods to the rotor blades In principle all known helicopters...

Page 323: ...se of emergency Later when you have gained enough experience to practice the autorotation flight a more stable idle can be entered here Adjustment notice for electric helicopters Since the motor must...

Page 324: ...mming you activate the so called flight phases which can be called with assigned switches as an al ternative to the previously described normal phase For this purpose first open the menu Phase setting...

Page 325: ...ch pad or go ahead and put the switch into its other limit position and define the name for this new switch position such as 3 Speed A B C D E F 6 5 3 Speed Phase assignment prior combi The switch s m...

Page 326: ...nd mc 20 HoTT transmitters here too offers multiple possibilities to realize various speeds in individual phases A prac tical proposal which retains the throttle limiter function can be found beginnin...

Page 327: ...327 For your notes...

Page 328: ...328 For your notes...

Page 329: ...ates uses and can radiate radio frequency energy and if not installed and used in accordance with the instructions may cause harmful interference to radio communications However there is no guar antee...

Page 330: ...2006 A11 2009 A1 2010 A12 2011 EN 301 489 1 V1 9 2 EN 301 489 17 V2 1 1 EN 300 328 V1 7 1 Health and safety requirements pursuant to 3 1 1 Article 3 1 a Protection requirement concernig electromagnet...

Page 331: ...z pr cis ment les d fauts ou vices constat s car si le mat riel est conforme et qu aucun d faut n a t constat par nos services nous nous verrions contraints de facturer le co t de cette intervention G...

Page 332: ...rm you of your nearest stockist We ac cept no liability for printing errors Printed in China PN QK 01 V3de Although we have carefully checked the information contained in these instructions and checke...

Reviews: