263
Program description - Ring limiter
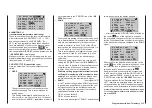
combination at any time. This is essentially done in
the same manner as described previously under
“Input”, for example:
4
4
Ring limiter
Input
SET
3
9
7
OFF
OFF
OFF
Output
X
3
3
3
Y
Y
4
10
6
X
4
Note:
Watch out for undesirable overlaps if you use one of
the outputs within a mixer.
Column, “SET”
The SET column is used to determine just which of
the ring limiters is to be “OFF” and which are to be
“ON”, i. e. active. Use the selection keys on the left or
right four-way button to move the marker frame to the
desired value field in the SET column then briefly tap
the center SET key of the right four-way button:
4
4
Ring limiter
Input
SET
3
9
7
OFF
OFF
OFF
Output
X
3
3
3
Y
Y
4
10
6
X
4
In the value field now displayed in inverse video,
make a choice between the two options, “ON” and
“OFF”, with the
or
selection keys then con-
clude the entry with a brief tap on the center
ESC
key
of the left four-way button or on the center
SET
key of
the right four-way button.
A tap on the
or
keys of the right four-way
button at the same time (CLEAR) will reset the active
value field back to its “OFF” default value.
„Settings page“
4
4
Ring limiter
Input
SET
3
9
7
ON
ON
ON
Output
X
3
3
3
Y
Y
4
10
6
X
4
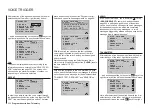
Following a selection of one of the three lines with
the selection keys, switch to the settings page for the
selected ring limiter (1 … 3) with a brief tap on the
center
SET
key of the right four-way button:
0%
R.
max-X
0%
CH 4
100% 100%
CH 3
1
lim.
If, however, the small diamond at the center of the
circle in the figure above (which represents the cur-
rent stick position) is not visible …
0%
max-X
0%
100% 100%
R.
CH 4 CH 3
1
lim.
… then the respective ring limiter is still switched
“OFF”. In this case, switch back to the previous page
with a brief tap on the center
ESC
key of the left four-
way button then switch the respective ring limiter “ON”
as previously described.
Programming procedure
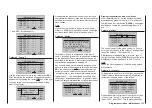
The two upper value fields – labeled at the bottom left
of the display as “max-X” or “max-Y”, depending on
the position of the marker frame – are used to specify
separate settings for each of the two control func-
tions, “left/right” and “forward/reverse” within a range
of 25 …
0%
max-X
0%
100%
25%
R.
CH 4 CH 3
1
lim.
… and 125 %:
0%
max-X
0%
100%
125%
R.
CH 4 CH 3
1
lim.
In practice, the setting is made by changing the given
value until the respective servos in the model just
reach the point where they no longer move.
A tap on the
or
keys of the right four-way
button at the same time (CLEAR) will reset the
changed value in the active value field back to its
“100 %” default value.
In the next line down – labeled at the bottom left of the
display as “
<=>
-X” or “
<=>
-Y”, depending on
the position of the marker frame – the setting values,
in a range from 0 % and a maximum of 125 %, affect
the form of limitation between “circular” and “rectan-
gular”, whereby a setting value here may never be
greater than the value of the field above it.
0%
-X
0%
100% 100%
R.
CH 4 CH 3
1
lim.
Summary of Contents for HoTT MC-16 Series
Page 1: ...Programming Manual mc 16 mc 20 HoTT 1 en mc 16 mc 20...
Page 27: ...27 For your notes...
Page 53: ...53 For your notes...
Page 61: ...61 For your notes...
Page 65: ...65 For your notes...
Page 71: ...71 For your notes...
Page 103: ...103 For your notes...
Page 107: ...107 For your notes...
Page 111: ...111 For your notes...
Page 155: ...155 For your notes...
Page 165: ...165 For your notes...
Page 201: ...201 For your notes...
Page 229: ...229 For your notes...
Page 231: ...231 For your notes...
Page 261: ...261 For your notes...
Page 265: ...265 For your notes...
Page 301: ...301 For your notes...
Page 327: ...327 For your notes...
Page 328: ...328 For your notes...


