Form No. 20026 XL 4000/5000 Center Pin Rebuild
Part No. 2460-4164
S
TAGE
1
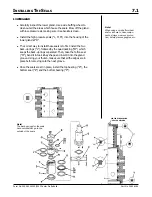
Install a lifting eye on top of the center pin assembly. Secure
lifting tackle of sufficient capacity to lift 300 lbs. and bring the
center pin assembly back to the machine.
Once the center pin assembly is in place, secure the mounting
plate to the frame of the machine. There are four 5/8" x 3"
bolts, each with two hardened flat washers and self-locking
nuts. Always install new nuts when reinstalling the center pin.
If everything is correctly assembled and installed, the stabilizer
bar can be installed.
S
TAGE
2
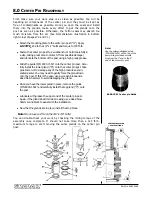
You are now ready to begin connecting hydraulic lines. Make
sure you install all new O-rings on the split-flange fittings.
Remember! The bolts that secure these fittings are only 3/8" x
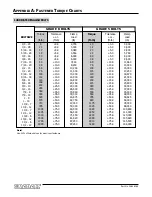
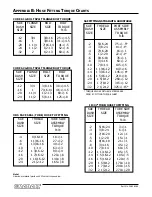
1 1/4"; refer to torque charts in Appendices A & B to avoid
overtorquing.
Once you have the top side hydraulic plumbing hooked up, go to
the underside of the machine and connect all the hydraulic lines
to the appropriate fittings.
S
TAGE
3
Reconnect the batteries.
Start the machine and let it idle for a time.
Once air pressure is at the correct level (120 PSI), run the en-
gine at approximately 1000 RPM.
S
TAGE
4
If machine is a wheeled excavator, put it in remote.
Begin carefully operating the machine. If it is a wheeled excava-
tor, start out with the steering and the travel pedal. If it is
a crawler-mounted machine, use the control pedals to move it
easily back and forth. This will tell you whether or not the pilot
lines are connected correctly.
If necessary, top off the hydraulic oil.
Once you have determined that the pilot lines are connected
correctly and the oil is at the correct level, you are ready for an
operational test of the machine.
Raise the boom off the ground. If you are working on a wheeled
excavator, replace the boom in the rack.
C
ENTER
P
IN
I
NSTALLATION
9.0
l
l
l
l
l
l
l
l
l
l
l
l
l
Note!
See comments in Section 9, “Hy-
draulic Plumbing.”
Summary of Contents for XL4000
Page 2: ......
Page 73: ......
Page 76: ... 5MP ...
Page 145: ......
Page 146: ......
Page 160: ......
Page 161: ......
Page 162: ......
Page 175: ......
Page 176: ......
Page 177: ......
Page 178: ......
Page 192: ......
Page 193: ......
Page 194: ......
Page 207: ......
Page 208: ......
Page 210: ...500P ...
Page 229: ......
Page 230: ......
Page 245: ......
Page 246: ......
Page 247: ......
Page 248: ......
Page 265: ......
Page 266: ......
Page 267: ......
Page 268: ......
Page 280: ......
Page 281: ......
Page 282: ......
Page 297: ......
Page 298: ......
Page 299: ......
Page 300: ......
Page 301: ......
Page 302: ......
Page 303: ......
Page 304: ......


