


120
7. EXAMPLES AND APPLICATION NOTES
80703B_MHW_2850T/3850T_02-2019_ENG
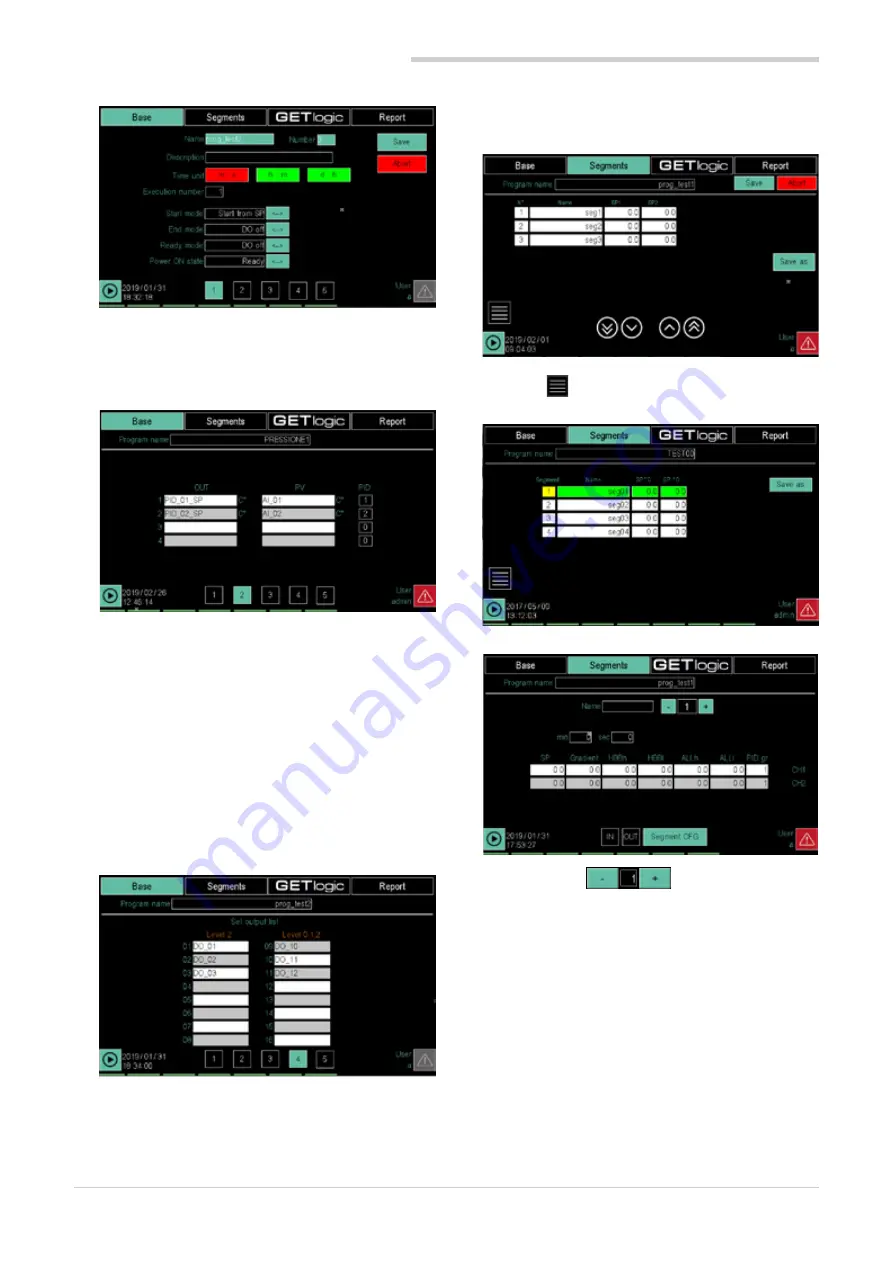
5. "Base" configuration page 1 opens.
As the "Unit of Time" parameter, select
m:s
(minutes:
seconds).
As "Start mode" parameter, select
Start from SP
.
6. Select "Base" configuration page 2.
Delete the variables in rows 3 and 4 from the "OUT"
and "PV" columns. This will only generate SP profiles
for 2 curves.
Configure the following parameters:
•
Column “OUT”, row 1 = PID_01_SP.
•
Column “OUT”, row 2 = PID_02_SP.
•
"PV" column, row 1 = AI_01 (check that variable
AI_01 is the input of the PID1 controller).
•
"PV" column, row 2 = AI_02 "PV" (make sure that
the variable AI_02 is the input of the PID2 control-
ler).
•
Column “PID”, row 1 = 1.
•
Column “PID”, row 2 = 2.
7. Select "Base" configuration page 4.
Configure the following parameters:
•
Column “Level 2”, row 01 = DO_05.
•
Column “Level 2”, row 02 = DO_06.
•
Column “Level 2”, row 03 = DO_07.
•
Column “Level 2”, row 04 = DO_08.
Delete parameter settings from rows 05 to 16.
8. Select
Segments
to set the SP profile.
9. Touch the
button and add the 4 SP profile seg-
ments.
10. Edit the list of available parameters for each segment.
Use the selector
in the page to display
the various segments.
Summary of Contents for 2850T
Page 2: ......
Page 6: ...80703B_MHW_2850T 3850T_02 2019_ENG 4...
Page 10: ...80703B_MHW_2850T 3850T_02 2019_ENG 8...
Page 20: ...80703B_MHW_2850T 3850T_02 2019_ENG 18...
Page 34: ...80703B_MHW_2850T 3850T_02 2019_ENG 32...
Page 104: ...80703B_MHW_2850T 3850T_02 2019_ENG 102...
Page 106: ...80703B_MHW_2850T 3850T_02 2019_ENG 104...
Page 124: ...80703B_MHW_2850T 3850T_02 2019_ENG 122...
Page 128: ...80703B_MHW_2850T 3850T_02 2019_ENG 126...
Page 156: ...80703B_MHW_2850T 3850T_02 2019_ENG 154...


