background image

2.  RADAR, CHART RADAR OPERATION

2-7

2.7

Interference Rejector

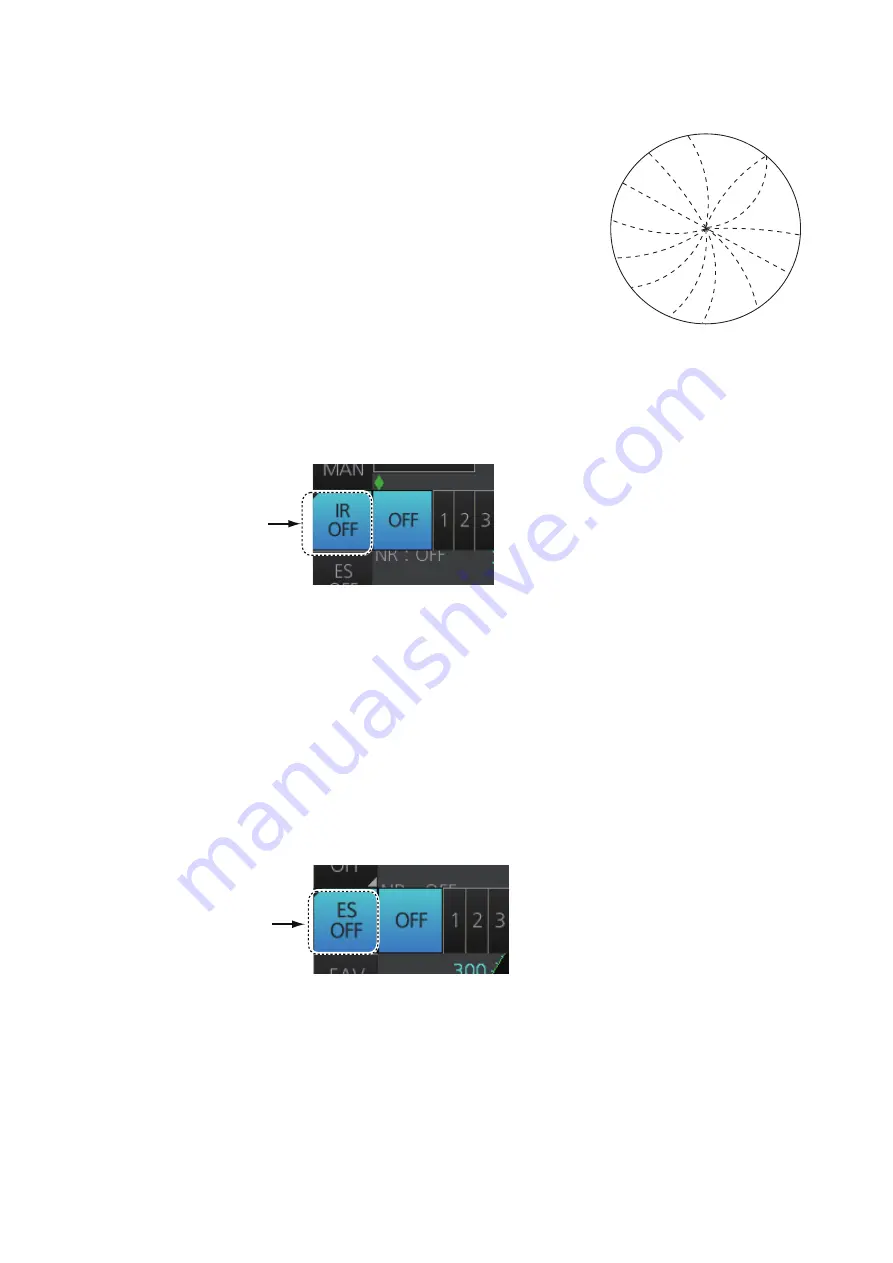
Mutual radar interference may occur in the vicinity of an-
other shipborne radar operating in the same frequency 
band. It is seen on the screen as a number of bright 
spikes either in irregular patterns or in the form of usual-
ly curved spoke-like dotted lines extending from the cen-
ter to the edge of the picture. Activating the interference 
rejector circuit can reduce this type of interference.

The interference rejector is a kind of signal correlation 
circuit. It compares the received signals over succes-
sive transmissions and reduces randomly occurring sig-
nals. There are three levels of interference rejection depending on the number of 
transmissions that are correlated.

Click the [IR] button on the InstantAccess bar™ then click desired rejection level. The 
higher the number the greater the degree of interference rejection.

2.8

Echo Stretch

The echo stretch feature enlarges targets in the range and bearing directions to make 
them easier to see, and it is available on any range. There are three levels of echo 
stretch, 1, 2 and 3. The higher the number the greater the amount of stretching.

The echo stretch magnifies not only small target pips but also returns from the sea sur-
face, rain and radar interference. For this reason, suppress those types of interference 
before activating the echo stretch.

Click the [ES] button on the InstantAccess bar™ then click desired echo stretch level.

IR button

ES button

Summary of Contents for FCR-2119-BB

Page 1: ...OPERATOR S MANUAL www furuno com CHART RADAR FCR 2119 BB FCR 2129 BB FCR 2139S BB FCR 2819 FCR 2829 FCR 2839S FCR 2829W FCR 2839SW Model Product Name MARINE RADAR ...

Page 2: ... is elemental chlorine free FURUNO Authorized Distributor Dealer 9 52 Ashihara cho Nishinomiya 662 8580 JAPAN A JUN 2012 Printed in Japan All rights reserved F1 JAN 10 2017 Pub No OME 36040 F1 DAMI FCR 2119 BB 0 0 0 1 7 6 1 3 2 1 5 ...

Page 3: ...or the battery recycle symbol The number of symbols can increase when the other countries make their own recycle symbols in the future This manual has been authored with simplified grammar to meet the needs of international users The operator of this equipment must read and follow the descriptions in this manual Wrong oper ation or maintenance can cancel the warranty or cause injury Do not copy an...

Page 4: ...RF radiation level of 100 50 and 10 W m2 are given in the table below Indicates a potentially hazardous situation which if not avoided could result in death or serious injury Indicates a potentially hazardous situation which if not avoided could result in minor or moderate injury XN20AF 198cm XN24AF 243cm SN36AF 377cm 100W m2 Radar model FCR 2129 BB FCR 2829 FCR 2119 BB FCR 2819 XN20AF XN24AF XN20...

Page 5: ...e liquid filled containers on or near the equipment Fire or electrical shock can result if a liquid spills into the equipment Do not operate the equipment with wet hands Electrical shock can result Keep objects away from the open type antenna unit so as not to impede rotation of the antenna Fire electrical shock or serious injury can result Use the proper fuse Use of the wrong fuse can cause fire ...

Page 6: ... Gyrocompass error Course change own ship and targets Handle the LCD carefully The LCD is made of glass which can cause injury if broken The data presented by this equipment is intended as a source of navigation information The prudent navigator never relies exclusively on any one source of navigation information for safety of vessel and crew WARNING To avoid electrical shock do not remove cover N...

Page 7: ...rs on the Status bar 1 16 1 10 InstantAccess BarTM 1 17 1 10 1 How to operate the buttons on the InstantAccess bar 1 19 1 11 Sensor Information Box 1 19 1 12 Menu Overview 1 21 1 12 1 Basic menu operation 1 21 1 12 2 How to enter numeric data 1 23 1 12 3 How to enter alphanumeric character data 1 23 1 13 Context Sensitive Menus in the Radar Mode 1 24 1 13 1 Context sensitive menus available with b...

Page 8: ... 12 2 12 2 How to edit a customized echo 2 12 2 12 3 How to restore a user customized echo to saved setting 2 13 2 12 4 How to restore a user customized echo to factory default settings 2 13 2 13 How to Suppress Second trace Echoes 2 14 2 14 Presentation Modes 2 14 2 14 1 Orientation modes 2 14 2 14 2 How to select a presentation mode 2 15 2 14 3 Description of presentation modes 2 16 2 15 How to ...

Page 9: ...2 40 2 28 Interswitch 2 41 2 28 1 How to display antenna information 2 41 2 28 2 How to preset antenna and display combinations 2 42 2 28 3 How to select an antenna 2 43 2 29 Dual Radar B type only 2 44 2 29 1 How to enable or disable the dual radar display 2 45 2 29 2 Operating considerations for the dual radar display 2 45 2 30 Performance Monitor 2 46 2 31 Magnetron Reset For A and B types 2 47...

Page 10: ...6 1 How to cancel tracking on individual tracked targets 3 7 3 6 2 How to cancel tracking on all TTs 3 7 3 7 TT Symbols and TT Symbol Attributes 3 8 3 7 1 TT symbols 3 8 3 7 2 TT symbol brilliance 3 9 3 7 3 Color for TT symbol 3 9 3 8 How to Display TT Data 3 10 3 8 1 How to display target data for individual TT 3 10 3 8 2 TT pop up information 3 11 3 8 3 Target list 3 11 3 9 Vector Modes 3 12 3 9...

Page 11: ...ve Speed Vectors 4 14 4 14 Association of TT and AIS Targets 4 14 4 14 1 How to select the association method 4 14 4 14 2 How to set the conditions for association 4 15 4 15 Voyage Data 4 16 4 16 AIS Messages 4 17 4 16 1 How to create and transmit a new AIS message 4 17 4 16 2 How to transmit a saved AIS message 4 18 4 16 3 How to display received AIS messages 4 18 4 17 How to View Own Ship Data 4...

Page 12: ... 6 Cursor Position Box 6 18 6 7 The Silent Mode 6 18 6 8 True Motion Reset 6 19 6 9 How to Control Route and User Charts in Voyage Navigation and Voyage Planning Modes 6 20 6 10 How to Use the VRM and EBL 6 21 6 10 1 How to hide show an EBL VRM 6 21 6 10 2 How to measure the range and bearing 6 21 6 10 3 How to select bearing reference 6 21 6 10 4 EBL VRM functions available with the context sensi...

Page 13: ...icenses 7 14 7 12 How to View Permit Expiration Date 7 15 7 13 How to Display Install Update History 7 16 7 14 Catalog of Chart Cells 7 17 7 14 1 How to group chart cells 7 19 7 14 2 How to view status of chart cells 7 20 7 15 How to Open Charts 7 21 7 16 How to Print Chart List Cell Status List 7 21 7 16 1 How to print the chart list 7 21 7 16 2 How to show the cell status list 7 22 7 17 How to D...

Page 14: ... for S57 chart features 9 6 9 4 How to Find Information About S57 Chart Objects 9 7 9 5 Admiralty Information Overlay AIO 9 8 9 5 1 Installation 9 8 9 5 2 How to display the AIO 9 8 9 5 3 Catalog of AIO cells 9 9 9 5 4 How to find AIO chart object information 9 9 9 5 5 How to select the information to display 9 11 10 C MAP CHARTS 10 1 10 1 How to Register the System at C MAP 10 1 10 2 How to Order...

Page 15: ... 12 10 2How to export route data in RTZ CSV ASCII format 12 20 12 11How to Delete Routes 12 21 12 12Route Transfer Feature 12 22 12 12 1How to turn route transfer on off 12 22 12 12 2How to send and receive monitored routes 12 23 12 12 3How to send and receive planned routes 12 24 12 13Reports 12 25 13 USER CHARTS 13 1 13 1 Introduction 13 1 13 1 1 Objects of user charts 13 1 13 2 How User Charts ...

Page 16: ... 15 3 15 2 3 Error Sources for Radar Echo Image and TT Mismatch 15 4 15 3 Parallel Index PI Lines 15 5 15 3 1 How to activate deactivate PI lines 15 5 15 3 2 PI line bearing reference 15 5 15 3 3 Number of PI lines to display 15 5 15 3 4 PI line mode 15 5 15 3 5 How to adjust PI line orientation PI line interval 15 6 15 3 6 How to reset the PI lines 15 6 15 3 7 How to adjust PI line length 15 7 15...

Page 17: ... 3 How to filter AIS targets 18 5 18 2 4 How to set conditions for automatic activation of sleeping targets 18 6 18 2 5 How to sleep all activated targets 18 6 18 2 6 How to set the AIS lost target filter 18 7 18 2 7 How to display AIS target data 18 7 18 2 8 How to display own ship data 18 9 18 3 Association 18 9 18 3 1 How to select association method 18 9 18 3 2 How to set the conditions for as...

Page 18: ...fault 22 15 22 13CCRP 22 16 23 COMMON REFERENCE SYSTEM 23 1 23 1 Installation of the System 23 1 23 2 Accuracy of the System 23 1 24 CONNING DISPLAYS 24 1 24 1 Main Conning Display 24 1 24 2 Conning Display Examples 24 3 24 3 Mini Conning Display 24 9 24 4 Side Conning Display landscape monitor only 24 10 25 MAINTENANCE AND TROUBLESHOOTING 25 1 25 1 Maintenance 25 2 25 2 How to Replace the Fuses 2...

Page 19: ...ets and other navigation data on a 23 1 inch display FCR 28x9 The main features of this series are The FCR 21x9 BB FCR 28x9 series consists of the following models and configurations Viewing distance 1020 mm Model Frequency Band Size of Monitor Unit Output Power Transceiver location FCR 2119 BB X band Local supply 12 kW Antenna unit FCR 2129 BB 25 kW Antenna unit FCR 2139S BB 30 kW Antenna unit FC...

Page 20: ...ay the related context sensitive menu This radar is available in three types of specifications IMO A or B This manual provides the descriptions for the B type of which some functions are not available with the IMO or A type See the menu tree in Appendix 1 for function availability The display colors mentioned in this manual are those with the color palette setting Day Gray Signal processing functi...

Page 21: ...roduction of a virus to the LAN DO NOT connect the system or HUB to an external network including other shipboard LAN Do not install 3rd party programs in the system Do not install any 3rd party programs Open Source Software This product includes software to be licensed under the GNU General Public License GPL GNU Lesser General Public License LGPL BSD Apache MIT and others The program s is are fr...

Page 22: ...CESSOR UNIT Sub Display 1 Sub Display 2 Gyro Converter GC 10 Gyrocompass A D Converter Heading Sensor LAN RU 3305 110 115 220 230 VAC 1ø 50 60 Hz Transformer RU 1803 440 VAC 1ø 50 60 Hz Brake Unit BR 001 002 Chassis RSB 096 078A RSB 097 078A RSB 096 079A RSB 097 079A EC 3000 PROCESSOR UNIT Serial 1 2 IEC 61162 2 Gyro 1 AIS Serial 3 8 IEC 61162 1 EPFS 2 navigator SDME speed log Echo sounder Wind Al...

Page 23: ...eather All other units Protected from the weather EC 3000 PROCESSOR UNIT Serial 1 2 IEC 61162 2 Gyro 1 AIS Serial 3 8 IEC 61162 1 EPFS 2 navigator SDME speed log Echo sounder Wind Alarm 5 Navtex etc Digital Out 1 6 6 1 System Fail 2 Power Fail 3 Normal Close 1 4 Normal Close 2 5 Normal Open 1 6 Normal Open 2 Dashed lines indicate optional or local supply equipment Sensor Adapter 4 Radar Control Un...

Page 24: ... Category of Units Antenna Unit Exposed to the weather All other units Protected from the weather EC 3000 PROCESSOR UNIT Serial 1 2 IEC 61162 2 Gyro 1 AIS Serial 3 8 IEC 61162 1 EPFS 2 navigator SDME speed log Echo sounder Wind Alarm 5 Navtex etc Digital Out 1 6 6 1 System Fail 2 Power Fail 3 Normal Close 1 4 Normal Close 2 5 Normal Open 1 6 Normal Open 2 Dashed lines indicate optional or local su...

Page 25: ...ntenna Unit Exposed to the weather All other units Protected from the weather EC 3000 PROCESSOR UNIT Serial 1 2 IEC 61162 2 Gyro 1 AIS Serial 3 8 IEC 61162 1 EPFS 2 navigator SDME speed log Echo sounder Wind Alarm 5 Navtex etc Digital Out 1 6 6 1 System Fail 2 Power Fail 3 Normal Close 1 4 Normal Close 2 5 Normal Open 1 6 Normal Open 2 Dashed lines indicate optional or local supply equipment Senso...

Page 26: ... for CAT 2C and CAT 2HC MU 231 for CAT 1C and CAT 1HC If a different monitor is to be used on IMO vessels its effective diameter must meet the applicable Category requirements CAT 1C and CAT 1HC effective diameter 320 mm or higher CAT 2C and CAT 2HC effective diameter 250 mm or higher For installation operation and viewing distance of other monitor see its manuals For BB type a monitor unit is pre...

Page 27: ...eel to do various functions The RCU 025 has 28 direct access keys five knob type controls two rotary encoders a power switch a USB port and a trackball module The system can be operated with the keys and controls or with the trackball module When you press the correct key a single beep sounds to alert you to correct opera tion For wrong operation several beeps sound You can select the loudness of ...

Page 28: ...buttons on the InstantAccess bar ESC Goes back one step in current operating sequence on the InstantAccess bar BRILL Rotate Adjusts the brilliance of the display FURUNO supplied monitor only Push Selects a color palette A C RAIN Rotate Suppresses rain clutter Push Toggles between manual and automatic rain clutter adjustment A C SEA Rotate Suppresses sea clutter Push Toggles between manual and auto...

Page 29: ...ntrol VRM1 VRM2 Rotary control Adjusts the diameter of the active VRM VRM1 VRM2 Activates or deactivates the respective VRM UNDO Undo edit or text input on radar map VIEW HIDE Radar mode chart radar mode Shows or hides the AZ box Drop mark box es EBLs Mark box PI line box Trial box VRMs Chart for radar mode Shows or hides the EBLs InstantAccess bar Over lay NAV Tools box Route information box VRMs...

Page 30: ...th this switch Status LED The color and state of the LED change according to system or alert status See the Status LED description on page 1 2 Left button Does the operation related to the object selected Confirms the operation done for the object selected Scrollwheel Selects menu options Selects chart scale Sets numeric data Right button Displays context sensitive menu when the cursor is put in t...

Page 31: ...sage Do not operate the system with a medium inserted in the DVD drive when its use is not required to prevent damage to the drive and medium After use of a medium is completed remove the medium from the drive and store it in its case To keep the system stable restart the unit at least once every two weeks Close the lid of the DVD drive when the drive is not in use The DVD ROM provided with this e...

Page 32: ...e indication ST BY appears at the screen center The radar is now ready to transmit radar puls es In the stand by condition no radar pulses are transmitted and TT nor AIS is active The settings on the menus are stored in a non volatile memory hard disk and are preserved when the power is turned off Note If the ambient temperature is less than 0 C 32 F when the power is applied nothing appears on th...

Page 33: ...d To select a palette do the following 1 Click the Palette button 2 Click Day Dusk or Night as appropriate For example select Day to show its options 3 Click the palette gray blue desired Note A palette can also be selected by pushing the BRILL control on the Control Unit Palette Brilliance Panel dimmer step Text color Background color MU 190 MU 231 Day gray 86 88 9 White Gray Day blue 86 88 9 Whi...

Page 34: ...ith BRILL control on the ECDIS control unit Operate the BRILL control to adjust brilliance Turn it clockwise to increase the bril liance counterclockwise to decrease the brilliance Watch the brilliance level indica tion on the BRILL button see the illustration below to see the current brilliance level Manual brilliance adjustment from the InstantAccess bar 1 Push the InstantAccess knob 2 Rotate th...

Page 35: ...B 1 6 2 Control unit backlighting How to adjust the brilliance manually with the control unit RCU 025 Push the PANEL key to adjust backlighting of the control unit How to adjust the brilliance manually on the menu For Radar mode and Chart radar mode 1 Right click the BRILL button on the InstantAccess bar then select Brill Menu 2 Adjust the backlighting on the 1 CONTROL PANEL menu How to adjust the...

Page 36: ...play mode Click the Display mode button to select desired mode RADAR Radar or chart radar mode see section 1 8 2 CHART for RADAR Chart for radar mode CONNING for RADAR Conning mode see section 24 1 1 7 2 Limitations when using the chart radar mode The presentation mode in the chart radar mode can be course up RM north up RM or north up TM The presentation mode is automatically switched to north up...

Page 37: ...ustration below shows the markers data etc as they appear on the FURUNO 19 inch monitor unit The layout for the 23 inch monitor unit is similar No Name Description 1 Status bar Selects an antenna Selects the mode Adjusts the radar picture Displays radar operational messages See section 1 9 2 Sensor information box Shows your ship s heading heading source ship s speed water tracking speed speed sou...

Page 38: ...aining until the buzzer sounds to alert the operator to view the radar picture 18 InstantAccess bar Quick access to often used radar chart radar and chart functions For radar and chart radar functions see section 1 10 For chart func tions see section 1 9 1 19 Tuning bar Shows tuning status 20 Range presentation mode box Selects the radar range Selects the presentation mode 21 REF point box Selects...

Page 39: ...um size click the minimized box Note The respective VRM or EBL is erased from the screen when the corresponding VRM or EBL box is minimized 1 8 2 Chart radar display The chart radar display overlays an electronic chart on the radar picture To switch be tween the radar and chart radar displays click the Chart ON OFF button on the In stantAccess bar Click arrow to minimize Click here to maximize Cli...

Page 40: ...hows only the electronic chart Click the Display mode button to se lect CHART for RADAR to activate this display See Chapter 6 for a description of the chart display Select CHART for RADAR CHART for RADAR 030 1 030 1 0 5NM 4min AUTO ACT FILT 0 50 NM 0 50 NM Voyage XTD Limit XTD ...

Page 41: ...igation purpose for example congested waters 5 Chart database Selects the IMO chart database base primary standard or all Available in the chart radar mode 6 Message area Shows operational messages and icons 7 RAIN Reduces rain clutter 8 SEA Reduces sea clutter 9 GAIN Adjusts the gain of the radar receiver 10 Settings Manages user profiles opens the Settings menu 11 Date Displays the date and whet...

Page 42: ...om standby to TX Drop down list button A drop down list button provides a list from which to select an option related to the label on the but ton A drop down list button is identified by a tri angle on the button s bottom right corner The Chart database button shown in the right figure is an example of a drop down list button Slider bar The slider bars provide for adjustment of the ra dar picture ...

Page 43: ...s displayed always This bar provides in the radar and chart radar modes buttons for adjustment of the radar picture and chart AIS operations display brilliance con trol FURUNO monitor only MOB screenshot etc For a description of the InstantAccess bar used in the chart mode see section 6 1 2 Radar mode map ON Radar mode chart ON 13 ...

Page 44: ...s 8 MAP ON OFF Shows or hides the radar map marks on the radar display in the radar mode 9 CHART ON OFF Shows or hides the electronic chart 10 Chart Disp Shows hides various chart objects Shown in the chart ra dar mode See section 2 39 2 11 OWN AIS Shows the VOYAGE DATA menu to set your ships AIS data 12 AIS message Displays screen for received AIS message 13 Palette Selects a color palette 14 BRI...

Page 45: ...onfirm your selection Note You can use the ESC key to return to the previous state 1 11 Sensor Information Box Toggle button Drop down list button Slider bar button A drop down list button provides the functions related to the label on the button This type of button is identi fied by the triangle at the bottom right corner of the button The Sensor information box displays the sen sor data and the ...

Page 46: ...r source indication is blank and the related indication shows asterisks Nav data indication Color of nav data indication Color of sensor name State Green White Sensor is normal Yellow White Validity of data is low or offset is applied Yellowish orange Yellowish orange Integrity check failed Green data shown with as terisks No display Data is not being re ceived Yellow White Data is input manually ...

Page 47: ...ck the menu desired The current selection is highlighted in green 3 Select a menu item Control Unit Press the corresponding numeric key Trackball module Click the menu item desired The current selection is highlight ed in green 4 Select a menu option Control Unit Press the corresponding numeric key The current selection is high lighted in orange Trackball module Spin the scrollwheel The current se...

Page 48: ... left arrow on the menu title bar to return to the main menu in no 2 layer or higher Menu history feature This chart radar remembers the 10 last used menus to help you go to recently used menus quickly The memorized menus are cleared when the power is turned off In stallation and service related menus and menus where no operation occurred are not memorized Menus accessed multiple times are counted...

Page 49: ...eel to set data then push the left button 1 12 3 How to enter alphanumeric character data Some operations display a software keyboard to enter alphanumeric character data To enter characters click applicable characters on the software keyboard You can switch between letter input and symbol input by clicking the key shown in the illustra tion above Click to switch between letters and symbols ...

Page 50: ... on chart overview 1 13 1 Context sensitive menus available with buttons and boxes No Box name Menu No Box name Menu 1 Adjust Local Time Local Time Adjust 2 Cursor Position Range Bearing Po sition X Y Position Cursor Menu 3 Sensor Informa tion Datum Box Select Sensor OS Info Menu 4 AIS Info Expanded AIS Data AIS Message 5 Association Association OFF TT AIS Association Menu 6 TT OFF MAN AUTO MAN AU...

Page 51: ...1 Trail Past POSN Reference True G S REL Past POSN Menu Trail Menu 22 Alert List Alert List Log Win dow 23 Trial Trial Mode Trial Maneuver Menu 24 AZ Acquisition Zone Menu 25 Drop Mark 2 Drop2 Off 26 VRM 2 VRM2 Off EBL VRM Menu 27 VRM 1 VRM1 Off EBL VRM Menu 28 EBL 2 EBL2 Off EBL VRM Menu 29 EBL 1 EBL1 Off EBL VRM Menu 30 Drop Mark 1 Drop1 Off 31 Mark Mark Color B type only Mark Position MAP File ...

Page 52: ...ff Own Ship Offset Apply an offset to own ship position REF Mark Make cursor selected target a reference target for use in TT Grayed out un less TT is active Cursor Size Select cursor size large or small Notes Detail Show details about cursor selected Notes MOB Delete Delete selected MOB mark This menu item is shown only when the context sensitive menu is shown on MOB Area selected Area Target Can...

Page 53: ...nd select Cursor Menu to open the CURSOR menu Note 2 The cursor position is shown as when the cursor is not within the effec tive display area 1 15 How to Select Sensor Settings This radar system accepts navigation data input two ways System or Local System shares sensor data among multiple radars in a network Sensor priority is also com monly shared among the radars Local selects a sensor outside...

Page 54: ...se the arrow buttons to select the SPD page SPD page 4 For automatic input follow the procedure below For manual input go to step 5 1 Check Sensors 2 Set the priority for the speed sensors in case of Local sensor Click the triangle on any line then select the sensor to set as the primary source of speed All other sensors are then set as secondary source Only one sensor can be pri ng System Local S...

Page 55: ...ep 6 5 For manual input set the stabilization mode for Water and check Manual Click the manual box to show the up and down arrows then click appropriate arrow to set speed Note For set and drift see chapter 16 6 Click the OK button to save the settings then click the MENU bar to close the menu Notes on speed input IMO Resolution A 823 19 for TT requires that a speed log to be interfaced with a TT ...

Page 56: ...ndary source Only one sensor can be primary while the oth ers can be secondary If a heading sensor is changed from secondary to pri mary state and another heading sensor was selected as primary then that sensor previously selected to primary state is then automatically selected to secondary state 3 Go to step 6 5 For manual input check the Manual box Click the heading input box to show the up and ...

Page 57: ...y for MOB marks is reached the oldest mark is automatically erased to make room for the latest To delete an MOB mark right click the mark to show the context sensitive menu then select MOB Delete Exercise caution when using this feature in strong tide or current The person will not be at the MOB position for a very long time How to find MOB information In a Chart for RADAR mode other than Chart ma...

Page 58: ... ZDA sentence to the chart radar and they appear on the Status bar Neither the time nor the date can be adjusted however you can select between UTC time default and local time You can switch between the lo cal time and the UTC time by left clicking the Current time format indication To use the local time enter the time difference between the local time and the UTC time as shown below Note Where th...

Page 59: ... See chapter 22 1 23 User Profiles for Radar Chart Radar The Settings button lets you store ten sets of custom settings for brilliance settings and color settings echoes TT and AIS symbols and echo trails This allows individual users to quickly set the system according to their preferences 1 23 1 How to create a profile 1 Set the color settings echoes TT and AIS symbols echo trail as desired 2 Cli...

Page 60: ...e default Do you wish to continue appears 4 Click Yes Note This setting for the default is available when selecting a profile to activate next time See section 1 21 3 1 23 6 How to change the settings on the current display to the rec ommended settings 1 Click on the Status bar 2 Click Default Settings The confirmation message Attention Settings will be changed to the default Do you wish to contin...

Page 61: ... TCPA CPA 2 NM TCPA 12 min AIS CPA AUTO ACT ALL Display mode RADAR MAP Radar map No change Route No change Alert AZ1 AZ2 OFF Lost TGT OFF Antenna connection status No change RANGE RING OFF PI LINE PI1 to PI6 OFF Number of PI line mode bearing range truncate No change SPD Own Ship Sensor Setting Stabilization Mode Bottom Sensor Type GPS Sensor Setting No change System or Local These settings can no...

Page 62: ...Checked NtoM page Temporary Notices Unchecked Preliminary Notices Unchecked No Information Unchecked Symbol Display menu General page Ship Outlines OFF AIS Outlines OFF greyed out Tracking page CCRP Checked Primary Checked Secondary Checked Pivot Checked Length 720 min Labels 30 min Mariner page Labels Checked Lines Checked Clearing Lines Checked Tidals Checked Areas Checked Circles Checked Chart ...

Page 63: ...mode North Up TM Overlay NAV Tools box Look ahead page Ahead Time 6 min Echo page 2 Display OFF TT AIS page TT display OFF AIS display DISP ALL Vector 6 min TGND Past POSN OFF Other functions Brilliance CALIB Viewing Date Display Date Auto Today Split Screen Full Screen no split Chart database mode CUSTOM TM Reset function Enabled Own track Disabled Log NAV Log Detail dialog SHOW TRACK Safety Cont...

Page 64: ...en click the Version tab to show the chart software version no conning software version no S52 presentation library version ENC user permit no and C MAP SDK software version no Click the System 1 tab to show system infor mation CPU type RAM capacity SSD free SSD capacity Equipment ID and dongle information Function shows this unit s capabilities Click the System 2 tab to show the startup time for ...

Page 65: ...or the status bar InstantAccess bar and Mark box To get a tip simply put the cursor on the object For example put the cursor on the BRILL button on the InstantAccess bar The tip Adjust brilliance appears If you do not need the tips you can turn them off with TIPS GUIDANCE in the INI TIAL SETTING menu Tip ...

Page 66: ...1 OPERATIONAL OVERVIEW 1 40 This page is intentionally left blank ...

Page 67: ...n transmit Set the radar in standby when its use is not required to conserve the life of the magnetron 2 2 How to Tune the Radar Receiver After the radar is transmitting adjust the receiver to the exact frequency of the trans mitter automatically or manually The current tuning method and tuning status is shown at the top left position 2 2 1 How to initialize tuning Automatic tuning is initialized ...

Page 68: ... at the top left position on the screen using the indications shown in the table below Appropriate pulse lengths are preset to individual range scales and function keys If you are not satisfied with the current pulse length settings you can change them as shown below 2 3 1 How to select a pulse length You can select the pulse length for the 0 5 to 24 NM range scales as shown below 1 Open the menu ...

Page 69: ...For coarse adjustment put the cursor within the slider bar area then push the left button For fine adjustment put the cursor at the end of the slider bar then roll the trackball while pushing and holding down the left button Release the button to finish 2 5 How to Suppress Sea Clutter Echoes from waves cover the central part of the display with random signals known as sea clutter The higher the wa...

Page 70: ...normal at those ranges where there is no sea clutter The proper setting of the A C SEA should be such that the clutter is broken up into small dots and small targets become distinguishable If the setting is set too low targets will be hidden in the clutter while if the setting is too high both sea clutter and targets will disappear from the display In most cases adjust the control until clut ter h...

Page 71: ...arder to detect than stationary ones when the echo average is active 2 6 1 How to reduce rain clutter automatically Control Unit Push the A C RAIN control to display AUTO1 AUTO2 AUTO3 or AUTO4 on RAIN mode indication on the Status bar The higher the number the great er the degree of rain clutter reduction Trackball module Click the RAIN mode indication on the Status bar to display AU TO1 AUTO2 AUT...

Page 72: ...lse Original range of first detection NM Original range of first detection NM 16 mm h rain short pulse 4 mm h rain short pulse 16 mm h rain long pulse 4 mm h rain long pulse 16 mm h rain short pulse 4 mm h rain short pulse 16 mm h rain long pulse 4 mm h rain long pulse Reduction of rain to first detection due to rain at S band Reduction of rain to first detection due to rain at X band The author t...

Page 73: ... are three levels of interference rejection depending on the number of transmissions that are correlated Click the IR button on the InstantAccess bar then click desired rejection level The higher the number the greater the degree of interference rejection 2 8 Echo Stretch The echo stretch feature enlarges targets in the range and bearing directions to make them easier to see and it is available on...

Page 74: ...tter True echo averaging is not however effective for picking up small targets running at high speeds over the ground Note 1 With echo average active it is harder to detect high speed targets than sta tionary ones Note 2 Do not use echo averaging under heavy pitching and rolling loss of targets can result Note 3 Echo averaging is turned off and the indication is greyed out when the heading sensor ...

Page 75: ...eived echoes in the range direction Note Use this function with caution Weak target echoes may disappear from the screen or the range resolution may worsen You can remove this noise as follows 1 Open the menu then select the 1 ECHO and 1 CUSTOMIZE ECHO menus to show the CUSTOMIZE ECHO menu 2 Select 4 NOISE REJECT 3 Select OFF or ON as appropriate 4 Close the menu The status of the noise rejector i...

Page 76: ...ng requirements For instance one of the presets is labeled HARD RAIN and is designed to be used in heavy rain Two user programmable presets are also provided labeled CUSTOM1 CUSTOM2 so that you can have the radar automatically adjusted to those conditions that are not covered by the provided setup options Below are the preset options provided with this radar Each picture option defines a combinati...

Page 77: ...BERTHING 2 OFF OFF OFF OFF OFF 2 B CONGESTION 2 OFF 2 OFF OFF OFF 1 B ROUGH SEA 2 OFF 2 OFF OFF OFF 2 A HARD RAIN 2 OFF OFF OFF OFF ON 2 A CUSTOM1 2 OFF OFF OFF OFF OFF 1 B CUSTOM2 2 2 1 OFF OFF OFF 2 B 0 5 NM 0 75 NM 1 5 NM 3 NM 6 NM 12 24 NM OCEAN S2 M1 M1 M3 L L CANAL S1 S2 M1 M2 M3 L BERTHING S1 S1 S2 M1 M3 L CONGESTION S1 S2 S2 M1 M2 L ROUGH SEA S1 S1 S2 M1 M2 M3 HARD RAIN S1 S2 S2 M1 M2 L CU...

Page 78: ... the Status bar then click Customize Echo Menu 2 Set the items below referring to the sections shown 3 Click 7 VIDEO CONTRAST 4 Spin the scrollwheel to select 1 2 3 or 4 Dynamic Range or A B C Curve as appropriate then push the left button Refer to the description and illustration below Int Reject section 2 7 Echo Stretch section 2 8 Echo Average section 2 9 Noise Reject section 2 10 Auto Sea sect...

Page 79: ... 2 12 3 How to restore a user customized echo to saved setting If you get lost in operation while adjusting the settings for a user customized echo you can easily restore the settings for that user customized echo saved at section 2 12 2 1 Click the Customize Echo button on the Status bar then click the picture preset option for which you want to restore its original user settings 2 Right click th...

Page 80: ...ed craft does not lessen To reject second trace echoes open the 1 ECHO menu then set 5 2ND ECHO REJ B type or 4 2ND ECHO REJ IMO and A types to ON then close the menu 2 14 Presentation Modes This radar has the following orientation modes in the radar mode 2 14 1 Orientation modes This radar has the following orientation modes in the radar mode Relative Motion RM Head up Unstabilized STAB H UP Head...

Page 81: ...Yes Head up RM Yes No STAB H UP RM Yes No North up RM Yes Yes North up TM Yes Yes Stern up RM Yes No IMPORTANT Loss of gyrocompass signal When the gyrocompass signal is lost the Alert Gyro xxx COM1 Error xxx a number be tween 255 and 259 ALF format between 10400 1 and 10400 5 according to gyro no appears in the Alert box After all signals are lost the Alert 450 ALF format 10601 9 Heading Sensor No...

Page 82: ...e position The heading line moves in ac cordance with ship s yawing and course change This mode is useful for avoiding smearing of the picture during course change STAB Head up mode Radar echoes are shown in the same way as in the head up mode The difference from the normal head up presentation lies in the orientation of the bearing scale The bearing scale is heading sensor stabilized That is it r...

Page 83: ...und are not available on the TM mode enter the set tide direction and drift tide speed manually referring to a Tide Table If the position of the CCRP results in a part of the bearing scale not being distinguishable that part of the bearing scale is indicated with appro priate reduced detail A failure of the heading sensor input will cause the heading readout to disappear and the Alert 450 ALF form...

Page 84: ...ranges How to select a range scale from the Control Unit Use the RANGE key to select range desired Hit the part of the key to raise the range the part to lower the range How to select a range scale from the Range Presentation mode box Method 1 Click the range scale indication Method 2 Click the appropriate range selection button Click the button to raise the range the button to lower the range Met...

Page 85: ...ol Unit 1 Press the VRM 1 or VRM 2 key to display desired VRM 2 Rotate the VRM rotary control to align the active variable range marker with the inner edge of the target of interest and read its distance at the bottom right posi tion on the screen Each VRM remains at the same geographical distance when you operate the range control This means that the apparent radius of the VRM ring changes in pro...

Page 86: ... menu for the IMO and A types 2 For the B type radar select 3 VRM1 or 4 VRM2 as appropriate Spin the scrollwheel to select desired unit then push the left button 3 Select 6 VRM TTG and then select the VRM s that are to show hide the TTG indication OFF shows no TTG indication 4 The LINK EBL option for 7 VRM OFFSET automati cally activates the corresponding VRM when the offset EBL is enabled 5 Close...

Page 87: ...ut the cursor in the applicable VRM box and roll the scrollwheel 2 17 1 How to measure the bearing How to measure the bearing from the Control Unit 1 Press the EBL 1 or EBL 2 key to display desired EBL 2 Rotate the EBL rotary control to bisect the target with the EBL Read the bearing to the target at the appropriate EBL box To erase an EBL press the EBL 1 or EBL 2 key to erase appropriate EBL How ...

Page 88: ...course 2 18 1 How to assess risk of collision How to assess risk of collision from the Control Unit 1 Press the EBL1 or EBL2 key to activate an EBL 2 Put the cursor on a target that appears as a threatening target A in the figure on the next page 3 Press the EBL OFFSET key to shift the EBL origin to the cursor location 4 Wait approx three minutes Operate the EBL rotary control to bisect the target...

Page 89: ...in point of offset EBL The origin point of the offset EBL can be ground stabilized geographically fixed north stabilized true or referenced to your ship s heading relative 1 Open the menu then select the 3 NAV TOOL and 2 EBL VRM B type or 2 EBL VRM CURSOR IMO and A types menus to display the 2 EBL VRM B type or 2 EBL VRM CURSOR IMO and A types menu 2 Select 5 EBL OFFSET BASE POINT 3 Select STAB GN...

Page 90: ...t click the display area to show the context sensitive menu 2 Select EBL Offset then EBL1 3 Put the origin of the EBL on a target of interest 4 Push the left button to anchor the EBL 5 Spin the scrollwheel or use the trackball to bisect the other target of interest 6 Put the cursor on the VRM1 box then spin the scrollwheel to put the range marker on the EBL on the inside edge of target 2 You can r...

Page 91: ...o move the sweep origin 2 Press the OFF CENTER key to move the sweep origin to the cursor position To cancel off centering press the OFF CENTER key again How to off center the display from the context sensitive menu 1 Put the cursor where you want to off center the display then right click to show the context sensitive menu 2 Select Off Center 3 Push the left button Then the sweep origin is off ce...

Page 92: ...u can also left click the trail time indication to change the trail time 2 21 2 True or relative target trails You may display echo trails in true or relative motion Relative trails show relative movements between targets and own ship True motion trails present true target movements in accordance with their over the ground speeds and courses The trail and past position modes in the North up true m...

Page 93: ...ow to reset target trails All trails may be erased including those in the memory and restarted to start trails fresh Control Unit Press and hold down the TRAIL key until trails disappear Context sensitive menu Right click the Trail box to show the context sensitive menu then select Trail All Clear 2 21 5 How to temporarily remove all target trails from the display You may wish to temporarily remov...

Page 94: ...om the PI line box which is at the bottom left position 1 TRAIL MODE Switch the trail mode to REL or TRUE 2 TRAIL GRAD The afterglow of the target trails can be shown in a single tone or gradual shading 3 TRAIL COLOR The trail color can be selected from the colors shown in the left figure This feature is not avail able with the IMO or A type radar 4 TRAIL LEVEL The level intensity of the afterglow...

Page 95: ...ox To use the PI line box enable this function 1 Open the menu 2 Select 3 NAV TOOL and 1 PI LINE to show the PI LINE menu 3 Select 2 SET ALL PI LINE then select OFF to disable the PI line function or select ON to enable the PI line function 4 Close the menu 2 22 3 How to adjust PI line orientation PI line interval 1 If not already displayed display a PI line 2 Put the cursor on the PI line angle i...

Page 96: ... for the PI line PI line bearing reference can be relative to your ship s heading Relative or refer enced to North True 1 Open the menu 2 Select 3 NAV TOOL and 1 PI LINE to show the PI LINE menu 3 Select 1 PI LINE BEARING 4 Select REL or TRUE 5 Close the menu 2 22 6 How to select the PI lines orientation 1 Open the menu 2 Select 3 NAV TOOL and 1 PI LINE to show the PI LINE menu 3 Select 4 PI LINE ...

Page 97: ...L PI LINE is set to 1 1 If not already displayed display a PI line to adjust the length referring to section 2 22 4 2 Open the menu 3 Select 3 NAV TOOL and 1 PI LINE to show the PI LINE menu 4 Select 7 TRUNCATE 5 Select ON in PI 1 or 2 3 4 5 6 TRUNCATE 6 Set the length setting range 0 000 to 24 000 NM 7 Close the menu 1 PI 1 TRUNCATE OFF ON 24 000NM 24 000NM 2 PI 2 TRUNCATE OFF ON NAV TOOL TRUNCAT...

Page 98: ...m the magnification and the posi tion See the zoom display at the right side of the screen To deactivate the zoom function right click the operational area to show the context sensitive menu then select Zoom Off Zoom display format You can select the zoom display format with the following procedure 1 Open the menu then select 4 INFORMATION BOX and 3 ZOOM DISPLAY 2 Select the appropriate zoom displ...

Page 99: ... Open the main menu then select 5 MAP MARK and 1 MARK SETTING 2 Select 6 STERN MARK 3 Select ON or OFF as appropriate 2 24 3 North marker The north marker appears as a short dashed line In the head up mode the north marker moves around the bearing scale in accordance with the compass signal 2 24 4 Own ship marker The own ship marker is displayed at your ship s position It can be turned on or off a...

Page 100: ...nformation as fol lows OWN SHIP VECTOR menu 1 VECTOR STAB IND Turn ON to show double arrow for ground tracking single arrow for water tracking 2 TIME INCREMENTS A short horizon tal line may be marked on the own ship vector in one minute intervals to show ap proximate later positions 3 OWN SHIP VECTOR Turn vector OFF or show ship s heading or course with a vector 4 VECTOR COLOR Set the color of the...

Page 101: ...na marker The antenna marker appears as a blue cross at the antenna location The marker can be shown or hidden as follows 1 Open the main menu 2 Select 5 MAP MARK and 1 MARK SETTING 3 Select 5 ANTENNA MARK 4 Select ON or OFF as appropriate 2 24 8 Cursor The cursor measures the range and bearing to an object selects menu items selects location for mark entry etc For the B type radar you can select ...

Page 102: ...htness of 1 CONTROL PANEL backlighting of keys on Control Unit 1 EBL EBLs blind sector 2 CHARACTER Alphanumeric charac ters 2 VRM VRMs 3 CURSOR Cursor 3 PI LINE PI lines 4 ECHO Radar echoes 4 TT SYMBOL TT symbols AZ area TT vector TT past posn 5 TRAIL Target trails 5 AIS SYMBOL AIS symbols AIS vec tor AIS past posn 6 HL Heading line stern line 6 MARK Radar map marks route waypoint MOB mark anchor ...

Page 103: ...s active Right click the time indication in the Watch box to show a drop down list of watch intervals Select a watch interval from the list The timer counts down from the interval set for example 12 00 and when the time interval elapses the buzzer sounds the visual Alert 500 ALF format 10499 Watch Alert flashes in orange in the Alert box the watch alert timer freezes at 0 00 Stop the flashing visu...

Page 104: ...de and wind gauge Nav data requires appropriate navigation sensors and IEC 61162 1 2 sentences out put from the sensor If there is no sentence or data input asterisks appear at the corresponding indication Depth graph Current direction and speed Wind direction and speed Current and wind gauge See inset Depth 403 m Water TEMP 3 7 C Wind True North Current 25 9 kn NAV data Route 1 Route 2 N E S W 0 ...

Page 105: ...ce to WOP wheel over point time to go planning turn radius turn rate next waypoint no bear ing to next waypoint Click the Route 1 or Route 2 tab to find route information 2 27 2 How to show the information box 1 Open the menu and select 4 INFORMATION BOX 2 Select 1 DISP INFO BOX then ON 3 Close the menu Route 1 Route 2 10 2 123 2 T 123 2 T 250 2 45 4 XTD Limit XTD ROUTE10 2 1 7 0 8 0 0 3 0 10 27 1...

Page 106: ...rth up and true motion 4 Close the menu Item Description 1 DEPTH Selects unit of depth measurement or turn depth indication OFF 2 DEPTH GRAPH SCALE Selects depth scale range The depth for the last 30 minutes is plotted with a yellow line The AUTO setting automatically adjusts the scale according to depth 3 DEPTH MARK Selects the depth at which to show the depth mark 4 CURRENT Turns the current tid...

Page 107: ...ection Note Switching to a different antenna or change the interswitch settings in the stand by mode 2 28 1 How to display antenna information The ANT SELECT display shows Radar band output power and antenna position of each antenna currently powered If an antenna is not powered its data area is blank Current antenna and display combinations To show antenna information open the menu then select th...

Page 108: ...ng as applicable If only your antenna is not displayed on the ANT SELECT display the LAN line in the Processor Unit may be faulty In this case use the standalone mode If the antenna that was in use does not appear on the ANT SELECT display the LAN line in other Processor Unit may be faulty In this case see the preceding page for how to select a different antenna unit When the Network fails the Int...

Page 109: ...alue can be set Desired value can be set Brilliance Echo trails EBL Lat long data Presentation mode Speed data TT AIS on off TT AIS track interval Vector mode Vector time VRM Range Reference Point A C SEA A C RAIN Auto Rain Gain Echo stretch Echo averaging IR Picture setting Customize echo Dependent control Cannot control Performance monitor SART STBY TX Tuning TT Lost alert Common control Item co...

Page 110: ...the external radar 2 COMBINE SECTOR 3 COMBINE RANGE Select the number of external radar to use 4 EXT RADAR Turn the dual radar function on 5 COMBINE FUNC is set to ON TT information When a TT target crosses over the boundary line between the two displays its infor mation is passed to the other radar display Tracking of the target continues The num ber of the antenna which acquires a TT target is d...

Page 111: ...ntenna button You can toggle each radar between standby and TX in the dual radar display When switching to the standby mode he Alert 730 ALF format 10740 1 EXT Radar STBY appears and the radar echoes are not displayed The following functions are based on the settings in the radar which enables the dual radar display These settings are shared between the two radars Notes Off center display Trail se...

Page 112: ...omatically set as follows when the performance monitor is activated TT targets can only be acquired manually The reference position is set to CCRP see section 2 32 Set the same CCRP po sition between two radars at the time of installation ECHO AREA is set to CIRCLE see section 2 37 The following functions are not available in the dual radar mode performance mon itor SART tune initialization SART T...

Page 113: ...ection in which the antenna unit is installed Judge the strength of the echo that appears within 60 from arc location to confirm if the radar is working properly or not 2 31 Magnetron Reset For A and B types After replacing the magnetron for the antenna unit reset the TX time then adjust the PM gain as follows 1 Open the menu then select 8 INITIAL SETTING RAIN AUTO MAN No Setting before activation...

Page 114: ...ntly appears The setting range is 0 to 255 Wait at least eight scans then adjust 7 Close the menu 2 32 CCRP Common Consistent Reference Point The reference position for measurements range bearing etc and markers heading line stern mark etc can be antenna position or CCRP which is a location on own ship to which all horizontal measurements for example range bearing relative course relative speed cl...

Page 115: ...ed from an tenna position VRM Cursor PI line Range ring Drop mark Graphics Heading line Drawn from CCRP Drawn from antenna position Stern mark Beam line Own ship vector Own ship track Bearing cursor Drawn with CCRP at center Drawn with antenna position at center Course speed Calculated with CCRP at center Calculated with an tenna position at center CPA TCPA Calculated with CCRP at center Calculate...

Page 116: ...on the Drop mark box or right click the box and select DROPx Off x Drop mark no ON Click the minimize box 2 33 2 How to inscribe a drop mark Click the desired Drop mark box at the bottom of the screen Click a position on the display area where to put a drop mark and a drop mark is inscribed at the position selected The angle and distance to the point appear in the corresponding Drop mark box 2 33 ...

Page 117: ... The drop mark and its data are erased 2 34 Anchor Watch The anchor watch is used to monitor if the ship is staying at anchor If your vessel trav els more than the distance set here the Alert 495 Anchor Watch Error appears in the Alert box and the audio alarm sounds How to activate anchor watch 1 Open the menu then select 8 INITIAL SETTING and 4 ALERT menus 2 Select 3 ANCHOR WATCH 3 Select ON Use ...

Page 118: ... select the 1 ECHO menu 2 Select 7 SART B type 3 Select ON 4 Close the menu The message SART appears in the message area when the SART function is active When the SART is activated the radar controls are automatically set as follows Item Setting at activation of SART feature Adjustable during activation of SART feature Setting at deactivation of SART feature CONDITION Setting stored Yes Setting at...

Page 119: ...n RAIN Setting stored Yes Setting at deactivation RAIN AUTO MAN No Setting before activation RANGE 12 NM 12 SM 24 km 24 kyd Yes 2 Setting at deactivation SEA Setting stored Yes Setting at deactivation SEA AUTO Setting stored Yes Setting at deactivation TUNE Setting stored Yes Setting at deactivation VIDEO CONTRAST Setting stored Yes Setting at deactivation WIPER Setting stored Yes Setting at deact...

Page 120: ...played A maximum of nine alerts are shown per page Unacknowledged alerts are displayed in flashing red alarm or flashing yellow orange warning The ZDA sentence is required to display time in the list How to acknowledge or rectify from the list Control Unit Press appropriate numeric key Trackball module Click alarm name Alert message Alert ID and alert name Alert list log icon Click to display Buzz...

Page 121: ...select the 8 INITIAL SETTINGS and 4 ALERT menus 2 Select 3 PRIMARY ALERT 3 Click the box to the left of an alarm name to show a circle to give that alarm the same priority as the alert category Alarm 4 Close the menu The priority is immediately changed for an inactive alert For an active alert the priority selected becomes effective when the alert is acknowledged and regenerated Priority Alert cat...

Page 122: ...ls of strong medium and weak IMO and A types Yellow green and white To select the echo color open the 1 ECHO menu then select desired color from 3 ECHO COLOR 2 39 Chart Radar Functions 2 39 1 How to switch between radar and chart radar modes Click the CHART ON OFF button on the InstantAccess bar to show or hide the chart Indication on button and corresponding mode Chart ON Chart radar mode active ...

Page 123: ...DISP Menu Show the CHART DISPLAY menu where you set safety con tours safety depth etc See the figure on the next page for the content of this menu and see section 8 2 How to Control Visi ble Chart Objects for details Note This menu can also be shown by right clicking the CHART ON OFF button and selecting Chart Display Menu 4 Sel DISP Object Show the SEL DISP OBJECT menu where you can select the ch...

Page 124: ...2 RADAR CHART RADAR OPERATION 2 58 CHART DISPLAY menu GENERAL menu STANDARD objects OTHER objects TEXT objects ...

Page 125: ...ow on the Status bar then select PERSONAL 2 39 4 Chart database information You can select the quantity of objects and text to display on the chart radar screen with the Chart database button on the Status bar There are four different pre defined settings available and one user definable PERSONAL Indication of selected set ting appears on the label of the Chart database button The Chart ON OFF but...

Page 126: ...qual to or less than the value of safety depth are highlighted For details see the ECDIS operator s man ual Note The shallow contour cannot be set higher than the safety contour 1 Open the menu then select the 6 CHART DISPLAY menu 2 Select 3 SHALLOW CONTOUR 4 SAFETY DEPTH 5 SAFETY CONTOUR or 6 DEEP CONTOUR 3 Spin the scrollwheel to set the value then push the left button 4 Close the menu To reset ...

Page 127: ... 39 7 How to show hide the curved EBL The Curved EBL function shows the planned steering radius You can use this func tion to determine the best location to begin a turn You can also use the Curved EBL function to determine whether a turn is conduct as planned To show hide the Curved EBL click the ON OFF button on the Curved EBL page of the Overly NAV Tools box Note This function is only available...

Page 128: ...2 39 9 Chart status The indication Chart status appears at the top right position on the screen when the display date for the currently displayed chart has passed 2 39 10 Chart alert function The chart alert function operates in chart mode only There are two types of chart alerts your ship s predicted course and route alert See the chapter on chart alerts for details For the ship s predicted cours...

Page 129: ...ing To display the Notes at other times right click the display area to show the context sensitive menu then select Notes details In the example below the Notes about a wreck are shown Object name The name assigned to the Notes Object class The type of object point line area or circle linked to the Notes Position Position of the object in latitude and longitude Range The range to the object Descri...

Page 130: ...ize shape and material of the target and the atmospheric conditions Under normal atmospheric conditions the maximum range is equal to the radar hori zon or a little shorter The radar horizon is longer than the optical one by about 6 because of the diffraction property of the radar signal The Rmax is given in the follow ing equation For example if the height of the antenna above the waterline is 9 ...

Page 131: ...racy One of the most important features of the radar is how accurately the bearing of a tar get can be measured The accuracy of bearing measurement basically depends on the narrowness of the radar beam However the bearing is usually taken relative to the ship s heading and thus proper adjustment of the heading line at installation is an important factor in ensuring bearing accuracy To minimize err...

Page 132: ...can be reduced through careful reduction of the gain or sea clutter Virtual image A relatively large target close to your ship may be represented at two positions on the screen One of them is the true echo directly reflected by the target and the other is a false echo which is caused by the mirror effect of a large object on or close to your ship as shown in the figure below If your ship comes clo...

Page 133: ...pears on the radar screen as a rectangular echo originating at a point just beyond the position of the radar beacon It has a Morse coded pattern Note that the position on the radar display is not accurate 2 40 4 Radar Target Enhancer RTE An RTE is a radar transponder that is mounted on navigation buoys and masts of small crafts to significantly improve their detection by radar Unlike a SART or RAC...

Page 134: ...2 RADAR CHART RADAR OPERATION 2 68 This page is intentionally left blank ...

Page 135: ...curacy after an abrupt course change The actual amount de pends on gyrocompass specifications The amount of tracking delay is inversely proportional to the relative speed of the tar get Delay is approx 15 30 seconds for the higher relative speed approx 30 60 sec onds for the lower relative speed The following factors can affect accuracy Echo intensity Radar transmission pulse length Radar bearing ...

Page 136: ... point located at 0 1 to 24 NM from own ship 3 Use the trackball to put the cursor on the target selected at step 2 4 Push the left button to insert the reference mark 5 Repeat steps 2 4 to continue entering reference marks Three may be entered 6 Right click the Sensor information box then choose Select Sensor and Setting Open the SPD page and put a checkmark at Reference SPD Click the OK button t...

Page 137: ...e indication then select TT Menu to show the TT menu 2 Select 1 TT SELECT and the acquisition condition 3 Close the menu Note 1 The TT indication in the TT AIS setting box shows AUTO MAN AUTO or MAN depending on the acquisition condition selected Note 2 When the menu set number of automatically acquired targets have been ac quired the Alert 523 ALF format 190 4 TT Auto ACQ 100 appears in the Alert...

Page 138: ...ctivate an acquisition zone Use the trackball to select the appropriate AZ box Sleep or deactivate the acquisition zone as appropriate Sleep acquisition zone Push the left button momentarily to remove the acquisition zone from the screen The indication in the AZ box changes from WORK to SLEEP To reactivate and display the acquisition zone repeat this procedure to display WORK Deactivate acquisitio...

Page 139: ...and the AIS symbol overlap one another push the right button to show the context sensitive menu then select Target Data ACQ ACT and TT Only to acquire the target 2 Put the cursor on the target to acquire then push the left button The plotting symbol is drawn by a dashed circle during the initial acquisition stage A vector appears approximately one minute after acquisition The vector indicates the ...

Page 140: ...ng tracked nears another target being tracked the targets may be swapped When two targets acquired either automatically or manually come close to each other one of the two may become a lost target If this occurs manual re acquisition of the lost target may be necessary after the two have separated Note 4 You can reuse a target number This is useful when you acquire the wrong target Drag and drop t...

Page 141: ... Control Unit 1 Use the trackball to put the cursor on the TT or reference target to cancel track ing 2 Push the TARGET CANCEL key Cancel tracking on a target by the trackball module 1 Right click the operational area of the screen to show the context sensitive menu 2 Select Target Cancel and Any or TT Only as applicable 3 Click the TT or reference target to cancel tracking 3 6 2 How to cancel tra...

Page 142: ...dy state tracking within three minutes after acquisition Red Acquired target in ACQ zone before acknowledg ment Solid circle with vector indicating steady state tracking within three minutes after acquisition Red Dangerous target Dangerous TT thick solid circle Green Reference target Used to calculate own ship s over the ground speed echo referenced speed for ground stabilization Green Association...

Page 143: ...2 select 4 TT SYMBOL then spin the scrollwheel to adjust the bril liance 3 7 3 Color for TT symbol You can select the color for the TT symbol as follows 1 Right click the TT mode indication then select Symbol Menu to show that menu 2 Select 1 SYMBOL COLOR and desired color Red and yellow are available with the A and B type 㻝㻡 㻝㻡 㻝㻡 㻝㻡 㻝㻡 㻝㻡 㻝㻡 ...

Page 144: ...all Click the target for which you want to show its data Tracked target data z To erase data from a data box click the appropriate close data button z The basic target data display for a TT consists of the following information TT no Target numbering starts from 1 When a target is erased the number will not be reused until the power is re set or more than 100 targets are acquired Bearing BRG and d...

Page 145: ...targets and AIS targets To show the list click the Target List button at the right side of the screen or press the TARGET LIST key on the Control Unit The button is light blue when the target list is displayed To close the list click the Close button X on the list or press the TARGET LIST key Filter targets Click to refresh data CLOSE 1 TT Target No 21 BRG 125 5 T RNG 3 434NM CPA 2 923NM TCPA 12 0...

Page 146: ...A ground sta bilized display will indicate all targets motion over the ground In coastal estuarial and river waters where a significant set and drift may be experi enced a sea stabilized display will produce significant target trails from all fixed sta tionary objects possibly producing an unacceptably high level of clutter and masking In such circumstances a ground stabilized display may reduce i...

Page 147: ...ary on the radar screen with vector length zero But in the presence of wind and or current the vectors appear on fixed targets representing the reciprocal of set and drift affecting own ship unless set and drift values are properly entered In the true vector mode there are two types of stabilization ground stabilization True G and sea stabilization True S The stabilization mode is automatically se...

Page 148: ...ion is shown in the Vector mode indication Vector length Push the VECTOR TIME key consecutively to select vector time among 30 seconds 1 minute 3 minutes 5 minutes 6 minutes 10 minutes 20 min utes 30 minutes 45 minutes and 60 minutes By trackball module Vector motion Click the vector motion indication at the right side of the screen to se lect relative or true vector mode Vector length Click the v...

Page 149: ...isable the past position display select past position reference Click the indications circled in the figure below to set the plot interval or disable the display and the past position reference true or relative 3 10 2 Past position points You can show 5 or 10 past position points per tracked target Right click the past po sition indication then select Past POSN Menu to show that menu Set 6 TT AIS ...

Page 150: ...d drift values should be adjusted until they lose vectors Note For the IMO type turn off the AIS function in order to enter set and drift To enter set and drift do the following 1 Right click the speed indication then select OS Info Menu to show the Own Ship Info menu 2 Select 2 SYSTEM SETTING or 3 LOCAL SETTING as appropriate 3 Use the right and left arrow buttons to select the SPD page 4 Set Sta...

Page 151: ...s of these variables but you must be aware that such errors will produce inaccuracies in the derived CPA and TCPA in particular during the initial tracking period CPA and TCPA settings must be set up properly taking into consideration the size tonnage speed turning performance and other characteristics of own ship The TT CPA TCPA alarm should not be solely relied upon to warn you of collision sit ...

Page 152: ... TT Lost Target Alert Tracked targets not detected in five consecutive scans become lost targets When this occurs A red X is put on the TT symbol flashing of the lost target The flashing stops after the lost target alarm is acknowledged The audio alert sounds and the Alert 527 ALF format 193 1 TT Lost appears in the Alert box 3 13 1 How to enable disable the TT lost target alert The Lost TGT indic...

Page 153: ...esults use relative motion and sea stabilization water tracking 3 14 1 Types of trial maneuvers There are two types of trial maneuvers static and dynamic Dynamic trial maneuver A dynamic trial maneuver displays predicted positions of the tracked targets and own ship You enter own ship s intended speed and course with a certain delay time As suming that all tracked targets maintain their present sp...

Page 154: ...he trial time you can find the safe time to make a ma neuver Thus the static trial maneuver will be convenient when you wish to know the maneuver result immediately Delay time 2 m 30 s Current position A B Current position Delay time T Course and speed changes completed position where course and speed are changed Position of target B at end of trial maneuver Position of target A at end of trial ma...

Page 155: ...k the Trial course indication Spin the scrollwheel to set the trial course 11 Click the Trial speed indication spin the scrollwheel or use the Control Unit to set the trial speed 12 Click the DELAY indication Spin the scrollwheel to set the amount of delay This is the time after which own ship takes a new situation not the time the simulation begins Change the delay time according to own ship load...

Page 156: ...how Off 3 15 TT Simulation Mode You can simulate the risk of collision by using the TT test and the trial maneuver to gether 1 Execute the TT test as follows 1 Open the menu then select 8 INITIAL SETTING and 8 TT SIMULATION MODE 2 The confirmation message Attention Do you wish to start TT SIMULATION MODE appears Click the OK button to start the test 2 The normal operation is suspended then three s...

Page 157: ...ations that cause the TT to trigger visual and audio alerts To ac knowledge the audio alerts push the ALARM ACK key or click the Alert box Alert No Message Category Description ALR 521 ALF 192 1 TT New Target Warning Tracked target entered the acquisition zone ALR 522 ALF 10190 4 TT Auto ACQ 95 Caution The capacity for auto acquisition has reached 95 ALR 523 ALF 190 4 TT Auto ACQ 100 Warning The c...

Page 158: ...e is true of radar interference Electronic circuits track both the closest and most distant edges of the echo At the end of the scanning of the echo the discrimi nator indicates the measured maximum range extent and total angular extent sub tended by the echo If the echo is larger than a ship sized echo in range extent and or angular width adjusted as a function of range it is declared to be a lan...

Page 159: ...int the range bearing CPA and TCPA of the tracked targets change Qualitative description of tracking error The FURUNO TT s accuracy complies with or exceeds IMO standards Own ship maneuvers For slow turns there is no effect For very high turning rates greater than 150 minute depending on gyro then all tracked targets revert to full accuracy Other ship maneuvers Target ship courses lag 15 to 30 sec...

Page 160: ...e path of the radar beam can result in reduction of radar beam intensity in that particular direction This may eliminate the detection of some targets The TT system will lose track of targets shortly after they are lost on the radar picture and if they remain in a blind zone These targets will however be acquired and tracked when they pass out of the blind zone and again present normal radar echo ...

Page 161: ...nsponder sent data depends on speed and course of tracked AIS target The table below shows the IMO standardized reporting rates for the AIS transponder Based on the table below the radar defines which AIS targets are in tracking or lost When you acknowledge a lost target alert the corresponding AIS symbol will be removed from the display An AIS transponder sees all ships fitted with an AIS transpo...

Page 162: ...e Alert 530 ALF format 10190 1 AIS Target Display 95 appears When 1 000 targets are displayed the Alert 531 ALF format 190 3 AIS Target Display 100 appears An indication of AIS target processing capacity limit is given well before it is reached The Alert 533 ALF format 190 2 AIS Target Capacity 100 appears when 2 000 targets are in the storage buffer This radar generates AIS related alerts These a...

Page 163: ... Lines are thicker than sleeping AIS symbol Green Activated target in AZ with acknowledgment Acknowledged active AIS target in acquisi tion zone with vector for course and speed Lines are thicker than sleeping AIS symbol Color can be changed with the menu Green Activated target true scale symbol Active AIS target with symbol shown in true scale Association AIS symbol or activate AIS symbol is disp...

Page 164: ...consecutive reporting periods Note 5 Physical and virtual AIS AtoN symbols that may appear are listed in the table on the following page Green Heading turn indicator Show target s direction of turning Green SAR Aircraft Denote SAR aircraft Blue AIS base station Denote AIS base station Green AIS select symbol Target selected to display its data Green SAR vessel SAR search and rescue vessel Red fixe...

Page 165: ...ed with yellow line and yellow text Light fail or at reduced range Displayed with yellow text RACON error Displayed with yellow text Missing Displayed with yellow dashed line and yellow text AIS Physical AtoN Symbol AIS Virtual AtoN Symbol Default Color Blue Blue Blue Blue Blue Blue Blue Blue Blue Blue Blue Blue Line Yellow Char Yellow Line Blue Char Yellow Line Blue Char Yellow Line Yellow Char Y...

Page 166: ...ILTER menu 3 At 1 SLEEPING CLASS A 5 VIRTUAL ATON disable or enable tracking of respective item as appropriate 4 Select 6 MAX RANGE and set the maximum range to display an AIS target An AIS target not within the range set here is not displayed 5 Set the minimum ship speed for AIS targets with 7 MIN SHIP SPEED Any AIS target whose speed is slower than that set here will not be displayed 6 Close the...

Page 167: ...t conditions for automatic activation of AIS targets 1 Right click the AIS mode indication then click AIS Menu to show that menu 2 Open the 4 CPA AUTO ACTIVATE menu 3 Set items 1 3 referring to the description below 1 MAX RANGE Set the maximum range to use Any AIS target at a distance greater than set here will not be activated 2 MIN SHIP SPEED Set the minimum speed to use Any AIS target whose spe...

Page 168: ...might prevent important radar and AIS targets from being iden tified The targets that have been activated automatically cannot be slept From the Control Unit Put the cursor on the AIS target to sleep then press the TARGET CANCEL key By the trackball module Right click the AIS target symbol to show the context sensitive menu Select Target Cancel followed by Any or AIS Only 4 6 2 How to sleep all ac...

Page 169: ...ut the cursor on the activated AIS target symbol you want to know its data 2 Press the TARGET DATA key 3 The selected target is marked with a broken square and AIS data is shown in the AIS data box when the target is correctly selected By the trackball module Click the activated AIS target symbol The selected target is marked with a broken square and AIS data is shown in the AIS data box when the ...

Page 170: ... information about an AIS target including call sign MMSI No IMO No etc To display expanded AIS data show the basic data for a target right click the target data display then select AIS Expanded Data If data for an item is unknown missing appears In the example above the name of the position sensor is missing Title bar Vessel name Length of vessel Position Navigation status Call sign Type of posit...

Page 171: ...IS CPA TCPA After the alert is acknowledged the target symbol is displayed in red color To set the CPA and TCPA ranges do the following 1 If the CPA and TCPA settings are not shown click CPA TCPA 2 Click the CPA indication to select desired CPA range 3 Click the TCPA indication to select desired TCPA setting 4 9 AIS Symbol Brilliance 1 Right click the BRILL button on the InstantAccess bar then sel...

Page 172: ...a lost target push the ALARM ACK key or click the Alert box Note The AIS data transmission interval depends on target s speed For example the data is transmitted every 10 seconds on the ship speed of 0 to 14 kn and every two seconds on the ship speed of more than 23 knots For details see the owner s manual of the AIS transponder 4 11 1 How to enable disable the AIS lost target alarm The Lost TGT i...

Page 173: ...d is slower than set here will not trigger the lost target alarm 3 EXCEPT CLASS B Select ON to exclude class B AIS targets from the lost tar get alarm 4 Close the menu 4 12 How to Display AIS Target Past Positions The past position display shows equally time spaced dots marking past positions of activated AIS targets If a target changes its speed the spacing will be uneven If it changes course its...

Page 174: ...oid the presentation of two target symbols for the same physical target use the association function If target data from both AIS and TT are available and if the as sociation criteria are fulfilled either the AIS or TT symbol is presented according to the association method selected Association will not happen between AIS and TT if the AIS target is sleeping or the AIS target is lost All associati...

Page 175: ...t and TT Setting range 0 000 0 050 NM 3 RANGE Enter the range difference from own ship to AIS target and TT setting range 0 000 0 100 NM 4 BEARING Enter the bearing difference from own ship to AIS target and TT Setting range 0 0 9 9 5 SPEED Enter the speed difference between AIS target and TT Setting range 0 0 6 0 kn 6 COURSE Enter the course difference between AIS target and TT Setting range 0 0 ...

Page 176: ...er ship s draft 0 0 25 5 m 6 On page 2 select 1 CREW then use the scrollwheel to enter the number of crew 0 8191 7 Where required spin the scrollwheel to enter the appropriate CARGO CATEGO RY referring to the table below No Nav status No Status 00 Underway using engine 08 Under way Sailing 01 At anchor 09 Reserved for high speed craft 02 Not under command 10 Reserved for wing in ground 03 Restrict...

Page 177: ... ship at 3 MMSI No 4 At 2 MESSAGE TYPE select SAFETY for safety mes sage or BINARY for routine message 5 At 4 CHANNEL select the channel over which to broad cast your message The choices are A B A or B or A and B 6 Click NEXT to go to the next page 7 Select 3 EDIT A text input box appears together with the software keyboard Use the software keyboard to enter your message The number of characters t...

Page 178: ...e 2 of the menu select 1 OPEN FILE then select the number of the message to transmit 4 Select 3 EDIT to edit the message 5 To save the message select 2 SAVE FILE 6 To transmit the message select 4 TRANSMIT MESSAGE The confirmation message Attention Do you wish to transmit AIS message appears Click the OK button to transmit the message 4 16 3 How to display received AIS messages When you receive an...

Page 179: ...IS Menu to show that menu 2 Select 7 RECEIVED MESSAGES 3 Click an AIS message in the list to show its contents 4 Click the Close window button to close the window 1 10 APR 2012 08 21 ADDRESSED SAFETY MMSI 431060309 2 10 APR 2012 10 45 ADDRESSED BINARY MMSI 303056302 NAME FURUNO CALL 098657334 OSAKA MARTIS R41 5 1 TEST INFORMATRIOIN SW 2M S WEATHER RAINY VISIBILITY 5000M Title bar Page no total no ...

Page 180: ... position of external GPS antenna can be viewed as follows 1 Right click the AIS mode indication then click AIS Menu to show the AIS menu 2 Select STATIC DATA 3 Close the menu Call sign MMSI no here Ship name A B Type of ship C D Ship width Ship length External GPS antenna position External GPS antenna position ...

Page 181: ...IT The ROT marker appears on the heading line of an AIS tar get and points in the direction of the turn when the ship s rate of turn is greater than that set here 1 AIS SCALED SYMBOL The AIS target symbol can be shown as a simple triangle or a symbol scaled according to a vessels dimensions Select ON to show the scaled symbol Page 2 Page 1 Standard AIS symbol AIS scaled symbol ...

Page 182: ...4 AIS OPERATION 4 22 This page is intentionally left blank ...

Page 183: ...gation or at leisure time at an chor or while the radar is not being used Waypoints events and user charts from the chart can be shown or hidden on the radar map display The radar map does not affect any radar function 5 2 Orientation Modes Six orientation modes are available North up Course up Head up STAB Head up Stern up and North up TM To select a mode use the MODE key on the Control Unit or c...

Page 184: ... mark The procedure below shows how to enter a mark including mark selection mark entry method and save location You can skip steps in the procedure where it is not neces sary to complete the corresponding action 1 Put the cursor on the mark shown in the Mark box at the bottom left position on the display 2 Spin the scrollwheel to select a mark The name of the mark appears to the right of the mark...

Page 185: ...To continue entering the same mark or line under the same conditions do the following at the next time of entry Entry by cursor Click the location where to put a mark Entry by ship s position or manual input of latitude and longitude Click the mark icon 5 5 How to Find Number of Map Points Used You can show the number of points used in each radar map file Right click the Mark box then select Map M...

Page 186: ...rk box to show the context sensitive menu then click Edit Map Comment A text input box ap pears together with the software keyboard as shown in the right figure Select the map no with the Radar map file drop down list Enter your comment in the text input box The number of characters available appears below the box Click the OK button to finish How to find the comment for a map Put the cursor on th...

Page 187: ...lick to show the context sensitive menu 2 Click Mark Delete to enable erasure of marks lines 3 Click the mark or line to erase 5 8 2 How to erase map marks and lines in an area You can erase all marks and lines within an area as follows 1 Right click the display area to show the context sensitive menu 2 Click Area Select Target Cancel Off Center EBL Offset Zoom Set Area Select Mark Delete Mark Cop...

Page 188: ... to erase all radar map marks and lines in a map file You can erase all radar map marks and lines in the map file currently displayed Be absolutely sure you want to erase the marks and lines erased marks and lines cannot be restored 1 Right click the Mark box select Map Mark Menu and 1 MARK SETTING 2 Select 8 MAP MARK ALL DELETE The confirmation message Attention Do you wish to delete all map mark...

Page 189: ...9 2 How to copy radar map marks and lines within an area to an other map file You can copy radar map marks and lines within an area of the currently displayed ra dar map to the radar map file of your choice 1 Right click the display area to show the context sensitive menu 2 Click Area Select 3 Specify the area as follows 1 Put the cursor on the start point and push the left button 2 Drag the curso...

Page 190: ...f your choice 1 Display the map file of which to copy all its marks and lines See section 5 6 2 Right click the Mark box then click Map Mark Menu 3 Select 1 MARK SETTING 4 Select 9 MAP MARK ALL COPY 5 Select 1 COPY TO then select where to copy the map marks and lines 6 Select 2 ALL MARK COPY The confirmation message Attention Do you wish to copy all map mark appears Click the OK button to copy 7 C...

Page 191: ...left position of the dialog box 6 Check the radar map s Map1 to Map10 to export 7 Click the Export button to show the Save file dialog box 8 Select the USB flash memory as the destination to save then click the Save but ton After the data export is completed the message x file s have exported suc cess appears x is the number of the radar map s 9 Click the OK button Attention Do you wish to open ma...

Page 192: ...lick the Open button to show the Map Convert dialog box 7 Check the radar map s Map1 to Map10 to which the data created on another equipment are imported 8 Click the Import button to import the data to the radar map s selected at step 7 Note When importing a radar map created on another FAR 2xx7 the radar maps marks and lines are converted See the tables on pages 5 11 and 5 12 Attention Do you wis...

Page 193: ...een Buoy Green Buoy Red Buoy Red Buoy Red Buoy Green Buoy Green Buoy Green Buoy Red Buoy Red Buoy Red Buoy Green Buoy Green Buoy Green Buoy Red Buoy Red Buoy Red Buoy Green Buoy Green Buoy Green Buoy Buoy Red Buoy Buoy Buoy Red Buoy Buoy Buoy Red Buoy Buoy Buoy Red Buoy Buoy Danger Purple Danger Danger Danger Purple Danger Danger Purple Danger Purple Danger Purple Danger Mark Yellow orange Mark Ma...

Page 194: ...Mark Mark Yellow orange Buoy Mark Nav Line Purple Buoy Nav Line Coast Line White Buoy Coast Line Contour Line Gray Buoy Contour Line Prohibited Area Purple Prohibited Area Prohibited Area Danger Purple Danger Danger Line Buoy Yellow orange Line Mark Line Buoy Line Buoy Yellow orange Line Mark Line Buoy Line Mark Yellow orange Line Mark Line Mark Line Mark Yellow orange Line Mark Line Mark Other Ye...

Page 195: ...al so as to keep the track on the display for a longer time 1 Open the menu then select the 6 CHART DISPLAY and 1 OWN TRACK menus 2 Select 1 DISP OWN TRACK 3 Select ON to show your ship s track or OFF to hide the track 4 Select 2 OWN TRACK SOURCE 5 Select the navigation sensor that is to feed the position data to use to plot your ship s track among PRIMARY SECONDARY and SYSTEM PRIMARY Navigation s...

Page 196: ...he chart mode can be shown on the radar display You can show or hide the entire route and show or hide elements of the route channel lim its safety margin leg marks and wheel over line 1 Right click the Mark box then select Map Mark Menu and 3 ROUTE 2 Turn the route display on or off at 1 DISP ROUTE 3 Turn the XTD limit safety margin leg marks and wheel over line displays on or off at 2 SEL ROUTE ...

Page 197: ... mode See chapter 13 for a de scription of the user chart 1 Right click the Mark box then select Map Mark Menu and 5 USER CHART 2 Show or hide the user chart on the radar display with 1 DISP USER CHART 3 Show or hide the user chart objects on the radar display with 2 SEL USER CHART OBJECT 4 Close the menu ...

Page 198: ...5 RADAR MAP AND TRACK 5 16 This page is intentionally left blank ...

Page 199: ...ga tion The Overlay NAV Tools box provides for setup of navigation related functions The Alert box shows operational and system alert messages The VRM boxes measure the range to an object The Permanent warning box displays chart related warning messages The EBL boxes measure the bearing to an object The InstantAccess bar provides quick access to functions such as brilliance adjustment dis play pal...

Page 200: ... chart radar When you open a chart it is displayed with the default scale called the compilation scale The details for the chart are displayed in the electronic chart area and these can be modified You can change the chart scale with the ZOOM IN and ZOOM OUT func tions and the scale range is 1 1 000 1 70 000 000 C MAP vector format The C MAP charts require a contract with applicable provider This ...

Page 201: ... delivery to onboard and then installed into the system A C MAP delivery is SENC delivery Important notices If you are using both services ENC and SENC deliveries having the same chart name installed into the system through both deliveries priority of displaying the chart is in ENC delivery Chart updates for ENC delivery are only for charts of ENC delivery and chart up dates for SENC delivery is o...

Page 202: ...s selected or dese lected on the Chart Display menu do not match the preset conditions for IMO BASE IMO STD or IMO ALL 11 Displays the operator s manual chart program no and system informa tion 12 Settings Manages user profiles opens the Settings menu 13 Date Displays the date Selects the time to use local or UTC Sets the time difference between local and UTC to use local time 14 Time Displays the...

Page 203: ...option related to the label on the button The Chart Database button is an example of a drop down list button See the right figure A drop down list button has a list status indicator a triangle whose position changes according to list status Button type Operating procedure List closed List opened Click button ...

Page 204: ...yage planning Voyage navigation and Chart maintenance The bar is divided into two sec tions upper and lower The buttons in the lower section are common to all modes A button with a triangle mark at its bottom right corner indicates a button with multiple functions Chart maintenance mode bar NAVI button activated CHARTS button activated PLAN button activated Voyage planning mode bar Voyage navigati...

Page 205: ...hart maintenance mode bar m Minimizes the InstantAccess bar AUTO Import Loads charts automatically Manage Charts Deletes charts installs loads charts manually Cell Status Finds cell status License Enters license information Public Key Shows the current public key The public key changes each time a new one is installed System Functions for chart synchronization Sync Config Selects the ECDIS units t...

Page 206: ...y menu Chart Alert dialog box TWO DISP Splits the screen in two vertically or horizontally in the Voyage nav igation mode NtoM Shows or hides the Notices to Mariners NtoM Shows or hides the software keyboard Log Displays Update log ENC C MAP Event log user event POSN event NAV log Voyage Details Chart Usage Target log Danger Target and Route Trans fer log Voyage navigation and Voyage planning mode...

Page 207: ...cted is light blue 3 Do one of the following depending on button type Toggle button Push the knob to select setting Drop down list button or slider bar Rotate the knob to select an item or ad just the slider bar Push the knob to confirm your selection or setting Note 1 You can use the ESC key to go back one step in the current operating sequence Note 2 The InstantAccess knob can only adjust the sl...

Page 208: ...datum to convert to at the Con verted pull down list then click the button The position on the chart selected is shown below the Converted pull down list To go to a position click a Go To button ENC info ENC chart info appears here No indication ENC chart is currently displayed Non ENC data Non official ENC material in yellow characters See section 7 19 TM CU status TM CU Reset True motion reset i...

Page 209: ...utical miles Click this box then select Off Track and unit desired or open the menu and select desired unit with unit of Off Track in the Route Information menu To WPT The waypoint that the ship is ap proaching DIST to WOP Wheel Over Point Distance to the point where rudder order for course change at To WPT is given Time to Go Time to go to WOP hh mm ss Turn RAD Planned turning radius at To WPT RO...

Page 210: ...box sets up the following objects and consists of the following pages TT AIS Echo 1 Parallel index lines Range rings Predictor predicts ship s future movements Under the keel clearance graphic Anchor watch Look ahead Curved EBL 2 See chapter 15 for information about objects other than TT AIS The Alert box shows operational and system alert messages with alert ID no and alert mes sage See chapter 2...

Page 211: ...e appropriate item from the menu The availability of the context sensitive menu depends on the mode in use as shown in the table below Item Functions Mode and availability NAVI CHARTS PLAN Chart scale Drop down list of chart scales Yes Yes Yes Cursor info display Switch cursor displays Yes Yes Yes Sensor selection Select sensors Yes Yes Yes Route selection route information Select unselect route f...

Page 212: ...ard The BS Enter n p m o and Space on the key board function the same as those keys on the keyboard of the Control Unit 2 To switch between the alphabet keyboard and symbols keyboard click the key 3 Click the input box 4 Click appropriate keys and finally click the Enter key To erase the software keyboard click the X button at the top right corner of the key board EBL reference Select EBL referenc...

Page 213: ...dule The trackball module can also be used to enter latitude and longitude data 1 Put the cursor in the input box A selection cursor light blue appears 2 Enter data by spinning the scrollwheel Upward to de crease the value downward to increase the value 3 To switch coordinate between N and S and vice versa put the cursor at the right edge of the input box Dual ar rows appear 4 Click to switch the ...

Page 214: ...s 1 1 000 to 1 70 000 000 Click the chart scale selection buttons in the Chart scale presentation mode box Right click anywhere inside the Chart scale presentation mode to show a drop down list of chart scales Put the cursor anywhere on the chart and spin the scrollwheel The table below lists the chart related messages and their meanings Shown as Display Not Real Time display is based on viewing d...

Page 215: ...top of the screen the moment it is selected Route up The planned course is put at the top of the screen in route monitoring When route monitoring is canceled the course up presentation mode is automatically selected Head up Heading is put at the top of the display TM True Motion Own ship mark follows ship s movement The chart is fixed RM Relative Motion Own ship mark is put at the screen center an...

Page 216: ...rt system Use this mode when the chart system is not re quired like in a harbor To go to the standby mode first click the OTHERS button on the Status bar in the CHART for RADAR mode then click SILENT Have the holder of the password enter the password then click the OK button To return to normal operation click Back to Normal Mode Note The silent mode is automatically re leased when switching the o...

Page 217: ...ow to enable disable automatic TM reset To enable automatic TM reset click the TM Reset off indication at the right side of the display to show TM CU Reset When the TM reset is disabled change the chart scale with the scrollwheel and scroll the chat by drag and drop The own ship functions box shows TM Reset off When own ship moves off the screen the box shows Ship off screen The TM reset is acti v...

Page 218: ...ute Move to Plan Moves monitored route to Voyage planning mode for editing Instant Track Creates a temporary track to return to or make a temporary detour from the monitored course User Chart This button has one function Select Unselect Selects and unselects user charts from monitoring regardless of route being monitored Monitor INFO Opens the Monitor Information dialog box to view monitored route...

Page 219: ...rker Trackball module Click the arrow on an EBL or VRM box to hide the respective marker To redisplay the marker click the minimized box 6 10 2 How to measure the range and bearing Range Put the cursor on the VRM then drag the cursor until the VRM is on the inner edge of the object Bearing Put the cursor on the EBL then drag the cursor until the EBL bisects the ob ject 6 10 3 How to select bearing...

Page 220: ...RM on the current position Ground Anchors the EBL and VRM to ground neither the EBL or VRM move with ship s movement Offset HDG Offset North Select Offset HDG Drag and drop EBL VRM on desired location When vessel changes course the EBL VRM move so that the range L to their centers stays fixed Drag and drop EBL VRM on desired location The EBL VRM move to keep the angle from North to the center of t...

Page 221: ...ther Rhumbline or Great Circle To select the calculation method do the following 1 Open the menu then select NAV Tools and Geometry The Geometry settings page appears 2 Click the triangle at EBL VRM to show the drop down options 3 Select Rhumbline or Great Circle as appropriate 4 Click Save to apply the changes then click Close to close the menu ...

Page 222: ... screen The active display can be switched by clicking an ACTIVE button at the top of the display The dividing line between the main and sub views cannot be moved 6 11 2 Function availability Item CHART for RADAR mode Viewable Operable Main Sub Main Sub AIS target Yes Yes Yes Yes TT Yes Yes Yes Yes EBL VRM Yes Yes Yes Yes Parallel index lines Yes Yes Yes Yes Divider Yes Yes Yes No Range rings Yes ...

Page 223: ...devices datum received little attention because the commonly used systems utilized special charts like Decca charts Later on data output was added to these systems but still no attention was paid to datum and the position errors were considered as an inaccuracy of the system With the spread of the GPS however datum has become better known An accurate position is of no val ue if co ordinates are in...

Page 224: ...lly changed between the radar and chart for radar modes This chart radar system accepts navigation data input two ways System or Local System shares sensor data among multiple chart radars in network Sensor priority is also commonly shared among the chart radar Local selects a sensor outside the network 1 Right click anywhere in the Sensor infor mation box to show the context sensitive menu 2 Clic...

Page 225: ... 1 Right click anywhere in the Sensor information box to show the context sensitive menu 2 Click Open MENU 3 Click System Sensor Settings or Local Sen sor Settings 4 Click the SPD tab SPD page system sensor SPD page local sensor Open MENU PRIM Speed sensor list GPS tion ation Check for automatic speed input or speed PRIM LOG GPS selection Speed sensor list Stabilization mode Check to use radar as ...

Page 226: ...r and check Manual En ter the speed using the scrollwheel the software keyboard or the keyboard on the Control Unit Note For set and drift see page 16 3 7 Click the Save button to save settings then click the Close button to close the menu Notes on speed input Be sure not to select a LOG option when a speed log is not connected If the log signal is lost the GPS sensor is used In the event of GPS l...

Page 227: ...pported in RADAR mode Heading can be entered manually or automatically 1 Right click anywhere in the Sensor informa tion box to show the context sensitive menu 2 Click Open MENU 3 Click System Sensor Settings or Local Sensor Settings 4 Click the HDG tab HDG page system sensor HDG page local sensor This is not available with the System Sensor Settings menu This is not shown on IMO type PRIM Check f...

Page 228: ...efore departure Update S57 chart material Update your S57 chart material before embarking on a new voyage See section 7 20 Display date and update review dates for S57 charts and manual updates Note It is very important that you set the Display and Update Review dates for charts as the current date There may be features that require chart viewing dates or seasonal dates in charts Accordingly if yo...

Page 229: ...ute Plan dialog box The following information is stored with the monitoring route plan Conditions for chart alerts during route monitoring which includes safety contour and other chart alerts on the Alert Parameters page of the Route Plan dialog box Name of the user chart to be used during route monitoring together with this planned route on the User Chart page of the Route Plan dialog box Name of...

Page 230: ... Monitor Information dialog box appears showing the Waypoints tab Note A route cannot be opened if its planned settings are different from its navigation settings The reason is given on the Select Route dialog box In this case open the route in the Voyage planning mode and click the Check Route button on the Alert Parameters page Adjust the route as necessary The To WPT can be selected however WPT...

Page 231: ... setting on the Chart Alert dialog box click the DISP SET and Chart Alert buttons to show that dialog box Check ETA WPT Distance 0 00NM 10 42 05 Jun 2016 10 25 05 Jun 2016 3 0 0kn Plan Actual To Localtime Start Calculate Off Plan SPD Calculation Suggested SPD 10 25 05 Jun 2016 ...

Page 232: ... in the Route information box right side of screen to show the Select Monitor User Chart dialog box Check the chart s to use in the Stored User Chart window then click the and Open buttons The Monitor Information dialog box automatically appears and the user chart s se lected are displayed in the Monitoring User Chart tab Click a user chart to view its contents Check ETA WPT Distance 0 00NM 10 42 ...

Page 233: ...sensor Checkbox status shows whether the sensor is used for integrated navigation or not If there is no value shown for a sensor it indicates that the sensor is not valid Note that the content of these pages depends on the sensors that are in use on the ship Select the available dual logs Note that manual speed should only be used in an emergency when no other speed reference is available Remember...

Page 234: ...to PRIM Primary and another sensor was PRIM Primary the sensor formerly PRIM Primary becomes Second Secondary Select the Primary navigation sensor as the sensor that is considered to be most ac curate and reliable Set all other navigation sensors as Secondary 6 16 5 How to reset odometer and trip meter To reset the odometer and or trip meter do as follows 1 Open the menu and select the Voyage menu...

Page 235: ...s via LAN Data is shared automatically no operation is required Note 2 Chart processing installation deletion etc may take several minutes depend ing on the number of charts to be processed Note 3 If when attempting to install charts nothing appears on the display at the start of the procedure reset the power and try again Note 4 If installation of AVCS charts stops the message Chart installation ...

Page 236: ... Key dialog box 7 2 How to Install ENC Licenses Charts Install your ENC licenses and charts in that order 7 2 1 How to install an ENC license Automatic installation 1 Insert the medium DVD USB flash memory etc that contains the ENC license 2 Get into the Chart maintenance mode then click the License button on the InstantAccess bar to show the Licenses dialog box 3 Click the Import Licenses button ...

Page 237: ...medium the system first loads a catalog which stores certain information into your SSD such as cell IDs their position and edition number from the install medium Then the system asks which charts you want to install from the chosen medium After building the catalog you can view the contents of it by click ing the Cell Status button on the InstantAccess bar Note 1 Do not click the Cancel button dur...

Page 238: ...rch are displayed an example of which is shown below To cancel the installation click the Cancel button 3 Click the OK button to install the charts The Install chart data window appears and shows the percentage of completion with digital and analog indications To show details during the installation click the Show detail button To close the Message window click the Hide detail button C1210011 ENC ...

Page 239: ... are installed the chart system checks for error in the in stalled chart data at the next power up This is not an indication of malfunction Note 2 Previous versions of charts cannot be displayed if installed after installing the latest versions 7 3 How to Delete ENC Licenses 1 Get into the Chart maintenance mode 2 Click the License button on the InstantAccess bar 3 Click the ENC tab as appropriate...

Page 240: ...ode button 4 Select the judgment information file then click the Open button 7 5 How to Install C MAP Charts Synchronize chart data before you install C MAP charts grouping the chart radar units to synchronize otherwise the chart data cannot be shared See the procedure in paragraph 7 21 1 for how to synchronize chart data If C MAP charts are not synchro nized after installation delete all C MAP ch...

Page 241: ...ltiple units FMD 3x00 FAR 3xx0 or FCR 2xx9 group the units see section 7 21 1 you wish to synchronize before you install the charts If the group setting is done after chart installation the units will not synchronize If after setting the group and installing the charts the charts are not syn chronized delete then reinstall the chart Note 2 The installation of a chart cannot be cancelled while it i...

Page 242: ...elete all correspond ing charts and then reinstall them Note 2 Synchronization is not done for charts which could not be installed success fully Reinstall failed charts 7 5 3 How to install C MAP licenses A C MAP license should be installed using the automatic installation method shown below If the automatic installation fails try the manual installation method Automatic installation 1 Set the med...

Page 243: ...tabase name and Collection name information as shown in the ta ble below Enter the names exactly as shown to ensure correct installation 5 Enter the license max 16 characters in the bottommost window 6 Click the OK button to install the license 7 Reset the power Database name Collection name Chart type Name to enter PROFESSIONAL Professional ENC SERVICE ENC ENC SERVICE ENC Enter the contracted zon...

Page 244: ...eces depending of the size selected 5 Click the Order Update File button A file name C MAP system ID and chart type is automatically created with the extension ord 6 Select the USB flash memory 7 Click the Save button to save the order file to the USB flash memory 8 Send the order file to update c map com Within a few minutes you will receive a file that includes the terms for using the chart serv...

Page 245: ...with the Database pull down list 4 Click the Delete Database button 5 Reset the power 7 7 How to Install C MAP DL Dynamic Licensing Charts Register the eToken if it has not already been registered See section 7 5 1 7 7 1 How to generate and order an update file To update the C MAP chart database you have to create an update file and e mail the file directly to C MAP The update file defines coverag...

Page 246: ...s bar 2 Click the C MAP DL tab to show the Licenses dialog box for C MAP DL 3 Check Enable Dynamic License to enable the dynamic licensing You now have access to all the charts contained within the selected subscription zones both already licensed charts and new charts Settings indications on the Licenses dialog box for C MAP DL Set your annual credit limit with Credit Limit A permanent warning is...

Page 247: ...he Chart maintenance mode click the Manage Charts button on the InstantAccess bar to show the Manage Charts dialog box Check the charts to add to the list Click the Export List button to export the checked charts to a USB flash memory in txt format 7 9 How to Export a List of Specific Licenses You can export a list of your ENC or C MAP excluding C MAP DL licenses to a USB flash memory in txt forma...

Page 248: ...e InstantAccess bar to show the Licenses dialog box 3 Click the Backup Licenses button 4 Select the USB flash memory then select the folder in which to save the licenses then click the OK button The license files ENCpermit dat ARCSpermit dat are saved in the selected fold er 5 Click the OK button To restore licenses 1 Insert the USB flash memory that has the licenses into the USB port on the Contr...

Page 249: ...ssued after the expiration date of the permit The user has a right to view a chart forever except C MAP charts that have viewing periods which end two months after the expiry date of the license If the charts are not updated regularly it will not complete the requirements for having up to date charts To view the permit status of a chart click the License button on the InstantAccess bar and then cl...

Page 250: ... Click the Clear Period button to display all entries The Refresh button updates the list Print Text prints hard copy of the history The Find button searches required text string as follows 1 Click the Find button to show the Find text box 2 Click the input box then enter the text to search 3 Select the search direction with the up or down radio button 4 Click the Find button The first matching te...

Page 251: ...ce mode then click the Manage Charts button on the InstantAccess bar The Filter window lets you select what to display Check or uncheck items as appropriate 1 Chart Type ENC Display ENC charts ARCS Display ARCS charts no use C MAP Display C MAP charts 2 Availability Display available or unavailable charts 3 License Valid Cell with valid license Missing Expired Cell with missing or expired license ...

Page 252: ... also set the waypoint s as a start point or des tination point within a route 11 Chart boundary boxes Define the area covered by a chart and are color coded according license and per mit status 12 Line Color Legend The line color legend provides information about license validity 13 Set Default Restore the filter window to default settings 14 Apply Apply the changes made to the filter box and sho...

Page 253: ...p click the button to move the names of the selected cells to the Inside Group window If you want to re move a chart from the group select it then click the button 6 Click the Save button 7 Enter a name for the group using the keyboard on the Control Unit or software keyboard then click the OK button 8 Click the Close button to finish How to edit a group of chart cells You can edit a group of char...

Page 254: ...ls The Cell Status dialog box shows the status of the chart cells stored in the system To show this dialog box get into the Chart maintenance mode then click the Cell Sta tus button on the InstantAccess bar Type Type of chart cell ENC or C MAP Chart Name Chart name Data Server The name of the data server where the chart was downloaded from Edition Issue Date Edition no and issued date of the chart...

Page 255: ...e Manage Charts button on the InstantAccess bar to display the dialog box shown below Select the chart to open then click the Open Chart button 7 16 How to Print Chart List Cell Status List 7 16 1 How to print the chart list 1 In the Chart maintenance mode click the Manage Charts button on the InstantAccess bar to show the Manage Charts dialog box 2 Check the charts to print 3 On the Filter window...

Page 256: ...lter window check the information to show 3 Click the Create Report button to generate the report A report for all cells shown in the Cell Status dialog appears Note If there are no cells shown in the Cell Status dialog box the Create Re port button is not available Item Description Ship Name Name of ship IMO Number Ship s IMO number Call Sign Ship s call sign MMSI Number Ship s MMSI number Printi...

Page 257: ... to delete the charts selected 4 Reset the power Item Description Ship Name Name of ship IMO Number Ship s IMO number Call Sign Ship s call sign MMSI Number Ship s MMSI number Printing Date Date list printed Content Settings of the items in the Filter window Full A full list of charts based on the filter settings Filtered for Route Plan Where a route is selected at the filter set tings this indica...

Page 258: ...ishers Notes for ENC Charts You should read the text file associated with each catalog which you can view when installing a chart from a medium Click the Note button in the Manage Charts dialog box You can print a hard copy with the Print Text button ...

Page 259: ...e still visible but the strike through line on the object indicates it is a deleted object However a mariner can remove objects that he has manually inserted himself Note that the manual updates have no automatic connection to any automatic update received later for charts If a manual update itself became obsolete because the offi cial chart has been updated to include the update defined as a manu...

Page 260: ...r do the updating where the chart is installed 1 Go to the Voyage navigation mode 2 Click the Manual Update button on the InstantAccess bar to open the Manual Update dialog box 3 Click the Planning tab 4 Click the Add button Note This window can also be shown from the con text sensitive menu Right click the display area then select Manual Update and Add New 5 Use the Drawing Type pull down list to...

Page 261: ...copy objects from an official chart and insert them as a manual update with the following procedure 1 Right click the object you wish to copy to show the context sensitive menu the click Manual Update and Copy From Chart The Copy Chart dialog box ap pears 2 Click the object to copy then click Copy The object is copied to the Manual Up date dialog box 3 Referring to step 8 and step 9 in section 7 2...

Page 262: ...paragraph 7 20 1 Note The annotation for all modified objects is reset to blank when the Modify but ton is clicked Check and re input the annotations as necessary 5 Click the Commit button A confirmation dialog appears Click Yes or No as appropriate 7 20 6 How to review a chart object You can review a chart object in order to see the object before any changes were made To review an object do the f...

Page 263: ...ck the Urge Sync button on the Sync Status dialog box on the unit containing the media to forcibly synchronize Make a group of all the units currently powered referring to paragraph 7 21 1 and register the group with Grouped with This Unit Reset the power on all units select ed for synchronization Note 2 C MAP charts are not automatically synchronized C MAP charts are only synchronized immediately...

Page 264: ...ol lowed by Sync Status to show the Sync Status dialog box Current Status Displays current synchronization status The table below shows all the synchronization status messages Update button Click this button to update Current Status Enable Sync button Enables synchronization The confirmation message Attention Do you want to enable sync appears Click the OK button to enable synchroniza tion Synchro...

Page 265: ... to reset 7 21 3 Manual updates and synchronization If you are synchronizing multiple units FMD 3x00 FCR 2xx9 or FAR 3xx0 while manual updating is being done on one of the units the message File not found may appear meaning the manual update data was deleted If this occurs follow the pro cedure below to synchronize the FAR 3xx0 units The procedure uses CRA001 and CRA002 as an example 1 At the CRA0...

Page 266: ...s If you unintentionally installed outdated SENC charts you can reconvert those charts to the latest SENC charts Click the System and Reconvert buttons on the InstantAccess bar to reconvert all your SENC charts Note All manual updates are removed in the reconversion ...

Page 267: ...enter To move the own ship mark to a location right click the position on the chart where to put the own ship mark then right click Ship off cen ter Ship off center is not available in the Voyage planning mode To scroll your chart simply drag and drop 8 2 How to Control Visibility of Chart Objects The Chart Display menu has several pages of chart features that you may show or hide as appropriate T...

Page 268: ...rea is all areas shallower than the safety contour Set the value for the shallow contour less than the value of the safety contour TWO COLOR presentation In the two color presentation unsafe water is shown in blue and safe water is shown in white The safety contour is used to qualify unsafe water depth shallower than safe ty contour and safe water depths deeper than safety contour If the value ent...

Page 269: ...light sector Attributes Display Set how to show attributes in a Pick Report The options are Text Box List TM Reset In the true motion mode own ship moves until it reaches the true motion reset borderline set here and then it jumps back to an opposite position on screen based on its course Set the limit for TM reset in percentage For example 80 resets the position when the own ship marker is at a l...

Page 270: ...e This page turns chart features on checkbox checked or off Symbol Determines how to display chart symbols Paper Chart Symbols displayed the same as the conventional paper chart symbols Simplified Symbols displayed in simplified style and the sea is displayed in color Boundaries Determines how to show boundary lines of chart objects Plain Boundary line shown with solid and dashed lines Symbolized ...

Page 271: ...chart features defined by IMO that comprise a standard display Other page The Standard page contains chart features not contained in IMO standard display Text page Show or hide text information on the chart NtoM page Show or hide the Notice to Mariners data Note To use the pick report feature which provides information for cursor chosen chart feature the associated chart feature must be turned on ...

Page 272: ... are being used as aids to navigation Traffic routine systems Scale range orientation and operating mode Units of depth and height 8 3 How to Control Visibility of Symbols Features Control of symbols and features is divided into five pages in the Symbol Display menu which you can access by clicking the DISP SET and Symbol DISP buttons on the InstantAccess bar General page Controls own ship and tar...

Page 273: ...isplay Velocity Vectors Ship Vectors Show or hide own ship vector Target Vectors Show or hide target vectors Style Select the vector style The std ECDIS vector is a speed referenced vector symbol Conventional is a simplified symbol Time Increments Check to show ticks of velocity vector This controls both own ship and targets ticks If ticks are too tightly spaced they will be automatically removed ...

Page 274: ...vents marks are based on the Voyage log records User Events Display event symbols on the chart User events are recorded by click ing Log Event Log and User Event on the InstantAccess bar Auto Events Display automatically entered event symbols where the system has re corded an event based on conditions you have set Auto events are recorded every 1 4 hours Position Events Display the latitude and lo...

Page 275: ...margin distance Leg Marks Indications of waypoint no and range and bearing to next waypoint True Reference to North Relative Reference to head ing Wheel Over Line The location where the ship turns toward new course WPT1 124 8 0 8NM WPT2 87 9 1 2NM Wheel over line XTD limit WOL WOL Direction of movement Vertical WOL for the current interval WOL for next section Safety margin 㼃㻼㼀㻟 Case 1 Normal Case...

Page 276: ...nt from 25 50 75 and as No color fill If No color fill is selected only the boundaries of the areas are visible Display user chart symbol name Check to display the name entered for a user chart symbol in the Name column of the User Chart dialog box Effective for the circle and area symbols only Names are shown in both the Voyage planning and Voyage navi gation modes See the figure below for exampl...

Page 277: ...ze for tracked targets Standard or Small AIS ROT TAG Limit ROT min limit to display AIS target with curved speed vector Source of ROT must be ROT gyro on target vessel TT Label Show or hide the TT label target no AIS Label Show or hide the AIS label ship s name TT Pop up INFO Show or hide the TT pop up which is shown by placing the cursor on a TT AIS Pop up INFO Show or hide the AIS pop up which i...

Page 278: ...t Display menu You can change the chart display setting in use with the Chart database button on the Status bar Chart Display menu IMO Base IMO Standard IMO All General page All items are un checked All items are un checked All items are un checked Standard page All items are un checked All items are checked All items are checked Other page All items are un checked All items are un checked All ite...

Page 279: ...2 2 for how to set these dates In the paper chart world the Preliminary and Temporary Notices to Mariners represent the date dependency described above for S57 charts An important part of ENCs are the updates Hydrographic Offices can issue two kinds of updates 1 Incremental updates which are small additions to original base cells 2 Reissues and new editions which are complete replacements of previ...

Page 280: ...lation Scale The scale of the original paper chart is shown here Cell A cell is a geographical area containing ENC data and it is the smallest di vision of ENC data Each cell has a separate unique name Hydrographic Offices divide their responsibility area by the cells that they publish S57 chart A database standardized as to content structure and format is issued for use with this system without a...

Page 281: ...installed S57 charts up to date and these are shown at the bottom of the screen Permanent warnings appear if the system detects a condition that may cause a chart to be not up to date Note The system can assist in keeping RENC received charts up to date For charts that have been loaded from sources other than an RENC the system is unable to know the exact up to date situation Message Meaning Remed...

Page 282: ...n efficiently use chart viewing date dependency in order to use the valid data for any given date applicable for your navigation or planning purposes For example you can check for existence of changes and restrictions weeks before they became valid Date dependency is a part of the new electronic method to keep your chart up to date and valid for your intended use Normally you should set Display da...

Page 283: ...current date during your voyage If your voyage lasts more than one week set current date at least once per week during your voyage Note 2 In order to display charts with correct updated situation during route planning always use planned date of each waypoint to check your plan 9 2 4 How to approve and highlight S57 chart updates You can highlight updated data by setting a date or date period and c...

Page 284: ...ons See section 8 2 1 Click the Chart INFO and Chart 1 buttons on the InstantAccess bar to show to the ECDIS Chart 1 menu shown below 2 Click a chart feature to show detailed information about the feature Click Over view to show a compilation of all features shown below 9 3 1 Presentation library used for S57 chart features The system uses the official IHO presentation library to draw S57 charts T...

Page 285: ...te The Include Danger Objects check box appears when there is at least one dangerous object To show dangerous objects in the Select Object dialog box check this box after the box is check it becomes unselectable 3 Click the object for which you want to know its details then click the Select button Note Objects selected from the Select Object dialog box are highlighted in or ange color and are show...

Page 286: ...arge as part of the Admiralty S57 Chart Service and within Admiralty Value Added Resellers services The AIO has been developed to ensure mariners can simply view the information they need in addition to the standard chart to navigate safely and compliantly By clearly showing where important Temporary or Preliminary changes may impact a voyage the Admiralty Information Overlay will give seafarers t...

Page 287: ...to the Chart maintenance mode then click the Manage Charts button on the InstantAccess bar The AIO cell is GB800001 9 5 4 How to find AIO chart object information Do the following to find chart object information contained in the AIO 1 Right click a red hatched area in the chart area then select Pick Report to show the Select Object dialog box ...

Page 288: ...for mation about an attribute click it to show its information in the Description box Information Description of area for example danger area Object name Object name number Textual description Full text of the Notice to Mariners NtoM ENC affected ENC affected by the NtoM Included in updates Date this item was updated Preliminary Notice items only All INFO checkbox Check the box to show Source indi...

Page 289: ...t what type of notices to display as follows 1 Click the DISP SET and Chart DISP buttons on the InstantAccess bar 2 Click the NtoM tab 3 In the AIO window check or uncheck items as appropriate 4 Click the Save button to save settings then click the Close button to close the menu ...

Page 290: ...9 VECTOR S57 CHARTS 9 12 This page is intentionally left blank ...

Page 291: ...rt order may be sent together with system registration as described above It is essential that the required information be sent to C MAP when ordering charts for a system C MAP issues order forms specifying the information that is required and contains vital information that will allows C MAP to monitor and maintain your licenses throughout the lifetime of the system For details on how to order ch...

Page 292: ...te PC and internet connection with e mail are required to use the C MAP DL Fur ther it is necessary to access C MAP approx once every two weeks 10 5 2 What is ENC delivery ENCs can be distributed as ENC delivery or SENC delivery Both deliveries can be used in this system In ENC delivery charts are distributed directly from source like PRIMAR IC ENC JHA etc They are delivered onboard in ENC format ...

Page 293: ...he chart Edition Date Date the edition was published Update Number Update number Update Date Date of update Compilation Scale The scale of the original paper chart is shown here Projection Projection of current chart Horizontal Datum Horizontal datum used with current chart Sounding Datum Datum used to create sounding data Vertical Datum Vertical datum used with current chart Units of Depth Unit o...

Page 294: ... button Click the C MAP tab then the Order Update File button C MAP Dynamic licensing credit limit You have exceeded the allotted credit limit Raise credit limit C MAP No connection to eToken eToken dongle is not connected inside the Processor Unit or the eToken has not been initialized If the don gle is connected open the License dialog box click the C MAP tab then click the C MAP Setup and OK bu...

Page 295: ...rs the same consistent picture of the maritime environment on their charts as they have always had The display and operation methods for NM is essentially the same as AIO See section 9 5 for details How to select the NM information to display Select what type of notices to display as follows 1 Click the DISP SET and Chart DISP buttons on the InstantAccess bar 2 Click the NtoM tab 3 In the C MAP wi...

Page 296: ...10 C MAP CHARTS 10 6 This page is intentionally left blank ...

Page 297: ...ase S57 charts stored on the SSD in SENC format Note that the chart radar calculates dangerous areas using the largest scale chart available which may not be the visualized chart You can select objects that are included for calculation of danger area for example restricted areas A dialog box lists the various areas that activate danger warnings You can also define your own safe area by creating a ...

Page 298: ...he route Modify your route if necessary and do the chart alert calculation again To modify an existing route see section 12 5 3 Select route as monitored route 4 Set the look ahead area for your own ship see section 11 2 The system is now ready for chart alert calculation of monitored route and estimated own ship position 11 1 1 How to set safety contour Select safety contour suitable for the own ...

Page 299: ...he check in the box and hide the alert Checked alerts are highlight5ed according to priority A Alarm Red color highlight W Warning and C Caution Yellow color highlight 4 Click the Save button to finish Note C MAP PROFFESIONAL charts may take several minutes to identify danger areas List of areas There are areas that the chart radar detects and provides the audible alert and or vi sual alert if the...

Page 300: ...t generate an alert are shown in the following manner Alarms red highlight Warnings Cautions yellow outline Alarm or Warning level alerts Alert message and aural alert are generated Caution level alerts Alert message is generated no aural alert Individual objects The object is highlighted in red or outlined in yellow Area objects If the area object is larger than the look ahead area the look ahead...

Page 301: ...route This can be done as follows 1 Enter safety contour you want to use 2 Plan a route define waypoints and other necessary information See chapter 12 for route planning 3 Select dangerous objects to be monitored during route monitoring on the Alert Parameters page in the Route Plan dialog box shown below Click the box be low each object to show or hide the check mark When the route is checked al...

Page 302: ...sages appear in the permanent warning box Safety Contour unchecked Indication of crossing safety contour if Off in planning Navigational Hazard unchecked Indication of navigational hazards is Off in planning Other alerts unchecked Indication of some prohibited areas or areas with spe cial conditions is Off in planning ...

Page 303: ...alog box s Waypoints so that land mass is not included in the route A route plan defines the navigation plan from starting point to the final destination The plan includes Route name Name latitude and longitude of each waypoint Radius of turn circle at each waypoint Safe channel limits Chart alarm calculation based on channel limits against chart database and user chart danger UKC calculation Dead...

Page 304: ...y the sync source The unit selected as the sync source de pends on the number of units connected as shown in the table below If the power of the initial sync source is turned off the 2nd unit turned on becomes the sync source Be aware that if a unit is turned off some route data may be deleted The steps below illustrate this using ECD001 and ECD002 1 CD002 is off ECD001 is powered and a route is c...

Page 305: ...he left mouse button A waypoint mark appears on the position selected and the latitude and longitude of the position etc are entered into the Route Plan dialog box After entering a waypoint edit Name Steering mode Rhumbline or Greatcircle Radius XTD limit Plan SPD SPD Max Margin and Local Time as appropri ate in the Route Plan dialog box using the keyboard on the Control Unit or the software keybo...

Page 306: ...for Draught m A parameter for Draught m can also be assigned globally to all legs from the context sensitive menu See section 12 4 4 for how to use the Alert Parameters page 9 Use the Check Route button on the Alert Parameters page to detect areas where the depth is less than the safety contour or where specified conditions exist The results appear on the Check Results page This system can examine...

Page 307: ...ing radius for each waypoint To change a radius put the cur sor in this column to show up and down ar rows Click the arrows to set the radius XTD Limit m For Symmetrical selected at the radio button define channel limit for each leg For Asymmetrical selected de fine channel limit for port starboard side for each leg at XTD Port m or XTD STBD m respectively Plan SPD Define planned speed to use with...

Page 308: ...mark Click the button to copy that name to the Linked User Chart list To de link a user chart click the box to the left of the user chart name in the Linked User Chart list then click the button to erase the name The contents of each user chart are shown in the Contents window Linked User Chart List of user charts linked with selected route Stored User Chart List of stored user charts button Link ...

Page 309: ...rrive at the waypoint selected Optimized Speed ETA The optimized speed for the date and time entered at Set ETA appears here after clicking the Calculate button Calculate button Click to calculate optimization Apply to Route button Apply the calculations on the Optimize page to the route 12 4 4 How to use the Alert Parameters page The Alert Parameters page sets the alert conditions to use when che...

Page 310: ...on to know date dependent features Submarine Transit Lane Submarine transit lane Leg Leg number Anchorage Area Anchorage area Draught m Ship s draught MarineFarm Aquaculture Marine farm aquaculture Safety Con tour Safety contour PSSA Area Particularly Sensitive Sea Area Navigation al Hazard Navigational hazards No Vector Chart No vector chart for area Areas to be Avoided Areas to be avoided Too Ma...

Page 311: ...yage the error message Route check is not done in PLAN mode appears at the bottom of the monitor page 12 5 How to Modify an Existing Route 12 5 1 How to change waypoint position To change position of a waypoint you have the following choices Drag and drop waypoint using the left button Enter latitude and longitude on the Waypoints page in the Route Plan dialog box How to drag and drop waypoint to ...

Page 312: ...point is added at the end of the list Edit the Latitude Longitude etc as neces sary 12 5 4 How to insert a waypoint How to insert a waypoint between waypoints from the electronic chart area 1 Put the cursor anywhere on the route where you want to insert a waypoint 2 Right click to show the context sensitive menu then click Edit 3 Put the cursor on the leg where you want to insert a waypoint 4 Righ...

Page 313: ...lanned speed 12 6 SAR Operations The SAR feature facilitates search and rescue operations for MOB To use the SAR feature get into the Voyage planning mode then do the following 1 Click the Planning and Route buttons on the InstantAccess bar to show the Route Plan dialog box then click the SAR button 2 Enter your start point To enter current position click the Ship Position button The start point c...

Page 314: ...t the direction to start the search Clockwise or An ticlockwise Search Pattern Heading See the right figure Start Leg Length Enter the start leg length Track Space Enter the length of the short legs in the route Number of Legs Enter the num ber of legs to use The parallel tracks pattern is usual ly the first pattern used in undertak ing a search operation since it assumes that the object to be sea...

Page 315: ...it or the software keyboard If necessary you can drag waypoints to new position like with an ordinary route Sector search Direction Select the direction to start the search Clockwise or An ticlockwise Search Pattern Heading See the right figure Search Radius Enter the search radius in NM Number of Sectors Enter the number of sectors to use The sector search is used when the position of the body is...

Page 316: ...where you want to insert waypoints into the active route Before or After the waypoint selected in the next step The Reset button re stores the route to the original condition 5 In the left hand column set the cursor on the waypoint where to insert waypoints from the inactive route 6 At the right hand column select the waypoint s to add to the active route A con text sensitive menu is available by ...

Page 317: ...uction factors weather ice fouling etc together with speed limits given for each waypoint to generate ETA ETA may be entered however it is calculated with user entered ETD and speed limit Time table Calculates the speed required in order to arrive at destination at required ETA Maximum speed is never exceeded The user enters ETD and ETA to calculate speed to use If the user entered ETA is earlier ...

Page 318: ...ng 1 At the Set ETD window enter starting WPT and date and time of departure To enter the date click the gray box to the right of the Date UTC indi cation The Set date window shown right ap pears Click the applicable date in the calendar if you are going to depart during the current month or click the applicable arrow on the month year button to select a different date Click the OK but ton to save...

Page 319: ...ote that the ETA used in route reports is the first entered ETA 12 8 3 How to plan a speed profile A speed profile is defined by general max speed and optimization types These val ues are given while planning a route You can define speed limit and optimize type in the Optimize page of the Route Plan dialog box and in the Waypoints page you can give planned and max speed for each leg The table belo...

Page 320: ...rt 7 Click the Import button 12 9 2 How to import FEA 2x07 route data Routes created at an ECDIS FEA 2x07 can easily be imported to this ECDIS Copy the routes to a folder in a USB flash memory then follow this procedure Note that FEA 2x05 created routes cannot be imported 1 Set the USB flash memory to the USB port on the Control Unit 2 Activate the Voyage planning mode 3 On the InstantAccess bar c...

Page 321: ...format The choices are RTZ route data XML format FEA 2x07 route data ECDIS FEA 2x07 format CSV Position waypoint position data CSV format ASCII WPT Name Position waypoint name position order ASCII format ASCII Full all route data ASCII format ASCII Full Support Asymmetrical XTD Limit asymmetrical channel limit sup port ASCII format CSV Route Sheet route data CSV format RTE Format route data RTE fo...

Page 322: ...he USB flash memory to the USB port on the Control Unit 2 Activate the Voyage planning mode 3 On the InstantAccess bar click the Manage Data Route and Route Data Management buttons to show the Route Data Management dialog box 4 At the drop down list select the import format The choices are RTZ route data XML format CSV Position waypoint position data CSV format ASCII WPT Name Position waypoint nam...

Page 323: ...lick the PLAN button on the Status bar to get into the Planning navigation mode 2 Click the Manage Data button on the InstantAccess bar followed by the Route button 3 Put a checkmark in the check box to the left of the route name 4 Click the Delete button The confirmation message appears 5 Click the OK button 6 Click the Close button to close the dialog box 0 92NM RTZ ...

Page 324: ... is disabled as required When route transfer is enabled the following functions are also enabled 3 Use the radio buttons to select what to do when receiving route data having the same name as existing route data Reject Overwrite Ask every time Send receive monitored routes Send received planned routes Reject Don t save received route data When route data is being received a pop up message informs ...

Page 325: ...tes Sending monitored routes The ECDIS sends the route data for a route which is selected for monitoring to other ECDIS connected to the same network This is done automatically when route transfer is enabled and route monitoring is initiated Receiving monitored routes When a route is received from another ECDIS on the same network the Route Trans fer window appears Select the appropriate handling ...

Page 326: ...e You can send a planned route to other ECDIS in the same network 1 Click the PLAN button on the Status bar to get into the Voyage planning mode 2 On the InstantAccess bar click the Manage Data and Route buttons to show the Route Data Management dialog box 3 Place a check in the box to left of the route s to transfer then select Route trans fer LAN from the drop down box 4 Select Export The select...

Page 327: ...eports can be searched with the Find button To generate a report do the following 1 Click the Plan button to go to the Voyage planning mode 2 Click the Report button followed by the Route button Click applicable report button The following dialog box appears 3 Select the appropriate route then click the Open button to show the selected re port See the next several pages for examples 177 50NM ...

Page 328: ...stance remaining in route Position in latitude and longitude Planned courses and steering methods RL RhumbLine GC GreatCircle Turning radius Planned speeds Estimated times of arrival ETA ETD from waypoint 1 start point ETA to waypoint x final waypoint Total length of route Estimated time required to run route using planned speeds and courses ...

Page 329: ...Date of report Waypoint no Position in latitude and longitude Planned radius XTD Channel limit If set individually port and starboard channel limits are sepa rated with a diagonal Planned speed Planned course ETA Time difference from UTC Steering mode rhumb line or great circle to each waypoint ROT Margin for XTD Channel limit Speed Max Leg length Time used ...

Page 330: ...ssage plan report generates waypoint information for each waypoint in the route selected Route name Date of report Waypoint no Position in latitude and longitude Length Cumulative length Planned course Steering method RL or GC Name of waypoint ...

Page 331: ...is a description of the objects used in a user chart Tidal There are two types of tidals current and predicted Line You can define four different types of lines Lines can be used in chart alert calculation and or display on the radar Navigation lines Displayed on both the radar display and the chart display Nav igation lines are reference lines for coast line Coast line Displayed on both the radar...

Page 332: ...sync source and the user chart data are automatically synced by the sync source The unit selected as the sync source depends on the number of units connected as shown in the table below If the power of the initial sync source is turned off the 2nd unit turned on becomes the sync source Be aware that if a unit is turned off some user chart data may be deleted The steps below illustrate this using E...

Page 333: ...the respective button to show a context sensitive menu The choices available for each object are shown below Tidal Current Predicted Line Coast Nav Route Depth Clearing line NMT Not More Than NLT Not Less Than Label Label Point 5 Put the cursor on the location to insert the object then push the left button See the figure below for how to construct lines areas and circles For the Tidal object you c...

Page 334: ...how a red checkmark to use the object in chart alert calculation For the area circle and line you can add Notes as shown below See the de scription and figure below for a description of Notes 1 Enter the text for the Notes in the Description box 2 Click the box in the Notes window of the User Chart dialog box to set the message indication E entering Shows the message when the own ship enters into ...

Page 335: ... miles of the line or x miles after passing the line 9 To continue entering the same symbol click a new location on the screen and do step 3 To enter a different symbol do steps 3 and 4 10 After you have entered all necessary objects click the Save button Note If the Save button is not shown update the user chart to show the button 11 The Save user chart window appears Enter a name for the user ch...

Page 336: ...ast three points Text input Erase last entered character or character string The Line with the name Coast is a coastline The Circle has the Notes E which means the message set in the Description box when the own ship enters the circle will be shown The Tidal marks line marks a tidal current The Area has Radar and Danger checked This means the area is shown on the radar display and is used in chart...

Page 337: ...sor on the point to delete right click to show the context menu then select Delete The point is removed and the object is redrawn How to insert a corner point on a line or area Put the cursor on the location where to insert a corner point right click the display area to show the context sensitive menu then select Insert Note You can also insert a point from the User Chart dialog box with the follo...

Page 338: ...o delete to show the context menu then select Delete 6 Click Save to save the changes and close the User Chart dialog box 13 6 How to Copy User Chart Objects You can copy user chart objects from one chart the origin chart then paste them onto a different user chart destination chart with the following procedure 1 Referring to step 1 and step 2 in section 13 3 show the User Chart dialog box 2 Click...

Page 339: ...How to import user chart data from other units You can import user chart data from other units FMD 3x00 FCR 2xx9 or FAR 3xx0 with the following procedure For FEA 2x07 user charts see section 13 8 2 1 Set the USB flash memory to the USB port on the Control Unit 2 Click the button on the InstantAccess bar then select Settings A confir mation pop up window appears 3 Click OK to show the Settings menu...

Page 340: ...or s manual of the FEA 2x07 in a USB flash memory then do as follows Note that FEA 2x05 created user charts cannot be imported 1 Set the USB flash memory to the USB port on the Control Unit 2 Activate the Voyage planning mode 3 Click the Manage Data Data Import and User Chart buttons to show the SE LECT DIRECTORY dialog box 4 Select the folder that contains the user chart s to be imported then cli...

Page 341: ...er units FMD 3x00 FCR 2xx9 or FAR 3xx0 13 9 1 How to export user chart data created on the FMD 3x00 1 Set the USB flash memory to the USB port on the Control Unit 2 Click the button on the InstantAccess bar then select Settings A confir mation pop up window appears 3 Click OK to show the Settings menu 4 Click the File Export tab 5 Check Route User chart then click the Export button 13 9 2 How to e...

Page 342: ...the User Chart button 3 Check the user chart s to delete 4 Click the Delete button 13 11 User Chart Reports 1 Click the Plan button to go to the Voyage planning mode 2 Click the Report button followed by the User Chart button to show the Select User Chart dialog box 3 Select the appropriate user chart then click the OK button to show the selected report See the next several pages for examples of r...

Page 343: ...rea circle and label in the user chart selected Check or uncheck the boxes at the top of the display to select the report s to display Tidal report A tidal report provides Position of the tidal Type of tidal current or predicted Speed and direction of the tidal Time of the tidal Check the report s to display ...

Page 344: ...mn for Radar Danger or Notes on the Us er Chart dialog box On Radar Danger or Has Notes appears in the report On radar is shown if the area is shown on the radar overlay Danger is shown when a check mark is input in the column for Danger on the User Chart dialog box Area no and area name The latitude and longitude position of each point of the area The description of the area Where a check mark is...

Page 345: ... a user chart Where a check mark is input in the column for Danger or Notes on the User Chart dialog box Danger or Has Notes appears in the report Latitude and longitude position of each label Name of each label Where a check mark is input in the column for Danger or Notes on the User Chart dialog box Danger or Has Notes appears in the report ...

Page 346: ...omatically appears and shows the user charts selected for use in route monitoring Click a user chart name to see details in the Contents window How to cancel use of a user chart during route monitoring To cancel only a user chart during route monitoring get into the Voyage navigation mode then click the Voyage User Chart Select Unselect buttons on the Instant Access bar to show the Select Monitor ...

Page 347: ... monitoring the route See chapter 11 for how to set those limits Each leg has information about planned speed shown in the Monitor Information dialog box Each leg has information about planned course to steer Note In order to display charts with correctly updated situation always use current date as Update Review and Display date during your voyage If your voyage lasts more than one week set curre...

Page 348: ...ght click the Route Information box to show the context sensitive menu then se lect Select Route to show the Select Route dialog box Select a route then click the Open button 177 50 NM Red box indicates detailed information available in larger scale Chart alert area warning Waypoint ...

Page 349: ...f this oc curs switch to the Chart for Radar mode The Monitoring Failed pop up window ap pears Click the OK button Find the reason why route monitoring was stopped and then restart route monitoring z Route monitoring is temporarily stopped route is grayed out and an alert appears when the signal for position speed or heading is lost To restore route monitoring change the sensor system from System ...

Page 350: ...at 10800 3 occurs route monitoring is stopped automatically See the Troubleshooting table in section 25 5 for details 14 3 How to Select What Parts of a Route to Display You can specify what parts of the monitored route to display Click the DISP SET and Symbol DISP buttons on the InstantAccess bar Click the Route tab 14 4 How to View Waypoint Information Click the Voyage and Monitor INFO buttons o...

Page 351: ...arameters for checking ETA The arrow to the left of Check ETA col lapse or display the Waypoints Linked User Chart and Check Results tabs WPT Distance Select a WPT to find the distance to that waypoint from current position Plan The ETA to the selected waypoint if the planned speed is maintained Actual The ETA to the selected waypoint if current speed is maintained To Localtime Switch between UTC ...

Page 352: ...For the Check ETA window see the preceding page 14 6 How to View User Chart Object Information in Route Monitoring In route monitoring you can cursor pick user chart objects to show their information Put the cursor on the user chart symbol to show the pop up menu Select User Chart INFO from the pop up menu Below are some examples of user chart info Check ETA WPT Distance 0 00NM 10 42 05 Jun 2016 1...

Page 353: ...There are two instant track modes Safe Off Track and Back to Track Safe Off Track This mode provides a track from the monitored route to a safe loca tion to avoid collision or the like Back to Track This mode creates a track to follow to return to the monitored route when the vessel goes outside the channel limits The mode is automatically selected according to whether a monitored route is active ...

Page 354: ...em uses ship position speed angle of approach to create an instant track route The track is also checked for hazardous objects and the like against the chart alerts During the calculation the Instant Track dialog box shows Checking in the Status field If after completion of the calculation the track is suitable the message OK re places Checking The track and its waypoints labeled T1 T4 are colored...

Page 355: ...tion must be within 50 NM of current position The system uses ship position speed and final waypoint to create a track The track is also checked for hazardous objects and the like against the chart alerts During the calculation the Instant Track dialog box shows Checking in the Status field If after completion of the calculation the track is suitable the message OK re places Checking The track and...

Page 356: ...tant track Yellow Checking Checking route Red OK Instant track checked and is suitable to follow Green NG Instant track check failed Red Check error Route check error Red Instant Track is expired Route monitor timeout Red Too many WPTs in monitoring route More than 190 waypoints are in the monitored route Instant track cannot be created Red 3 User operation message Please click a destination Selec...

Page 357: ...e remaining counts to zero otherwise the instant track will be can celed followed by the message Instant Track is expired After the Monitor button is clicked the Monitoring page is opened The Monitoring page shows the name of the instant track and the instant track mode The vessel follows the instant track route in the same method as a monitored route which is grayed out to indicate it is inactive...

Page 358: ... route click the Original Route button on the Monitoring page in the Instant Track dia log box to show the Select Route dialog box Check Planned Route to show a list of planned routes or check Instant Track to show a list of instant track routes 2 Select the route to use The original route or the instant track route currently in use can not be selected 3 Click the Open button to close the dialog b...

Page 359: ...t the position circled in the figure below changes according to the state of the instant track Instant track state Button label Creating Monitoring Monitoring Stop Return to original route after back to track mode Reset Instant track route is erased another instant track route can be created ...

Page 360: ... menu Select MAS TER BACKUP SYNC or CLEAR as appropriate MASTER Assigns selected unit as the master unit One unit must be assigned as the master unit BACKUP When route monitoring starts on the master the route and its informa tion are displayed on the backup SYNC Selected unit receives and displays the route data output from the mas ter and monitors the route displayed on the master CLEAR Removes ...

Page 361: ...y NAV Tools box is located at bottom right position on the screen There are two methods to access the NAV Tools Click the page selection buttons to show the desired page Right click the Overlay NAV Tools box to show the context sensitive menu then click the desired page TT AIS see chapters 3 and 4 Echo 1 Parallel index lines Look ahead Range rings Predictor Anchor watch Under keel clearance Curved...

Page 362: ...ner also gets a very good confirmation that his navigation sensors such as gyro and position receivers operate properly and accurately However if the mariner is unable to achieve exact match it is a very strong indication that something is wrong and he should not rely on what he sees Selected scale of displayed chart also defines scale of radar overlay When you change the chart scale the scale of ...

Page 363: ...e To adjust put the cursor on the slider bar and roll the scrollwheel 5 Density controls the see through behavior of the radar overlay 100 overlays the radar echo on the chart without modification 75 displays radar echoes faintly and 25 displays radar echoes somewhat faintly It is recommended to use 25 or 50 when navigating narrow channels so as not to conceal land masses 6 Click the Antenna drop ...

Page 364: ...r Radar Echo Image and TT Mismatch There are several reasons why the radar echo image and tracked target symbols do not match exactly 1 Different gyro value at radar overlay and at ECDIS 2 Improper installation parameters radar overlay bearing offset radar overlay range offset conning position offset The example below shows how different gyro value set at radar overlay and at ECDIS affect the disp...

Page 365: ...line s set to activate or deactivate with the Display drop down list Ac tivate or deactivate the set selected with the ON OFF button The Func ON Func OFF button globally activates deactivates all PI lines selected to ON 15 3 2 PI line bearing reference PI line bearing reference may be relative to own ship s heading Relative or refer enced to North True Select True or REL 15 3 3 Number of PI lines ...

Page 366: ... PI lines to default orientation 0 degrees for parallel ori entation 90 degrees for perpendicular orientation This is faster than doing it manual ly Click the Reset button to reset the parallel lines How to adjust orientation and interval multiple PI lines Adjust interval Put cursor on any PI line other than the one bisecting own ship marker then drag cursor Adjust orientation Put cursor on PI lin...

Page 367: ...e PI line whose length you want to adjust 3 Click the value in Forward and Backward columns to adjust their lengths refer ring to the illustration below 4 Click the Save button to finish 15 4 Look ahead Look ahead sets the area ahead and around own ship for which to check for safe nav igation See section 11 2 for how to activate own ship check PI line PI line Adjust the forward length Adjust the f...

Page 368: ...r the EBL and VRM can be selected to Rhumbline or Great Circle Do as follows to select a calculation method 1 Open the menu then select NAV Tools and Geometry to show the Geometry page 2 Select Rhumbline or Great Circle with the drop down list box for Rings 3 Click the Save button to save the setting then click the close button to finish Chart scale Ring interval nm Chart scale Ring interval nm 1 ...

Page 369: ...used in every steering state including manual steering To activate and set the Predictor show the Predictor page Turn the display on or off with Display Set the time 30 60 90 120 150 180 seconds with Time The Predictor is updated every three seconds internally and the status of the predictor is shown with Status as shown in the table below Note The ship speed must be 0 5 kn or higher The predictor...

Page 370: ...p An chor button 4 Click the Start Anchor Watch button to start the anchor watch If your vessel travels more than the distance set here the corresponding caution is generated If your ship drifts more than the anchor watch setting the Alert 495 ALF format 10802 Anchor Watch Setting appears The alert is escalated from warning level to alarm level if the alert is not acknowledged within two minutes A...

Page 371: ...m setting the Alert 30801 Depth Limit also is generated Depth data is required to use the UKC and Echo Alarm functions UKC takes into account the amount of hull subsidence Squat Effect The evaluation criteria for Alert 173 UKC Limit is not based solely on the distance from the keel to the seabed under keel clearance or draught Note 1 When conducting a route check UKC is calculated based on the pla...

Page 372: ...re to change the setting whenever the draft changes 5 Use Type to set the shape of your ship s hull to show on the UKC window V shape or Concave See the figure in section 15 8 2 6 Click the Apply button 15 8 3 UKC window The UKC window provides a visual graphic of the relationship between UKC draft and current depth The window can be shown or hidden as desired and located anywhere within the elect...

Page 373: ...urn You can also use the Curved EBL function to determine whether a turn is conduct as planned To show hide the Curved EBL click the ON OFF button on the Curved EBL page of the Overly NAV Tools box Note This function is only available when a EC 3000 with TCS functionality is con nected to the network WPT1 Curved EBL Steering line Steering line OS mark OS mark XTD limit ...

Page 374: ...00 00 00 2 6NM 055 1 00 00 00 00 Divider appears Drag circle to next point Right click starting point Select New Divider 00 00 00 00 5 0NM 051 2 00 32 00 32 5 9NM Starting point Delete end point Delete intermediate point Connecting points are deleted End point Intermediate point How to delete points TTG to point Total TTG Total distance TTG to point Total TTG Total distance TTG to point Total TTG ...

Page 375: ...ll the TTGs The TTG is measurable to 99 00 If the TTG is higher the TTG indication is 99 00 The ship s speed must be at least 0 5 kn to calculate TTG The divider cannot be used in latitudes higher than 85 In the split screen display the divider is viewable on both the main and sub views but is operable only on the main view 15 10 3 How to deactivate and erase the divider Get into the Voyage naviga...

Page 376: ...ider can be selected to Rhumbline or Great Circle Do as follows to select a calculation method 1 Open the menu then select NAV Tools and Geometry to show the Geometry page 2 Select Rhumbline or Great Circle with the drop down list box for Divider 3 Click the Save button to save the setting then click the close button to finish ...

Page 377: ...checksum status A V Mode indicator and setting val ues are checked If checksum error is found the sentence is disaffirmed Legitimacy check The range and accuracy of a sentence is checked If the check for both is OK a valid flag results If either is invalid the invalid flag is given Types of CCRS There are two types of CCRS System and Local The System CCRS integrates all navigation devices In the L...

Page 378: ...how the sensor menus in the radar mode The sensor menus in the chart mode mirror those in the radar mode although the layout is differ ent Any change made in a sensor menu is reflected to the companion sensor menu to synchronize the data between the modes 16 2 1 Sensors menu description HDG page Local Sensor Sensors Select the heading sensor to use Analog Gyro No use Manual Set heading manually wh...

Page 379: ... Check to use radar as the source for speed and course Only available with the Local Sen sor Setting and checking Bottom in Stabilization Mode Set Drift Check the Set Drift checkbox to manually set speed and course of drift Note that you can select manual drift only if you check Water in Stabilization Mode Angle Difference between heading and COG Spd Speed component of the drift vector Cse Course ...

Page 380: ...PS001 GPS002 indicates the name of the sensor Data Source Check Sensors to use a sensor in the Sensors list or click DR to enter position manually When the position source is changed based on priori ties and signal validity to another position source then you get the Alert 472 ALF format 10602 1 Position Source Change DR Check DR when no position source is available ...

Page 381: ...nd Select wind unit wind reference and wind source See section 16 9 Depth Below Trans Depth from hull at bow and aft to bottom A depth alert value may be entered to alert you when the depth is within the value set Temperature Water surface temperature Water Current Tide at own ship s position 130 7m Mid 130 8m Aft 130 8m 1 9 012 1 037 3 3 2kn ...

Page 382: ...ple below the position source is DGPS Other indications that may be displayed in the position area are as follows DR Shown in yellow when position source is dead reckoning DGPS GPS Name of position source If the system changes the source of position because of lost sensor data the system immediately generates the Alert 472 ALF format 10602 1 Position Source Change Position sensor selected as high ...

Page 383: ...p is chosen as Secondary on the POSN page of the Sensor menu Secondary position of own ship is not available as latitude longitude value for the user System primary and secondary positions of your ship may be plotted on the chart radar display with the past tracks feature You can control their visibility etc from the Tracking page of the Symbol Display menu shown in the right figure In this exampl...

Page 384: ...without additional text meaning the value is referenced to true North SOG COG used by the system is shown at the top right position on the chart radar display In the example below COG and SOG are from chosen position sensors and this is indicated with the text GPS or LOG is the number of sensors Heading sensor selected as high priority Alert 450 ALF format 10601 10 Heading Sensor Not Available Hea...

Page 385: ...ALF format 10601 9 Heading Sensor Not Available When no speed source is available the system generates the Alert 453 ALF format 10601 10 SDME Sensor Not Available When no COG SOG data is available the system generates the Alert 279 ALF format 10601 6 COG SOG Not Available Speed used by this system Water Stabilization Mode Selected Manual speed Selected and Manual set drift exists Manual speed Manu...

Page 386: ...oring Sensors may be excluded manually or automatically An excluded sensor participates in neither integrity monitoring or filtering The filter automatically excludes a sensor from use if the sensor fails the first level of integrity check for example if a sudden jump is detected If the actual integrity check fails for some reason and the filter is able to identify the faulty sensor the faulty sen...

Page 387: ... changed to Passed because there is COG for comparison The methods of integrity monitoring are outlined in the table below The status and integrity of all sensors can be monitored from the Filter Status page in the Other Sensor Settings menu Sensors can also be unselected and the filter re set from this page Sensor Comparison Position Comparison with other position sensors Comparison with dead rec...

Page 388: ...the sensor from the drop down list at the bot tom left corner of the page click the Unselect button then click the Save button Un selected appears in the Status column To reselect an unselected sensor select the sensor from the drop down list click the Select button Selected appears in the Sta tus column The Reset Filter button functions to recover from sensor failure When the button is operated A...

Page 389: ...tion get into the Voy age navigation mode click the Offset button at the top right position on the screen You are asked if you want to align position click the Yes button to proceed Put the cursor on the correct position then click The amount of offset in bearing and range appears to the right the Offset button The latitude and longitude position indication is shown in yellow characters when the p...

Page 390: ...g from the North but the wind di rection displays otherwise check if the format is Theoretical If it is switch to another format Wind angle Wind speed Apparent 345 10 kn North 330 5 kn Theoretical 285 5 kn Wind speed Apparent 10 kn Apparent Wind Heading Angle reference North Wind Angle North 330 Wind Speed North Theoretical 5 0 kn Ship s Speed SOG 8 7 kn True Wind North Wind from NNW 330 Wind Angl...

Page 391: ...d aft installed The system displays depth value as depth below the transducer If required you can get an alert when the measured depth is less than the Echo Alarm Limit setting at the UKC page in the Overlay NAV Tools box The system generates the Alert 485 ALF format 10801 Depth Limit 130 7m Mid 130 8m Aft 130 8m 1 9 012 1 20 1 C 037 3 3 2kn Wind reference APPARENT NORTH THEORETICAL Source of Wind...

Page 392: ...16 NAVIGATION SENSORS 16 16 This page is intentionally left blank ...

Page 393: ... are only an additional means to broadcast safety information They do not remove the requirements of the GMDSS 17 1 1 How to send an AIS safety message Note If you are using the Trackball Control Unit RCU 026 display the software keyboard DISP button ON on the InstantAccess bar before starting this procedure 1 In the Voyage navigation mode click the MSG and Safety MSG buttons on the In stantAccess...

Page 394: ...ers available depends on the type of message Safety message broadcast 90 characters Binary message broadcast 86 characters Safety message addressed to MMSI 85 characters Binary message addressed to MMSI 80 characters 7 Click the Send button to send the message 17 1 2 How to display received and sent AIS safety messages When an AIS message is received the Alert 539 ALF format 10540 1 AIS Message Re...

Page 395: ... check mark All messages can be checked or unchecked with the context sensitive menu Right click the box to the left of Date then select Check All or Uncheck All as applicable 3 Click the Delete button 17 2 Navtex Messages Navtex Navigational Telex is an international automated medium frequency direct printing service for delivery of navigational and meteorological warnings and fore casts as well ...

Page 396: ...ter the appropriate distance setting range 1 to 100 NM To protect a message or remove the protection click the protection status column for the message When removing protection the confirmation window shown below appears Select Yes or No as appropriate Note You can protect up to 50 messages When you try to protect more than 50 messages the message shown below appears Message protection status P Pr...

Page 397: ...e left of P then select Select All or Deselect All as applicable 4 Click the Delete button The selected message is sent to the Trash Box The Trash Box can hold up to 200 messages Note If a protected message is se lected for deletion the confirmation message shown to the right ap pears Click Yes to delete the pro tected message or No to cancel deletion How to deleted received Navtex messages perman...

Page 398: ...17 AIS SAFETY NAVTEX MESSAGES 17 6 This page is intentionally left blank ...

Page 399: ...ons COG and SOG in the TT info data box show missing 18 1 TT Display 18 1 1 TT symbols Refer to section 3 7 1 18 1 2 TT symbol color and size Do the following to select TT symbol color and size Note that the color of the AIS sym bol is also changed 1 Click the DISP SET and Symbol DISP buttons on the InstantAccess bar to show the Symbol Display menu 2 Click the Targets tab 3 Select the color among ...

Page 400: ...et is erased the number will not be reused until the power is re set or more than 100 targets are ac quired Bearing BRG and distance RNG of the target from own ship True speed SOG and true course COG of the target CPA and TCPA A negative TCPA value means that you have already passed the closest point and the TT is going away from own ship Bow Crossing Range BCR and Bow Crossing Time BCT Title bar ...

Page 401: ... filter If you are in a congested area the lost target alert may sound against many AIS tar gets In this case you can prevent the alarm from sounding against TT that are be yond a certain range and or smaller than a specific length 1 Open the MENU and select TT AIS and Setting then click the Setting 2 tab 2 In the TT Lost Target Filter window set the maximum range to track a target MAX Range The m...

Page 402: ...n using a maximum of 20 characters 7 Use the Cargo Type pull down menu to specify the type of cargo your vessel is carrying 8 Click the Save button to save the settings Underway using engine At anchor Not under command Restricted maneuverability Constrained by her draught Moored Aground Engaged in fishing Under way sailing Reserved for high speed craft Reserved for wing in ground Power driven vess...

Page 403: ...ping Class B to show OFF or ON to hide or show those targets Click the button of Base Station to show OFF or ON to hide or show AIS base stations Click the button of Physical AtoN to show OFF or ON to hide or show Phys ical AtoN targets Click the button of Virtual AtoN to show OFF or ON to hide or show Virtual AtoN targets Set the maximum range with MAX Range Any target beyond the range set here w...

Page 404: ... as shown below The CPA TCPA alarm must be active to get automatic activation of AIS targets Right click AIS on the TT AIS page in the NAV Tools Overlay box select Setting and open the Setting 1 page 18 2 5 How to sleep all activated targets You can sleep all activated targets Right click AIS on the TT AIS page in the NAV Tools Overlay box select Setting and open the Setting 1 page Click the butto...

Page 405: ...Class B Exclude class B AIS targets from the AIS lost target alert 18 2 7 How to display AIS target data Normal data Put the cursor on an activated target then push the left button Title bar MMSI Bearing Range Course over ground Speed over ground CPA TCPA Bow cross range Bow cross time Position Normal Expand button Heading Navigation status 2 Rate of turn Scroll buttons 1 Close button Vessel name ...

Page 406: ...eed over ground CPA TCPA Bow cross range Bow cross time Position Level of detail button Heading Navigation status 2 Rate of turn Scroll buttons 1 Close button Position sensor Position sensor accuracy HIGH LOW Call sign IMO No Length Width Draught Destination ETA AIS version no Ship Cargo type Vessel name Association condition 1 Scroll buttons appear when there are multiple AIS targets 2 Where the ...

Page 407: ...able and if the as sociation criteria are fulfilled either the AIS or TT symbol is presented according to the association method selected Association will not happen between AIS and TT if the AIS target is sleeping or the AIS target is lost All association settings including ON OFF can also be controlled from the radar mode with the TT AIS setting box see section 4 14 All settings are mutually sha...

Page 408: ...desired association method 18 3 2 How to set the conditions for association To set the criteria for association right click AIS on the TT AIS page in the NAV Tools Overlay box select Setting and open the Setting 2 page For setting details see section 4 14 2 Association OFF Association TT Association AIS ...

Page 409: ...nd the event is recorded to the Voy age log To view the comment entered for an event put the cursor on the event then left click to show the Event Information window Note The Event Information window is shown with the CHART for RADAR mode The window shows the name of the event UserEvent time and date of entry lati tude and longitude position of the event and comment Note that the comment can be ed...

Page 410: ...log box 2 At the list box at the top of the dialog box select position type Manual Manual input of ship s position Go to step 4 LOP Latitude and longitude position of a fixed object at ship s position Go to step 5 Position Ship s position fed from navigator selected Go to step 3 3 For Position click the Log button The position event mark appears at the ship s position The position is recorded to t...

Page 411: ...include the observation in the fix com putation The counter shows new 1 at the input of the second observation The word new indicates that the observation currently displayed is not yet included in the fix computation and it appears as a dashed line or ring on the chart The added obser vations can be edited or deleted after selecting them at the counter When at least two measurements are entered t...

Page 412: ...the position shown in the latitude and longitude fields then click the Log button to save the position observation to the Voyage log If you wish you can also enter latitude and longitude values manually Timeouts The observations cannot be used long after they were made because dead reckoning is inaccurate Click the Log button to put a position event at the LOP calculated position The po sition is ...

Page 413: ...utside the set period become gray and the entries inside the set period remain visible To show log entries which are not visible spin the scrollwheel upward to scroll up the log downward to scroll down the log To refresh the log click the Refresh button To search the log do as follows 1 Click the Find button to show the Find text box 2 Click the input box then enter the text to search 3 Select the...

Page 414: ... Position data source LOP see below The latitude and longitude position and bearing or distance of a maximum of three objects are automatically recorded to each log entry An object whose posi tion accuracy is low is not recorded If an object has both a bearing and distance separate entries are made Latitude Longitude Position as output by selected sensor and sensor used as the data source SOG kn C...

Page 415: ...s follows 1 Click the Find button to show the Find text box 2 Click the input box then enter the text to search 3 Select the search direction with the up or down radio button 4 Click the Find button The first matching text is highlighted in yellow at the top of the screen 5 To continue the search click the Find button To cancel the search click the Cancel button To print the log click the Print Te...

Page 416: ...the NAV Log dialog box 2 Set desired limit for log interval Setting range 1 to 4 hr 1 hr inter val When your speed or course changes by the amount set here an entry is made in the Voyage log at the inter val selected 19 4 Chart Usage Log The Chart Usage log stores which charts were used in chart alerts To open the log click Log NAV Log and Chart Usage on the InstantAccess bar The following informa...

Page 417: ... screen 5 To continue the search click the Find button To cancel the search click the Cancel button To print the log click the Print Text button 19 5 Danger Targets Log The Danger Targets log stores information about dangerous targets that are re ceived from a radar TTs and or targets that are received from an AIS transponder AIS targets If a TT or AIS target is within the set CPA Closest Point of...

Page 418: ...ton To search the log do as follows 1 Click the Find button to show the Find text box 2 Click the input box then enter the text to search 3 Select the search direction with the up or down radio button 4 Click the Find button Matching text is highlighted in yellow at the top of the screen 5 To continue the search click the Find button To cancel the search click the Cancel button To print the log cl...

Page 419: ...te Transfer Version Transferred route s version Current WPT Current waypoint Transfer Status Current transfer status of the transferred route Application Status Current status of the transfer application How to view the route transfer log On the InstantAccess bar click the Log Target Log and Route TRANS Log but tons To show the logs of a specific period enter the period to show with Period Cov ere...

Page 420: ...of the screen 5 To continue the search click the Find button To cancel the search click the Cancel button To print the log click the Print Text button Select the printing format then click the Print button To export the log click the Export File button The file is namedRouteTransferL ogYYYYMMDDhhmmss csv ...

Page 421: ... to avoid any kind of hazardous situation and to maintain the safe navigation of the ship Warning Conditions or situations which require immediate attention for precautionary reasons to make the bridge team aware of conditions which are not immediately haz ardous but may become so Caution Awareness of a condition which continues to require attention out of the or dinary consideration of the situat...

Page 422: ...e and the background change according to alert priority and alert state See the table on the next page An alert can be acknowledged from the Alert box or Alert List An alert remains in the Alert box and Alert List until it is acknowledged and rectified See section 20 5 Alert List Alert Log button Right click to select Alert List Window or Alert Log Win dow The background color of the button is lig...

Page 423: ... Not rectified OR Not acknowledged Rec tified Black characters on yellow orange background Flashing Yellow orange characters on gray background Warning Acknowledged Not recti fied Yellow orange characters on gray background Caution Not rectified Yellow characters on gray background Emergency Alarm Warning Acknowledged Recti fied No display Caution Rectified No display Displayed alternately 171 171...

Page 424: ... circle with black loud speaker in center of circle Flashing on 1s off 1 s 7 Not acknowledged Not rectified Buzzer temporarily silenced Yellow orange circle with crossed out black loudspeaker in center of circle Flashing on 1s off 1 s 8 Acknowledged Not rectified Steadily displayed yellow orange circle with black exclamation point in center of circle 9 Active responsibility trans ferred warning St...

Page 425: ...the priority of the alert changes as shown in the table below The alert message remains on the display until rectified Button state Description No alert generated The background is gray and the icon is grayed out An alarm or warning is being acknowledged The background is gray and the icon is white Button clicked to silence buzzer temporarily The background is light blue and the icon is black In t...

Page 426: ...ipment that generated the alert Equipment that generated the alert B Equipment and AMS Alert Management System No use Equipment that generated the alert or AMS C IAS Integrated Automation System gen erated engine related alert The log shows the following information for each alert Alert no Alert text Source of alert Time UTC alert was generated Time UTC alert was acknowledged Details about the ale...

Page 427: ...rt List Alert Log button in the Alert box click Alert List The background color of an unacknowledged alarm is red and flashing and unac knowledged warning is yellow orange and flashing An acknowledged alert is dis played steadily in red for alarm and yellow orange for warning A caution is displayed steadily in yellow The Status section has three columns Icons appear in the columns as follows Left ...

Page 428: ...lences the buzzer How the alert list is updated after acknowledgement rectification When you acknowledge an alert its display method on the Alert list changes accord ing to alert category and alert state Acknowledged and rectified alerts are immediately removed from the list No Alert priority Alert state Display after acknowledgement Display after rectification 1 Emergency Alarm Not acknowledged N...

Page 429: ...n the Log Search box then click the Find button You can save the contents of the log to a USB flash memory in dat format by clicking the Export Log button The log shows the following information for each alert Priority of alert Emergency Alarm Warning Caution Category of alert A B or C Alert no alert instance 1 Alert name Source of alert Time UTC alert occurred Time UTC alert was acknowledged Time...

Page 430: ...y in dat format by clicking the Export Log button 20 7 Alert Reception from Connected Sensors An ALR receive and ACK transmit communication is available for every serial line input The ALR message from the sensor includes information about alerts from the sensor and is presented though the normal alert system When you acknowledge an alert an ACK message is sent to the sensor to do remote acknowled...

Page 431: ...tion Loss of System Communication Warning B Repeated warning 150 150 Early Course Change Early Course Change Warning A Repeated warning 170 170 PositioningSystem Failure PositioningSystem Failure Warning B Repeated warning 171 171 Crossing Safety Contour Crossing Safety Contour Alarm A 172 172 Off Track Alarm Off Track Alarm Alarm A 173 1 620 Area With Special Conditions User Chart Danger Area War...

Page 432: ...23 TT Auto ACQ 100 190 5 525 TT MAN ACQ 100 191 1 526 CPA TCPA TT CPA TCPA Alarm A Repeated warning 191 2 536 AIS CPA TCPA 192 1 521 ACQUISITION ACTIVATION NEW TARGET TT New Target Warning A Repeated warning 192 2 529 AIS New Target 193 1 527 Lost Target Alert TT Lost Warning A Repeated warning 193 2 528 REF Target Lost 193 3 537 AIS Lost 194 1 720 Radar System Fail ure No ANT Heading Signal Warni...

Page 433: ...n Speed Lowering 10001 4 004 Main Monitor Fan4 Rotation Speed Lowering 10001 5 014 Sub Monitor Fan1 Rotation Speed Lowering 10001 6 015 Sub Monitor Fan2 Rotation Speed Lowering 10001 7 016 Sub Monitor Fan3 Rotation Speed Lowering 10001 8 017 Sub Monitor Fan4 Rotation Speed Lowering 10001 9 011 Main Monitor RS485 Communi cation Timeout 10001 10 024 Sub Monitor RS485 Communi cation Timeout 10001 11 ...

Page 434: ...001 25 081 Processor Unit Fan3 Rotation Speed Lowering 10001 26 089 Processor Unit CPU board Battery Power Error 10001 27 090 Processor Unit CPU board Core Power Error 10001 28 070 RCU 1 COM Time out 10001 29 071 RCU 2 COM Time out 10001 30 072 RCU 3 COM Time out 10001 31 400 Network Printer Not Available 10001 32 401 Local Printer Not Available 10002 1 005 HW Status Abnor mal Main Monitor LCD Uni...

Page 435: ...02 14 083 Processor Unit Fan1 Fan No Rota tion 10002 15 084 Processor Unit Fan2 Fan No Rota tion 10002 16 085 Processor Unit Fan3 Fan No Rota tion 10002 17 086 Processor Unit CPU board 5V Power Error 10002 18 087 Processor Unit CPU board 3 3V Power Error 10002 19 088 Processor Unit CPU board 12V Power Error 10050 1 320 Serial Ch COM Timeout Processor Unit Ch 01 COM Time out Caution B 10050 2 321 P...

Page 436: ...ensor Adapter COM Timeout Sensor Adapter 1 COM Timeout Caution B 10300 2 031 Sensor Adapter 2 COM Timeout 10300 3 032 Sensor Adapter 3 COM Timeout 10300 4 033 Sensor Adapter 4 COM Timeout 10300 5 034 Sensor Adapter 5 COM Timeout 10300 6 035 Sensor Adapter 6 COM Timeout 10300 7 036 Sensor Adapter 7 COM Timeout 10300 8 037 Sensor Adapter 8 COM Timeout 10300 9 038 Sensor Adapter 9 COM Timeout 10300 1...

Page 437: ... COM Error 10400 22 291 EPFS 2 COM Error 10400 23 292 EPFS 3 COM Error 10400 24 293 EPFS 4 COM Error 10400 25 294 EPFS 5 COM Error 10400 26 295 EPFS 6 COM Error 10400 27 296 EPFS 7 COM Error 10400 28 297 EPFS 8 COM Error 10400 29 298 EPFS 9 COM Error 10400 30 299 EPFS 10 COM Er ror 10400 41 280 SDME 1 COM Er ror 10400 42 281 SDME 2 COM Er ror 10400 43 282 SDME 3 COM Er ror 10400 51 235 Echo Sounde...

Page 438: ...10499 500 Watch Alert Watch Alert Warning B Repeated warning 10500 1 851 Sensor Banned EPFS 1 Sensor Banned Caution B 10500 2 852 EPFS 2 Sensor Banned 10500 3 853 EPFS 3 Sensor Banned 10500 4 854 EPFS 4 Sensor Banned 10500 5 855 EPFS 5 Sensor Banned 10500 6 856 EPFS 6 Sensor Banned 10500 7 857 EPFS 7 Sensor Banned 10500 8 858 EPFS 8 Sensor Banned 10500 9 859 EPFS 9 Sensor Banned 10500 10 860 EPFS ...

Page 439: ...ror Warning B Repeated warning 10540 1 539 AIS Message Alert AIS Message Re ceived Caution B 10540 2 541 AIS Message Transmit Error 10540 3 542 AIS Transmitting 10560 560 Association Association Caution B 10601 1 272 Sensor Data Not Available UTC Time Not Available Caution B Repeated warning 10601 2 277 Wind Speed Direc tion Not Available 10601 3 279 COG SOG Not Available 10601 4 284 SOG Not Avail...

Page 440: ...o Sig nal 10740 3 750 EXT Radar COM Error 10760 760 Datum Mismatch Datum Mismatch Caution B 10800 1 691 RM Stop RM Stop Exceed Max XTD Alarm A 10800 2 692 RM Stop Sensor lost 10800 3 693 RM Stop Internal Error 10801 485 Depth Limit Depth Limit Alarm A Repeated warning 10802 495 Anchor Watch Anchor Watch Warning A Escalated to alarm 10803 640 Chartalign Over 30 min Chartalign Over 30 min Caution B ...

Page 441: ...below Ship parameters description MAX Speed Maximum speed the ship can do MAX Height Max height of ship above sea level MAX Draught Max draught of ship Route parameters description MAX R O T The maximum rate of turn of the ship Set at installation WPT Approach The alert time before reaching the wheel over point WPT Prewarning The alert time before reaching the wheel over point Default Line Radius ...

Page 442: ...s change according to the radius of turn The forwarding distances are entered at installation and cannot be changed by the op erator However the operator can view the forwarding distances settings on the For warding Distance display MENU o General o Navigation Parameter Note These are the port side values Starboard side values can also be shown Con tact a FURUNO dealer for details ...

Page 443: ...ip s plan etc At the Cost window enter the cost hour and cost ton for heavy fuel oil and diesel oil At the Fuel Consumption window define the fuel consumption figures for up to 12 different speeds Before entering the data plot the data on a graph like the one shown below Use a second graph if for example diesel oil consumption is different from that of heavy fuel oil Reset the power to effect the ...

Page 444: ...ab Delay before Initiating First Turn Set the number of seconds 30 600 seconds to wait before initiating the first turn in the simple route Turn Radius Set the turning radius 0 02 3 00 NM to use between waypoints four waypoints in the simple route XTD Limit Set the channel limit 10 3704 m for the instant track automatically or manually The Auto setting uses the channel limit set for the monitored ...

Page 445: ... tus bar then select Settings The right message appears Click the OK button to show the Settings menu To open a page use the page selection buttons to select a page then click the tab of the page required The color of the border of the page selected is cyan No Name Description 1 Pages menus Twelve menus 2 Page selection buttons Scroll the Settings menu 3 Menu area The menu for the selected page ap...

Page 446: ...heck to export setting data radar chart conning com mon performance monitor data and ten user profile data 2 Route User chart Check to export all routes and user charts 3 Playback data No use 4 Radar map Check to export all radar maps 5 Radar Installation Check to export all setting of the RADAR INSTALLATION menu The RADAR INSTALLATION menu is for a qualified technician only 6 Export button Click ...

Page 447: ...Import button appears after the data to import is selected Note 4 The message Now processing appears during the importing The message File import finished appears upon completion of the importing Click the OK button No Name Description 1 Select file to import button Click to show the OPEN FILE dialog box where you can select the file to import 2 Select data to import Check the data to import among...

Page 448: ... To restore the route data from the backup data first check all route data then do the restore from the latest data No Name Description 1 Route Userchart Application Back up Click to restore last saved route userchart application 2 Route Userchart System Backup Click to restore last saved route userchart system 3 Restore button Click to restore item selected 1 2 3 ...

Page 449: ...y of an alert is raised to Warning or Alarm when the alert goes unacknowledged Click the Escalation Setting button to show the escalation settings Alerts can be escalated to alarm level or re peated as a warning A greyed out Escalation Mode or Escalation Time value means that the value can not be changed ...

Page 450: ...store factory settings 5 Escalation Mode Set the escalation mode Warning Warning is repeated when the Escalation Time elaps es Alarm The alert priority is changed if the alert is not acknowledged before the Escalation Time elapses To globally assign escalation mode on the displayed page change the setting below the item 6 Escalation Time Set the escalation time the time to wait before escalation o...

Page 451: ...pro gram numbers don gle information The time of and results of the self test and display of the program numbers xx version number and dongle information 2 Start button Start the self test 3 Stop button Stop the self test Shown during test 4 Export button Save the results to external device ex USB flash memory Avail able after the results are shown on the display OK OK Function ecdis conning tcs a...

Page 452: ... radar and the chart radar No Name Description 1 NAV Tools Check the NAV tools items to share them between the chart and the radar 2 Display Settings Check the display setting items to share between the chart and the radar NAV Tools VRM EBL PI Line Display Settings Color Palette Display Brilliance 1 2 ...

Page 453: ...rotation Set the direction of scrollwheel rotation direction Normal Downward to increase value upward to decrease value Reverse Reverse of Normal 2 Key beep volume Set the loudness of the key beep that sounds for correct key or mouse button operation 0 No beep 1 LOW 2 MID 3 HIGH 3 Alert sound vol ume Set the loudness of the alert buzzer 1 LOW 2 MID 3 HIGH 1 2 3 ...

Page 454: ...buzzer sounds when the display test starts Left click to proceed in the numerical order shown below right click to proceed in re verse order To quit the display test at any time press the ESC key on the applicable Control Unit 1 2 3 4 5 6 7 8 9 10 11 12 13 14 15 16 Diagonal Black All colors Black White Red Green Blue Gray Red bars Green bars Blue bars Yellow bars Aqua bars Purple bars Gray bars ...

Page 455: ...e window above the control shows the setting value Push a control and the corresponding location on screen lights in light blue The EBL and VRM controls do not have a push function 2 InstantAccess knob key Check the InstantAccess knob and key 1 Rotate the knob and the setting value ap pears in the window 2 Push the knob and the knob lights in light blue 3 Push the key and the key lights in blue 3 ...

Page 456: ...trol shows the setting value 2 Push each button The window above a pushed button lights in light blue 3 Push the scrollwheel The window above the wheel lights in light blue 7 Buzzer ON button Click the Buzzer ON button to sound the buzzer The buzzer sounds and the button flashes in red Click the button again to can cel 8 Contact Output button Click the Contact Output button to output the Alarm out...

Page 457: ...f the time and date the screenshot was taken 2 Check boxes Put a checkmark in the box of the screenshot to process 3 Preview Preview of the screenshot selected 4 Delete button Delete the screenshot s selected 5 Export button Export selected screenshot s to a USB flash memory 6 Print button Print the screenshot selected 7 Apply button Save comment 8 Comment box Enter comment for screenshot Put a ch...

Page 458: ...nside the EC 3000 1 Select the Screenshot page 2 Put a checkmark in the checkbox of the screenshot s to delete To select all screenshots right click the box to the left of the Date column then select Select all To clear all check marks select Clear all 3 Click the Delete button The confirmation message Attention Selected files will be deleted Do you wish to continue appears 4 Click the Yes button ...

Page 459: ...Setting menu Click the Restore User Setting button The mes sage All setting data will be restored to the default Do you wish to continue ap pears Click the Yes button to restore default settings and reset the power If you require the setting data copy it to a USB flash memory using the file export fea ture BEFORE restoring user defaults ...

Page 460: ...location of various sensors No Name Description 1 CCRP Select the CCRP to use in the case of multiple CCRPs 2 Anchor Enter anchor installation position X and Y values from CCRP The setting ranges are X 15 0 to 15 m Y 0 0 to 300 0 m 3 Display Filter Check the items to show on the ship s graphic 4 Ship s graphic Shows the location of the sensors selected at the Dis play Filter ...

Page 461: ...is adjusted from the RADAR INSTALLA TION menu accessible by a qualified technician Contact a FURUNO dealer for details z Heading Adjustment of radar echo heading Heading is adjusted from the RA DAR INSTALLATION menu accessible by a qualified technician Contact a FU RUNO dealer for details z Radar ANT position Center of radar image is the radar antenna position Radar antenna position is set on the ...

Page 462: ...d to the chart radar the heading indication on the chart radar must be adjusted to match that of the gyro For the adjustment procedure see section 1 17 z Speed data Speed may be input from SDME or GPS SDME may be single axis water speed or dual axis ground speed GPS may be used to input COG SOG Ground speed may also be taken from TT reference target Speed is entered from the Setting menu For detai...

Page 463: ...ata in analog serial and contact signal formats Six sets of conning displays are available and they are arranged at installation Con sult with the installer of the equipment to decide the content and layout of each display To show the conning display click the Operating Mode button on the Status bar to se lect CONNING for RADAR Note Analog data is shown in the lowest value of the setting range whe...

Page 464: ...e keyboard adjusts the volume of the key beep and audio alert 5 Selects a display palette See section 1 5 6 Adjusts the brilliance of a the monitor See section 1 6 7 Takes a screenshot See section 1 21 8 Displays AMS and conning software version and system information The information shown in the figure may differ from your own See section 1 24 9 Date See section 1 20 10 Time See section 1 20 To a...

Page 465: ...the system is working properly If it is not spinning the system is not working Shortly after the working indicator stops spin ning the buzzer sounds and the status LED turns red Reset the power to restore normal operation If the primary display mode is specified during installation the first letter of the primary mode name appears at the center of the working indicator as follows C Conning E ECDIS...

Page 466: ...24 CONNING DISPLAYS 24 4 Example 2 General navigation Example 3 General navigation ...

Page 467: ...24 CONNING DISPLAYS 24 5 Example 4 General navigation Example 5 All waters navigation Silence ...

Page 468: ...24 CONNING DISPLAYS 24 6 Example 6 All waters harbor Example 7 Ocean navigation 27 May 2016 Silence 27 May 2016 Silence ...

Page 469: ...24 CONNING DISPLAYS 24 7 Example 8 Ocean harbor Example 9 Offshore Service Vessel Fore 1 27 May 2016 Silence Silence ...

Page 470: ...24 CONNING DISPLAYS 24 8 Example 10 Offshore Service Vessel Fore 2 Example 11 Offshore Service Vessel Aft 1 27 May 2016 Silence Silence ...

Page 471: ...during the installation The display example be low shows heading doppler log speed and rudder angle To show or hide the mini conning display click the Mini Conning button on the InstantAccess bar To shift the mini conning display right click the mini conning display to show the context sensitive menu Click an option Left Top Left Middle Left Bottom Right Top Right Middle or Right Bot tom 27 May 20...

Page 472: ...mode The presence or absence of the display is determined during the installation Four side conning sheets are preset during the installation according to expected us age possible navigation conditions etc The operator cannot modify the sheets You can select a sheet by clicking the current sheet name at the top right corner on the display Side conning display Sheet name Rudder ...

Page 473: ... sealant or contact spray to coating or plastic parts of the equipment Those items contain organic solvents that can damage coating and plastic parts especially plastic connectors WARNING NOTICE Do not open the equipment Hazardous voltage which can cause electrical shock exists inside the equipment Only qualified personnel should work inside the equipment Turn off the radar power switch before ser...

Page 474: ...CD carefully to prevent scratching using tissue paper and an LCD cleaner To re move dirt or salt deposits use an LCD cleaner wiping slowly with tissue paper so as to dis solve the dirt or salt Change paper frequently so the salt or dirt will not scratch the LCD Do not use solvents such as thinner acetone or benzene for cleaning Also do not use a degreaser or an antifog solution as they can strip t...

Page 475: ...the radiator is iced use a wooden or plastic headed hammer to remove the ice DO NOT use a steel ham mer Terminals connec tors Check that all terminals and connectors on circuit boards are securely fastened Have a qualified technician check terminals and connec tors 6 months to 1 year Screws on terminal boards in Proces sor Units Check that all screws are tightly fastened Have a qualified technicia...

Page 476: ... ring on clean soft cloth laid on a flat surface 3 Clean the ball with a damp soft cloth then use a dry lint free cloth to carefully wipe the ball dry 4 Use a swab moistened with water to carefully clean the inside of the retaining ring the inside of the trackball housing the supports and the lens Change the swab regularly so that dirt and dust build up is easily removed 5 Make sure that the track...

Page 477: ...en Remedy the radar echoes disappear and the alert 727 ALF format 194 8 Radar Sensor COM Er ror appears check the connection between the EC 3000 and radar sensor Reconnect the cable if loos ened then restart the equip ment the alert 750 ALF format 10740 3 EXT Radar COM Er ror appears check the connection be tween the EC 3000 of this equipment and the EC 3000 in the LAN line check the connection be...

Page 478: ...the message There is no dongle or an error has occurred in the dongle The system will automatically shut down appears dongle is not connected data in the dongle is corrupted Connect dongle Contact FURUNO for assistance monitored route is not displayed route has not been selected monitor route has not been se lected to be visible above the chart Select route to monitor Open the Route page of the Sy...

Page 479: ...igation mode Select user chart in Voyage navi gation mode the message Nearing memory usage limit Click the Restart button to restart the system to prevent trouble ap pears the memory usage limit for soft ware is close to capacity Per formance may be affected If you need to save your work click the Later button then restart the equipment If you don t need to save your work click the Restart button ...

Page 480: ... BEZEL 19 LCD ASSEMBLY MU 190 50 000 hours BEZEL 23 LCD ASSEMBLY MU 231 50 000 hours Processor Unit EC 3000 CPU Fan KTA 555 01 8 5 years Power Fan 109P0612H761 8 5 years Chassis Fan 109P0612H761 8 5 years Sensor Adapter MC 3000S MC CS Board 24P0114 8 5 years Sensor Adapter MC 3010A MC ANLG Board 24P0115 7 0 years Part Type Lifetime Remarks ...

Page 481: ...inguish between the various color coded areas lines and symbols 1 Click the Chart INFO and Chart 1 buttons on the InstantAccess bar to show the ECDIS Chart 1 menu 2 Click Color diagram to show the color test diagram If the colors are correct the diagonal line will be distinguishable from its surroundings at any brilliance setting New symbols Color diagram ...

Page 482: ...ing priority order GPS BT LOG BT The SPD indication reads kn when both GPS BT and LOG BT can not be used When LOG BT is selected The sensor used is automatically switched in the following priority order GPS BT LOG WT The SPD indication reads kn when both GPS BT and LOG WT can not be used When GPS BT is selected The sensor used is automatically switched in the following priority order LOG BT LOG WT...

Page 483: ... PNK MAG WHT YEL 4 TRAIL LEVEL 1 2 3 4 5 OS TRAIL OFF ON 6 SUPPRESS TRAIL AROUND OS OFF ON 2 TT AIS 1 ACQUISITION ZONE 2 TRIAL MANEUVER 3 TT 4 AIS 1 AZ STAB STAB HDG STAB NORTH 2 AZ POLYGON OFF STAB GND STAB HDG STAB NORTH 1 TRIAL MANEUVER STATIC DYNAMIC 2 SPEED RATE 3 TURN RATE 4 TGT DATA ACTUAL TRIAL 1 TT SELECT 2 ALL CANCEL NO YES 3 LOST FILTER MAX RNG OFF ON 0 to 99 NM 12 1 VOYAGE DATA NAV STA...

Page 484: ...I LINE 1 PI LINE BEARING 1 REL TRUE 2 SET ALL PI LINE OFF 1 2 3 6 3 NUMBER OF ALL PI LINE OFF 1 2 3 6 4 PI LINE MODE PARALLEL PERPEN DICULAR 5 RESET PI LINE 6 RESET ALL PI LINE 7 TRUNCATE 1 EBL1 2 REL TRUE 2 EBL2 2 REL TRUE 3 VRM1 2 NM SM km kyd 4 VRM2 2 NM SM km kyd 5 EBL OFFSET BASE POINT STAB GND STAB HDG STAB NORTH 6 VRM TTG OFF 1 2 1 and 2 7 VRM OFFSET OFF LINK EBL 1 CURSOR BEARING REL TRUE 2...

Page 485: ...INES LABELS TIDALS AREAS CIRCLES CLEARING LINES 6 CHART DISPLAY 1 OWN TRACK 2 SEL DISPLAY OBJECT 1 1 2 Continued from previous page Continued on next page 2 Not available with IMO type 23 inch monitor 1 DISP EVENT OFF ON 2 SEL EVENT OBJECT USER EVENT AUTO EVENT POS EVENT 1 Not available with IMO or A type Page 2 1 MAP MARK MANAGE 2 DISP CURVED EBL OFF ON 1 SAVE TO PERSONAL 2 GENERAL 3 STANDARD 4 O...

Page 486: ...RSOR Page 2 1 EBL 2 VRM 3 PI LINE 4 TT SYMBOL 5 AIS SYMBOL 6 MARK 7 CHART 1 WATCH ALERT OFF 6MIN 10MIN 12MIN 15MIN 20MIN 2 ANCHOR WATCH OFF ON 0 01 to 9 99 NM 0 01 NM 3 PRIMARY ALERT 4 ALERT 1 DISP1 ANT 1 2 3 4 M S 2 DISP2 ANT 1 2 3 4 M S 3 DISP3 ANT 1 2 3 4 M S 4 DISP4 ANT 1 2 3 4 M S 5 STORE INTER SW NO YES 5 ANT SELECT 6 AUTO COURSE UP RESET OFF ON 22 5 to 45 0 22 5 7 TIPS GUIDANCE OFF ON 8 TT ...

Page 487: ...s Manual Local Sensor Settings HDG SPD COG SOG POSN Data Source Sensors Analog Gyro No use Manual 2 Gyro Correction PRIM 1 Second 1 Stabilization Mode Bottom Water Sensor Type GPS LOG Data Source Sensors Manual Reference SPD Drift PRIM 1 Other Sensor Settings Wind Depth Below Trans Values for Bow Mid and Aft Temperature Temperature of water surface Water Current Course and speed of water current S...

Page 488: ...a Checkbox unchecked Tracking Own Ship Past Tracks CCRP Checkbox unchecked Primary Checkbox unchecked Secondary Checkbox unchecked Pivot Checkbox unchecked Style Tick Point Length 1 120 min 1 Labels 0 60 min 0 Events User Events Checkbox unchecked Auto Events Checkbox unchecked Position Events Checkbox unchecked Show Newer than 12 hours Newer than 24 hours Newer than 1 week Newer than 2 weeks Newe...

Page 489: ... 30 m Deep Contour 0 99 60 m AIS CPA Auto Activate Limits Log Interval 1 to 4 4 hours Distance Counter AIS DISP Filter Sleep All Targets Voyage data NAV Log Voyage Speed 0 to 10 5 kn Course 0 0 to 30 0 10 0 Target Log Danger Target Log Interval 1 to 100 10 min TT AIS Setting Setting 1 Sleeping Class A ON OFF Sleeping Class B ON OFF MAX Range ON OFF 0 to 99 NM 12 NM MIN Ship Speed ON OFF 0 0 to 9 9...

Page 490: ...tem Alert Settings Shows the settings window Self Test Check various components of the system Data Sharing Display settings Color Palette Checkbox checked Display Brilliance Checkbox checked Customize Wheel rotation Normal Reverse Key beep volume 0 to 3 1 Alert sound volume 1 to 3 3 Display Test Display test patterns Keyboard Test Test the Radar Control Unit ECDIS Control Unit and Trackball Contro...

Page 491: ... August AUTO Automatic BB Blackbox BCR Bow Cross Range BCT Bow Cross Time BLU Blue BRG Bearing BRILL Brilliance BT Bottom Tracking CANCEL Cancel Caps Capital letters CAT Category CCRP Common Consistent Reference Position CH Channel COG Course over the ground CORRE Correlation CPA Closest Point of Approach CPU Central Processing Unit CSE Course CU TM Course up True Motion CYA CYAN DATA Data Dec Dec...

Page 492: ...ational Maritime Organization IND Indication INS Integrated Navigation System IR Interference Rejection J Japanese Jan January Jul July Jun June kyd kiloyard L Long pulse length L L Latitude Longitude LAN Local Area Network LIST List LL Latitude Longitude LO Low MAG Magnetic or Magenta MAN Manual Mar March MARK Mark MAX Maximum MENU Menu MID Middle min minute MIN Minimum MMSI Maritime Mobile Servi...

Page 493: ...e RAD Radius RAIN Rain RANGE Range REF Reference Rel Relative RM Relative Motion RNG Range ROT Rate of Turn S South s second S1 2 Short1 2 pulse length SAR Search And Rescue SART Search And Rescue Transponder SEA Sea SEL Select Sep September SM Statute Miles SOG Speed Over the Ground SPD Speed SPEC Specification SSD Solid State Drive Solid State Device S SRC Sensor Source STAB Stabilization STBY S...

Page 494: ...arget or Target Tracking TTD Tracked Target Data TTG Time to go TTM Tracked Target Information TUNE Tune TX Transmit UNDO Undo UTC Universal Time Coordinated VECT Vector VECTOR Vector VIEW View VRM Variable Range Marker W West W O Without WHT White WOL Wheel Over Line WOP Wheel Over Point WPT Waypoint WT Water Tracking XTD Cross Track Distance YEL Yellow Abbreviation Meaning ...

Page 495: ... length is more than 3 mm Own ship simplified symbol Own ship minimized symbol Radar antenna position This symbol indicates location of the radar antenna Select if position of radar antenna is displayed with symbol in MARK SETTING menu Own ship heading line This line originates from CCRP or Radar antenna position CCRP Consistent Common Reference Point Beam line This line passes through the CCRP or...

Page 496: ...argets in acquisition state automatically detected Automatically detected target symbol is red and it flashes until acknowledged 5 mm in diameter Tracked radar targets 3 mm in diameter Tracked radar targets dangerous targets Dangerous target symbol is red and it flashes until acknowledged Reference targets TT Std or small user selection by Symbol Display Sleeping AIS targets Orientation is towards...

Page 497: ...d when based on user selec tion either beam width or length is more than 3 mm AIS outline ON OFF Activated AIS targets dangerous targets Dangerous target symbol is red and it flashes until acknowledged Activated AIS target with neither reported heading nor COG Activated AIS targets alternative Associated targets represented by AIS target symbols Associated targets represented by radar tar get symb...

Page 498: ... target velocity vectors AIS target velocity vectors Associated target velocity vectors Target past positions Radar target past positions AIS target past positions Associated target past positions Symbol name and description Symbol graphic s Sarah J Sarah J Sarah J Sarah J 18 S arah J S arah J S arah J S arah J 18 ...

Page 499: ...N in off position is yellow AIS search and rescue transmitter SART AIS base station AIS SAR vessel AIS aircraft Selected targets Selected radar targets Selected AIS targets Selected association targets Selected AIS ATON Selected AIS SART Symbol name and description Symbol graphic s BS S arah J S arah J 5 5 S arah J S arah J 18 5 5 5 5 5 ...

Page 500: ...it flashes until acknowl edged Lost radar targets Lost AIS targets Lost associated targets LOST AIS ATON Lost AIS SART Radar and AIS target acquisition area Waypoint Next waypoint Routes Event marker Symbol name and description Symbol graphic s S arah J S arah J S arah J S arah J 18 ...

Page 501: ...EBL Second example show with range marker Variable range marker VRM Range rings Parallel index lines Trial maneuver Displayed flashing during trial maneuver Simulation mode Displayed flashing during TT performance test Drop mark Symbol name and description Symbol graphic s T S ...

Page 502: ...Buoy Buoy Buoy Buoy Buoy Danger Danger Mark Mark Mark Nav Line Coast Line Contour Line Prohibited Area Cable Danger Line Mark Line Mark 7 colors 7 colors 7 colors 7 colors 7 colors 7 colors 7 colors 7 colors 7 colors 7 colors 7 colors 7 colors 7 colors 7 colors 7 colors 7 colors 7 colors 7 colors 7 colors 7 colors 7 colors 7 colors 7 colors 7 colors Buoy Buoy Buoy Buoy Danger Danger Mark Mark Mark...

Page 503: ...Display received AIS message radar mode Access user profile common settings Information show program no operator s manual Undo redo Note This symbol is not displayed on the FURUNO 19 inch monitor unit on radar mode or chart radar mode Screenshot capture Adjust the monitor brilliance Adjust the control unit backlighting Chart mode only Color palette selection ...

Page 504: ...me as corresponding indication in SYSTEM Same as corresponding indication in SYSTEM Same as corresponding indication in SYSTEM HDG SPD and POSN values and MAN 5 in yellow characters Sentence not input when GNS N incorrect value GGA N incorrect value GLL N incorrect value and Status V RMC N incorrect value and Status V Sentence not input when VTG N incorrect value or RMC N incorrect value 1 S only ...

Page 505: ...ng 152 152 Wheel Over Line Alarm A Waypoint is now be ing approached When alert 150 and 151 are not ac knowledged ship crosses WOL When alert 150 is not acknowledged this is generated in stead of alert 151 30 seconds before WOL Be careful that ship crossed WPT 153 153 Track Control Stop Warning B Track control is dis continued because sensors such as GYRO GPS LOG and Autopilot stop input during Tr...

Page 506: ...onds Check the connec tion with all GPS 171 171 Crossing Safety Contour Alarm A When a check area is set the vessel entered a shallower area than the threshold set in Safety Contour Reconfirm Safety Contour setting or change the course 172 172 Off Track Alarm Alarm A Deviation is big be tween planning course and current heading While monitoring route ship position devi ates XTD Limit Reconfirm XTD...

Page 507: ...arget Capaci ty 100 Warning A 100 of memory capacity for AIS tar gets is filled Memory for AIS targets is filled 100 Cancel un necessary targets 190 3 535 AIS Target Acti vate 100 Warning A 100 of capacity for active AIS is used The number of ac tive AIS target be came 100 of its limit Change the unnecessary tar gets to sleep mode 260 260 Emergency Call Alarm A When not acknowl edging alerts relat...

Page 508: ...itor Fan3 Rotation Speed Lowering For MU 231 Con nected to COM1 Main Moni tor Fan3 rotation speed is below threshold If the error fre quently occurs contact FURUNO and in form frequency of occurrence 10001 4 004 Main Monitor Fan4 Rotation Speed Lowering For MU 190 Con nected to COM1 Main Moni tor Fan4 rotation speed is below threshold If the error fre quently occurs contact FURUNO and in form freq...

Page 509: ...muni cation Timeout For MU 190 231 Connected to COM1 There has been no communi cation from proces sor unit through RS485 for 180 sec onds No commu nication implies in completed sen tence or checksum error Check the connec tion of brightness control cable 10001 10 024 Sub Monitor RS485 Communi cation Timeout For MU 190 231 Connected to COM2 There has been no communi cation from proces sor unit thro...

Page 510: ...error occurs after a few minutes contact FURUNO 10001 18 074 Processor Unit GPU Temp High GPU temperature in processor unit ex ceeds threshold Turn off Processor Unit If same error occurs after a few minutes contact FURUNO 10001 19 075 Processor Unit CPU Board Temp High CPU temperature in processor unit ex ceeds threshold Turn off Processor Unit If same error occurs after a few minutes contact FUR...

Page 511: ...s contact FURUNO 10001 28 070 RCU 1 COM Time out Caution B Communication er ror with this remote control unit is de tected 40 seconds timeout Check the connec tion with this re mote control unit 10001 29 071 RCU 2 COM Time out 10001 30 072 RCU 3 COM Time out 10001 31 400 Network Printer Not Available When executing printout network printer is not recog nized network printer connection is interrupt...

Page 512: ...uency of occurrence 10002 4 019 Sub Monitor High Temperature In side Monitor Internal tempera ture exceeds threshold Monitor Connect ed to COM2 Sub Monitor If the error fre quently occurs contact FURUNO and inform fre quency of occurrence 10002 5 007 Main Monitor Fan1 No Rotation For MU 190 231 Connected to COM1 Main Moni tor Fan1 rotation speed is below threshold If the error fre quently occurs c...

Page 513: ... of occurrence 10002 12 023 Sub Monitor Fan4 No Rotation For MU 190 Con nected to COM2 Sub Monitor Fan4 rotation speed is below threshold If the error fre quently occurs contact FURUNO and inform fre quency of occurrence 10002 13 082 Processor Unit CPU Fan No Rota tion Rotation speed of fan in processor unit is below threshold If the error fre quently occurs contact FURUNO and inform fre quency of...

Page 514: ...en discontinued for more than certain time Set at installation Default No timeout Check the connec tion of Ch 1 10050 2 321 Processor Unit Ch 02 COM Time out Input from EC 3000 serial ch 2 has been discontinued for more than certain time Set at installation Default No timeout Check the connec tion of Ch 2 10050 3 322 Processor Unit Ch 03 COM Time out Input from EC 3000 serial ch 3 has been discont...

Page 515: ...ess than UKC lim it 10173 2 635 Non official ENC When Non official ENC is set to Warn ing Caution in chart alert the non offi cial chart area is de tected inside the check area Be careful of the object mentioned left on ship s direc tion 10173 3 636 No Vector Chart When No Vector Chart is set to Warning Caution in chart alert the No Vector Chart area is detected inside the check area Be careful of...

Page 516: ... 95 of capacity for active AIS is used The number of ac tive AIS target be came 95 of its limit Change the unnecessary tar gets to sleep mode 10300 1 030 Sensor Adapter 1 COM Timeout Caution B Communication er ror with this sensor adapter is detected 30 seconds time out This sensor adapter is turned off or there is a problem with net work Check the connec tion with this sen sor adapter and network...

Page 517: ...25 045 RADAR 6 COM Timeout 10300 26 046 RADAR 7 COM Timeout 10300 27 047 RADAR 8 COM Timeout 10300 28 048 RADAR 9 COM Timeout 10300 29 049 RADAR 10 COM Timeout 10300 30 050 ECDIS 1 COM Timeout Caution B Communication er ror with the ECDIS is detected 30 sec onds timeout The RADAR is turned off or there is a problem with net work Check the connec tion between the ECDIS and the network 10300 31 051 ...

Page 518: ...nd inform fre quency of occurrence 10380 131 380 AIS COM Error Warning B Data from AIS has been discontinued for more than set time Set at installation Default 60 seconds AIS is turned off or there is a problem with network Check the connec tion with AIS and network 10400 1 255 Gyro 1 COM Error Caution B Data from this gyro has been discontin ued for more than set time Set at installation Default ...

Page 519: ...ff or there is a problem with network Check the connec tion with this SDME sensor and network 10400 42 281 SDME 2 COM Er ror 10400 43 282 SDME 3 COM Er ror 10400 51 235 Echo Sounder 1 COM Error Caution B Input of depth data from this echo sounder has been discontinued for more than set time Set at installation Default 60 seconds This echo sounder is turned off or there is a problem with network Ch...

Page 520: ... lation Default 180 sec onds BNWAS is turned off or there is a problem with net work Check the connec tion with BNWAS and network 10400 101 360 Wind Sensor 1 COM Error Caution B Data from this wind sensor has been discontinued for more than set time Set at installation Default 60 seconds This wind sensor is turned off or there is a problem with network Check the connec tion with this wind sensor 1...

Page 521: ...d for more than set time Set at installa tion Default 180 seconds Other sensor is turned off or there is a problem with network Check the connec tion with the other sensor and net work 10400 152 311 Other Sensor 2 COM Error 10400 153 312 Other Sensor 3 COM Error 10400 154 313 Other Sensor 4 COM Error 10400 155 314 Other Sensor 5 COM Error 10400 156 315 Other Sensor 6 COM Error 10400 157 316 Other ...

Page 522: ... 174 424 Other Sensor 24 COM Error 10400 175 425 Other Sensor 25 COM Error 10400 176 426 Other Sensor 26 COM Error 10400 177 427 Other Sensor 27 COM Error 10400 178 428 Other Sensor 28 COM Error 10400 179 429 Other Sensor 29 COM Error 10400 180 430 Other Sensor 30 COM Error 10431 431 HUB 3000 LinkUP Error Warning B 10499 500 Watch Alert Warning B Watch alert interval reached ACK the alert check th...

Page 523: ...ng data from this Gyro is deter mined abnormal by integrity check 10500 12 872 Gyro 2 Sensor Banned 10500 13 873 Gyro 3 Sensor Banned 10500 14 874 Gyro 4 Sensor Banned 10500 15 875 Gyro 5 Sensor Banned 10500 21 861 SDME 1 Sensor Banned Caution B Own ship speed data from this SDME sensor is de termined abnormal by integrity check 10500 22 862 SDME 2 Sensor Banned 10500 23 863 SDME 3 Sensor Banned 1...

Page 524: ...S target pair meet the condi tions of association Check the associa tion target 10601 1 272 UTC Time Not Available Caution B Time data of all available GPS sen sor has been not available for more than 3 seconds Check the connec tion with all GPS 10601 2 277 Wind Speed Direc tion Not Available Wind speed direc tion data of all avail able WIND sensors has been not avail able for more than 3 seconds ...

Page 525: ...p s information management is changed 10602 5 470 Datum Change Current datum of EPSF is changed Acquisition timing Once in 60 seconds or when position sensor is changed Check the opera tor s manual of GPS 10603 1 273 Depth Bow Not Available Caution B Depth data of all available depth sensor Bow Miship Stern has been not available for more than 3 seconds Check the connec tion with all echo sounders...

Page 526: ...antenna unit 10740 3 750 EXT Radar COM Error No communication from the antenna unit selected with the Interswitch Check that both the antenna unit and the processor unit are powered Also check the wir ing between the antenna unit and the processor unit 10760 760 Datum Mismatch Caution B Datum mismatch between EPFS and chart Match the datum 10800 1 691 RM Stop Exceed Max XTD Alarm A Route monitorin...

Page 527: ...S mode of ECDIS and AP are different Check the mode in autopilot 10852 667 AP Receive Error Caution B Communication be tween AP and EC DIS is discontinued Check the connec tion with autopilot 10853 675 Use MAN steering Warning B All GPS signals are lost during track control and track control has been continued for 10 minutes in DR Alarm generates every 2 minutes Switch autopilot mode to manual or ...

Page 528: ... 46 30960 960 Takeover AMS Master Warning B 10960 961 Takeover AMS Master Warning B 40960 962 Takeover AMS Master Warning B 50960 963 Takeover AMS Master Warning B ALF ALR Alert name Priority Category Meaning Remedy No Inst No ...

Page 529: ...n 2 MONITOR UNIT 2 1 MU 231 Display Color LCD raster scan daylight bright radar echoes in 32 levels Screen size 23 1 inch Effective area 470 40 x 352 80 mm Resolution UXGA 1600 x 1200 Effective radar diameter 335 2 mm Visible distance 1 02 m nominal 2 2 MU 190 option Display Color LCD raster scan daylight bright radar echoes in 32 levels Screen size 19 inch Effective area 376 32 x 301 06 mm Resolu...

Page 530: ...0 5 0 75 1 5 3 0 75 1 5 3 6 3 6 12 24 3 6 12 24 6 12 24 48 96 2200 Hz with TT range on 32 NM 500 Hz on 96 NM range 4 4 Duplexer FCR 2119 BB 2129 BB 2819 2829 2829W 2139S BB 2839S Ferrite circulator with diode limiter FCR 2839SW Ferrite circulator with TR limiter 4 5 Display related specifications Minimum range 22 m Range discrimination 26 m Range scales NM Range ring interval 0 125 025 0 25 0 05 0...

Page 531: ...Route information indication User chart User chart creation MOB Man Overboard Position etc at time of man overboard are recorded and MOB mark is displayed on the screen 6 INTERFACE 6 1 Processor unit EC 3000 Number of port Serial 7 ports IEC61162 1 2 2 ports IEC61162 1 5 ports Digital input 1 port contact signal 100 ohm max or 24VDC input Alarm output 6 ports contact signal 0 5A 60V max NC 4 NO 2 ...

Page 532: ... ports I O IEC61162 1 2 4 ports IEC61162 1 4 ports MC 3010A analog 3 ports Input 10 to 10 V 0 to 10 V or 4 to 20 mA MC 3020D digital in 8 ports relay contact logics set from program MC 3030D digital out 8 ports relay contact normal open and normal close available 6 5 Radar processor unit RPU 013 Heading signal Sync signal 20 100 VDC or 20 135 VAC 50 60 400 500 Hz or stepper signal 20 100 VDC built...

Page 533: ...t 40 C 8 3 Degree of protection Antenna unit IP56 Processor unit RPU 013 IP20 EC 3000 IP20 IP22 option Transceiver power supply unit IP20 Control monitor unit IP22 Sensor adapter IP20 IP22 option HUB HUB 100 IP20 HUB 3000 IP22 8 4 Vibration IEC 60945 Ed 4 9 UNIT COLOR 9 1 Antenna unit N9 5 9 2 Processor transceiver unit 2 5GY 1 5 9 3 Control unit N3 0 9 4 Monitor unit N2 5 10 PERFORMANCE MONITOR 1...

Page 534: ...FURUNO FCR 21x9 BB FCR 28x9 SERIES SP 6 E3607S01D M This page is intentionally left blank ...

Page 535: ... chart mode 18 6 sleeping targets 4 8 symbol brilliance 4 11 symbol color 4 12 symbols 4 3 symbols chart mode 18 4 target data basic 4 9 target data chart mode 18 7 18 8 target data expanded 4 10 vectors 4 14 voyage data 4 16 18 4 voyage data chart mode 18 4 Alert box 2 54 6 12 20 2 Alert list 20 6 Alert log 20 9 Alert parameters page 12 7 Alert state icon 20 4 Alerts acknowledging 20 6 alert list...

Page 536: ... radar chart radar 1 24 Context sensitive menus chart 6 13 Controls 1 1 Cost parameters 21 3 Course up mode 2 16 CPA TCPA alarm AIS 4 11 TT 3 17 Cursor attributes 2 35 Cursor position box chart 6 18 radar chart radar 1 27 Customize page 22 9 Customized echo programming 2 12 restoring 2 13 restoring to default settings 2 13 selection 2 12 D Danger targets log viewing 19 9 Data sharing 22 8 Deep con...

Page 537: ...ring 14 12 Interference rejector 2 7 Interswitch 2 41 K Keyboard test page 22 11 L Label report 13 15 Line report 13 14 Look ahead page 11 4 15 7 Lost target alarm 3 18 AIS 4 13 M Magnetron reset 2 47 Mains switch 1 6 Manual updates deleting update symbols 7 27 inserting new update symbols 7 26 modifying existing update symbols 7 28 Mariner page 8 10 Mini conning display 24 9 MOB position 1 31 N N...

Page 538: ...es 5 5 erasing marks and lines in an area 5 5 exporting 5 9 features on off 5 13 hiding 5 1 importing 5 10 line entry 5 2 map comment 5 4 map points used 5 3 mark entry 5 2 radar map no 5 4 route display 5 14 showing 5 1 Radar overlay errors in 15 3 15 4 Rain clutter adjustment automatic 2 5 manual 2 5 Range and bearing between two targets 2 24 Range measurement chart 6 21 radar 2 19 radar chart r...

Page 539: ...reenshots page 22 13 self test page 22 7 user default page 22 15 Shallow contour 8 1 Ship and route parameters 21 1 SPD page 16 3 Speed input 1 28 6 27 Split screen 6 24 Standard page 8 4 Static trial maneuver 3 20 Status bar chart display 6 4 radar chart radar 1 15 STBY TX button 2 1 Stern marker 2 33 T TARGET DATA key 4 9 Target list TT AIS 3 11 TARGET LIST key 3 11 Targets page 8 11 Tidal repor...

Page 540: ...t 13 14 creating 13 3 deleting 13 12 deleting objects from 13 8 editing objects on 13 7 full report 13 13 importing 13 10 information in route monitoring 14 6 label report 13 15 line report 13 14 notes 13 5 route monitoring 13 16 selecting objects to display 13 9 tidal report 13 13 User default page 22 15 User events 19 1 User profiles 1 33 1 34 V VECTOR MODE key 3 14 VECTOR TIME key 3 14 Vectors ...

Page 541: ......

Reviews: