48
L i f e B o o k C S e r i e s N o t e b o o k – S e c t i o n F o u r
OPTICAL DIGITAL
AUDIO-OUT CONNECTOR
The optical digital audio-out connector allows you to
download digital audio to MiniDisc recorders or
connect to your sound system to play audio files. It uses
SPDIF (Sony Philips Digital Interface) format. Please use
the following setting when using the digital audio-out
connector. (See Figure 2-5 on page 10 for location)
1. Click on
Start
,
Settings
and then click on
Control Panel
.
2. Select
Yamaha Ds-XG Audio Configuration
.
3. Click on the SPDIF tab and click on
Digital Sources
Only
. If you don’t see this setting, the optical digital
is always on by default.
HEADPHONE JACK
The headphone jack allows you to connect headphones
or powered external speakers to your LifeBook note-
book. Your headphones or speakers must be equipped
with a 1/8" (3.5 mm) stereo mini-plug. In order to
connect headphones or speakers follow these steps: (See
Figure 2-5 on page 10 for location)
1. Align the connector with the port opening.
2. Push the connector into the port until it is seated.
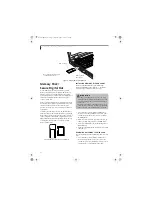
S-VIDEO OUT PORT
The S-Video port allows you to connect and use directly
any S-Video device, such as a VCR or television. The
S-Video standard provides for a higher quality picture
than NTSC or PAL. To connect an S-Video device,
follow these steps: (See Figure 2-4 on page 9 for location)
1. Align the connector with the port opening.
2. Push the connector into the port until it is seated.
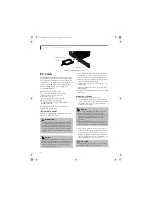
EXTERNAL MONITOR PORT
The external monitor port allows you to connect an
external monitor. To connect an external monitor follow
these steps: (See Figure 2-6 on page 11 for location)
1. Align the connector with the port opening.
2. Push the connector into the port until it is seated.
3. Tighten the two hold-down screws, located on
each end of the connector.
SERIAL PORT
The serial port allows you to connect serial devices, such
as printers or scanners. In order to connect a serial inter-
face device follow these easy steps:
1. Align the connector with the port opening. (See
Figure 2-6 on page 11 for location)
2. Push the connector into the port until it is seated.
3. Tighten the two hold-down screws, located on each
end of the connector.
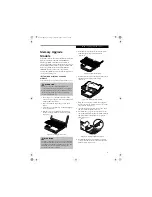
INFRARED PORT
The Infrared IrDA (4 Mbps) port allows for wireless data
transfer between your notebook and other IrDA-
compatible devices, such as another computer or a
printer, without the use of a cable. (See Figure 2-5 on
page 10 for location)
It is important to keep in mind that while carrying out
this form of communication, both devices must be
placed so their infrared ports are directly facing each
other without obstruction. The devices must also be
separated by at least 6" but no more than 36" for
maximum performance.
P O I N T
■
There are several types of cables for connecting a
digital electronic device (e.g., MD player) to the
digital audio-out connector, depending on the
connector type. The connector on your computer is a
Optical Mini Plug (3.5mm diameter mini plug)
■
The frequency of the digital sound output from the
SPDIF output connector is fixed to 48 KHz. If a
sampling rate convertor is not installed in your digital
electronic device (e.g., MD player), recording is not
possible. See the device user manual for more details.
■
The sound recorded through connecting a digital
electronic device (e.g., MD player) to the SPDIF
output connector cannot be used as digital output.
All output data from the SPDIF output connector has
copyright protection information included.
P O I N T
If you plug headphones into the headphone jack, you
will disable the built-in stereo speakers.
P O I N T
Pressing the [Fn] + [F10] keys allows you to change the
destination of your display video. Each time you press
the key combination, you will step to the next choice,
starting with the built-in display panel only, moving to
the external monitor only, finally moving to both the
built-in display panel and an external monitor.
P O I N T
■
Do not move either device while communication is
active as it may interrupt data transmission.
■
Be careful not to scratch the infrared port lens. Dirt,
scratches, or other surface marks can degrade
operation.
Brie3-B5FH-8711.book Page 48 Wednesday, May 14, 2003 10:37 AM
Summary of Contents for Lifebook C2220
Page 7: ...1 1 Preface Brie3 B5FH 8711 book Page 1 Wednesday May 14 2003 10 37 AM ...
Page 11: ...5 2 Getting to Know Your Computer Brie3 B5FH 8711 book Page 5 Wednesday May 14 2003 10 37 AM ...
Page 29: ...23 3 Getting Started Brie3 B5FH 8711 book Page 23 Wednesday May 14 2003 10 37 AM ...
Page 39: ...33 4 User Installable Features Brie3 B5FH 8711 book Page 33 Wednesday May 14 2003 10 37 AM ...
Page 79: ...73 6 Troubleshooting Brie3 B5FH 8711 book Page 73 Wednesday May 14 2003 10 37 AM ...
Page 95: ...89 7 Care and Maintenance Brie3 B5FH 8711 book Page 89 Wednesday May 14 2003 10 37 AM ...
Page 101: ...95 8 Specifications Brie3 B5FH 8711 book Page 95 Wednesday May 14 2003 10 37 AM ...
Page 111: ...105 9 Glossary Brie3 B5FH 8711 book Page 105 Wednesday May 14 2003 10 37 AM ...

