background image

Version 2.6:190307-Eng 

26 

Correcting a missing clocking 
 

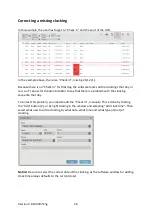
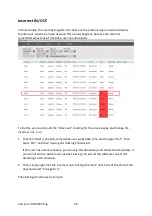
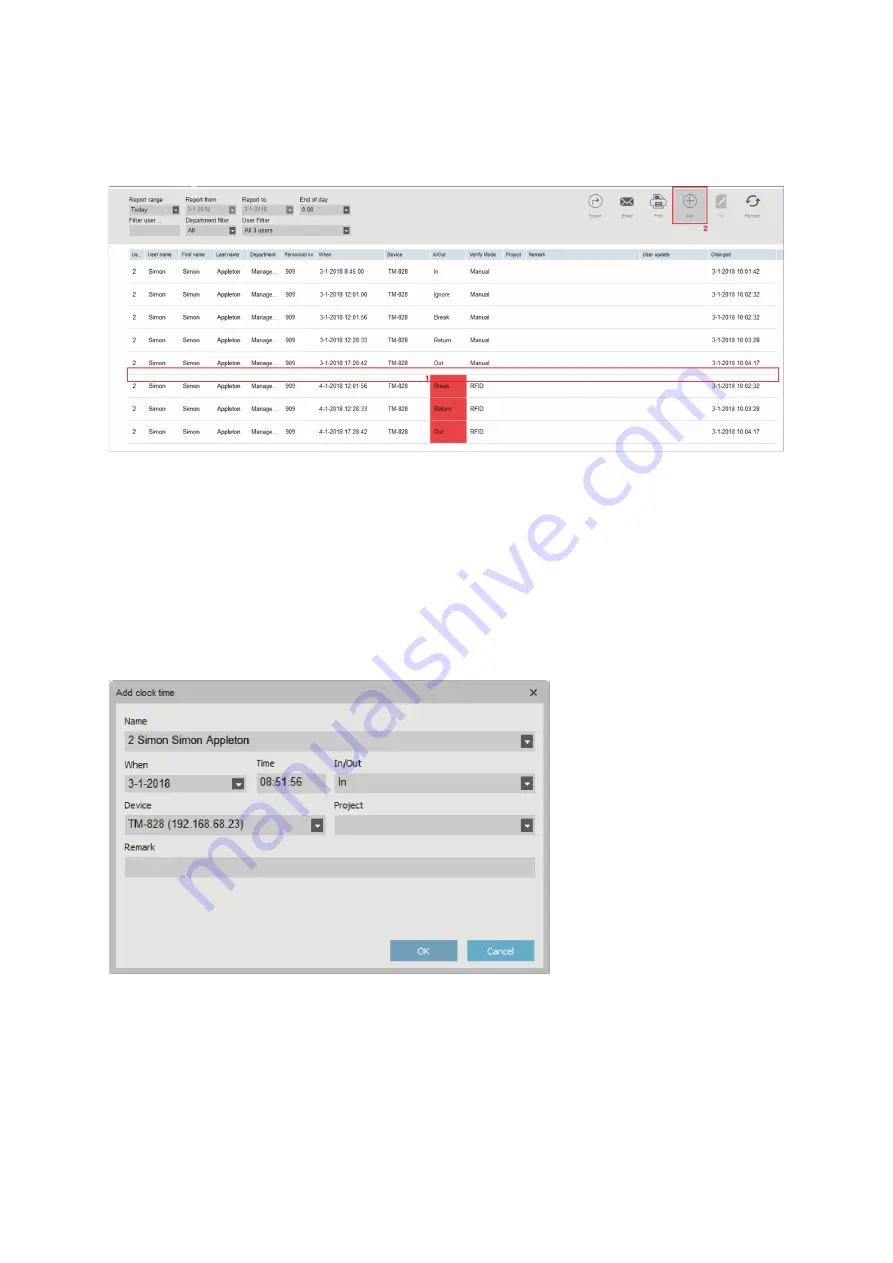
In this example, the user has forgot to “Check in” and the start of the shift. 


In the example above, there is a “Check in”, missing 21/12 (1).  


Because there is no “Check in” for that day, the software marks all the clocking’s that day in 

red, so it’s easier for the administrator to see that there is a problem with the clocking 

sequence that day. 


To correct this problem, you need to add the “Check in”, manually. This is done by clicking 

the “Add” button (2), or by right clicking in the window and selecting “Add clock time”. Then 

select what user to add a clocking to, what date, what time and what type (in/out) of 

clocking. 


Notice!

 Be sure to select the correct date of the clocking, as the software window for adding 

clock time always defaults to the current date! 


Summary of Contents for TM-600 Series

Page 1: ...Version 2 6 190307 Eng 1 QUICK START MANUAL Fr bergs RFID Fingerprint TM 600 Series...

Page 2: ...erminal can be connected to the network by Wi Fi or LAN cable If no network is available the attendance logs can be transferred with a USB memory Follow the steps below according to the connection typ...

Page 3: ...7 Eng 3 Choose language Choose software Normally this will be the TimeMoto PC Software the second listed option Only if you bought the optional Cloud software should you choose the first option Choose...

Page 4: ...Version 2 6 190307 Eng 4 Select Wi Fi name and enter credentials Use DHCP should normally be selected If your network SSID is hidden select Other and enter it s name Confirm your settings...

Page 5: ...s the MENU button on the terminal Scroll down to System settings using the arrows and press the OK button Select Communication and press the OK button 4 Select Network and press OK 5 Make a note of th...

Page 6: ...re Normally this will be the TimeMoto PC software the second listed option Only if you bought the optional Cloud software should you choose the first option Select connection with LAN Local Area Netwo...

Page 7: ...Version 2 6 190307 Eng 7 Use DHCP should normally be selected Confirm your settings At the following screen close your browser Your device is pre registered...

Page 8: ...installed and you ll find an icon for TM TA on your desktop 4 Start the TM TA software Choose Start TM Trial see image below Within 30 days from your purchase you will receive your license key by e m...

Page 9: ...TM TA 2 Click Edit in the main menu and choose Device 3 Click the button Scan in the top right corner In most cases the software locates your device and connects it In some cases the software doesn t...

Page 10: ...e should now be added and shown as connected in the column Active If the connection still doesn t work you might need to check that your computer is connected to the same network and that they are on...

Page 11: ...backup file to Yes and choose Backup file location Remember to press Save in the top of the window to save your setting Import country specific holidays only available in TM To import country specifi...

Page 12: ...tab you enter the following Username this is the name shown in the device when the user identifies and is also the name the user can use to login in the PC software This field takes a max of 8 charact...

Page 13: ...Work Schedule this is changed later Steps for this will be found later in this manual 4 Change tab to the Personal data tab In the Personal data tab you enter the First name and Last name of the user...

Page 14: ...ID card tag you can enroll RFID by scanning them in the terminal See how to do this later in this manual If your user is going to use fingerprint you can skip this step since fingerprints are enrolled...

Page 15: ...nchronize your changes to users The DIRECTION of the synchronization is important Note the following TM PC copies users from the terminal TM to your computer PC PC TM copies users from your comuter PC...

Page 16: ...r be synchronized manually over the network Over the network attendance logs are only automatically performed 8 ENROLLING FINGERPRINTS AND RFID IN THE TERMINAL If your users are going to use fingerpri...

Page 17: ...OK 6 Select the finger you wish to enroll by pressing the number for that certain finger displayed in the terminal display then press OK Follow the instructions given in the display We recommend that...

Page 18: ...or user followed by OK 2 In the menu of the terminal select User management first option and press OK 3 Use the arrows up and down to scroll through the user list and select the user you wish to enrol...

Page 19: ...forgets to check out when their work shift end the report automatically ends the day with the shift s end in the work schedule Marking absence during sick leave is possible Work schedules are suitable...

Page 20: ...at have the same start and end time Input the start end and if there is a rounding to be applied In the example below the work schedule is Monday Thursday 07 00 16 30 and Friday The personnel in this...

Page 21: ...d lunch breaks This means that a check in and a check out is automatically input at the specified times if a user with the schedule has checked in that day before this scheduled break 7 Remember to cl...

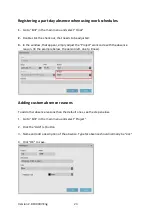
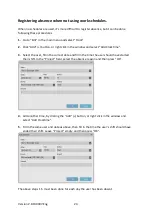
Page 22: ...Clock Grid 2 Select filter for time period and what users to display in the grid 3 Right click on a day you wish to add absence to You can select multiple days or multiple users at the same time 4 Cho...

Page 23: ...that appear simply adjust the Project work code with the absence reason In the example below the person left due to illness Adding custom absence reasons To add other absence reasons than the default...

Page 24: ...locktime 3 Select the user fill in the correct date and fill in the time the user should have started their shift In the Project field select the absence reason and then press OK 4 Add another time by...

Page 25: ...to check out he will be asked if he want to check out when he arrives the following day This is due to the last clocking was a Check in This can however be solved by the user directly if he clicks on...

Page 26: ...ier for the administrator to see that there is a problem with the clocking sequence that day To correct this problem you need to add the Check in manually This is done by clicking the Add button 2 or...

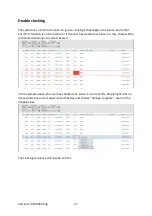
Page 27: ...on is not turned on or if the user has clocked out twice in a row there will be red marked clocking s to correct as well In the example above the user has checked out twice To correct this simply righ...

Page 28: ...us day and change the incorrect out to in 1 Click the Add button select what user what date time and the type Out Then press OK and their missing out clocking should exist If the user has a work sched...

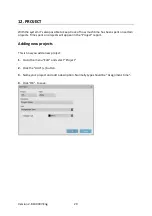
Page 29: ...been spent on certain projects Time spent on projects will appear in the Project report Adding new projects This is how you add a new project 1 Go to the menu Edit and select Project 2 Click the Add b...

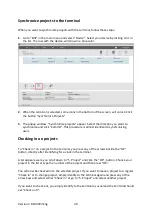
Page 30: ...st identical to synchronizing users Checking in on projects To Check in on a project in the terminal you press any of the arrows beside the OK button directly after identifying for a clock in the term...

Page 31: ...s report shows information of time spent on work codes and projects If a person as shown as Sick in the Report above you can tell how long they spent a certain day as sick in this report Payment repor...

Page 32: ...re functions not described in this manual Payment class rules Scheduling using the Planning grid for users with non fixed schedules For more information about these functions or more detailed instruct...

Page 33: ...6 190307 Eng 33 More manuals for this system can be found at www frobergs se tm and www tidsupport se kb2 For support contact us at tid frobergs se or create an account and a support ticket at www tid...

Reviews: