187
Camera
1
Finder display
i
(
)
Auto timer
ON or OFF
p
When you select “OFF”, the setting is completed.
p
You can set Auto Timer also by pressing
6
from
the Finder display.
2
Enter a delay time (seconds).
p
Enter from “01” through “15”, in two digits.
Information
p
Even when you set “File restriction” to “File restricted”,
the still or moving images can be output from the
destination mobile phone by transmitting the images
using infrared data exchange or by copying them to the
microSD memory card.
p
After saving, you can use “File restriction” on page 294
to change the settings.
p
When “Store in” is set to “microSD” in Movie Mode, you
cannot set “File restriction”.
Auto Timer
At Camera start-up
OFF
■
When Auto Timer is set to “ON”
When set to “ON”, “
” appears on the Finder display.
If you press
O
o
(
), a confirmation tone sounds and
“
” blinks. The Call/Charging indicator flickers every
about 1 second until about 5 seconds before shooting.
From about 5 seconds before shooting, the Call/Charging
indicator flickers every about 0.5 second, and the
confirmation tone sounds every about 1 second. Shooting
takes place after the set delay time has elapsed.
p
To cancel shooting, press
l
(
) or
r
while
the Call/Charging indicator is flickering. Even if you
cancel shooting, “Auto timer” stays set to “ON”.
p
If you press
O
o
(
) before the delay time has
elapsed, shooting takes place immediately.
Information
p
You cannot use Auto Timer in “Manual” of Continuous
Mode.
p
Auto Timer will be set to “OFF” when shooting ends.
■
To operate the Icon Menu from the Finder display
You can operate the icons instead of the Function menu to
change the settings of the camera. You can set the
following: “Brightness”, “White balance”, “Photo mode”,
“Image quality set.”, “Image size setting”.
1. Finder display
l
(
)
Select an icon
Select an item.
p
You can operate the Icon Menu by pressing
1
,
2
,
3
,
4
, or
5
from the Finder display.
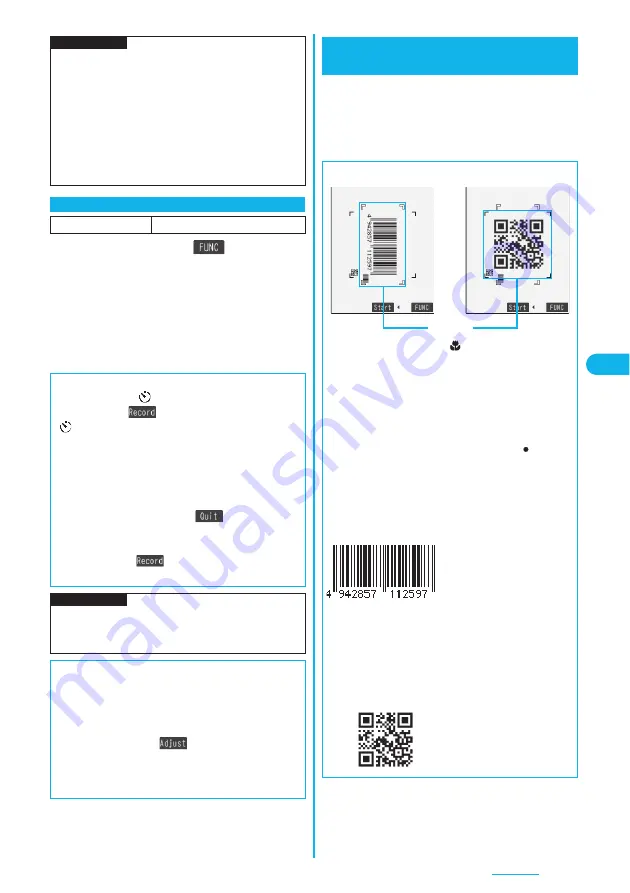
You can use the outside camera to scan JAN codes
and QR codes and store them as data.
From the scanned data, you can make calls, compose
i-mode mail messages, and access Internet web
pages, and so on.
Bar Code Reader
Using Bar Code Reader
■
When scanning with Bar Code Reader
p
Slide the close-up lever to “
” and start scanning. (See
page 184)
p
Scan a code with the camera about 8 cm away from the
code. However, when the code is small, bring the
camera close to it slowly so that the code is scanned
larger within the guide frame.
p
Scan so that the camera is in parallel with the code.
p
After scanning, return the close-up lever to “
”.
■
JAN Code
JAN Code is a bar code that denotes numerals with
the vertical bars of a different width.
You can scan 8-digit (JAN8) and 13-digit (JAN13) JAN
codes.
p
“4942857112597” is
displayed when you scan
this bar code with the
FOMA phone.
■
QR Code
QR Code is one of the 2-dimensional codes that
denotes data in the vertical and horizontal directions.
Alphanumeric and other characters (kanji, katakana,
and pictographs) are displayed.
Some QR codes have image or melody information.
p
“
株式会社
NTT
ドコモ
” is
displayed when you scan
this QR code with the
FOMA phone.
<
>
Guide frame
Summary of Contents for P703i
Page 52: ...50 MEMO ...
Page 108: ...106 MEMO ...
Page 396: ...394 MEMO ...
Page 455: ...453 Index Quick Manual Index 454 Quick Manual 460 ...
Page 506: ...Kuten Code List ...


