321023
95
NOTE:
Ensure test cord cables and fuses meet specifications for unit under test (see Technical
Sheet for unit under test).
6. Replace compressor protector cover securely.
7. Plug test cord into outlet, then press and release start cord switch.
CAUTION
To avoid risk of damage to compressor windings, immediately disconnect (unplug) test cord from
power source if compressor does not start. Damage to compressor windings occurs if windings
remain energised when compressor is not running.
If compressor runs when direct wired, it is working properly. Malfunction is elsewhere in system.
If compressor does not start when direct wired, recover system at high side. After the system is
recovered, repeat compressor direct wire test.
If compressor runs after system is recovered (but would not operate when wired direct before
recovery) a restriction in sealed system is indicated.
If motor does not run when wired direct after recovery, replace faulty compressor.
13.7
Dehydrating Sealed Refrigeration System
Moisture in a refrigerator sealed system exposed to heat generated by the compressor and motor
reacts chemically with refrigerant and oil in the system and forms corrosive hydrochloric and
hydrofluoric acids. These acids contribute to breakdown of motor winding insulation and corrosion of
compressor working parts, causing compressor failure.
In addition, sludge, a residue of the chemical reaction, coats all surfaces of sealed system, and will
eventually restrict refrigerant flow through capillary tube.
To dehydrate sealed system, evacuate system (see paragraph
Evacuation).
13.8 Leak
Testing
DANGER
To avoid risk of serious injury or death from violent explosions, NEVER use oxygen or acetylene
for pressure testing or cleaning out of refrigeration systems. Free oxygen will explode on contact
with oil. Acetylene will explode spontaneously when put under pressure.
It is important to check sealed system for refrigerant leaks. Undetected leaks can lead to repeated
service calls and eventually result in system contamination, restrictions, and premature compressor
failure.
Refrigerant leaks are best detected with halide or electronic leak detectors.
13.8.1
Testing Systems Containing a Refrigerant Charge
1. Stop unit operation (turn refrigerator off).
2. Holding leak detector exploring tube as close to system tubing as possible, check all piping, joints,
and fittings.
NOTE:
Use leak detection fluid on areas leak detector cannot reach or reliably test.
13.8.2
Testing Systems Containing No Refrigerant Charge
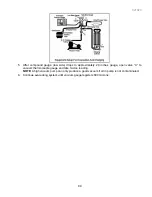
1. Connect cylinder of nitrogen, through gauge manifold, to process tube of compressor and liquid line
strainer.
Summary of Contents for RX256DT4X1
Page 11: ...321023 11 2 3 Refrigerant Flow...
Page 12: ...321023 12 2 4 Cabinet Air Flow...
Page 13: ...321023 13 2 5 Ice And Water Dispenser Diagram...
Page 14: ...321023 14 2 6 Water Valve Diagram...
Page 15: ...321023 15 2 7 Typical External Sweat Pattern...
Page 16: ...321023 16 3 INSTALLATION...
Page 17: ...321023 17...
Page 18: ...321023 18...
Page 76: ...321023 76 Ice Water Dispensing Board...
Page 78: ...321023 78 Mid Electronic Specification Control RX256DT4X1 RX256ET2B1 RX256ET2W1...
Page 104: ...321023 104 14 WIRING DIAGRAMS 14 1 Wiring Schematic RX256DT7X1...
Page 105: ...321023 105 14 2 Wiring Diagram RX256DT7X1...
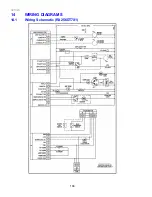
Page 106: ...321023 106 14 3 Wiring Schematic RX256DT4X1 RX256ET2B1 RX256ET2W1...
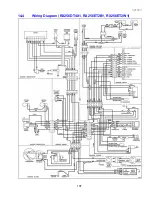
Page 107: ...321023 107 14 4 Wiring Diagram RX256DT4X1 RX256ET2B1 RX256ET2W1...
Page 108: ...321023 108 NOTES...


