70
Revision date: 12.02.16
7:,672)7+(:5,67$66(0%/<FRQWLQXHG
8. Slide the Twist-of-the-Wrist assembly onto the
aluminum channel from the ground end. (This is the
free end of the channel.)
9. Using the conduit as a guide, adjust the aluminum
channel on the threaded rod so the channel runs
parallel with the end rafter. In some instances, you
may need to trim the conduit.
10. Attach the roll-up conduit to the square shaft of
the assembly by inserting a 1/4" x 2" carriage bolt
(FAH005B) through the hole in the conduit and tubing
adapter. Tighten the nut.
11. Test the operation of the Twist-of-the-Wrist assembly
and repeat the steps for the remaining assembly.
NOTE:
If cover rolls in desired direction, but you want
to turn crank in the opposite direction for the same
result, unbolt, reposition/flip gearbox, and remount it
on the same side of the mounting bracket
.
12. Repeat the steps to install the remaining roll-up panel
and Twist-of-the-Wrist Assembly.
13. Once both assemblies are installed, continue with the
installation of the anti-billow rope.
INSTALL THE ANTI-BILLOW ROPES
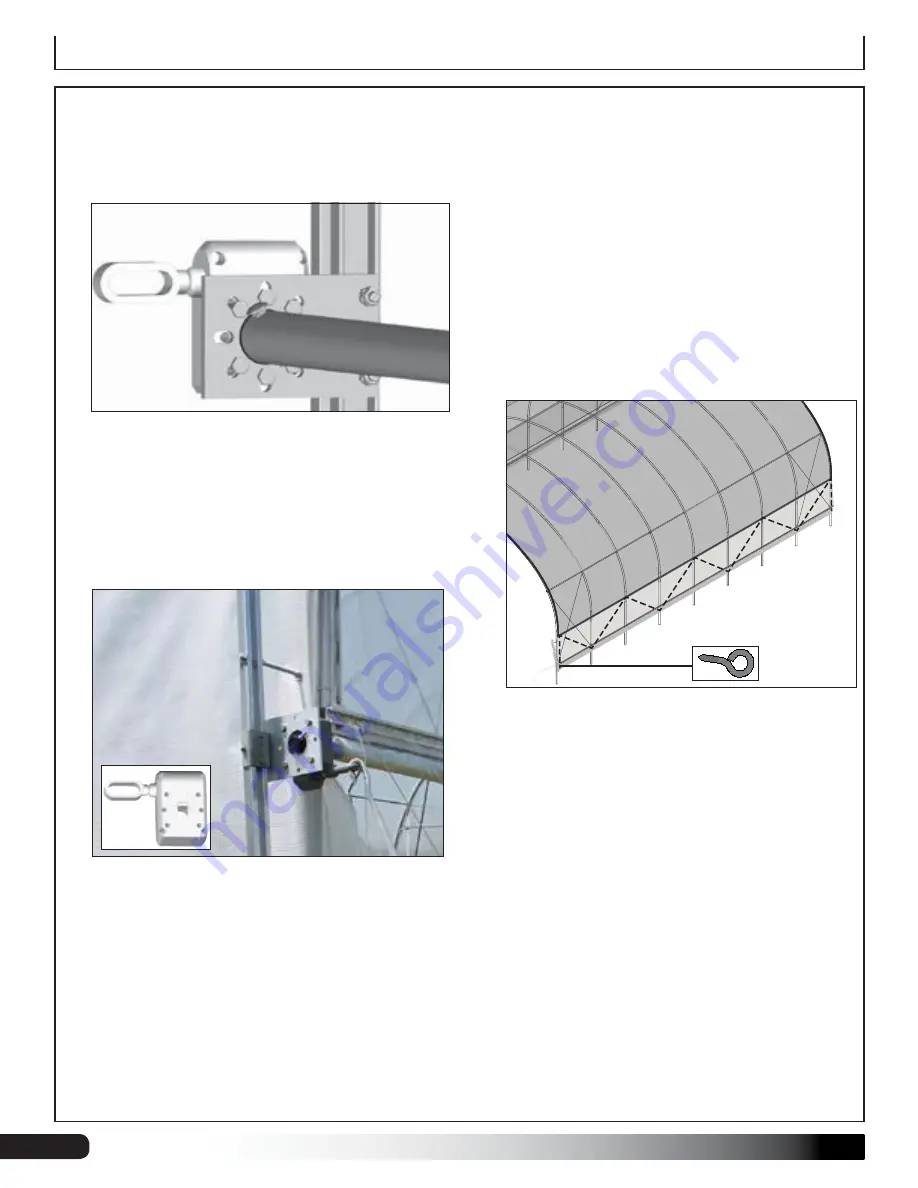
The anti-billow rope is installed along the outside of the
frame and stretches between the ribbon board and the
baseboard. When installed correctly, the anti-billow rope
helps keep the roll-up panel in place when it is fully or
partially closed. Use the diagram as a guide and complete
the steps to install the anti-billow rope.
1. Beginning
at
one end rafter
, take two (2) eye screws
(FA2155) and attach one to the baseboard and one to
the ribbon board. Align the FA2155 eye screws with
each other. See circles below.
ATTENTION:
If a baseboard is not present to mount
the eye screws, purchase eyebolts locally to mount to
the individual rafter legs/ground posts.
2. Using the sample diagrams as guides, move to the
next rafter and attach the eye screw to either the
baseboard or the ribbon board, depending on the
desired pattern.
3. Continue installing eye screws until reaching the other
end rafter and finish installation by repeating Step 1.
4. Take one end of the bulk roll of rope, thread it through
the eye screws, and secure the end to an eye screw.
5. Move to the other end of the rope, pull to remove
slack, and cut to length. Tie the end to the eye screw.
6. Test the roll-up panel operation and adjust rope if it
interferes with the curtain.
7. Repeat for the remaining roll-up side panel.
8. Read the shelter care and maintenance information.
FA2155 Eye
Screws
Roll-Up Side Panel Installation


