E
B
C
D
A
Basic Control Elements
With the control unit keys, you can ergonomically
control the functions of the e-bike system. The
hand can remain on the handlebar grip while
the thumb operates the control unit keys. The
information on the display tells you about the
selected assistance level and gives you more
information about your Brose Drive System.
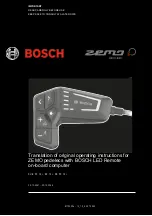
Switch the e-bike on or off with the «On/Off» key (A).
With the «Menu» key (B), a range of information
can be called up while riding.
Use the «Increase» (C) and «Decrease» (D) keys
to increase or decrease the assist level. If you are
in a menu (e.g. settings), you can use these two
keys to scroll up or down in the menu.
Press the «Menu» key (B) to con
fi
rm the settings.
You can go back one level at any time using
the «Walk assist» key (E). Changed settings are
saved.
The menu and the settings menu cannot
be accessed while riding.
All the interface illustrations and text on
the following pages correspond to the
release status of the software. Due to the
fact that the software can be updated
several times during a year, it is possible
that the interface illustrations and/or
interface texts will change slightly after
an update.
基本的な操作方法
コントロールユニットキーを使用して
e-bike
システ
ムの機能をコントロールすることができます。ハン
ドルバー・グリップに手を置きながら、お親指でコ
ントロールユニットキーを操作することができます。
ディスプレイに表示される情報は、選択されたア
シスタンスレベルと、ブローゼドライブシステムに
関する詳細情報を示します。
「
On/Off
」キー(
A
)で
e-Bike
の電源を入れたり切っ
たりします。
「メニュー」キー(
B
)では、走行中のさ
まざまな情報を呼び出すことができます。
「+」(
C
)および「-」(
D
)キーを使って、アシストレベ
ルを増加または減少させます。メニューモード(設
定など)に入っている場合は、この
2
つのキーでメ
ニューを上下にスクロールすることができます。
「メニュー」キー(
B
)を押すと、設定が確定します。
「ウォークアシスト」キー(
E
)でいつでも
1
段階戻るこ
とができます。変更した設定は保存されます。
走行中は、メニューや設定メニューにはア
クセスできません。
以下のページに掲載されているインターフェ
イスのイラストとテキストは、すべて本ソフト
ウェアのリリース状態に対応しています。本
製品は年に数回アップデートされることがあ
るため、アップデート後にインターフェースの
イラストや文章が若干変更されることがあり
ます。
ディスプレイ
- DISPLAY
68
Summary of Contents for INTEGRA XTF1.5
Page 10: ...INTEGRA XTF1 5 INTEGRA XTF 1 5 SPORT X 1 X 1 X 1 X 1 BMX X X X X X X X 1 10...
Page 51: ...20 150 km 3 4 40 4 5 1 2 0 C 15 15 h 3 EN USING YOURBICYCLE 51 JPN...
Page 58: ...Completely screw the fixing screw to lock the battery USING POWER ASSISTED PEDALLING 58...
Page 83: ...e Bike EN 83 JPN DISPLAY...
Page 107: ...LED 5mm 17mm EN TROUBLESHOOTING 107 JPN...
Page 110: ...TROUBLESHOOTING Errore Spiegazione Soluzione 10 11 T4 12 20 T4 21 T4 24 25 T4 26 T4 40 110...
Page 112: ...Errore Spiegazione Soluzione 72 T4 73 T4 74 T4 80 T4 81 82 T4 83 T4 84 T4 TROUBLESHOOTING 112...
Page 116: ......


