8.4
10.
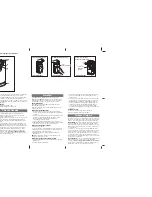
Insert the threaded rear fitting into the already
clamped post mounting bracket.
11.
Position the gate mounting bracket on a cross member of
the gate suitable for supporting the arm and bracket with the
gate in the
FULL CLOSED POSITION pressed firmly
against the closed stop
. Use a second C
-
clamp to hold it in
place.
12.
Check the levelness of your operator on the
Bottom of the
arm. Do not use the top to check levelness as it is a sloped
surface.
Make the appropriate adjustments, and check
your setback one last time to be sure the positioning did not
shift during leveling. With the brackets clamped in place be
sure that the gate can move to the full closed position.
14.
Attach the mounting brackets either using a carriage bolt or lag bolt with a washer on both
sides of the structure and a nut on the back side of the structure
or
by welding. Always take the
proper precautions, protective eyewear, etc. when drilling or welding.
13.
Remove the operator arm from the brackets. Leaving the
brackets clamped in place
mark your holes
. If you are bolting
your brackets in place, remove the mounting brackets and drill
the marked holes using a power drill with a 3/8” drill bit for the
post and 1/4” drill bit for the gate.
Tip:
Using a level on top of the drill as a guide helps you to
keep your holes level.
Lift up on arm
Estate Swing
Summary of Contents for Estate Swing E-S 1100 Series
Page 51: ...9 4 Estate Swing...


