22
ExtremeWare 7.2e Installation and User Guide
Summit 400-48t Switch Overview and Installation
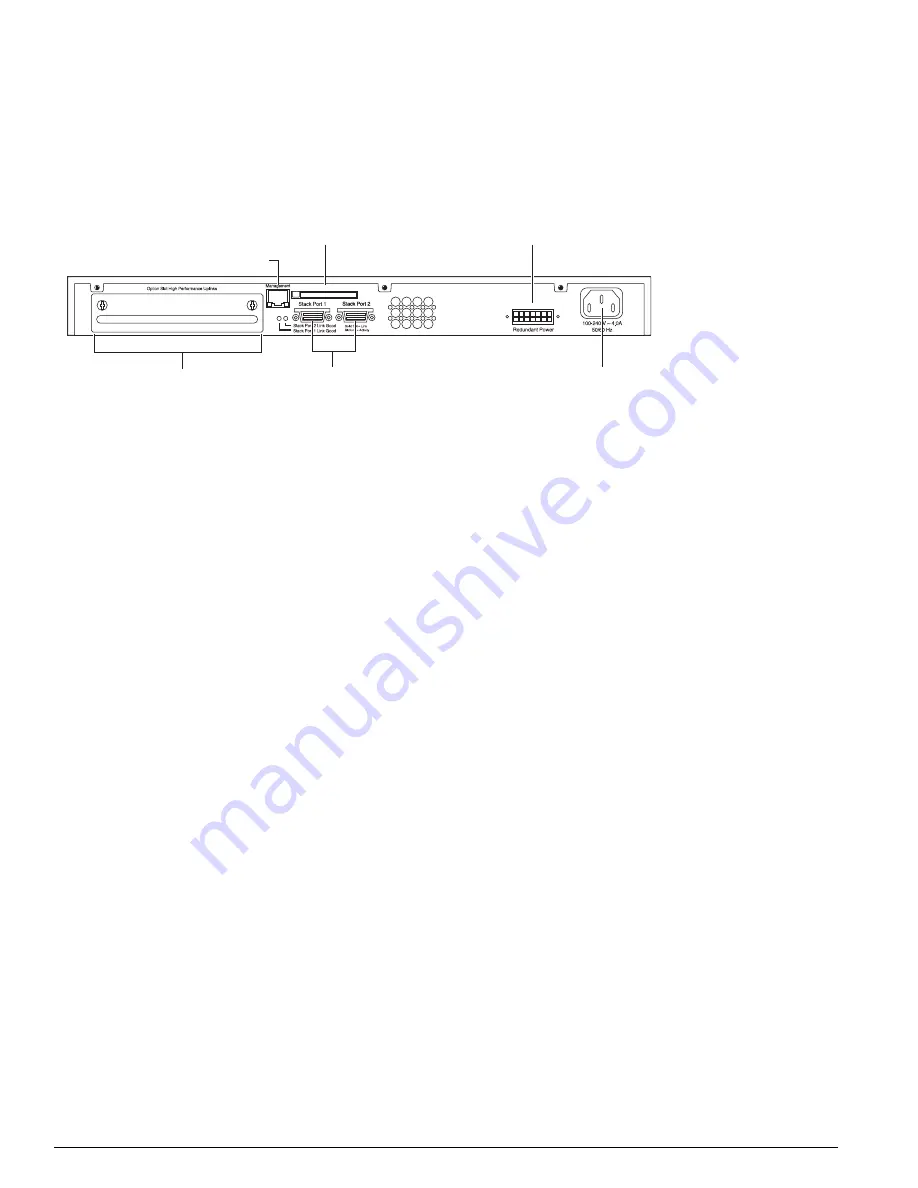
Summit 400-48t Switch Rear View
Figure 2 shows the rear view of the Summit 400-48t switch.
Figure 2: Summit 400-48t switch rear view
The rear panel consists of:
•
An option slot for the dual 10 Gigabit uplinks
To install this option, see “Installing Optional Features” on page 39.
•
The management port
The 10/100/1000BASE-T Ethernet management port communicates directly with the CPU of the
switch, bypassing the switch. Connect an Ethernet cable directly from a laptop into the management
port to view and locally manage the switch configurations.
Do not assign an in-band IP address to the management port VLAN. The management port VLAN is
an out-of-band VLAN, so if it is assigned an in-band IP address (an address where the source and
destination are in the same subnet), the switch treats it as a normal VLAN and attempts to route
traffic through it.
Extreme Networks does not recommend that you use the management port to route traffic to any
front panel port on the switch. The management port is designed only for switch management
purposes.
There are two LEDs for the management port, located in the bottom corners of the port. The LED on
the bottom right turns solid green when a cable is inserted and the port detects a link. The LED on
the bottom left blinks green when there is transmission activity on the link.
•
A compact flash slot
This slot is currently not supported but is reserved for future use.
•
Two high-performance stacking ports
These ports are currently not supported but are reserved for future software features.
•
Vents for the internal power supply fan.
•
The connector for the optional Extreme External Power Supply System.
For further information about this feature, see “Installing Optional Features” on page 39.
•
AC Power Socket
The Summit 400-48t switch automatically adjusts to the supply voltage. The power supply operates
from 100 VAC to 240 VAC.
ES4K018A
10 Gigabit
uplink option
Mgmt port
Compact flash
(reserved for future)
10 Gigabit stacking ports
(reserved for future)
Power socket
External power
supply connection
Summary of Contents for ExtremeWare 7.2e
Page 14: ...14 ExtremeWare 7 2 0 Software User Guide Contents...
Page 18: ...18 ExtremeWare 7 2e Installation and User Guide Preface...
Page 80: ...80 ExtremeWare 7 2e Installation and User Guide Accessing the Switch...
Page 102: ...102 ExtremeWare 7 2e Installation and User Guide Virtual LANs VLANs...
Page 108: ...108 ExtremeWare 7 2e Installation and User Guide Forwarding Database FDB...
Page 180: ...180 ExtremeWare 7 2e Installation and User Guide Security...
Page 194: ...194 ExtremeWare 7 2e Installation and User Guide Ethernet Automatic Protection Switching...
Page 218: ...218 ExtremeWare 7 2e Installation and User Guide Spanning Tree Protocol STP...
Page 248: ...248 ExtremeWare 7 2e Installation and User Guide Interior Gateway Protocols...
Page 256: ...256 ExtremeWare 7 2e Installation and User Guide IP Multicast Routing...
Page 308: ...308 ExtremeWare 7 2e Installation and User Guide Using ExtremeWare Vista on the Summit 400...
Page 316: ...316 ExtremeWare 7 2e Installation and User Guide Technical Specifications...
Page 324: ...324 ExtremeWare 7 2e Installation and User Guide Software Upgrade and Boot Options...


