


- 43 -
Z22
Z21
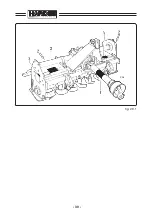
fig. 4.2.2
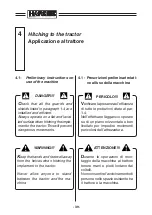
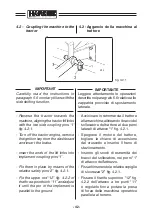
- Avviare il motore del trattore ed azio-
nare il sollevamento della macchina
da terra, quindi spegnere il motore
del trattore e togliere la chiave di
accensione dal cruscotto.
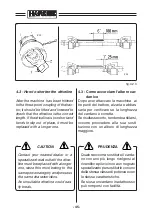
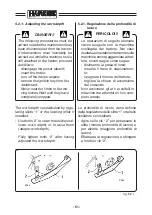
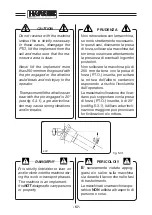
- Agire sulla regolazione “13” dei tiran-
ti dei bracci del sollevatore per evita-
re eccessive oscillazioni trasversali.
E’ consigliabile una oscillazione di
circa 50 mm per parte (2 inches).
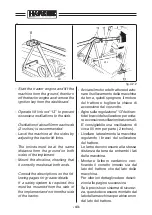
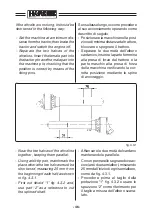
- Livellare lateralmente la macchina
regolando i bracci del sollevatore
del trattore.
Le lame devono essere alla stessa
distanza da terra da entrambi i lati
della macchina.
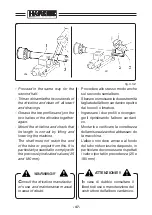
- Montare l’albero cardanico veri-
ficando il corretto innesto sia dal
lato del trattore che dal lato della
macchina.
Per ulteriori dettagli vedere descri-
zioni alle pagine successive.
Se è previsto un sistema di sicurez-
za, questo deve essere montato dal
lato della macchina operatrice e non
dal lato del trattore.
- Start the tractor engine and lift the
machine from the ground, then turn
off the tractor engine and remove the
ignition key from the dashboard.
- Operate lift link rod “13” to prevent
excessive oscillations to the side.
Oscillation of about 50 mm each side
(2 inches) is recommended.
- Level the machine at the sides by
adjusting the tractor lift links.
The knives must be at the same
distance from the ground on both
sides of the implement.
- Mount the driveline, checking that
it correctly meshes at both ends.
Consult the descriptions on the fol-
lowing pages for greater details.
If a safety system is required, this
must be mounted from the side of
the implement and not from the side
of the tractor.
Summary of Contents for HARDEE HT3
Page 2: ......
Page 22: ...10...
Page 27: ...15 39914100 g 2 2 1 g 2 2 2 Z11 399143000 g 2 2 4 Z13 Z14 g 2 2 3 399CEE001 399CEE002 Z12...
Page 42: ...30 g 2 9 1 Z06...
Page 43: ...31 1 g 2 9 2 399CEE001 39914100 Z11 Z12...
Page 44: ...32 g 2 9 3 2 72 0386 00...
Page 45: ...33 3 g 2 9 4 72 0390 00...
Page 46: ...34 5 g 2 9 5 72 0391 00...
Page 50: ...38...
Page 98: ...86...
Page 106: ...94...
Page 107: ...95 9 Assembly instructions for Kit standing jack Schema di montaggio per Piedino di appoggio...
Page 108: ...STANDING JACK PIEDISTAL STUTZHALTER PIEDINO DI APPOGGIO HT2 1 10 12 11 4 5...
Page 110: ...7 3 6 2 4 5 STANDING JACK PIEDISTAL STUTZHALTER PIEDINO DI APPOGGIO HT3...
Page 112: ...7 12 12 8 10 9 11 6 STANDING JACK PIEDISTAL STUTZHALTER PIEDINO DI APPOGGIO HT4...
Page 114: ...STANDING JACK PIEDISTAL STUTZHALTER PIEDINO DI APPOGGIO HT6 7 11 11 8 10 9 12 6...
Page 116: ...STANDING JACK PIEDISTAL STUTZHALTER PIEDINO DI APPOGGIO HT9 8 13 13 9 11 10 12 7...
Page 118: ......
Page 119: ......


