


Section 11: Hyper-Surround
11 - 8
Euphonix CS3000/2000 Operation Manual
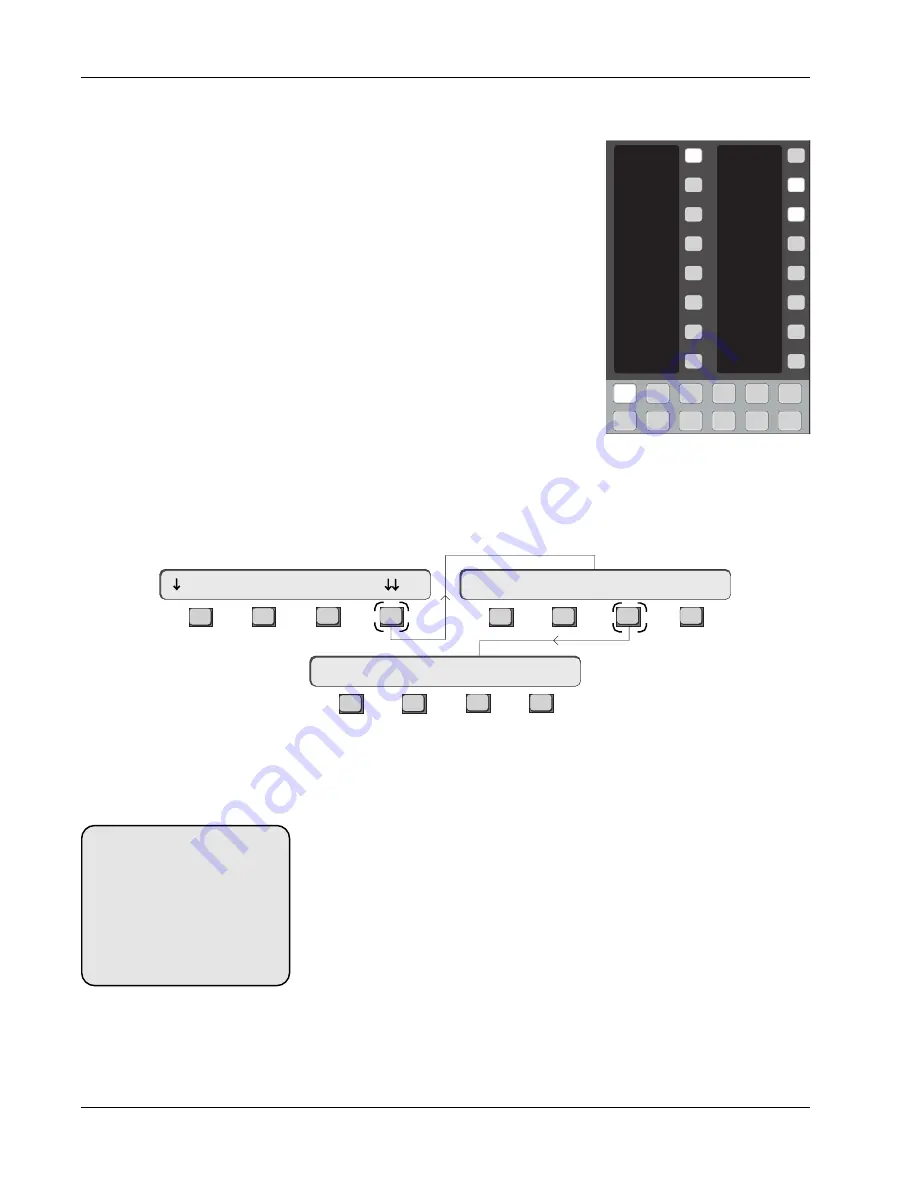
When in Pan Assign mode, the two columns of DSC Assignable Keys become
integral to the Hyper-Surround system.
The left column keys are the Panner Keys,
used for assigning elements (faders) to
panners. The panner name will appear in the
8 character display next to each left column
key. Once panners are set up, you simply
attention a fader then turn on the desired
panner by pressing a panner key. This will
send that faders signal to a stem via the
selected panner.
Quick Tip: Assigning faders to panners from
the “Active” template is easy. From the top-
level Pan Assign mode menu, press [
F4
]
(down arrows) and then [
F3
] (Active). A
template will appear on the DSC screen.
Use the [
+
]/[
-
] keys to select a panner then press the desired fader attention
key. You will see that fader block turn green in the template indicating it is
assigned (turned on). This is a quick way to assign faders to your effects,
music or dialog stems in groups.
The Assignable Keys
The right column keys add the following functionality:
Bus mode
- Used to hard assign a Hyper-Surround fader to individual
stem buses. The tracks of a predub for example can be easily hard
reassigned to the appropriate stem buses using this mode. Press [
Bus
Assign
] then the desired panner key. You see the screen change from
a panner set to individual bus level & mute controls. These are not bus
master controls, they control only that faders signal to the stem buses.
Pan mode
- Provides full pan, surround, focus and divergence control
for panning an element into position within a stem.
Assign & Attention
- Changes the operation of the left column
panner keys. When in
Assign mode
the panner keys are used to
assign/un-assign a fader to a panner, i.e., send LF4 to panner 1. When
in
Attention mode
, the panner keys become simply attention keys
allowing a panner to be accessed, viewed and controlled but not
1
2
3
4
5
6
7
8
9
10
11
12
13
14
15
16
Faders
Mon
Select
Snap
Shot
Preset
Macro
Pg 1
Pg 2
Pg 3
Pg 4
Store
Mon
Cnfg
Studio
Panner 1
Panner 2
Panner 3
Panner 4
Panner 5
Panner 6
Panner 7
Panner 8
BUS
PAN
ASSIGN
ATTN
L
C
R
S
Faders
Pg 1
Pg 2
Pg 3
Pg 4
Store
Mon
Select
Snap
Shot
Preset
Macro
Mon
Cnfg
Studio
F3
F1
F2
F4
F3
F1
F2
F4
F3
F1
F2
F4
Pan Assign Menu
Preset
Setup
Active
P1->
Assign Panner 1
3P1->
OFF
SIDE NOTE:
Press the key adjacent to the
assignable display
BUS
designa-
tor and then a panner key to put
that panner into direct busing
mode. Press the key adjacent to
the assignable display
PAN
designator and then a panner key
to put that panner into pan mode.
Summary of Contents for MixView CS2000
Page 1: ...CS3000 CS2000 Operation Manual Version 3 0 Revision 1...
Page 14: ...Table of Contents xiv Euphonix CS3000 2000 Operation Manual This page intentionally left blank...
Page 303: ...Euphonix CS3000 2000 Operation Manual A 1 A APPENDICES EUPHONIX MIXING SYSTEMS...
Page 304: ...A 2 Euphonix CS3000 2000 Operation Manual This page intentionally left blank...
Page 315: ...Index CS3000 2000 Operation Manual I 1 I INDEX EUPHONIX MIXING SYSTEMS...
Page 316: ...I 2 CS3000 2000 Operation Manual Index This page intentionally left blank...
Page 324: ...I 10 CS3000 2000 Operation Manual Index This page intentionally left blank...


