EPSON Stylus COLOR C70/C80
Revision A
Adjustment
Adjustment
159
5.2.9 Platen Gap Adjustment (Mechanism Adjustment)
This section describes how to perform the platen gap adjustment. This adjustment must
be made under the following conditions.
NOTE:
This adjustment can not be made without removing upper case and
middle case.
1.
Carriage Guide shaft has been replaced or removed.
2.
Lubrication has been done for the carriage guide shaft.
NOTE:
Lubrication for the carriage guide shaft requires its removal once.
And Do notlubricate the oil directory without removal.
(Refer to Chapter 6 "Maintenance".)
3.
Carriage unit has been replaced or removed.
4.
Platen Gap adjust lever for the right side or the bushing for the left side
has been moved.
1.
Make sure check that AC cable disconnects to the printer.
2.
Prepare the thickness gauge. (thickness = 1.35 mm)
3.
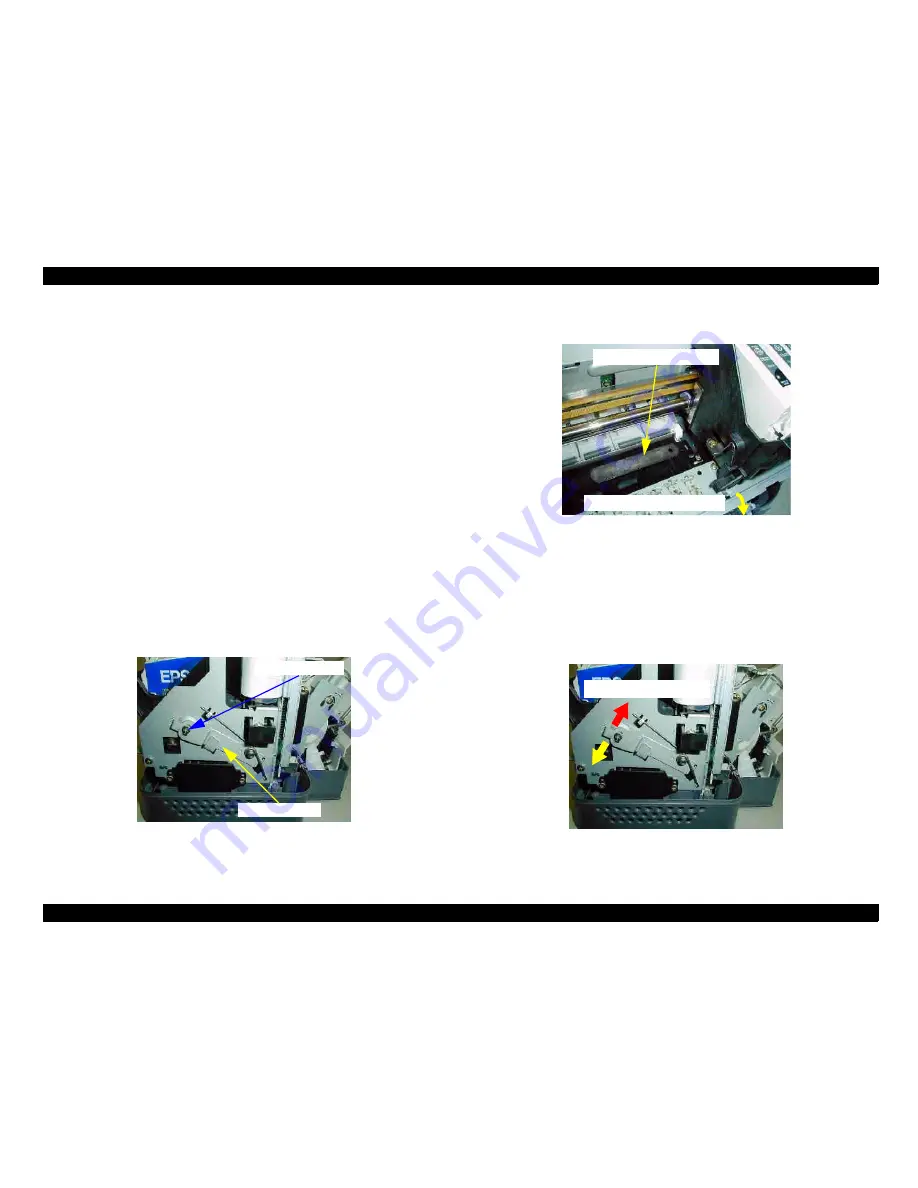
Loosen a screw (C.B.S M3x6) securing the PG adjust lever.
NOTE:
Do not remove a screw completely. (two or three revolution)
NOTE:
You need not to loosen a screw securing PG adjust bushing on the left
side.
Figure 5-41. PG Adjust Lever Location
4.
Release the carriage lock lever if the carriage is locked.
5.
Place the thickness gauge around the right side of the front paper guide.
(Specification: 1.35 mm)
Figure 5-42. Thickness Gauge Placing
6.
Check PG lever is normal position, and change to normal position if PG lever is in
envelope position.
7.
Move the carriage unit on the placed thickness gauge by using timing belt, and
check whether the placed thickness gauge moves or not.
NOTE:
If you push the carriage unit directly, print head surface is possible to be
had a damaging caused by the friction with the thickness gauge.
NOTE:
Following is the relationship between "PG adjust lever operation" and
"platen gap reaction".
Figure 5-43. Relationship between Lever Operation & Platen Gap
8.
Accede to following steps until you've completed the right side PG adjustment.
C.B.S M3x6 screw
PG Adjust Lever
Place thickness Gauge
Release the CR lock lever
PG Down (Narrower)
PG Up (Wider)
Summary of Contents for Stylus Color C70
Page 1: ...EPSONStylusColorC70 C80 Color Inkjet Printer SEIJ01 004 SERVICE MANUAL ...
Page 5: ...Revision Status Revision Issued Date Description A July 31 2001 First Release ...
Page 9: ...C H A P T E R 1 PRODUCTDESCRIPTION ...
Page 35: ...C H A P T E R 2 OPERATINGPRINCIPLES ...
Page 60: ...C H A P T E R 3 TROUBLESHOOTING ...
Page 96: ...C H A P T E R 4 DISASSEMBLYANDASSEMBLY ...
Page 137: ...C H A P T E R 5 ADJUSTMENT ...
Page 169: ...C H A P T E R 6 MAINTENANCE ...
Page 182: ...C H A P T E R 7 APPENDIX ...
Page 214: ......
Page 215: ......
Page 216: ......


