CHAPTER 3 WORK BENCH
S5U1C88000C MANUAL II
EPSON
39
WORKBENCH/DEV TOOLS/OLD ASSEMBLER
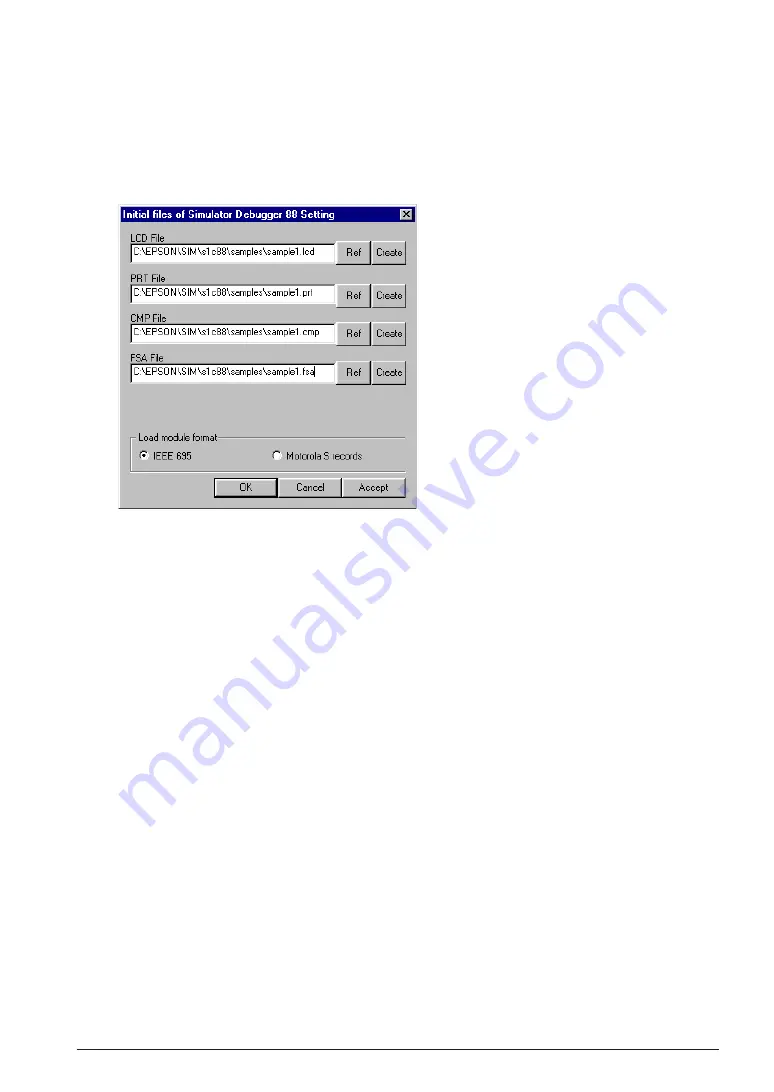
2. Specify the following files needed to invoke the simulator. Select each file from the file select
dialog box displayed by clicking the [Ref] button, or enter a path for each file directly into the text
box.
LCD File: LCD panel definition file
PRT File: Port setting file
CMP File: Component mapping file
FSA File: Function option HEX file
For detailed information on the LCD panel definition file, port setting file, and component map-
ping file, refer to the simulator manual.
Click the [Create] button to launch the tool to create each file.
LCD File: LCD panel customize utility LcdUtil
PRT File: Port setting utility PrtUtil
CMP File: Editor (specified with [Tool | Editor Configuration])
FSA File: Function option generator winfog (see Chapter 8)
For detailed information on the LCD panel customize utility and port setting utility, refer to the
simulator manual. These tools can also be launched from the [Tool] menu or with the toolbar
button.
3. Using the [Load module format] radio button, select the object file format (IEEE 695 or Motorola S)
to be loaded into the simulator.
4. Click the [OK] button to close the dialog box and start the simulator. From the input file informa-
tion, the Work Bench generates a simulator project file (.spj) and a command file to load the
necessary files, then passes these files to the simulator. The simulator is ready to start debugging
as soon as it is started.
The [Accept] button only generates the above files. It does not close the dialog box or launch the
simulator.


