4.
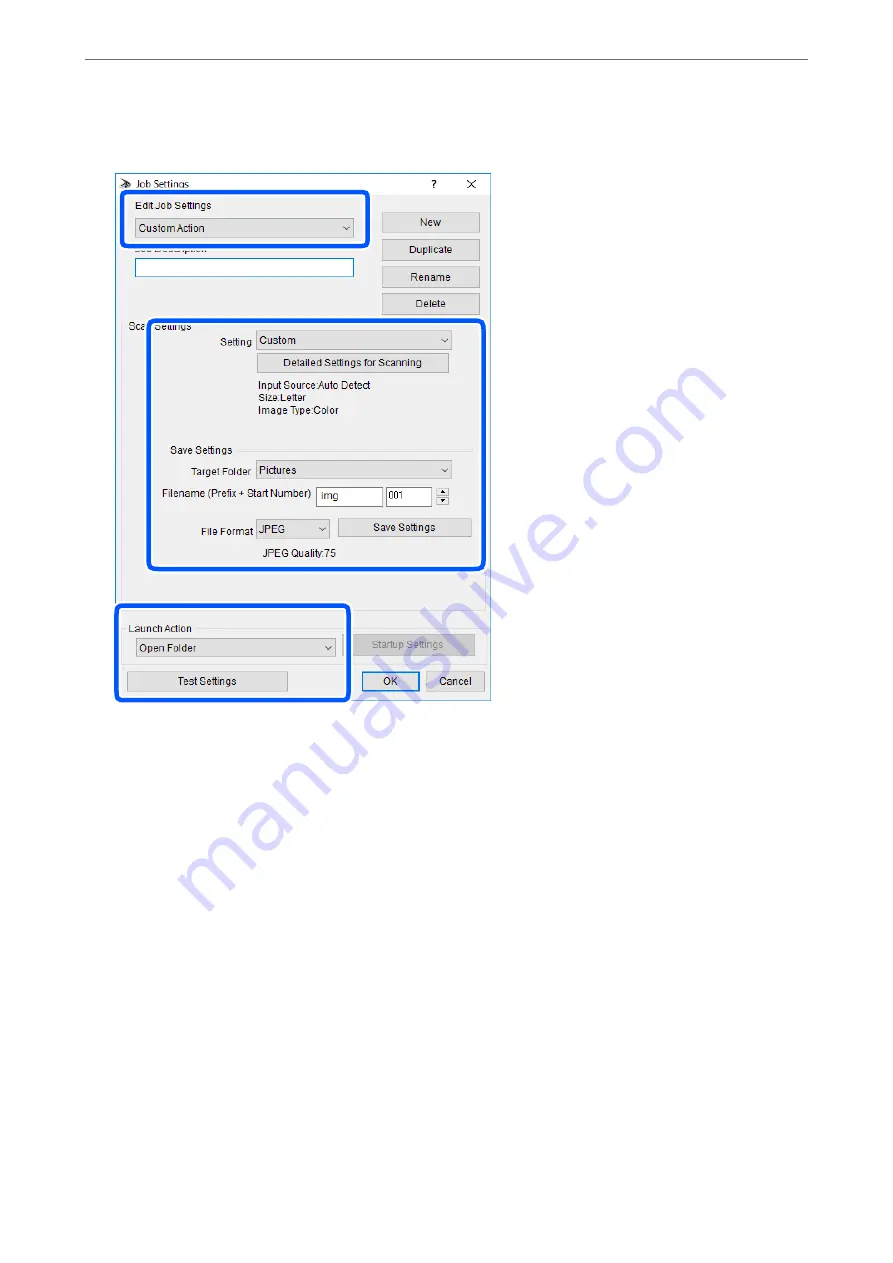
Make scan settings on the
Job Settings
screen.
❏
Edit Job Settings: Select
Custom Action
.
❏
Setting: Scan using the best settings for the selected type of original. Click
Detailed Settings for Scanning
to set the items such as the resolution or the color for saving the scanned image.
❏
Target Folder: Select the save folder for the scanned image.
❏
Filename ( Start Number): Change the settings for the file name you want to save.
❏
File Format: Select the save format.
❏
Launch Action: Select the action when scanning.
❏
Test Settings: Starts test scanning using current settings.
5.
Click
OK
to return to the main screen.
>
>
Making Custom Settings for Scanning Using the Control Panel
91
Summary of Contents for ET-M2120 Series
Page 1: ...User s Guide Printing Copying Scanning Maintaining the Printer Solving Problems NPD6205 01 EN ...
Page 15: ...Part Names and Functions Front 16 Rear 17 ...
Page 31: ...Placing Originals Placing Originals on the Scanner Glass 32 ...
Page 74: ...Copying Copying Originals 75 Copying ID card 80 ...
Page 228: ...Where to Get Help Technical Support Web Site 229 Contacting Epson Support 229 ...


