Epson DFX-9000
Revision B
Product Description
Operations
45
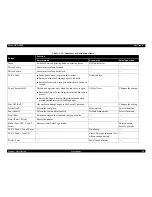
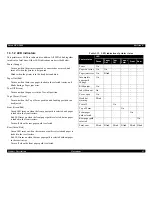
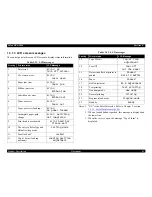
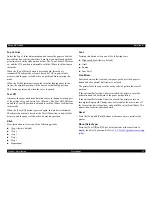
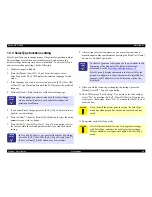
Top of Form
Enters the Top of form adjust mode and advances the paper so that the
desired first line of print (characters’ base line) can be aligned with the
print-line mark on the ribbon mask holder. The Top of Form LED turns
on, and the TOF position is adjustable with the [Micro feed] buttons in
this mode.
When the [Top of Form] button is pressed again, this mode is
terminated. The adjusted position is stored as TOF in non-volatile
memory, and the paper is fed back to its position before entering this
mode.
When the TOF adjustment is executed just after loading paper in the
tractor, the adjusted position will be treated as the loading position.
This button operates only when the cover is opened.
Tear Off
Advances the paper until its perforation comes to the paper cutting part
of the printer cover, and enters Tear Off mode. The Tear Off LED turns
on and the Tear Off position is adjustable with the [Micro feed] buttons
in this mode.
When the [Tear Off] button is pressed again, this mode is terminated.
The adjusted position is stored as the Tear Off position in non-volatile
memory, and the paper is fed back to its previous position.
Pitch
Press this button to select one of the following pitches.
10 cpi (factory default)
12 cpi
15 cpi
17 cpi
20 cpi
Proportional
Font
Pressing this button selects one of the following fonts.
High speed draft (factory default)
Draft
Roman
Sans Serif
Front/Rear
Switches between the front and rear paper paths, provided paper is
loaded and the optional Pull tractor is not used.
The printer feeds the paper in the newly selected path to the tear off
position.
If the optional Perforation Cutter is installed, the paper is cut at the
perforation and fed backward to the paper park position.
If the optional Perforation Cutter is not used, the printer enters an
Incomplete Paper-path Change error as it waits for the user to tear off
the form at the tear-off position, and push [Pause] or [Front/Rear]. The
printer then feeds the paper backward.
Reset
Press the [Font] and [Pitch] buttons at the same time to initialize the
printer.
Menu (SelecType)
Press the [Tear Off] and [Top of Form] buttons at the same time to
display the SelecType menu. Refer to
1.3.3 SelecType functions setting
(p.46)
.
Summary of Contents for DFX-9000
Page 1: ...EPSONDFX 9000 Serial Impact Dot Matrix Printer SEDM04003 SERVICE MANUAL ...
Page 8: ...C H A P T E R 1 PRODUCT DESCRIPTION ...
Page 61: ...Epson DFX 9000 Revision B Product Description Dimensions and weight 54 ...
Page 62: ...C H A P T E R 2 OPERATING PRINCIPLES ...
Page 99: ...Epson DFX 9000 Revision B Operating Principles Circuit operation 92 ...
Page 100: ...C H A P T E R 3 TROUBLESHOOTING ...
Page 104: ...Epson DFX 9000 Revision B Troubleshooting Overview 97 Mechanism initialization e e e e e ...
Page 107: ...Epson DFX 9000 Revision B Troubleshooting Overview 100 PAPER FEEDING FF APG APPROACH ...
Page 130: ...C H A P T E R 4 DISASSEMBLY AND ASSEMBLY ...
Page 218: ...C H A P T E R 5 ADJUSTMENT ...
Page 263: ...Epson DFX 9000 Revision B Adjustment Additional functions 256 ...
Page 264: ...C H A P T E R 6 MAINTENANCE ...
Page 286: ...C H A P T E R 7 APPENDIX ...
Page 297: ......
Page 298: ......
Page 299: ......
Page 300: ......
Page 301: ......
Page 302: ......
Page 303: ......
Page 304: ......
Page 305: ......
Page 306: ......
Page 307: ......
Page 308: ......
Page 309: ......
Page 310: ......
Page 311: ......
Page 312: ......
Page 313: ......
Page 314: ......
Page 315: ......
Page 316: ......
Page 317: ......
Page 318: ......
Page 319: ......
Page 320: ......
Page 321: ......
Page 322: ......
Page 323: ......
Page 324: ...EPSON DFX 9000 Revision B Appendix Component Layout 317 7 4 Component Layout ...
Page 333: ...EPSON DFX 9000 Revision B Appendix Parts list 326 ...

