Epson DFX 9000
Revision B
Troubleshooting
Overview
95
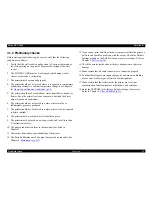
3.1.2 Preliminary checks
Before starting troubleshooting, be sure to verify that the following
conditions are all met:
1. Verify that the wall socket supplies clean AC current that matches
the voltage rating on the printer. Measure the voltage at the wall
socket.
2. The POWER CORD must be free from physical damage, short
circuit, wire breaks, or miswiring.
3. The printer must be grounded properly.
4. The printer should not be located where it is exposed to temperature
or humidity extremes, or abrupt temperature change. See Chapter 1
for
Operating environment conditions (p.12)
.
5. The printer should not be located near water, humidifiers, heaters, or
flames. Keep the printer free from exposure to dust and the direct
output from an air conditioner.
6. The printer should not be located in a place where volatile or
inflammable gases are produced.
7. The printer should not be located in a place where it can be exposed
to direct sunlight.
8. The printer must be located in a well-ventilated place.
9. The printer must be placed on a strong, steady, and level (less than
5° inclination) surface.
10. The paper used must conform to the specifications listed in
Chapter 1.
11. There must be no abuse or mishandling of the printer.
12. The Periodic Maintenance Parts must be replaced on schedule. See
Chapter 6,
Maintenance (p.257)
.
13. If you cannot print data from the host computer, initiate the printer’s
self test and check for problems with the output. Check the Default
Settings printed on the Self Test for any incorrect settings. Refer to
Chapter 1,
Self test (p.50)
.
14. Check the printer inside and out for dirt, obstructions or physical
damage.
15. Make certain that all cable connectors are connected properly.
16. Confirm that all gears are engaged properly and are not exhibiting
excess wear or other signs of friction or misalignment.
17. Make certain that the rollers inside the printer are free from
contamination, label remnants or other debris, and scratches.
18. Reset the EEPROM to the factory default settings, if necessary.
Refer to Chapter 1,
Clear EEPROM (p.51)
.
Summary of Contents for DFX-9000
Page 1: ...EPSONDFX 9000 Serial Impact Dot Matrix Printer SEDM04003 SERVICE MANUAL ...
Page 8: ...C H A P T E R 1 PRODUCT DESCRIPTION ...
Page 61: ...Epson DFX 9000 Revision B Product Description Dimensions and weight 54 ...
Page 62: ...C H A P T E R 2 OPERATING PRINCIPLES ...
Page 99: ...Epson DFX 9000 Revision B Operating Principles Circuit operation 92 ...
Page 100: ...C H A P T E R 3 TROUBLESHOOTING ...
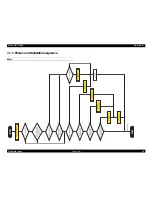
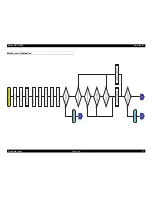
Page 104: ...Epson DFX 9000 Revision B Troubleshooting Overview 97 Mechanism initialization e e e e e ...
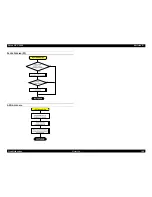
Page 107: ...Epson DFX 9000 Revision B Troubleshooting Overview 100 PAPER FEEDING FF APG APPROACH ...
Page 130: ...C H A P T E R 4 DISASSEMBLY AND ASSEMBLY ...
Page 218: ...C H A P T E R 5 ADJUSTMENT ...
Page 263: ...Epson DFX 9000 Revision B Adjustment Additional functions 256 ...
Page 264: ...C H A P T E R 6 MAINTENANCE ...
Page 286: ...C H A P T E R 7 APPENDIX ...
Page 297: ......
Page 298: ......
Page 299: ......
Page 300: ......
Page 301: ......
Page 302: ......
Page 303: ......
Page 304: ......
Page 305: ......
Page 306: ......
Page 307: ......
Page 308: ......
Page 309: ......
Page 310: ......
Page 311: ......
Page 312: ......
Page 313: ......
Page 314: ......
Page 315: ......
Page 316: ......
Page 317: ......
Page 318: ......
Page 319: ......
Page 320: ......
Page 321: ......
Page 322: ......
Page 323: ......
Page 324: ...EPSON DFX 9000 Revision B Appendix Component Layout 317 7 4 Component Layout ...
Page 333: ...EPSON DFX 9000 Revision B Appendix Parts list 326 ...


