Epson Artisan 700/Epson Stylus Photo PX700W/TX700W
Revision C
ADJUSTMENT
Adjustment Items and Overview
210
Confidential
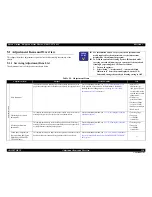
5.1 Adjustment Items and Overview
This chapter describes adjustments required after the disassembly/reassembly of the
printer.
5.1.1 Servicing Adjustment Item List
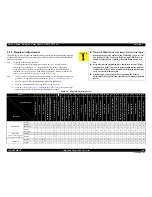
The adjustment items of this product are shown below.
C H E C K
P O I N T
For information on how to carry out the adjustments and
media required for the adjustments, see the instructions
displayed by the adjustment program.
To avoid the auto head cleaning by the AID function while
carrying out each adjustment, you can turn off the auto head
cleaning by operating the LCD Panel as follows.
1. Turn on the printer.
2. Select “Setup” - “maintenance” - “Automatic Head
Maintenance” from the menu displayed on the LCD
Panel, and change the auto head cleaning setting to OFF.
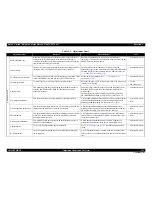
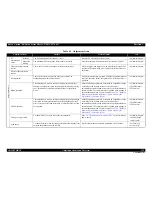
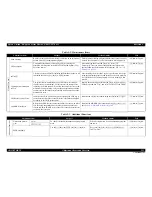
Table 5-1. Adjustment Items
Adjustment Item
Purpose
Method Outline
Tool
Adj
ustme
nt Ite
m
s
PG Adjustment
Install the Head Nozzle surface parallel to the printing surface and set the
gap between the paper and the Head Nozzle surface to the specified value.
For the adjustment method, see
5.3.1 “PG Adjustment (p235) ”
.
If the position of the notch on the Parallelism Adjustment
Busings have not changed, only “
Checking the result of PG
adjustment (p239)
” is necessary.
• Parallelism
adjustment jigs
(two types; the one
for 0th column side
and the one for 80th
column side)
• Fixtures for
precision control
• Thickness Gauge
1.15mm, 1.3mm
• Phillips screwdriver
• Hex wrench
CR timing belt tension
adjustment
This adjustment is made to avoid the idling of the CR motor (fatal error) or
breaking of the motor coil or the like due to an abnormal heat.
For the adjustment method, see
5.3.2 “CR Timing Belt Tension
Adjustment (p240) ”
.
• Tension gauge
• Tweezers
• (+) Phillips
screwdriver
PF timing belt tension
adjustment
This adjustment is made to avoid the idling of the PF motor (fatal error),
breaking of the motor coil due to an abnormal heat, or lost of paper feed
accuracy that causes banding on the printout.
For the adjustment method, see
5.3.3 “PF Timing Belt Tension
Adjustment (p241) ”
.
• Tension gauge
• Tweezers
• (+) Phillips
screwdriver
Touch Panel Adjustment
(Epson Artisan 800/Epson
Stylus Photo PX800FW/
TX800FW only)
This adjustment is made to adjust the relative positions between the Touch
Panel detection points and displaying positions on the Control Panel.
For the adjustment method, see
5.3.4 “Touch Panel Adjustment
(Epson Artisan 800/Epson Stylus Photo PX800FW/TX800FW
only) (p242) ”
.
---
Summary of Contents for Artisan 700 Series
Page 7: ...Confidential C H A P T E R 1 PRODUCTDESCRIPTION ...
Page 42: ...Confidential C H A P T E R 2 OPERATINGPRINCIPLES ...
Page 48: ...Confidential C H A P T E R 3 TROUBLESHOOTING ...
Page 189: ...Confidential C H A P T E R 5 ADJUSTMENT ...

