background image

.-.

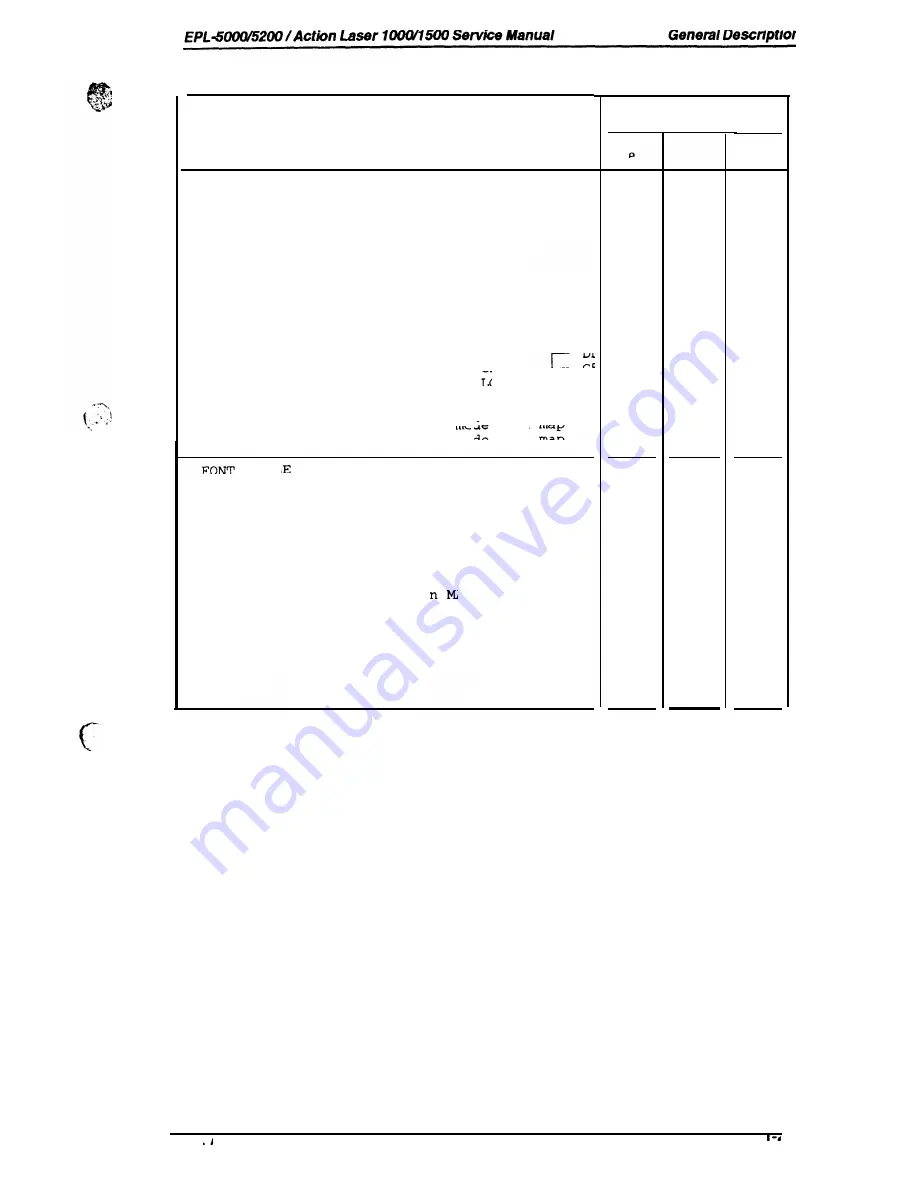
Table 1-10. Built-in Fonts (EPL-5000 with GQ Chip)

Resident Fonts

Bitmap fonts
Courier

Courier Bold
Courier Italic
Courier

Courier Bold
Courier
Courier Bold

Courier Italic
Line printer
Line printer
Presitage
Presitage
EDP
EDP

Medium
Bold

Medium
Medium
Bold
Medium

Bold
Medium

Medium
Medium

Medium
Medium
Medium
Medium

Upright
Upright
Italic

Upright
Upright
Upright

Upright
Italic
Upright

Upright
Upright

Upright
Upright
Upright

10 cpi
10 cpi
10 cpi

10 cpi
10 cpi
12 cpi

12 

cpi

12 cpi
16.66 

cpi

16.66 cpi
12 

20 

13 


Portrait
Portrait
Portrait

Portrait

Portrait
Portrait
Portrait

Portrait
Portrait
Portrait

Modern

Medium

Upright

10 point

Portrait

 fonts 

 G(?

Courier

Medium

Upright

Courier

Bold

Upright

Courier

Medium

Oblique

Courier

Bold

Oblique

EPSON Roman T

Medium

Upright

EPSON Roman T

Bold

Upright

EPSON Roman T

Medium

EPSON Roman T

Bold

EPSON Saris serif H

Medium

Upright

EPSON Saris serif H

Bold

Upright

EPSON Saris serif H

Medium

Oblique

EPSON Saris 

 H

Bold

EPSON 

 Set

Medium

S: 

Supported, NS: Not 

Supported

Applicable Mode

HP 

s

s
s

NS
NS

s

s

s

s

NS
NS
NS
NS

NS
NS

NS
NS
NS

NS
NS
NS
NS
NS
NS
NS

NS
NS

NS

s
s

NS

s

s
s
s

NS

s

s
s

s

NS
NS
NS

NS
NS
NS
NS

NS
NS
NS
NS
NS
NS

NS
NS
NS

GQ

s

s

NS

s

s

NS

NS
NS

s

s

s

s

s

s
s

s
s

s

s
s
s
s
s
s
s
s

s
s

Rev. 

Summary of Contents for ActionLaser 1000

Page 1: ...EPSON TERMINAL PRINTER EPL 5000 5200 5200 1000 I15OO SERVICE MANUAL EPSON 4001962 ...

Page 2: ...IS MANUAL DO NOT CONNECT THE UNIT TO A POWER SOURCE UNTIL INSTRUCTED TO DO SO WHEN THE POWER SUPPLY CABLE MUST BE CONNECTED USE EXTREME CAUTION IN WORKING ON POWER SUPPLY AND OTHER ELECTRONIC COMPONENTS WARNING REPAIRS ON EPSON PRODUCT SHOULD BE PERFORMED ONLY BY AN EPSON CERTIFIED REPAIR TECHNICIAN MAKE CERTAIN THAT THE SOURCE VOLTAGE IS THE SAME AS THE RATED VOLT AGE LISTED THE SERIAL NUMBER RAT...

Page 3: ... for laser products on August 2 1976 Compli ance is mandatory for products marketed in the United States The label shown below indicates compliance with the regulations and must be attached to products marketed in the United States WARNING Use of controls adjustments or performance of procedures other than those specified in this manual may result in hazardous radiation exposure Internal Laser Rad...

Page 4: ...t i kan for som overskrider laser 1 er en laser laserdiode er 5 7x 10 4 W er 780 nm Laser Safety Labels Label on rear printer case A laser safety labels is attached on the outside of the printer shown below For United State P r to the applicable requirement of 21 CFR Chapter J SEIKO CORP 80 JAPAN MANUFACTURED iv ...

Page 5: ...For Europe Label inside printer The following laser safety label will be attached inside the printer as shown below ...

Page 6: ... components of the printer CHAPTER 2 OPERATING PRINCIPLES Describes the theory of printer operation CHAPTER 3 DISASSEMBLY AND ASSEMBLY Includes a step by step guide for product disassembly and assembly CHAPTER 4 ADJUSTMENTS Includes a step by step guide for adjustment CHAPTER 5 TROUBLESHOOTING Provides Epson approved techniques for adjustment CHAPTER 6 MAINTENANCE Describes preventive maintenance ...

Page 7: ... 8 1993 1st issue Rev B June 28 1993 Page 1 23 1 31 2 22 3 11 4 1 Added information for the Cl 08 Rev C August 5 1993 MAIN B board Page B i B 1 through B 10 Rev D February 28 1994 Page 1 33 Added information for the Rev E April 4 1995 Page C i C 1 through C 10 vii ...

Page 8: ...TABLE OF CONTENTS CHAPTER 1 CHAPTER 2 CHAPTER 3 CHAPTER 4 CHAPTER 5 CHAPTER 6 APPENDIX GENERAL DESCRIPTION OPERATING PRINCIPLES DISASSEMBLY AND ASSEMBLY ADJUSTMENTS TROUBLESHOOTING MAINTENANCE ...

Page 9: ...e Action Laser 1000 1 16 Optional interface Action Laser 1000 Only 1 18 1 4 OPERATING INSTRUCTIONS 1 19 1 4 1 Control Panel 1 19 1 4 2 Functions 1 21 Displayof Messages 1 24 1 4 3 1 Status Messages 1 24 1 4 3 2 Error Messages 1 25 1 4 3 3 Power On Display 1 26 Printer Sharing 1 27 1 4 4 1 individual Mode 1 27 1 4 4 2 Auto Sense Mode 1 28 1 4 4 3 Data Receive Buffer 1 28 1 4 5 Controller RAM Status...

Page 10: ...2 Figure l 16 Adjustment 1 32 Figure l 17 Component Layout 1 34 Figure l 18 Board 1 35 Figure 1 19 Board 1 36 Figure l 20 Control Panel 1 37 Figure l 21 Board 1 38 Figure 1 22 Board 1 38 Figure 1 23 Board 1 39 Figure 1 24 PRINTHEAD UNIT 1 39 Figure 1 25 FUSING UNIT 1 40 Figure l 26 Drive Unit 1 40 Figure 1 27 IMAGING CARTRIDGE 1 40 Figure l 28 Lower Paper Cassette 1 41 Figure l 29 Face Up Output T...

Page 11: ...al Timing 1 14 Table l 13 Parallel Interface Pin Assignment 1 15 Table l 14 Serial interface Connector Pin Assignments 1 16 Table Status Messages 1 24 Table Error Messages 1 25 Table l 17 Displayat Power 1 26 RAM Chip Combinations 1 30 Table l 19 Differences in Components MAIN Board 1 36 l iii ...

Page 12: ...mode 1500 has HP emulation mode to PCL5 Upgrade 1000 can be upgraded from HP emulation mode with the optional Epson Board card Optional Epson GL identity card High speed serial communication rate of 38400 bps except for the 1000 A multi user multi emulation mode Various types of fonts available in font cards and cartridges Intelligent Emulation Switch allows switching of the printer mode between m...

Page 13: ...ps installed Standard Parallel Parallel Parallel Parallel Parallel Parallel Type B Type B Type B Type B l F Type B l F Type B l F Cards Cards Cards Cards Cards Cards Optional Except Include Except Include Except Except Cards and and except and and except and and No No Yes Yes Yes Yes 9 Portrait 9 Portrait Fonts and Fonts and 9 Portrait 9 Portrait 9 Portrait 9 Portrait Resident None None Fonts and ...

Page 14: ...ard supports Postscript Yes Yes Yes Yes language Note 4 Note 4 Note 4 Note EPSON GL Identity Supports HP GL Yes Yes Yes Yes commands Note 4 Note 4 Note 4 Note 4 HP Epson 111 l emulation Upgrade mode includes Yes No Yes No Board EPSON mode and support GQ chip ROM Supports GQ mode Yes Yes fonts and commands Note 5 Note 5 0 0 Local language ROM supports local Yes fonts Note 5 0 0 RAM chips RAM chip s...

Page 15: ...488 No No No No interface card COAX interface card Yes Yes Yes Yes TWINAX interface Yes Yes Yes Yes card Notes 1 GQ mode can be used if the optional GQ chip is installed 2 The ActionLaser 1000 1500 uses only card 5400 3 Scalable fonts for HP LaserJet III mode can used if the optional Epson Upgrade Board is installed 4 Requires added memory RAM over a total 1 5 MB including standard RAM 5 The ROM c...

Page 16: ... Auto feed Standard built in paper bin Manual feed Lower paper cassette Optional Notes Paper Size Beam Weight I 150 A4 LT GLT EXE 16 to 24 lb I Envelopes made to 10 Commercial 10 of 20 to 24 lb 75 to paper Any size 16 to 42 lb Note 2 250 A4 or LT 16 to 24 lb 1 lb ream weight 500 sheets of 17x 22 inch paper 1 g m2 0 2659763 lb 2 Paper size range width 3 63to 8 5 inches length 5 85 to 14 0 inches 14...

Page 17: ...mage quality P Possible but better avoided I Impossible Paper feed alignment and direction Center alignment for all sizes Paper ejection Face down face up optional Output tray capacity 100 sheets face down 20 sheets face up standard paper Printable area standard paper See Figure 1 2 Printable Area Figure 1 2 Printable Area Note The actual printable area depends on the printer mode Noise Less than ...

Page 18: ...2 inches or less 1 out of 1 000 sheets 30 minutes or less 5 years or 180 0000 sheets 1 2 4 Environmental Conditions for Operating Include Imaging Cartridge Temperature 10to35 C 50 to 95 F Humidity 15 to 85 Altitude m feet or lower Levelness Printer should be installed on a level plane 3 000 IUX or less Must not be exposed to direct sunlight Surrounding space Printer should have at least 100 mm cle...

Page 19: ...ration Resistance to atmospheric pressure Storage term 1 2 8 Physical Specifications Dimensions Printer With lower cassette With face up tray With lower cassette and face up tray Weight With lower cassette With face up tray With lower cassette and face up tray Oto30 C 32 to 86 F over full storage term 20 to40 C 4 to 104 F under extreme condition Extremes are allowable for up to 1 30 of full storag...

Page 20: ...ng Not available Reduced printing setting in Switch to Not supported Reset ESC E Ejects paper and then paper switches to initializes and then initializes PJL EJL and ES Supported supported Advance Full Page Not Notes EPSON mode has two operational modes One is mode the other is the mode mode emulates the mode in the HP emulation l he user can print with software that supports the HP series plotter...

Page 21: ...ht Upright Italic Upright Upright Italic Upright Upright Italic Upright Upright Italic Upright Upright Upright 10 10 10 10 10 10 12 12 12 12 12 12 16 66 16 66 12 Portrait Portrait Portrait Landscape Landscape Landscape Portrait Portrait Portrait Landscape Landscape Landscape Portrait Landscape Portrait Medium Upright 20 Portrait Scalable fonts for EPSON Roman T Medium Upright EPSON Roman T Bold Up...

Page 22: ...t Portrait Portrait Portrait Portrait Portrait Portrait Portrait Portrait Portrait Modern Medium Upright 10 point Portrait fonts G Courier Medium Upright Courier Bold Upright Courier Medium Oblique Courier Bold Oblique EPSON Roman T Medium Upright EPSON Roman T Bold Upright EPSON Roman T Medium EPSON Roman T Bold EPSON Saris serif H Medium Upright EPSON Saris serif H Bold Upright EPSON Saris serif...

Page 23: ...an T Bold Italic EPSON Saris serif U Medium Upright EPSON Saris serif U Bold Upright EPSON Saris serif U Medium Italic EPSON Saris serif U Bold Italic EPSON Saris serif U Medium Condensed Upright EPSON Saris serif U Bold Condensed Upright EPSON Saris serif U Medium Condensed Italic EPSON Saris serif U Bold Condensed Italic ITC Medium for Courier Medium Upright Bold Upright Medium Oblique Bold Obli...

Page 24: ...icrosoft Publishing Venture ITC Zapf Dingbatts Windows PS ITC Zapf Dingbatts DeskTop ITC Zapf Dingbatts 100 ITC Zapf Dingbatts 200 ITC Zapf Dingbatts 300 ESC P Mode 13 International Characters USA SPAIN1 FRANCE JAPAN GERMANY NORWAY UK DENMARK2 DENMARK1 SPAIN2 SWEDENT L AMERICA ITALY In addition to the above Code Page 860 863 850 865 and 437 can also be selected by SelecType GQ Mode 35 symbol sets ...

Page 25: ...a transfer Handshaking BUSY and ACKNOWLEDGE signals Note While the setting for BUSY delay is MlN the handshaking signal is BUSY only Comector type receptacle Applicable plug 57 30360 or equivalent Transfer speed About 75 000 bytes second max About 125 000 bytes second max 1500 timing See Figure 1 3 Signal description See Table 1 12 2 r DATA 1 8 VALID STOROBE 4 7 BUSY 6 Figure 1 3 Signal Timing Tab...

Page 26: ... empty for the standard 12 PE OUT cassette selected through or command or for the option paper cassette Paper empty is by HIGH 13 OUT Pulled up to through a 3 3 resistor If the AUTO FEED signal is set to LOW the printer performs a LF line upon a CR Carriage Return oode from the host computer In GQ Mode option or Mode AUTO FEED signal 14 AUTO FEED IN the CR operation according to settings In HP Mod...

Page 27: ...or 8 bits Parity Odd even or none Protocol X ON X OFF can be combined with control control can be combined with X ON X OFF Transfer speed 300 600 1200 2400 4800 9600 19200 or 38400 bps Error Overrun error Processed as missing data and replaced by Parity error Replaced by Framing error Replaced by Breaking character Ignored Signal description See Table 1 14 Table 1 14 Serial Interface Connector Pin...

Page 28: ...col There are three types of protocols as listed below and each of them can be designated by independently protocol is used to execute the control protocol signal is set HIGH when the printer is ready to receive data and to LOW when conditions indicate an error or that the receiving buffer is When the error is cleared and the printer returns to on line mode the signal returns to HIGH When is used ...

Page 29: ...start stop system Start bit 1 Stop bit 1 Data length 7 bits or 8 bits Parity Odd even or none Protocol X ON X OFF cannot be combined with control control cannot be combined with X ON X OFF Transfer speed 300 600 1200 2400 4800 9600 or 19200 bps Error Overrun error Processed as missing data and replaced by Parity error Replaced by Framing error Replaced by Breaking character Ignored 1 18 Rev A ...

Page 30: ...host is possible OFF Communication with the host is impossible Flashing This state occurs when the system cannot shift from off line to on line or vice versa FEED This LED indicates the data processing condition for each interface channel S P and O ON Indicates that received data is stored in the printer that has not been printed out However the LED does not light up when only non printable data d...

Page 31: ... INITIALIZE Continuing to hold this button down after RESET appears causes the message to change to INITIALIZE This function clears received print data and returns Level 1 and 2 settings to their power on settings Holding down this button while turning on the printer causes FACTORY RESET to appear on the display and all settings return to the factory settings COPY END P S or O EPL 5000 5200 1500 C...

Page 32: ... HLT LGL COPIES ORIENT FONT STATUS SHEET FONT SAMPLE SUB CONFIG SYSTEM CONFIG 1 999 Refer to mode menu map Refer to mode menu map Refer to mode menu map FULL PRINT T OFFSET L OFFSET MEMORY LEFT XX LOAD MACRO SAVE MACRO DELETE MACRO PowerOn MACRO O to 62 64 to 63 64 to 63 available bytes o to 4 1 to 4 1 to 4 0 to 4 Figure 1 5 SelecType Level 1 Menu Map SelecType Level 1 in LJ 2P and 3 P Si Mode fon...

Page 33: ...R 0 1 0 05 to BUTT SQUARE TRIANGLE ROUND MITER M B TRIANGLE ROUND BEVEL NONE OFF 10 to 60 in EpsonGL 2Mode Menu Map CONDENSED L MARGIN R MARGIN T MARGIN TEXT SKIPBOTTOM 10 12 15 Prop ON OFF O to available O to available 0 50 to 1 50 1 to available ON OFF CGTABLE ITALIC USA COUNTRY USA France German UK Denmark Italy J REPRINT ON OFF AUTO CR ON OFF ZERO CHAR two types WIDE PAGE ON OFF B IMAGE DARK P...

Page 34: ...RFACE CH P I F PARALLEL S I F WORD LENGTH BAUDRATE PARITY STOP BIT DSR CTS RX BUFFER SIZE X K XK S E R P s o TIMEOUT 10 to 600 AUTO CONT ON OFF TONER LIFE 5000 to 9000 E F F F PAGE COUNTER Figure 1 9 Level 2 Note The Action Laser 1000 does not indicate CH S serial interface The Laser 1000 does not have R Tech Rev B 1 23 ...

Page 35: ...tion CHAR CREATING Creating characters by caching GRAPHIC DRAWING Drawing a graphic image OFF LINE 4 Off line with no data in This message displays for 10 seconds at power on NEW CARTRIDGE when toner is out the TONER display is E F YES RESET To reset the toner counter press the RESET button NO CONTINUE 4 The toner counter does not change when you hold down the CONTINUE button for over 10 seconds T...

Page 36: ...sed by 1 Printer mode change Add memory Press the LEVEL 2 ADD MEMORY FOR 2 RX BUFFER SIZE increase button to enter 2 CH X 3 INDIVIDUAL setting change and adjust the INDIVIDUAL memory X indicates the channel where the distribution or RX BUFFER SIZE memory shortage was INVALID ASSIGN mode is set to Iwo Set mode to one channel channels Register type data filled the Confirm and press the CONTINUE MEMO...

Page 37: ...n the OPC after error measures are taken 1 4 3 3 Power On Display The control panel will display the messages in table below only at power on Table 1 17 Display at Power On Order Control Panel Display and Operation Error Operation 1 All lights light up for approximately 1 5 seconds The system checks the EPROM and The message SERVICE REQ will 2 MASK ROM The message ROM be displayed if an error is d...

Page 38: ... S O The partitioned segments not interfere with each other so the user of each channel can share the printer as if there were actually three individual printers Mode Assign Channel P User 1 Parallel mode Mode Assign Channel S User 2 mode Mode Assign Channel O User Memory User 3 Option for Channel O mode Figure 1 10 Individual Note The ActionLaser 1000 does not have a serial interface PostScript m...

Page 39: ...t first Mode Assign Channel P User 1 Parallel b mode Mode Assign Channel S User 2 RS 232C mode All User Memory Mode Assign Channel O User 3 Option mode Figure 1 11 Auto Sense Mode Note The ActionLaser 1000 does not have a serial interface 1 4 4 3 Data Receive Buffer The size of the data receive buffer for each interface parallel serial and optional can be assigned separately through 1 AMP Channel ...

Page 40: ... Settings that exceed the ranges shown below waste memory capacity The system goes into full page buffer mode if any of the following maximum n values is reached Printing is done after the complete image for the page has been developed in RAM However the n value should be set to the minimum necessary value It is recommended that there be a total of or more memory when using the full page buffer mo...

Page 41: ... Each set contains four 1 Mbit x 4 80 DRAM 20 pin DIP chips By installing RAM chip sets you can increase the printer s memory to a total of for the 1000 or for 1500 including the resident memory The table below describes the RAM chip combinations Table 1 18 RAM Chip Combinations I Total RAM Chip Set Installed 1000 1500 No chip sets 1 OMB One chip set 1 OMB 1 Two chip sets 1 Three sets One chip set...

Page 42: ...ise specifications for this language are on the HP ES Switch This is a method offered from Adobe which is able to switch between PostScript and The precise specifications are based on software from Adobe The figure below shows three types of mode switching Neither nor switches the mode directly They first exit the current mode or Then they enter another mode and return to I ES LO v I Ps A I ES EPS...

Page 43: ...It is therefore necessary to set appropriate values in mode Note Figure 1 15 Effect of R Tech not as effective a mesh pattern or gray scale In such cases R Tech must beset to OFF The default setting MEDIUM Since the R Tech effect depends on the toner condition adjusted when the imaging cartridge replaced or after the imaging cartridge used for a long The following settings are available in Level 2...

Page 44: ...eft or right cursor button default paper size selection A4 or letter settings stored in are replaced with the factory default settings except the page counter and the value for toner left in the imaging cartridge memory all clear including clearing of the page counter and toner counter Turn on the power while pressing the ON LINE FEED and CONTINUE buttons Afterward both the page counter and toner ...

Page 45: ... board ROM B Board program and fonts ROM board Control Panel Board Engine controller circuit board Board Power supply circuit board Board High voltage supply circuit board UNIT Optical unit FUSING UNIT Drive Unit Imaging Cartridge Housing Lower Paper Cassette Unit optional Face up Output Tray optional Face up Output Tray FUSING UNIT Board Board UNIT Board Board MAIN Board Figure 1 17 Component Lay...

Page 46: ... and sending the image to the engine controller via the video interface A 16 bit MHz CPU is used and the following memory chips custom are assigned to the 16MB memory Memory chips MASK ROM or EPROM or two EPROM DRAM 1 M bit DRAM 32 33 Custom Standard cell Gate array Others Serial interface driver receiver MAX238 4M DRAM MAX23 Card Slot Type B l F Connector Figure 1 18 MAIN Board Rev 1 35 ...

Page 47: ...ial interface Mini screw type M i n i Inch screw type connector connector connector connector socket None socket None None or or 1 5 2 ROM B Board Upgrade Board The ROM B board has the ROM and The printer changes from to a printer with the enhancement once this board is attached to connectors and on the MAIN board In the 1500 this board is standard In the EPL 5000 ActionLaser 1000 this board is op...

Page 48: ...RFACE FONT uSER FONT AUTO CONTINUE CONFIGURATION F ULL P R I N T TONER pAGE ON LINE LEVEL 1 LEvEL 2 RESET v D EPL 5000 LEVEL 1 LEvEL 2 INPUP TRAY FEATURE PRINT PAOE EMULATION COPIES INTERFAcE RECEIVE USER STATUS TIME OUT FONT AuTO CONFIGURATION LANGuAGE OFFSET TONER MACRO VERSION COUNTER m LINE LEVEL 1 LEVEL 2 o P E E O v EPL 5200 Figure 1000 LINE LEVEL 1 LEVEL 2 EMT o 0 CONTINUE a A v D Action La...

Page 49: ... drive motor image pulse width and power I M4 Figure 1 21 Board 1 5 5 Board The is the power supply board which consists of a switching regulator circuit It converts the AC line voltage into 24 V and 5 voltages There are two types of power supply board the 100 120 V type and 220 240 V type difference between is section Do not touch on board This volume is for factory setting only F2 F1 Figure 1 22...

Page 50: ...ing only Figure 1 23 Board 1 5 7 UNIT The unit consists of the laser diode semi conductor laser the scanner motor which drives the polygon mirror for laser scanning and several mirrors and lenses laser beam generated the laser diode is conducted to the OPC drum surface by way of the polygon mirror as well as several mirrors and lenses to create a latent image on the drum Figure 1 24 UNIT Rev A 1 3...

Page 51: ... difference between them is only the heater lamp Figure 1 25 FUSING UNIT 1 5 9 Drive Unit The drive unit consists of the main motor and a series of gears and clutches It drives the paper transport rollers OI C drum sleeve roller fusing roller and some other mechanisms Figure 1 26 Drive Unit 1 5 10 IMAGING CARTRIDGE The core mechanisms of the printing process such as developing and cleaning are int...

Page 52: ... this printer Figure 1 28 Lower Paper Cassette 1 5 12 Face Up Output Tray The face up output tray is an optional tray useful for feeding single sheets of paper types such as envelopes transparencies labels or heavy paper The face up feeding method reduces and the tray catches the paper at the paper ejection area at the top back of the printer Figure 1 29 Face Up Output Tray Rev 1 41 ...

Page 53: ... Control 2 15 Power SupplyCircuit Function and Safety Protection 2 15 2 2 VIDEO CONTROLLER OPERATION 2 16 2 2 1 2 16 2 2 1 1 2 2 1 2 2 2 1 3 2 2 1 4 2 2 1 5 2 2 1 6 2 2 1 7 2 2 1 8 Reset 2 19 Bus Control Circuit 2 19 Interrupt Control 2 20 DRAM Management 2 20 Parallel Interface Circuit 2 21 Circuit 2 21 Optional Type B Interface 2 21 Video Interface 2 22 2 2 2 ROM B 2 22 List of Figures Figure 2 ...

Page 54: ... 13 Figure 2 27 High Voltage Supply Block Diagram 2 13 Figure 2 28 Print Process 2 14 Figure2 29 PowerOn Sequence 2 14 Figure 2 30 Print Sequence Start 2 14 Figure 2 31 Print Sequence End 2 15 Figure2 32 Fan MotorSpeed Control Timing 2 15 Figure 2 33 Fan Motor Malfunction Search Timing 2 15 Figure 2 34 Power Supply Circuit Block Diagram 2 15 Figure 2 35 Video Controfler Section 2 16 Figure 2 36 C1...

Page 55: ... roller Upper fusing roller Heater lamp Hi 16 17 18 19 20 21 22 23 24 25 Face up face down switching guide 26 Face up tray option 27 Face up exit roller 28 Fusing separator 29 Paper exit sensor 13 14 15 16 17 18 19 20 21 25 24 23 22 Lower fusing roller Fusing cleaning roller cooling fan Image transfer roller Main motor Ml Lower paper cassette option Paper take up sensor Transport roller Transport ...

Page 56: ... 1 1 Print Process This section describes the print process from paper feeding to paper exit Figure 2 2 shows a diagram of the process 8 Exit 8 Exit F U Fusing 6 E x p o s u r e Imaging Cartridge 1 Paper Feeding 1 Figure 2 2 Print Process Diagram 2 2 Rev ...

Page 57: ...leading edge of the page with image is detected by the paper take up sensor When the page is on top of the paper take up sensor detection lever is lowered allowing light from the LED to reach the photo transistor causes the signal to go HIGH informing the engine driver that paper has been detected The paper exit sensor is located beyond the fusing roller in the paper path When paper passes the pap...

Page 58: ...coupling connector Ca Paper e Figure 2 4 Paper Feeding from the Lower Paper Cassette 2 1 1 2 Drum Charge Drum charge is the process of charging the PC drum with static electricity before laser exposure This printer uses a brush charge method rather than the corona charge method to charge the drum In the brush charge method there is no generation of ozone as a result of corona discharge This method...

Page 59: ...t is the process of creating a toner image on the PC drum by applying toner to the invisible static electric image doctor blade spreads a thin even coat of toner over the flexible sleeve When the toner passes between the doctor blade and the flexible sleeve it becomes negatively charged flexible sleeve transports toner to the surface of the PC drum and controls the development with the developing ...

Page 60: ... Image Transfer Roller Sequential Bias 3 2KV Reverse Bias Figure 2 8 Image Transfer 2 1 1 7 Fusing Fusing is the process of fixing the toner image transferred during the image transfer process onto the paper This printer uses the heating roller method for fusing The heating roller method fixes the toner image with an upper fusing roller that is heated by the heater lamp The printer uses the cleani...

Page 61: ...ws an engine controller diagram LO Sos Polygon Scanner motor Video Controller Board C108 Main Lower Paper detecting Paper Take Up Solenoid Engine Controller Board Fan Motor High B Doctor Blade Bias Transfer Roller Development 4 Paper Take Up Sensor PSI Thermistor Paper Take Up Solenoid 1 I Exit Sensor PS3 I L Paper Empty Sensor I Power AC Power Input supply Board Figure 2 10 Engine Controller Conn...

Page 62: ...paper cassette option Figures 2 11 through 2 16 show the positions of the gears and rollers 17 16 19 21 26 2S 54 2 11 Gear and oiler Positions Up Exit Roller Face Down 17 Exit Roller 19 25 1 6 16 15 Fusing Roller Revolution 36 40 Process 38 12 1 4 2 1 28 6 P C Drum Revolution 24 04 rpm Process Speed 37 77 mm s 1 9 2 Fig Drive Fig 2 13 Developing Drive Section Transport Roller 1 2P Paper Take Up Ro...

Page 63: ...aper Take up Roller 13 23 Roller 27 28 Transport Roller 14 l 75 28 14 Image Transfer Roller 1 Option lower paper cassette Figure 2 17 shows the main motor drive circuit main motor MI is a four phase stepping motor This motor is controlled by the CPU on the engine controller board The power supply board has a stepping motor driver IC This drives the main motor Ml with a current The main is when the...

Page 64: ...rocess area The paper take up sensor or the paper exit sensor is on at power on or when upper case is closed The paper take up sensor or the paper exit sensor is not turned on off within specified time Refer to the following timing chart Take Up Solenoid ON sec 3 79 10 53 the the Figure 2 18 Paper Take U Sensor and Paper Exit Sensor On Timing 2 1 2 3 Control The is heated the heater lamp which is ...

Page 65: ...ly high level over 2 1 2 4 Scanner Mirror Motor Control Figure 2 21 is the scanner mirror motor M2 control circuit l he scanner mirror motor is driven while the scanner motor receives the SCANNER MIRROR MOTOR signal Engine Controller Board GND2 POLYGON MOTOR LOCK CLOCK Motor 5 M2 3 2 1 Figure 2 21 Scanner Motor Control Circuit Figure 2 22 is the scanner mirror motor driving timing chart The scanne...

Page 66: ...EO or the FORCED LASER DIODE ON signal is activated LOW the L DATA signal will be active The VIDEO signal is an image signal sent from the video controller board MAIN board The FORCED LASER DIODE ON signal is a laser emission signal to apply the beam to the SOS sensor Forced Diode ON from the Video Controller Board MAIN Board Figure 2 24 L DATA Generation Circuit The laser diode is forcibly activa...

Page 67: ...terlock switch is set to OFF which cuts the 24 which in turn cuts the bias voltages These bias voltages are controlled by the engine controller board The I IV T signal is the image transfer roller bias voltage control While this signal is LOW the image transfer roller is charged to by high supply circuit And while this signal is HIGH the image transfer is charged to The the drum charge While this ...

Page 68: ...r On C 165 degree C sec Polygon Motor 0 8 1 61 M2 Main Motor Ml Drum Charge 0 5 1 24 Laser 0 1 Exposure Development Image Transfer Figure 2 29 Power On Sequence Figure 2 30 is the start print sequence The printer s engine starts printing when the PRINT signal is received from the video controller board Print Main Motor On 17 sec Drum 0 5 0 3 Charge Laser Exposure Development 0 48 2 32 0 36 Image 0...

Page 69: ...the fan motor slows down after 15 seconds Print Print sec M Figure 2 32 Fan Motor Speed Control Timing the voltage of pin on the engine controller board does not exceed for 1 second the printer indicates a fan motor malfunction on 1 7 M 2 33 Fan Motor Malfunction Search 2 1 2 8 Power Supply Circuit Function and Safety Protection The printer s power supply board supplies the 5 and 24 The 24 is used...

Page 70: ...e signals for the control panel through the engine controller board Video Controller Section ROM B Board MAIN Board Engine Controller Board Control Panel Figure 2 35 Video Controller Section 2 2 1 MAIN Board Operation Figure 2 36 shows a block diagram of the MAIN board The MAIN board contains the video controller which consists of a 16 bit 68000 16 67 MHz CPU the standard cells developed for this ...

Page 71: ...t with the Video signal switching This ROM stores the Basic Operating program An 8M ROM or or HP emulation mode program two 4M ROMs emulation mode program Bit the has only one 8M ROM This ROM is the GQ chip option GQ mode program and GQ 8M ROM fonts or the local language ROM fonts option except in 1000 1500 This stores the Model type Printed page counter value Toner life setting The 1000 s standar...

Page 72: ...can be specified using A page error occurs when the V RAM is so that the cannot process data faster than it is transmitted to the engine controller board If such error occurs increase the V RAM using The CPU transmits image data stored in the V RAM in a temporary buffer in the SRAM which is located in an address space different from the CPU The temporary buffer has a capacity equivalent to several...

Page 73: ...e CPU can also be issued to reset all the devices to the RESET line This circuit uses an M51954A to monitor the supply voltage and reset the CPU if a voltage level less than 4 25 V is detected The reset time is approximately 840 ms WCC OUT M51954AFP c 74LS05 Figure 2 38 Reset Circuit 2 2 1 2 Bus Control Circuit outputs the R W read write signal AS address strobe signal and the FCO and FC2 signals ...

Page 74: ...is mounted providing a total of sockets 32 33 34 10 11 12 13 17 16 15 14 are optional DRAM sockets These sockets can use x 4 bit DRAMs or x 4 bit In the EPL 5200 ActionLaser 1500 a standard x 16 bit DRAM and four x 4 bit DRAMs are mounted in locations 31 32 33 34 which provide a total of The sockets IC1O 11 12 13 17 16 15 14 are optional DRAM sockets These sockets can use x 4 bit DRAMs or x 4 bit ...

Page 75: ...es serial data to parallel data Since the 1000 does not have an the CPU must check the type for an interface at initialization In a printer with an interface the terminal pin 16 for the is up to 5 The CPU checks the termina pin for at initialization If the ter is LOW the CPU assumes that the printer is a model with no The model with no built in the ActionLaser 1000 can use a non intelligent option...

Page 76: ...e second group is the synchronizing signal for the printing operation The third group VIDEO is the serial video data signal The fourth group CMD and ETBSY is used to transfer the coremands from the video controller or the status from the engine controller for printer mechanism control This printer has function 1000 or standard ActionLaser 1500 This function modifies the VIDEO signal with the gate ...

Page 77: ...pty Sensor Removal 3 12 High Voltage Supply Board PWB F Removal 3 13 Main Motor Ml Removal 314 Fan Motor M3 Removal 315 Fusing Unit Removal 315 3 2 3 10 Unit Disassembly 316 3 2 3 11 Image Transfer Roller Removal 317 3 2 3 12 PaperTake Up Roller Removal 318 List of Figures Figure 3 l Removing the Interface Cover 3 4 Figure 3 2 Screws 3 4 Figure 3 3 Pulling the Tab 3 4 Figure 3 4 Controller Board 3...

Page 78: ...16 Figure 3 21 Removing the Image Transfer Assembly 3 17 Figure 3 22 Removing the Image Transfer Roller 3 17 Figure 3 23 Removing the Paper Take Up Assembly 3 18 Figure 3 24 Removing the Paper Take Up Roller 3 19 List of Tables Table 3 1 Tools 3 1 Table 3 2 Abbreviations Used for Screws 3 2 Table 3 3 Screw Types and Abbreviations 3 2 Table 3 4 Checks after Repair 3 3 3 ii Rev ...

Page 79: ...e high voltage unit Do not disassemble the If the is the do not place it in the direct sunlight Do not disassemble the printhead unit Never turn power on if the unit is not installed To prevent damage to static do not touch the on the circuit board or the terminals of electrical components your hands Use only the recommended tools to ensure safe and maintenance work tools may damage the machine Ne...

Page 80: ... head CC screw Cup head Screw Cross recessed Pan head with Outside toothed took washer screw Cross recessed Pan head with Spring lock washer and Plain washer CCB screw Cross recessed Cup head Bind SCB screw Slotted B tite screw Slotted Cross recessed Bind with Spring washer and 1 Plain washer Table 3 3 Screw Types and Abbreviations Head Top 1 Gross recessed head 2 recessed head Side 3 Body 1 Norma...

Page 81: ... card slot sample Printing I Data print Does data print in all modes Is the gap between the top edge of the paper and Adjustment Print position the line in the feature print exactly 32 4 mm EPL 5000 or ActionLaser 1000 or 33 5 mm 1500 I ROM version I IS it the Is toner and dust removed from the paper path Is the tens on the printhead unit cleaned Cleaning Is the paper take up roller cleaned Is the...

Page 82: ...oard 3 2 1 1 Video Controller Board MAIN Removal Before you remove the video controller board make sure that you remove any optional cards or cartridges Otherwise you may damage the or card connectors on the board as well as the cartridge or card itself Turn the printer so that its left side faces you 2 Remove the 2 screws x 14 securing the interface card cover then off the cover 3 Remove the 3 sc...

Page 83: ...rd from board CP X 5 Figure 3 5 Removing the 3 Screws ure 3 6 the Upgrade oard 3 2 1 3 Control Panel Removal cartridge Cover the imaging cartridge to it from the light or place it in a dark area 2 Remove 1 CC screw x 8 from the control panel 3 Lift control and then remove CN3 on the engine controller board 4 Remove the control panel CC X 8 Figure 3 7 Removing the Control Panel Rev A 3 5 ...

Page 84: ...ove the imaging cartridge Cover the imaging cartridge to protect it from the light or place it in a dark area Remove the control panel Refer to Section Remove the paper cover Remove 3 CC screws x 8 for the paper guide case and remove the paper guide case Loosen 2 CC screws x 8 and the front cover Remove 1 CCB screw x 8 and 2 CC screws x 8 and remove the right cover Remove 3 CC screws x 8 and left ...

Page 85: ...tect it from the light or place it in a dark area Remove the control panel Refer to Section 3 2 13 Remove the paper cover Remove therightcoverand left cover Refer to Section 3 2 2 Remove the top cover Remove 6 screws x 6 and lift the rear frame Discomect comector on the power supply board and connector on the high voltage supply board PWE3 E Board X 6 Figure 3 9 Removing the Rear Frame ...

Page 86: ...IN board Refer to Section Open the top cover Remove the imaging cartridge Cover the imaging cartridge to protect it from the light or place it in a dark area Remove the control Refer to Section Remove the paper cover Remove the right cover Refer to Section Disconnect and on the engine controller board Remove 4 CC screws x 6 on the engine controller board Remove the engine controller board cc cc X ...

Page 87: ...idge to protect it from the light or place it in a dark area Remove the control panel Refer to Section Remove the paper cover Remove the right cover Refer to Section CN4 and on the power supply board and on engine controller board the for the interlock switch Remove 2 screws x 6 and remove the power supply unit X 6 6 Board Figure 3 11 Removing the Power Supply Unit Rev 3 9 ...

Page 88: ... protect it from the light or place it in a dark area 2 Remove the control panel Refer to Section 3 2 1 3 3 Remove the paper cover 4 Remove the right cover Refer to Section 5 Remove the power supply unit Refer to Section 3 2 3 2 6 Remove 2 CC screws x 16 for the interlock switch and remove the interlock switch CC X 16 Figure 3 12 Removing the Interlock Switch 3 1o Rev ...

Page 89: ...osition A in the Do not loosen the 2 screws shown in position the figure 1 Open the top cover Remove the imaging cartridge Cover the imaging cartridge to protect it from the light or place it in a dark area 2 Remove the control panel Refer to Section 3 Remove 4 Remove Refer to 5 Disconnect connector engine controller board 6 Remove 2 CC screws 6 and CC screw 12 and remove unit B A I CC M3 X 6 B Bo...

Page 90: ...k area 2 Remove the control panel Refer to Section 3 2 1 3 3 Remove the paper cover 4 Remove the paper guide case Refer to Section 3 2 2 1 5 Remove the power supply unit Refer to Section 3 2 3 2 6 Remove thepnnthead unit Refer to Section 3 3 3 4 7 Remove the paper empty sensor 8 Disconnect the comector for the paper empty sensor Paper Em Right Frame Connector Figure 3 14 Removing the Paper Empty S...

Page 91: ...ction 3 Remove the paper cover 4 Remove therightcoverand left cover Refer to Section 3 2 2 5 Remove the top cover 6 Remove the rear frame Refer to Section 3 2 2 2 7 connectors the red wire terminal and the black wire terminal on the high voltage supply board 8 Remove 3 screws x 8 on the high voltage supply board and remove the high voltage supply board CP CP X 8 CN1 X Red Terminal Black Wire Termi...

Page 92: ...light or it in a dark area Remove the control panel Refer to Section Remove the paper cover Remove the right cover and left cover Refer to Section 3 2 2 Remove the top cover Remove the rear frame Refer to Section 3 2 2 2 Remove 4 screws x 6 for the main motor Ml Lift the main motor Ml and discomect the connector for the main motor Ml Ml x 6 Figure 3 16 Removing the Main Motor 3 14 Rev ...

Page 93: ... Removing the Fan 3 2 3 9 Fusing Unit Removal 1 2 3 5 6 7 8 Motor Open the top cover Remove the imaging cartridge Cover the imaging cartridge to protect it from the light or place it in a dark area Remove the control panel Refer to Section Remove the paper cover Remove the right cover and left cover Refer Section 3 2 2 Remove the upper unit Remove the rear frame Refer to Section 3 2 2 2 the connec...

Page 94: ... support plate and remove the heater lamp support plate 5 Remove the heater lamp Paper Exit Sensor CC X 6 CC 6 L Figure 3 19 Disassembling the Fusing Unit 1 Be careful not to scratch the surface of the upper roller 6 Remove 2 CC screws x 6 on the guide plate and remove the guide plate 7 Remove 2 springs and 2 bushings on the cleaning roller and remove the cleaning roller 8 Remove 2 springs and 2 b...

Page 95: ...ver Remove the left and right covers Refer to section 3 2 2 1 Remove the top cover Refer to Section 3 2 2 1 Remove the rear frame Refer to Section 32 2 2 Remove the fusing unit Refer to Section 3 23 9 Slide the image transfer assembly to the left lift up the right side and remove the image transfer assembly Remove the image transfer roller Figure 3 21 Removing the Image Transfer Assembly Figure 3 ...

Page 96: ...e Refer to Section 3 2 2 2 Remove the fusing unit Refer to Section 3 2 3 9 Remove the power supply unit Refer to Section 3 2 3 2 Remove the printhead unit Refer to Section 3 2 3 4 Remove the image transfer assembly Refer to Section 3 2 3 11 comectors CN3 the red wire terminal and the black wire terminal on the high voltage supply board Remove the 2 CC screws x 8 on the guide plate Remove the guide...

Page 97: ... cover 17 Remove 1 E ring on the paper take up clutch and remove the paper take up clutch Remove 2 E rings and left bushings on the paper take up roller shaft Remove the paper take up roller Paper Take Up Clutch Figure 3 24 Removing the Paper Take Up Roller Rev A 3 19 ...

Page 98: ...sition Adjustment 4 1 List of Figures Figure 4 1 Print Position Adjustment 4 1 Figure 4 2 Opening the Upper Unit Upper Cover and Removing Screw 4 1 Figure 4 3 Holding the Control Panel and Adjusting VRIA 4 2 Figure 4 4 Closing the Upper Cover and the Upper Unit 4 2 Rev 4 i ...

Page 99: ... below 1 Set LANGUAGE to ENGLISH in Level 2 2 Run a FEATURE PRINT in Level 2 Perform the following procedure if the registration gap between the leading edge of paper and the printing of a horizontal line is not the following value PRINT page for 1000 2 5 FEATURE PRINT page for 2 5 mm 1 41 0 10 inch Note The FEATURE contains the model name on side Check the model name on the PRINT page before adju...

Page 100: ...r the 1500 Turn clockwise to decrease the gap for the print position of the horizontal line Turn counterclockwise to increase the gap Turn on the printer Run a FEATURE PRINT in Level 2 again to check the print position Repeat steps 3 to 7 above the print position is 32 4 1 27 inch or 33 5 mm 1 32 inch Reattach the control panel securing it with the one screw close the upper cover and close the upp...

Page 101: ...LCD Displays PAPER JAM at Power On 5 6 Table 5 12 The LCD Displays PAPER JAM during Paper Feeding 5 7 Table 5 13 The LCD Displays RESELECT TRAY 5 7 Table 5 14 The LCD Displays RAM ERROR 5 7 Table 5 15 The LCD Displays START UP ERROR 5 7 Table 5 16 The LCD Displays SERVICE REQ 5 8 Table 5 17 The LCD Displays SERVICE REQ 5 8 Table 5 18 The LCD Displays SERVICE REQ 5 9 Table 5 19 The LCD Displays SER...

Page 102: ...ror Condition Error Type Fusing Unit Error Main Motor Error Fan Motor Error Scanner Mirror Motor Error Engine Error Laser Light Error Communication Error for Engine Controller and Video Controller Bus Error Address Error illegal Instruction Division by O Zero Instruction TRAPV Instruction Execution Privilege Violation Trace Mode Unimplemented Instruction cool 1 Unimplemented Instruction Uninitiali...

Page 103: ...oting table Table 5 3 Symptoms and Reference Table Symptom Printer Condition Reference Table The printer does not operate at all The heater lamp in fusing unit does not come on and so RAM check is not started RAM check not displayed The heater lamp in fusing unit comes on but RAM check is not started I 5 5 COVER OPEN The upper unit is closed but the LCD still displays COVER OPEN 5 6 PAPER OUT The ...

Page 104: ...d the ROM B board is used 5 25 The LCD displays SERVICE REQ Cl 140 and SERVICE REQ Cl 140 the chip option or the language ROM is 5 26 inserted into on the Cl 08 MAIN board SERVICE REQ Cl 114 The LCD displays SERVICE REQ Cl 114 5 27 Other SERVICE REQ displayed The LCD displays another SERVICE REQ error 5 28 code Table 5 4 The Printer Does Not Operate at All Cause Step Finding Solution Connector on ...

Page 105: ...s closed Does the switch toggle Check with Finding Yes No No Solution Connect the terminal connector on the interlock switch Reseat the interlock switch Replace the interlock switch Replace the board Table 5 7 The LCD Displays PAPER OUT Cause Step Checkpoint Finding Solution The paper empty sensor flag position may be 1 Is paper empty sensor flag No Reseat the paper incorrect position OK empty sen...

Page 106: ...sistance approximately 80 ohms If the coil is shorted check the solenoid drive circuit The paper take up solenoid using the procedure below coil may be open or shorted 1 Set the for voltage 2 Place the terminal of the on pin 7 Replace the paper of connector on the Yes take up solenoid board and the 3 Place the terminal of board the on pin 5 With power on does the detect any current Paper take up s...

Page 107: ...B A board board 3 Place the terminal on ground to jumper J2 With power on does the detect any current The paper take up roller in the lower paper cassette may 2 Replace the paper be bad take up roller Table 5 11 The LCD Displays PAPER JAM at Power On Cause Step Checkpoint Finding Solution The paper take up sensor Is the paper take up sensor Reposition the flag position may be incorrect 1 flag posi...

Page 108: ...isplays SERVICE REQ Cause The main motor coil may be open or shorted The board maybe dead Step 2 Disconnect connector on the board and check the coil resistance between pin 1 and pin 2 pin 2 and pin 3 pin 4 and pin 5 and pin 5 and pin 6 4 points total on the disconnected cable side of the connector using a Pin 1 Pin 2 Pin 2 Pin 3 Pin 4 Pin 5 Pin 5 Pin 6 Are the resistances of all four points appro...

Page 109: ...ng Solution unit maybe Replace the dead unit The board Replace the dead board Table 5 21 The LCD Displays SERVICE REQ EO014 Step Checkpoint Finding Solution Cause The board maybe bad Replace the board Replace the MAIN board The MAIN board may be bad Table 5 22 The LCD Displays SERVICE REQ Cause Step Checkpoint Finding I Solution Replace the ROM B board Replace the MAIN board The ROM B board may be...

Page 110: ... board Replace the MAIN may be bad board Table 5 26 The LCD Displays SERVICE REQ Cause Step Checkpoint Finding Solution The ROM on the Replace the ROM Cl 08 MAIN board may 1 on the be bad MAIN board The MAIN board I Replace the mav bad MAIN board Table 5 27 The LCD Displays SERVICE REQ I Cause Step Checkpoint Finding Solution The on the Replace the Cl 08 MAIN board maybe 1 on the bad Cl 08 MAIN bo...

Page 111: ...k to see if the Image transfer surface of image Replace the image Image transfer roller transfer roller is transfer roller problem damaged board Replace the board Paper problem Paper Check to see if paper is moist Defective unit Replace the unit unit Improper print Adjust the print density setting density using level 2 Foggy background Replace the imaging Imaging cartridge development Check the wi...

Page 112: ... on the fusing roller Replace the board Replace the board board Image transfer roller Check the surface of the image transfer Replace the image roller transfer roller Replace the board Adjust the print density in level 2 board unit Replace the unit Imaging cartridge Replace the imaging cartridge Replace the board Black print board Imaging cartridge board Replace the imaging cartridge Replace the b...

Page 113: ...fer roller I board Replace the ABC board Shake the imaging Poor Imaging cartridge cartridge Replace the imaging 1 cartridge Poor board Replace the development board Paper problem Paper Check to see if Replace the paper paper is moist Toner smudges on Image transfer Check the back side of pages Clean the image roller surface of image transfer roller transfer roller Fusing roller Clean the fusing ro...

Page 114: ...nued Symptom Possible Cause Parts Name Check Item Remedy Black specks or dots Imaging Shake the imaging Poor cartridge cartridge Replace the ABC DE development imaging cartridge ABC board Replace the C DE board Defective PC Imaging Replace the imaging drum cartridge cartridge 5 14 Rev ...

Page 115: ...2 2 Cleaning 6 4 List of Figures Figure 6 1 External Cleaning 6 1 Figure 6 2 Cleaning Printhead Unit Lens 6 1 6 2 Figure 6 4 Shaking the Imaging Cartridge 6 2 Figure 6 5 Removing the Clear Seal 6 2 Figure 6 6 Inserting the Imaging Cartridge 6 2 Figure 6 7 Toner Counter Setting 6 3 List of Tables Table 6 1 Weight and Toner Counter 6 3 Table 6 2 Periodic Service Maintenance 6 4 Cleaning Parts and Pr...

Page 116: ...ce maintenance repair 6 1 1 User Maintenance Users can achieve maximum print quality from the printer by following the procedures below 6 1 1 1 Cleaning This section describes the g required for optimal print quality ExternalCleaning Be sure to discomect the printer from the power outlet before cleaning it Wipe the cover and external parts of the printer with a damp cloth that has been soaked in a...

Page 117: ...and remove the imaging cartridge by pulling 2 Dispose of the used imaging cartridge 3 holding the new imaging cartridge horizontally gently shake it a few times to distribute the toner evenly Figure 6 3 Removing the Imaging Figure 6 4 Shaking the Imaging Cartridge Cartridge 4 Set the imaging cartridge on a clean flat surface Firmly grip the tab on the left side of the cartridge Pull the clear seal...

Page 118: ...full toner Select TONER in Level 2 in the second printer and set the toner counter to the same value as the counter for the first printer Figure 6 7 shows an example of when the toner counter is F 1 Toner Lrft Counter Check Used Imaging 2 Toner Left Counter Set Cartridge I Current Printer New Printer Figure 6 7 Toner Counter Setting 3 If you remove an imaging cartridge from a printer with a malfun...

Page 119: ... service interval above is only a reference value You do not need to perform service maintenance exactly at this time 6 1 2 2 Cleaning Some parts of this printer require regular cleaning Clean each part using the specified method and tools Refer to Chapter 3 for of disassembly Table 6 3 Cleaning Parts and Procedures Parts Name Cleaning Procedure 1 Image Transfer Roller Printhead Lens Wipe the surf...

Page 120: ...8 MAIN Control Board Circuit Diagram A 12 Figure A 4 C82907 ROM B Board Circuit Diagram A 13 Figure A 5 Control Panel Circuit Diagram A 14 Figure A 6 PWB A Board Circuit Diagram A 15 Figure A 7 Basic Circuit Diagram A 16 Figure A 8 C108 MAIN Board Component Layout Front Side A 17 Figure A 9 C108 MAIN Board Component Layout Back Side A 18 Figure A 10 C82907 ROM B Board Component Layout Front Side A...

Page 121: ...ent Table A 3 Assignment A 5 Table A 4 Assignment Table A 5 Table A 6 Table A 7 CN8pin Assignment Assignment Table A 9 Table A 10 PinAssignment Assignment Table A 13 Assignment Pin Assignment Table A 15 Pin Assignment Table A 17 CN3pin Assignment A ii ...

Page 122: ...llustrate the interconnection of the primary components Table A 1 gives size and a description of each connector Video Controller Board C108 MAIN Board Parallel l F ROM B Board r HP font cartridge and Option l F card Engine Controller Board Figure A 1 Cable the Video Rev A ...

Page 123: ...Appendix Laser 1000 1500 Service Manual c m 0 L v E Figure A 2 Cable Connections for the Engine Section A 2 Rev ...

Page 124: ... panel 16 pins Not Connector for printhead unit 13 pins Table A 8 Connector for paper take up solenoid paper exit sensor and paper empty sensor 8 pins Table A 9 Connector for high voftage supply board board 9 pins Table A 10 Connector for power suppfy board board 11 pins Table A 1 1 Connector for lower paper cassette 7 pins Table A 1 2 CN1O Not Connector for thermistor 2 pins Table A 1 3 Connector...

Page 125: ... bit 7 Data bus bit 4 Data bus bit 5 Data bus bit 10 Data bus bit 11 Data bus bit 8 Data bus bit 9 Data bus bit 14 Data bus bit 15 Data bus bit 12 Data bus bit 13 Address bus bit 1 Address bus bit 2 Ground Address bus bit 5 Address bus bit 6 Address bus bit 3 Address bus bit 4 Address bus bit 9 Address bus bit 10 Address bus bit 7 Address bus bit 8 Address bus bit 13 Address bus bit 14 Address bus...

Page 126: ...nal Clock from CPU Not Board identification O Board identification 1 Font ROM 2 select Font ROM 3 select Reset signal Option select 5 VDC Initialize from the option Font ROM 2 enable signal Code ROM enable Font ROM 5 enable error Reset the option Font ROM 6 enable VDC Table A 3 Pin Assignment Pin No Signal Name 1 3 2 4 5 v 5 SVCLK 6 7 8 VIDEO 9 10 11 RESET 12 13 14 ROM2X 15 RIT2 o 0 I o 0 0 0 0 I ...

Page 127: ... bit 8 Address bus bit 10 Address bus bit 12 Address bus bit 14 Address bus bit 16 Address bus bit 18 Address bus bit 20 Data bus bit 1 Data bus bit 3 Data bus bit 5 Data bus bit 7 Data bus bit 9 Data bus bit 11 Data bus bit 13 Ground 5 VDC Upper data strobe Address decode Ground Address bus bit 1 Address bus bit 3 Address bus bit 5 Address bus bit 7 Address bus bit 9 Address bus bit 11 Address bu...

Page 128: ...16 o Write enable 17 o Read enable 18 o Chip select 19 24 Ground 25 28 o Address bus bit 3 O 29 36 Data bus bit 7 O Table A 6 Pin Assignment Pin No Signal Name Description Ground 2 5 v 5 3 o card enable 4 I Not 5 20 DB15 DBO Date bus bit 15 0 21 SET I card presence check 22 42 AB21 AB1 o bus bit 21 1 43 o card select 44 R w o Read write strobe 45 UDSX o Upper data strobe 46 LDSX o Lower data strob...

Page 129: ...nnected 19 Ground 20 RESETX o Reset signal 21 Ground 22 NC Not connected 23 Ground 24 HSYNCX I HSYNC for video I F 25 EPRDYX Engine controller ready 26 PRDYX I Print ready 27 TODX I Video request 28 ETBSYX I Engine controller busy 29 STSX Status transfer 30 CMDX o Command transfer 31 CTBSYX o Video controller busy 32 o Print signal 33 SRCLKX o Serial transfer clock 34 CPRDYX o Video controller rea...

Page 130: ...power adjust 1 0 Laser power adjust 2 I Laser power signal I Horizontal synchronous signal Ground Table A 9 Pin Assignment Pin No Signal Name l O 5 2 3 I 4 5 5 6 I 7 24 8 SL1 o Description 5 Ground Paper empty 5 Ground Paper exit 24 Paper take up solenoid drive Table A 10 Pin Assignment Pin No 2 3 4 5 6 7 8 9 Signal Name DC5V DC24V M3 CNT I o I o 0 0 0 Ground Paper take up 5 24 Ground Drum charge ...

Page 131: ...4 3 Ground 4 NC Not connected 5 SL2 o Lower cassette solenoid on 6 S3 I Lower cassette detected 7 PC4 I Lower cassette paper empty Table A 13 CN11 Pin Assignment Pin No Signal Name Description 1 TH1 I Thermistor 2 5 5 Power Supply Board PWB E Board Table A 14 Pin Assignment Pin No 2 3 4 5 6 Signal Name B o 24 B o A o 24 A o Description Ml phase B 24 Ml phase B Ml phase A 24 Ml phase A Table A 15 P...

Page 132: ...anual Appendix A 1 4 High Voltage Supply Board Board Table A 16 Pin Assignment Pin No Signal Name 1 0 Description 1 24 24 2 o M3 control Table A 17 Pin Assignment Pin No Signal Name Description 5 5 2 GND1 Ground PC2 I Rev A 11 ...

Page 133: ...Laser 100W15OO Service Manual Appendix I I I I 0 o Figure A 4 C82907 ROM B Board Circuit Diagram Rev ...

Page 134: ...Manual 1 m 0 0 0 0 a 0 N 1 1 1 1 1 1 1 1 0 I 1 I VI Figure A 5 Control Panel Circuit Diagram A 14 Rev ...

Page 135: ...Laser 100W15OO Service Manual Appendix 10 W Figure A 6 PWB A Board Circuit Diagram Rev A 15 ...

Page 136: ...Appendix Laser 100LW5OO Service Manual W I u I z z II I em m m m m u Figure A 7 Basic Circuit Diagram u A 16 Rev A ...

Page 137: ...1000 1500 Service Manual Appendix A 3 CIRCUIT BOARD COMPONENT LAYOUT I 1 Figure A 8 C108 MAIN Board Component Layout Front Side Rev A 17 ...

Page 138: ...Appendix Laser Service Manual 0 o 0 o o Figure A 9 C108 MAIN Board Component Layout Back Side Rev A ...

Page 139: ...Laser 10QW15OO Manual Appendix I Figure A 10 ROM B Board Component Layout Front Side 79 77 80 J C7 200934600 Figure A Il ROM B Board Component Layout Back Side Rev A 19 ...

Page 140: ...9 List of Figures Figure B 1 MAIN B Board Block Diagram B 2 Figure B 2 Cable Connections for MAIN B B 4 Figure B 3 MAIN B Board Circuit Diagram B 7 Figure B 4 MAIN B Board Component Layout Front B 9 Figure B 5 MAIN B Board Component Layout Back B 9 of Tables Table B 1 MAIN B Board Block Diagram B 2 Table B 2 Functions of MAIN B Board Main Elements B 3 Table B 3 Board Connector Summary B 5 Rev C B ...

Page 141: ...nd current 1500 are same MAIN COMPONENTS This section describes the MAIN B board 6 2 1 MAIN B Board The MAIN B board is video The functions of this board main are receiving print data from host generating print image video and sending the print image to the engine controller via the video interface A M bit 16 67 MHz CPU location is used and the following memory chips and custom are assigned to the...

Page 142: ...ket Connector and None None Connector Board fixed pole None None Three poles B 3 MAIN B BOARD OPERATION The operation for MAIN B board is same as operation for MAIN board with ROM B Board Figure El shows a block diagram of the MAIN B board The MAIN B board contains the video controller which consists of a 16 bit 68000 16 67 MHz CPU the standard cells developed this printer DRAMs ROM and a ADDHESS ...

Page 143: ...Parallel cell DRAM management with the Video signal switching This ROM stores the following Basic operating program 16M ROM PCU5 EPSON emulation mode program emulation mode program Fonts This ROM is the GQ chip option GQ mode program and GQ 8M ROM fonts or the local language ROM fonts option except in ActionLaser 1500 This EEPROM stores the following Model type EEPROM Printed page counter value To...

Page 144: ...igures B 2 illustrate the of the primary components Table B 3 gives the size and a description of each comector Video Controller C108 MAIN B Board Parallel l F Optional Board L HP font Figure Option l F Card CN1 Engine Board B 2 Cable Connections for B 4 Rev C ...

Page 145: ...ins Not Connector for printhead unit 13 pins Table A 8 Connector for paper take up solenoid paper exit sensor and paper empty sensor 8 pins Table A 9 I Connector for high voltage supply board board 9 pins Table A 1 O I Connector forpowersupply board board 11 pins Table A 11 1 1 lower paper cassette 7Pins Table A 12 CNIO CN1l Connector for thermistor 2 pins Table A 1 3 Control Panel Connector for e...

Page 146: ...1000 1500 Service Manual Appendix B B 6 CIRCUIT BOARD COMPONENT LAYOUT I I I 0 i J I I Figure B 4 CI08 MAIN B Board Component Layout Front Rev C B 9 ...

Page 147: ...Appendix B Service Manual o 0 R m43 Figure B 5 CI08 MAIN B Board Component Layout Back B 10 Rev C ...

Page 148: ...INSTRUCTIONS C 3 Control Panel C 3 Optional EEPROM Reset DIFFERENCES IN COMPONENTS c 6 Figure C 1 Figure C 2 Figure C 3 List of Figures Board Circuit Diagram C 7 MAIN B Component Layout Front C 9 MAIN B Component Layout Rear C 10 List of Tables Table C 1 Options for EPL 5200 Built in Fonts Table C 3 Differences in Main Board ...

Page 149: ...ce Motorola 68000 Toner save mode Table C 1 lists the optional units available for the Table C 1 Options for Cat No I Description Note C83213 Level 2 Module ROM SIMM type PostScript level 2 emulation C83212 Level 2 Cartridge Cartridge type PostScript level 2 emulation GQ chip ROM Supports GQ mode fonts and commands Local language ROM Supports local language fonts 250 sheet lower paper cassette A4 ...

Page 150: ...rier 12 Portrait 12 Portrait 20 Portrait Scalable fonts 801 Roman Dutch 801 Bold Dutch 801 Italic Dutch 801 Bold Italic 742 Swiss 742 Bold Swiss 742 Medium Italic Swiss 742 Bold Italic Swiss 721 Roman Swiss 721 Bold Swiss 721 Oblique Swiss 721 Bold Oblique Dutch 801 Roman Dutch 801 Bold Dutch 801 Italic Dutch 801 Bold Italic Symbol Set More WingBats Courier Courier Bold Courier Italic Courier Bold...

Page 151: ...meters can be displayed and set using mode Indicator lights ONLINE ON Communication with the host is possible OFF Communication with the host is impossible Flashing This state occurs when the system cannot shift from off line to on line or vice versa FEED This LED indicates the data processing condition for each interface channel S O ON OFF Fast flashing Slow flashing Indicates that received data ...

Page 152: ...s return to their previously saved value INITIALIZE Continuing to hold this button down after RESET causes the message to change to INITIALIZE This function clears received data and returns Level 1 and 2 settings to their power on settings Holding down this button while turning on the printer causes FACTORY RESET to appear on the display and settings return to the factory settings COPY END Cancels...

Page 153: ...are only required when the main board replacement replacement or firmware version is revised and these operations are specified in the accompany ing documentation memory reset excluding clearing of the page counter and toner counter Turn on the power while pressing the ON LINE FEED and CONTINUE buttons simultaneously the printer enters clear mode and the message START UP ERROR is displayed on the ...

Page 154: ... board The MAIN B board and the MAIN B board are same function The differences between parts in the MAIN B board and the MAIN B board areas following table Table C 3 Differences in Main Board Parts MAIN B MAIN B CPU clock 16 7 MHz 20 0 MHz CPU Include 68 E05A84 ASIC E05A64 and toner save function Code ROM program with CG program ROM CG mask ROM data ROM M80A99 ...

Page 155: ...Service Manual Appendix C 0 ml 10 r 0 0 0 0 0 0 0 0 0 00 Figure C 2 C154 MAIN B Component Layout Front Rev E c 9 ...

Page 156: ...Appendix C Service Manual 3 C154MAIN B 1 0 1 3 2 2 J 1 1 121 M27C4OOI 1OXFIL I 4 1 I I27C4OO1 1OXF1L 1 2 1Rn30 22 I 1 1 u 7 0 N Figure C 3 C154 MAIN B Component Layout Rear c lo Rev E ...

Page 157: ......

Reviews: