


73
EATON
www.eaton.com
Instruction Booklet
IB020003EN
Effective January 2021
AMPGARD RVSS
Reduced Voltage Soft-Starter
User Manual
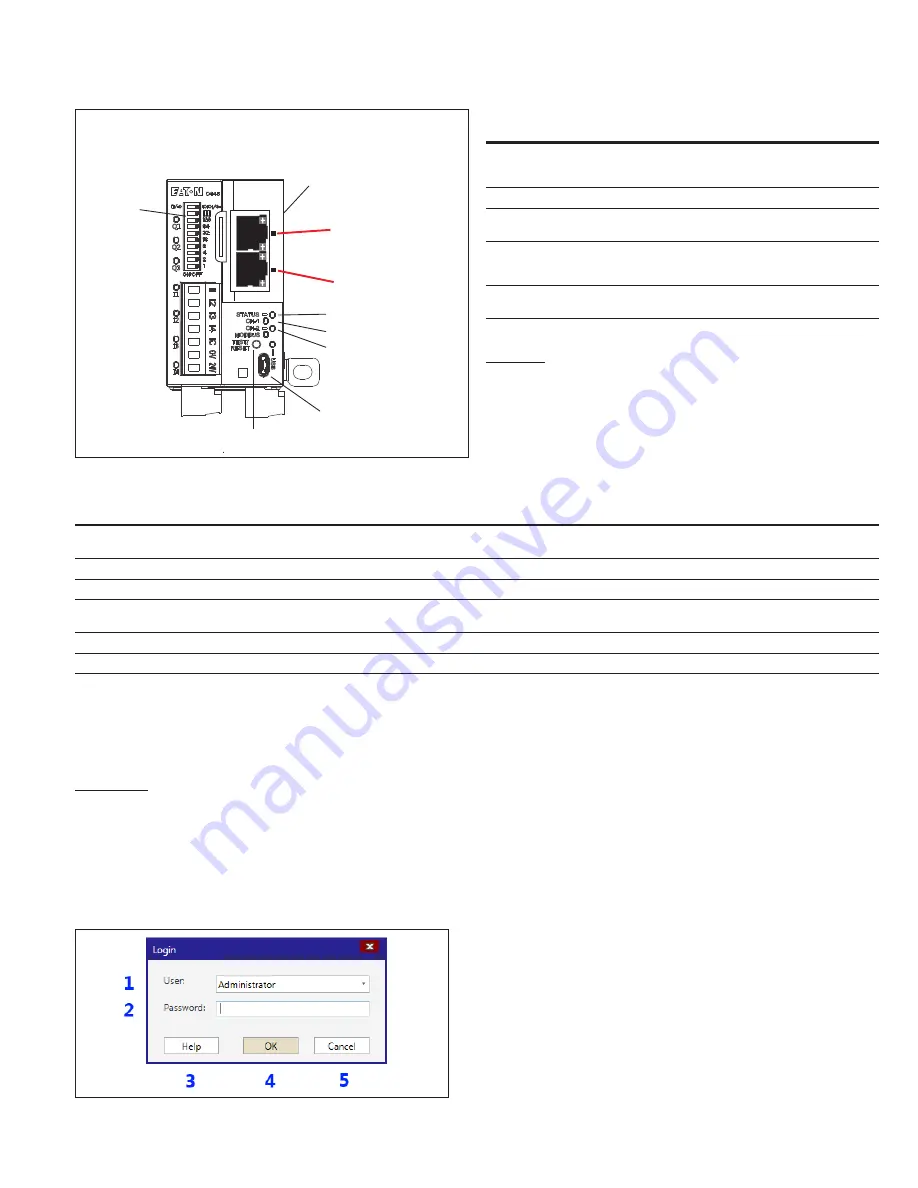
Figure 109.
Inputs
Status LED
CH 1 LED
CH 2 LED
USB Port
Test/Reset
Ethernet
Communication
Module
DIP
Switches
Front View
P1
P2
NS
MS
Network Status LED
Module Status LED
Network and module status LEDs.
Table 16. Ethernet card network status indicator states
Indicator state
Summary
Requirement
Steady Off
Not Powered,
No IP Address
The device is powered off, or is powered on but with no IP address configured (Interface Configuration attribute of the TCP/
IP Interface Object).
Flashing Green
No Connections
An IP address is configured, but no CIP connections are established, and an Exclusive Owner connection has not timed out.
Steady Green
Connected
At least one CIP connection (any transport class) is established, and an Exclusive Owner connection has not timed out.
Flashing Red
Connection
Time-out
An Exclusive Owner connection for which this device is the target has timed out. The network status indicator shall return to
steady green only when all timed out Exclusive Owner connections are re-established.
Steady Red
Duplicate IP
If the device has detected a non-recoverable major fault, the module status indicator shall be steady red.
Flashing Green and Red
Self-test
While the device is performing its power up testing, the module status indicator shall be flashing green and red.
9.4
Ampgard RVSS setup using inControl
Following are excerpts from the inControl Help utility, provided to
familiarize the user with the application.
9.4.1 Incontrol user interface features
Login screen
The Login dialog is displayed when you start the application. You
must successfully log in to use the application.
The first time you start the application, the Administrator role has no
password. It is recommended that you choose a password for the
Administrator role as soon as possible.
If only the Administrator role is enabled and the Administrator has no
password, an automatic log in as Administrator is done. See
and
.
Figure 110. Login window.
Table 17. Login window fields and buttons
Area
Function
Explanation
1
User
A dropdown menu with all available user
roles opens when you click the dropdown
button on the combo box.
2
Password field
Enter your password here.
3
Help
Pressing this button opens the Online Help
System for this page.
4
OK
Pressing this button validates the user
role and password and closes the dialog
window.
5
Cancel
Press this button to abandon login and
close the application.
Start page
After a successful login, the application shows the Start Page where
you can open your recently used projects, open a project file from
the file browser or create a new project. See


