OPERATION
VistaGRAPHX 2500 User's Manual
3-32
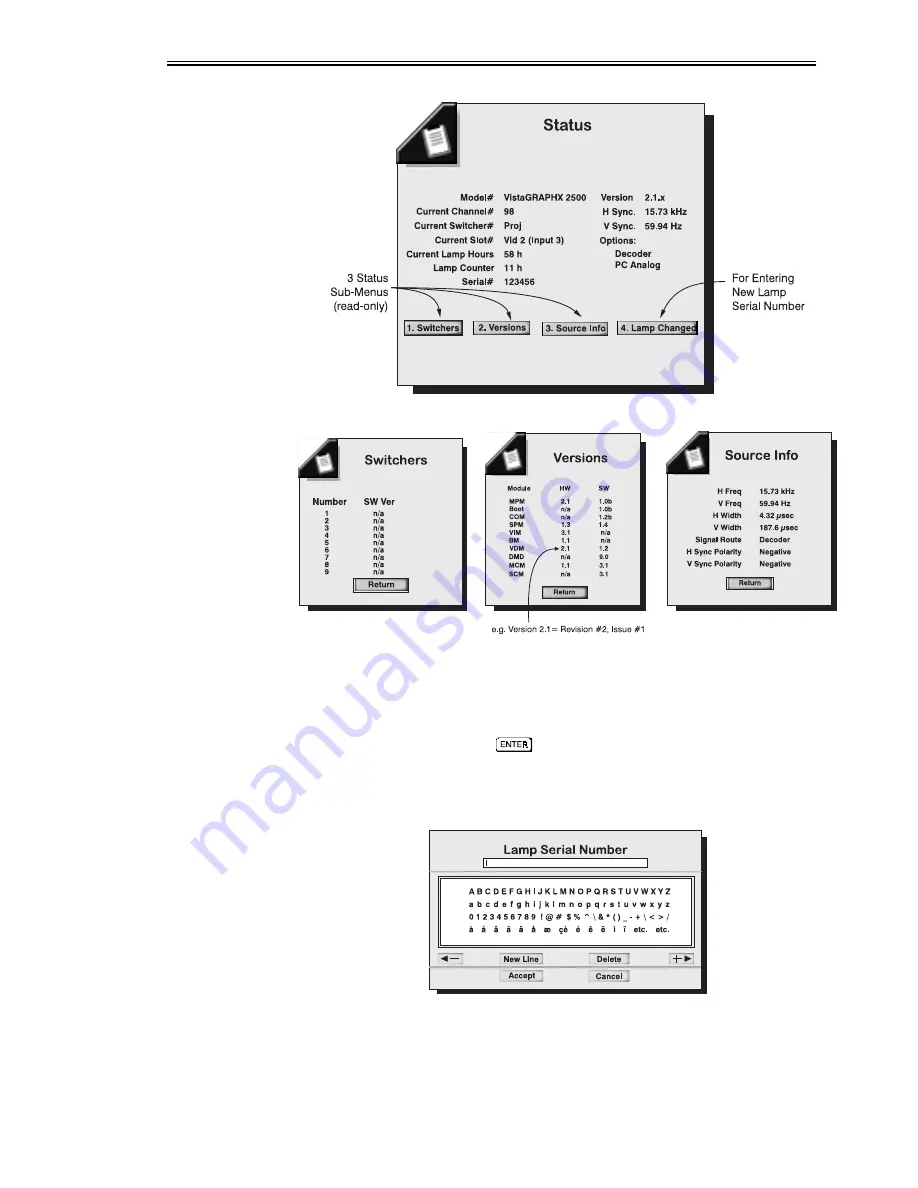
Figure 3-15. Main Status Menu (example)
Figure 3-16. Status Sub-menus (example)
Lamp Changed
When you install a new lamp assembly, select the "Lamp Changed" button on
the main Status menu to record the serial number of the new lamp. Using the
arrow keys to navigate, press
on the keypad to select each number or
character needed for the serial number (Figure 3-17). When done, select the
"Accept" button to record the new number. If you need help with this window,
see the Editing Text subsection earlier in this section.
Figure 3-17. Entering a New Lamp Serial Number
Recording the serial number of the new lamp automatically resets the lamp timer
to "0" to reflect the number of hours the lamp has been used. The timer will now
begin logging each hour of use for the new lamp, recording the current level in
Summary of Contents for VistaGRAPHX 2500
Page 81: ...KEYPAD REFERENCE B 2 VistaGRAPHX 2500 User s Manual Figure B 2 Built in Keypad ...
Page 82: ...Appendix C Menu Tree VistaGRAPHX 2500 User s Manual C 1 ...
Page 84: ...SERIAL COMMUNICATION CABLES D 2 VistaGRAPHX 2500 User s Manual ...
Page 87: ...THROW DISTANCE CHARTS E 2 VistaGRAPHX 2500 User s Manual ...
Page 88: ...THROW DISTANCE CHARTS VistaGRAPHX 2500 User s Manual E 3 ...
Page 89: ...THROW DISTANCE CHARTS E 4 VistaGRAPHX 2500 User s Manual ...
Page 90: ...THROW DISTANCE CHARTS VistaGRAPHX 2500 User s Manual E 5 ...
Page 91: ...THROW DISTANCE CHARTS E 6 VistaGRAPHX 2500 User s Manual ...
Page 92: ...THROW DISTANCE CHARTS VistaGRAPHX 2500 User s Manual E 7 ...
Page 93: ...THROW DISTANCE CHARTS E 8 VistaGRAPHX 2500 User s Manual ...
Page 94: ...THROW DISTANCE CHARTS VistaGRAPHX 2500 User s Manual E 9 ...


