28
Owner's Manual for Duke Flexbake 5
TM
Proof and Bake Oven with WiFi Connectivity
PROGRAMMING CONTROLS - continued
CONFIG (CONFIGURATIONS)
Step 1
Touch the
button and then enter pin code 2 3 4 5
and Touch the
button when prompted.
Step 2
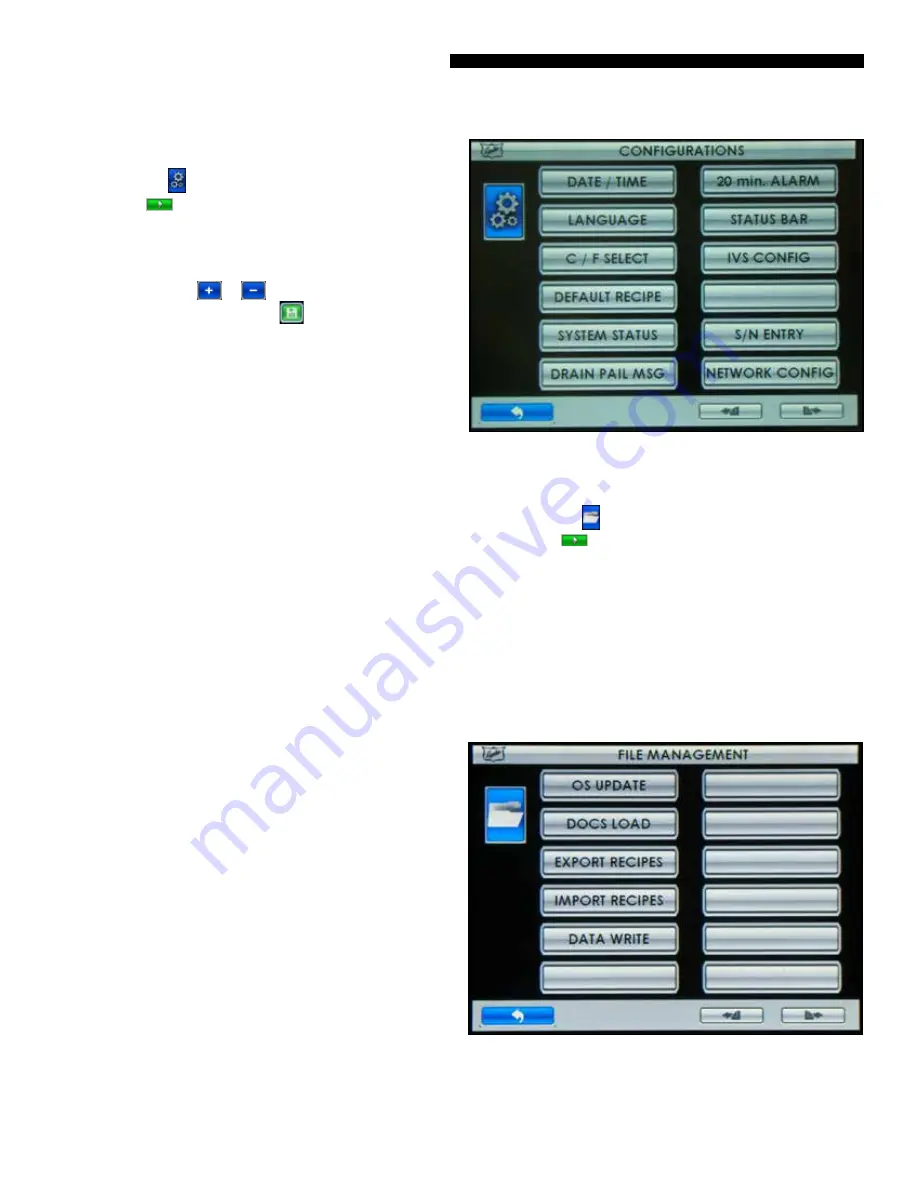
Touch the button for the setting you want to edit.
•
DATE/TIME – Touching will display DATE/TIME edit
screen. Touch the
or
button adjacent to the field
you want to change. Touch the
button to save the
changes.
•
LANGUAGE – Touching will display a list of included
languages. Touch the preferred language button to select.
•
C/F SELECT – Touching will toggle between CENTIGRADE
MODE ENABLED and FAHRENHEIT MODE ENABLED.
•
DEFAULT RECIPE – Touching will reload factory defaults.
•
SYSTEM STATUS – Touching will display unit status.
•
DRAIN PAIL MSG – Touching will toggle between message
enabled and disabled.
•
20 min. ALARM – Touching will toggle between 20 min.
ALARM ENABLED and 20 min. ALARM DISABLED. A bake
complete in 20 min. message and alarm will alert the
operator to retard the next load of bread for optimized
baking throughput.
•
STATUS BAR – Touching will toggle between STATUS BAR
ENABLED and STATUS BAR DISABLED.
•
IVS CONFIG – Touching will toggle between NO IVS
INSTALLED and IVS INSTALLED.
•
S/N ENTRY - Touching will display current oven S/N stored
within the control and an option to enter the S/N if
missing or incorrect.
•
NETWORK CONFIG – Touching will display network
connection options and subsequent configuration
settings screens. Refer to the NETWORK CONFIGURATION
section of this manual for detailed instructions.
Figure: Configurations Screen
FILES (FILE MANAGEMENT)
Step 1
Touch the
button and then enter pin code 3 4 5 6
and Touch the
button when prompted.
•
Select file operation from list and follow instruction on the
display screen.
•
OS UPDATE –Update the control firmware.
•
DOCS LOAD – Update the embedded User Manual and
graphics files.
•
EXPORT RECIPES – Saves Oven Recipes to a USB Drive
•
IMPORT RECIPES – Loads Oven Recipes from a USB Drive
•
DATA WRITE – Reserved for future use
Figure: File Management Screen


