


E-40
5. Setting Up for Double Stacking in Link Mode
1
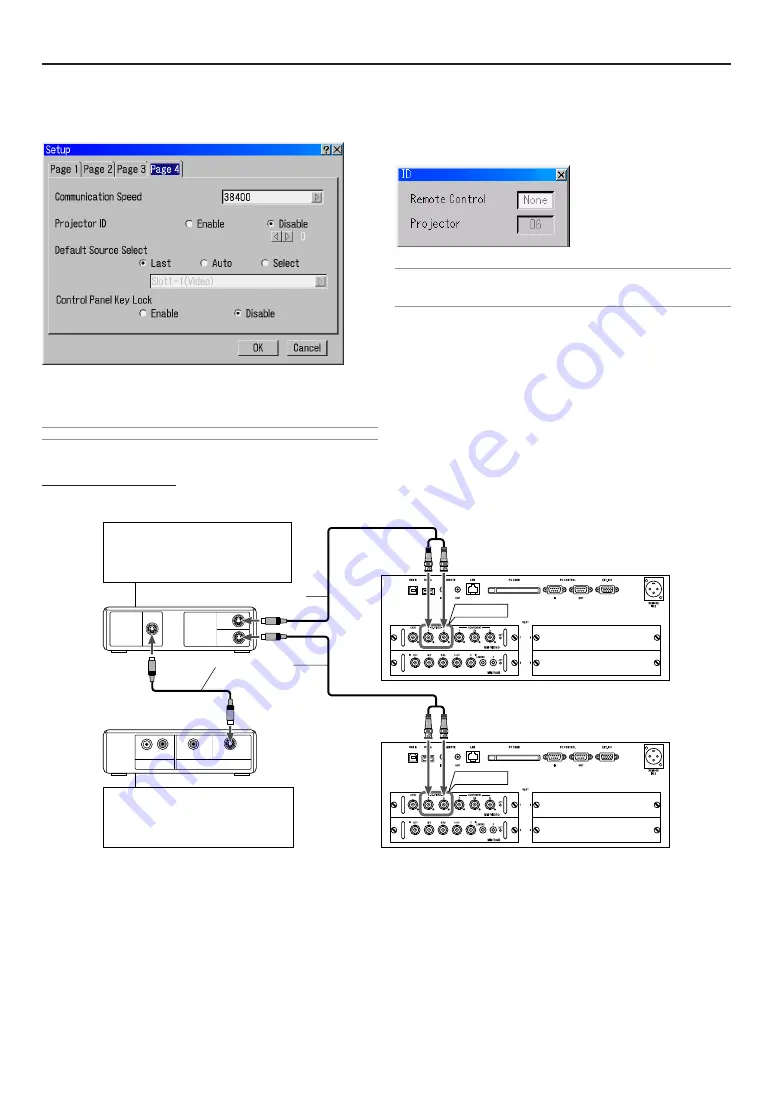
3-1. Select “Projector Options”
→
“Setup”
→
“Page4”
→
“Pro-
jector ID” and assign an ID number to each projector. See also
page 8-18.
1
-3-2. Select the same communication speed for both the pro-
jector.
NOTE: Do not turn on [Master] or [Slave] at this time.
2
1
S-VIDEO
S-VIDEO
OUTPUT
INPUT
AUDIO OUT
VIDEO OUT
L
R
S-VIDEO
VIDEO
S-Video cable
(not supplied)
S-VIDEO
S-VIDEO
Signal Divider
Picture Device
Master projector
Slave projector
According to signal dividers, the port
name, location and aspect are different.
Please check the signal dividers'
instruction manuals.
According to picture devices, the port
name, location and aspect are different.
Please check the picture devices'
instruction manuals.
S-Video cable (not supplied)
1
-3-3. On the remote control specify the ID number of the pro-
jector to be adjusted. Press and hold the CTL and press
MENU (ADDRESS) button to enter the ID number.
You can operate the projector assigned the same ID number
as the remote control.
NOTE: Specifying "None" for projector ID allows you to operate multiple projectors
concurrently. However, some projectors may not synchronize to the other projec-
tors.
1
-4. Stacking the Projectors
Place the projectors at the proper height for best screen to pro-
jector relationship. Make sure that all projectors have the same
display orientation.
1
-5. Cable Connection
Example on Video Signal
Picture signal is divided by commercial signal divider, and connected to both master projector’s and slave projector’s input ports.
Summary of Contents for HIGHlite 12000Dsx+
Page 34: ...E 34...
Page 72: ...E 72...
Page 73: ...E 73 7 Maintenance 1 Cleaning the Cabinet and the Lens E 74...
Page 88: ...E 88...
Page 89: ...E 89...
Page 90: ...E 90...


