


2–Driver Installation and Configuration
VMware Driver Installation and Configuration
48
CU0354602-00 L
Installing the vSphere Web Client Plug-in
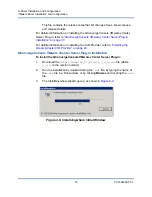
1.
Gather all information necessary for the installation
IP address of the vCenter Server
vCenter Server credentials (user name and password)
Where to host the QLogic Adapter vSphere Web Client Plug-in (on
vCenter Server or other server)
If you are hosting the vSphere Web Client Plug-in on a
non-vCenter Server, make sure the server has Tomcat running as a
service and have the IP address of the Tomcat instance ready. Also,
make sure the Tomcat
CATALINA_HOME
environment variable is set to
the appropriate directory.
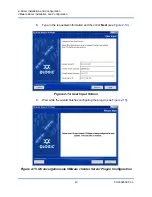
2.
Run the installer on the server providing the Tomcat service. Provide the
information requested by the installer.
On Windows, double-click on the installer and follow the instructions
on the GUI provided.
On Linux:
a.
Make sure the user is the root user (or has root privileges).
b.
Create the installer executable if one does not already exist.
Choose the installer for your system (32-bit or 64-bit), and type
the following command:
chmod +x <
installer
>
Where <
installer
> is the file name of the installer.
c.
Run the installer by issuing the following command:
./<
installer
>
Where “<
installer
>” is the file name of the installer.
d.
Follow the instructions provided by the installer.
3.
Restart the Tomcat service.
If the vSphere Web Client Plug-in is being hosted on the vCenter Server, you
must restart the VMware Virtual Center Management Web services. In
Windows, go to the
Administrative Tools
menu, select
Services
, and
restart VMware Virtual Center Management Web services. On the vCenter
Server Appliance (Linux), issue the following command:
/etc/init.d/vmware-vpxd tomcat-restart
4.
Restart any vSphere Web Client sessions.