background image

2–Driver Installation and Configuration
VMware Driver Installation and Configuration

33

CU0354602-00  L

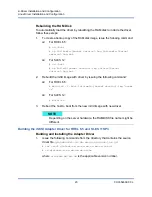
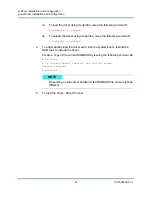
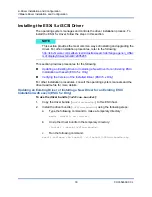
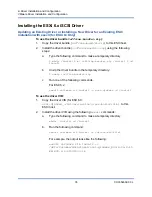
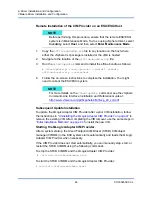
To use the driver VIB:

1.

Copy the driver VIB (for ESX 5.0/5.1: 

scsi-qla2

xxx

-<

driver-version>

.0.0.

<esx-build

>.x86_64.vib

for ESX 5.5: 

qlnativefc-<

driver-version

>.0.0.<

esx-build

>.x86_64.vib

to this ESXi host.

2.

Install the driver VIB using the following 

esxcli

 commands:

a.

Type the following command to make a temporary directory: 

mkdir /install; cd /install

b.

Run the following command: 

$ esxcli software vib install -v <

driver-vib-file

>

For example:

esxcli software vib install -v 
/vmfs/volumes/datastore1/scsi-qla2

xxx

-934.5.10.0-1OEM.500

.0.0.472560.x86_64.vib

Verifying the Version of the Installed Driver (ESXi 5.

x

 Only)

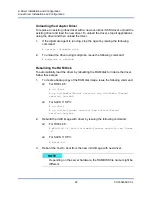
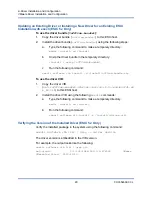
Verify the installed package in the system using the following command:

esxcli software vib list | grep -i <

driver-version

 / 

driver name

>

The driver version is embedded in the VIB version.

For example, the output looks like the following: 

# esxcli software vib list | grep qla2

xxx

scsi-qla2

xxx

             911.k1.1-16vmw.500.0.0.406165       VMware                   

VMwareCertified     2011-09-21

Summary of Contents for QLE8262

Page 1: ...CU0354602 00 L Third party information brought to you courtesy of Dell User s Guide Converged Network Adapter QMD8262 k QLE8262 QME8262 k ...

Page 2: ...uture direction and intent are subject to change or withdrawal without notice and represent goals and objectives only Document Revision History Revision A September 2011 Revision B March 30 2012 Revision C July 18 2012 Revision D August 30 2012 Revision E November 20 2012 Revision F April 8 2013 Revision G September 6 2013 Revision H June 9 2014 Revision J January 22 2015 Revision K June 24 2015 R...

Page 3: ...rdware Installation Overview 1 Hardware and Software Requirements 1 Safety Precautions 1 Pre Installation Checklist 2 Installing the Adapter 2 Connecting to the Network 3 2 Driver Installation and Configuration Overview 4 Windows Driver Installation and Configuration 5 Running the DUP in the GUI 5 Running the DUP from the Command Line 12 Options 13 Examples 14 Linux Driver Installation and Configu...

Page 4: ...SXi Installation with esxcli ESXi 5 x Only 29 Verifying the Version of the Installed Driver ESXi 5 x Only 29 Installing the ESXi 5 x iSCSI Driver 30 Updating an Existing Driver or Installing a New Driver for an Existing ESXi Installation with esxcli ESXi 5 x Only 30 Verifying the Version of the Installed Driver ESXi 5 x Only 31 Installing the ESXi 5 x FCoE Driver 32 Updating an Existing Driver or ...

Page 5: ... the NIC Driver with QConvergeConsole 51 Configuring iSCSI with QConvergeConsole 51 Configuring FCoE with QConvergeConsole 51 Configuring iSCSI Offload with QConvergeConsole 52 Adapter Level iSCSI Parameters 52 Displaying Adapter Level iSCSI Parameters 52 Modifying Adapter Level iSCSI Parameters 53 Port Level iSCSI Parameters 53 Displaying Port Level iSCSI Parameters 53 Modifying Port Level iSCSI ...

Page 6: ...stic Test Descriptions 101 Windows Diagnostic Test Messages 103 Linux Management Applications 106 Linux NIC Driver Management Applications 106 Overview 106 Viewing and Changing Adapter Properties on Linux 106 User Diagnostics for Linux NIC Driver Management Applications 108 Running Linux User Diagnostics 109 Linux Diagnostic Test Descriptions 111 Linux Diagnostic Test Messages 111 VMware Managemen...

Page 7: ...dependent Partitioning 121 Choosing DCBX or Switch Independent Partitioning 121 4 Switch Independent Partitioning Overview 123 Switch Independent Partitioning Setup Requirements 124 Hardware Requirements 124 Software Requirements 124 Switch Independent Partitioning Configuration 126 What Is Switch Independent Partitioning 126 Switch Independent Partitioning Options 127 Personality Changes 130 Qual...

Page 8: ...tch Independent Partitioning Configuration Parameters and Setup Tools 174 5 Boot Configuration Overview 176 Boot from SAN 177 General Boot from SAN 177 Windows Boot from SAN 177 Creating a Driver Disk 177 Windows 2008 Boot From SAN 178 Linux Boot from SAN 178 Red Hat Enterprise Linux Boot from SAN 178 SUSE Linux Enterprise Server Novell Boot from SAN 179 ESX Boot from SAN 180 Dell System Setup 181...

Page 9: ...ring DHCP iSCSI Boot for IPv4 219 DHCP Option 17 Root Path 220 DHCP Option 43 Adding Vendor Options 220 A Troubleshooting Diagnosing Problems 222 NIC Troubleshooting 223 iSCSI Troubleshooting 224 FCoE Troubleshooting 225 ESX Troubleshooting 227 B Specifications QMD8262 k Specifications 229 Physical Characteristics 229 Power Requirements 229 Standards Specifications 229 Interface Specifications 230...

Page 10: ...ts from the QLogic Web Site 237 Installing the Agents Using the Built in Agent Installer 237 Installing the QConvergeConsole GUI 238 Installing QConvergeConsole in a Windows Environment 238 Installing QConvergeConsole in a Linux Environment 239 Installing QConvergeConsole in Silent Mode 240 What Is in the QConvergeConsole Help System 241 D Regulatory Information Warranty 243 Regulatory and Complia...

Page 11: ...s installed on Dell PowerEdge servers in Windows Linux or VMware environments User s Guide Content The QLogic QMD8262 k QLE8262 QME8262 k User s Guide includes the following sections Hardware Installation covers the hardware and software requirements safety precautions a pre installation checklist and adapter installation Driver Installation and Configuration covers the installation of the three d...

Page 12: ...ace specifications and environmental specifications QConvergeConsole GUI provides an overview of the QConvergeConsole Web management interface Regulatory Information provides warranty regulatory and compliance information Related Materials For additional information refer to the following QConvergeConsole GUI Help System available through the QConvergeConsole GUI provides help topics on configurin...

Page 13: ...for the blade server environment Features The adapters provide the following features Switch Independent Partitioning Message signaled interrupts MSI X Device management for power and SAN Multi boot capability including PXE iSCSI Fibre Channel Unified extensible firmware interface UEFI PCIe 2 0 x8 User diagnostics that can be run from the CLI and the GUI Ethernet functions include 2x10 gigabit Eth...

Page 14: ... Stateful offload features include iSCSI offload Fibre Channel and FCoE offload Advanced management features for Converged Network Adapters and Fibre Channel adapters including QConvergeConsole GUI and CLI Interrupt management and scalability features including Receive side scaling RSS Interrupt moderation Flow control Locally administered address LAA Enhanced optimization with MSI MSI X and NetQu...

Page 15: ...Server 2008 SP2 x64 Windows Server 2008 SP2 x32 Linux Red Hat Enterprise Linux RHEL 7 2 Red Hat Enterprise Linux RHEL 7 0 Red Hat Enterprise Linux RHEL 6 5 SUSE Linux Enterprise Server 12 SUSE Linux Enterprise Server 11 SP3 SUSE Linux Enterprise Server 11 SP4 VMware vSphere VMwareESXi 6 0 vSphere VMwareESXi 5 5 U2 vSphere VMwareESXi 5 1 U3 NOTE For the most current versions of the OS and drivers s...

Page 16: ...00e Systems Configuration Guide For QLE8262 adapter port and slot assignments refer to the Expansion Cards section of the Hardware Owner s Manual for your Dell PowerEdge server Software For information on the supported operating systems firmware versions adapter drivers and utilities refer to the product release notes Safety Precautions Remove any metallic objects or jewelry from your hands and wr...

Page 17: ...uctions for your adapter QMD8262 k QME8262 k Refer to the I O Module Mezzanine Cards and Guidelines for Installing I O Modules sections of the Dell PowerEdge Modular Systems Hardware Owner s Manual ftp ftp dell com Manuals all products esuprt_ser_stor_net esuprt_poweredge po weredge m610x_Owner 27s 20Manual_en us pdf QLE8262 To install the QLE8262 adapter follow these steps 1 Power off the compute...

Page 18: ...r s Manual for your Dell PowerEdge server Connecting to the Network Follow the instructions for your adapter QMD8262 k QME8262 k Refer to the Guidelines for Installing I O Modules section of the Dell PowerEdge Modular Systems Hardware Owner s Manual ftp ftp dell com Manuals all products esuprt_ser_stor_net esuprt_poweredge po weredge m610x_Owner 27s 20Manual_en us pdf QLE8262 Refer to the Hardware...

Page 19: ... Update the Flash Using the Flash Update Wizard topic in the QConvergeConsole Help System For the QConvergeConsole CLI use the flashsupport command to update the Flash memory for all cards supported by the specified file for example qaucli pr nic flashsupport i ALL a p3p11179 bin NOTE When you disable the firmware for example during a firmware dump or during a firmware update in Windows or Linux w...

Page 20: ...e or driver Dell update package DUP can be run in two ways Running the DUP in the GUI Running the DUP from the Command Line Running the DUP in the GUI To run the DUP in the GUI 1 Double click the icon representing the DUP file The Update Package window appears as shown in Figure 2 1 Figure 2 1 Update Package Window NOTE The actual file name of the DUP varies ...

Page 21: ...guration Windows Driver Installation and Configuration 6 CU0354602 00 L 2 Click Install to continue The QLogic Super Installer InstallShield Wizard appears as shown in Figure 2 2 Figure 2 2 QLogic Super Installer InstallShield Wizard ...

Page 22: ...lation and Configuration Windows Driver Installation and Configuration 7 CU0354602 00 L 3 Click Next to continue The License Agreement dialog box appears as shown in Figure 2 3 Figure 2 3 License Agreement Dialog Box ...

Page 23: ...icense agreement and click Next The Setup Type dialog box appears as shown in Figure 2 4 Figure 2 4 Setup Type Dialog Box a Select a setup type as follows Select Complete to install all program features Select Custom to manually select the features to be installed b Click Next to continue If you selected Complete proceed directly to Step 5 ...

Page 24: ...ted To change a feature s install setting click the icon next to it and select one of the following This feature will be installed on the local hard drive This setting marks the feature for installation This feature and all subfeatures will be installed on the local hard drive This setting marks the feature and all of its subfeatures for installation This feature will not be available This setting...

Page 25: ...lation and Configuration Windows Driver Installation and Configuration 10 CU0354602 00 L 5 The Ready to Install the Program dialog box appears as shown in Figure 2 6 Figure 2 6 Ready to Install the Program Dialog Box ...

Page 26: ...354602 00 L 6 Click Install so that the InstallShield Wizard installs the QLogic Adapter drivers and Management Software Installer When the installation is complete the InstallShield Wizard Completed dialog box appears as shown in Figure 2 7 Figure 2 7 InstallShield Wizard Complete Dialog Box ...

Page 27: ...pears as shown in Figure 2 8 Figure 2 8 Update Package Window 8 Click OK to close the window Running the DUP from the Command Line Running the DUP from the command line with no options specified results in the same behavior as double clicking the icon representing the DUP To run the DUP from the command line C DUP_file_name EXE NOTE The actual file name of the DUP varies ...

Page 28: ...ation behavior To update the DUP usage information or h To suppress the DUP GUI s To extract update contents to a directory e path To extract only the driver components to a directory drivers path To install update only the driver components driveronly Advanced This command sends all text following the passthrough option directly to the QLogic installation software of the DUP This mode suppresses ...

Page 29: ... exe s To extract the update contents to the C mydir directory DUP_file_name exe s e C mydir To extract the driver components to the C mydir directory DUP_file_name exe s drivers C mydir To install only the driver components DUP_file_name exe s driveronly To change from the default log location to C my path with spaces log txt DUP_file_name exe l C my path with spaces log txt NOTE This command req...

Page 30: ...drivers on a Linux system refer to the driver release notes readme and installation instructions included in the package Installing the Linux NIC Driver To install the Linux NIC driver refer to the instructions INSTALL qlcnic provided with the individual driver package NOTE To install the Red Hat Package Manager RPM issue the following command as a root user rpm Uvh rpm name For example rpm Uvh ql...

Page 31: ...ile qla4xxx src x xx xx xx xx xx k tar gz tar xzvf qla4xxx vx xx xx xx xx xx kx tar gz cd qla4xxx vx x xx xx xx xx xx kx tar xvzf qla4xxx src vxx xx xx xx xx ky tar gz cd qla4xxx vx xx xx xx xx xx kx where x xx xx xx xx xx is the applicable version number 2 Build and install the driver modules from the source code by executing the build sh script as follows extras build sh install The build sh scr...

Page 32: ...river 1 If the iqlremote agent is running stop the agent by issuing the following command service iqlremote stop 2 To unload the driver using modprobe issue the following command modprobe r qla4xxx Rebuilding the RAM Disk with the New Driver 1 Edit the etc modprobe conf file and add the following entry if it is not present alias scsi_hostadapterX qla4xxx Where X is based on the order of the SCSI m...

Page 33: ... tar xzvf qla4xxx vx xx xx xx xx xx cx tar gz cd qla4xxx vx xx xx xx xx xx cx where x xx xx xx xx xx is the applicable version number 2 Build and install the driver modules from the source code by executing the build sh script as follows extras build sh install The build sh script does the following Builds the driver ko files Copies the ko files to the appropriate directory For RHEL 6 5 lib module...

Page 34: ...updates qla4xxx ko To load the driver using modprobe issue the following command modprobe v qla4xxx 2 If the iqlremote agent was previously running restart the agent by issuing the following command to ensure that the QConvergeConsole GUI can reconnect to this host service iqlremote start Unloading the Adapter Driver To replace an existing inbox driver with a new out of box iSCSI driver unload the...

Page 35: ...2 Rebuild the initrd image with driver by issuing the following command For RHEL 6 5 mkinitrd f boot initramfs kernel version img uname r For SLES 12 mkinitrd 3 Reboot the host to boot from the new initrd image with new driver Building the iSCSI Adapter Driver for RHEL 6 5 and SLES 11 SP3 Building and Installing the Adapter Driver 1 Issue the following commands from the directory that contains the...

Page 36: ...anually Loading the Adapter Driver 1 To load the driver use one of the following methods To load the driver directly from the local build directories issue the following commands For RHEL 6 5 insmod lib modules 2 6 kernel drivers scsi scsi_transport_iscsi ko insmod lib modules 2 6 extra qlgc qla4xxx qla4xxx ko For SLES 11 SP3 insmod lib modules 2 6 kernel drivers scsi scsi_transport_iscsi ko insmo...

Page 37: ...command modprobe r qla4xxx Rebuilding the RAM Disk To automatically load the driver by rebuilding the RAM disk to include the driver follow these steps 1 To create a backup copy of the RAM disk image issue the following command For RHEL 6 5 cd boot cp initramfs kernel version img initramfs kernel version img bak For SLES 11 SP3 cd boot cp initrd kernel version img initrd kernel version img bak 2 R...

Page 38: ...x xx xx k where x xx xx xx xx xx is the applicable version number 2 Build and install the driver modules from the source code by executing the build sh script as follows extras build sh install The build sh script does the following Builds the driver ko files Copies the ko files to the appropriate lib modules 2 6 extra qlgc qla2xxx directory 3 Manually load the driver for Linux by issuing the foll...

Page 39: ...driver ko files Copies the ko files to the appropriate lib modules 2 6 updates directory Adds the appropriate directive in the modprobe conf file if applicable 3 Manually load the driver for Linux To load the driver using modprobe issue the following command modprobe v qla2xxx To unload the driver using modprobe issue the following command modprobe r qla2xxx 4 To automatically load the driver each...

Page 40: ...code by executing the build sh script as follows extras build sh install The build sh script does the following Builds the driver ko files Copies the ko files to the appropriate lib modules 3 x updates directory Adds the appropriate directive in the modprobe conf file if applicable 3 Manually load the driver for Linux Edit the etc modprobe d unsupported_modules file to make the following change al...

Page 41: ...e the following commands tar xzvf qla2xxx src vx xx xx xx 11 x k tgz cd qla2xxx x xx xx xx xx xx k4 where x xx xx xx xx xx is the applicable version number 2 Build and install the driver modules from the source code by executing the build sh script as follows extras build sh install The build sh script does the following Builds the driver ko files Copies the ko files to the appropriate lib modules...

Page 42: ...be issue the following command modprobe r qla2xxx 4 To automatically load the driver each time the system boots rebuild the RAM disk to include the driver Create a copy of the current RAMDISK by issuing the following commands cd boot cp initrd kernel version img initrd kernel version img bak mkinitrd 5 To load the driver reboot the host NOTE Depending on the server hardware the RAMDISK file name m...

Page 43: ...are system refer to the driver release notes and readme files included in the package Installing the ESXi 5 x NIC Driver The operating system manages and controls the driver installation process To install the ESXi 5 x driver follow the steps in this section This section provides procedures for the following Updating an Existing Driver or Installing a New Driver for an Existing ESXi Installation w...

Page 44: ...sxcli software vib install d install offline bundle zip To use the driver VIB 1 Copy the driver VIB net offline bundle driver version 0 0 esx build x8 6_64 vib to this ESXi host 2 Install the driver VIB using the following esxcli commands a Type the following command to make a temporary directory mkdir install cd install b Run the following command esxcli software vib install v install driver vib ...

Page 45: ...file for more details Updating an Existing Driver or Installing a New Driver for an Existing ESXi Installation with esxcli ESXi 5 x Only To use the driver bundle offline bundle 1 Copy the driver bundle offline bundle to this ESXi host 2 Install the driver bundle offline bundle using the following steps a Type the following command to make a temporary directory mkdir install cd install b Unzip the ...

Page 46: ...o make a temporary directory mkdir install cd install b Run the following command esxcli software vib install v install driver vib Verifying the Version of the Installed Driver ESXi 5 x Only Verify the installed package in the system using the following command esxcli software vib list grep i driver version The driver version is embedded in the VIB version For example the output looks like the fol...

Page 47: ...Driver for an Existing ESXi Installation with esxcli ESXi 5 x Only To use the driver bundle offline bundle zip 1 Copy the driver bundle offline bundle zip to this ESXi host 2 Install using the driver bundle offline bundle zip a Type the following command to make a temporary directory mkdir install mv offline bundle zip install cd install b Unzip the driver bundle in the temporary directory unzip o...

Page 48: ...dir install cd install b Run the following command esxcli software vib install v driver vib file For example esxcli software vib install v vmfs volumes datastore1 scsi qla2xxx 934 5 10 0 1OEM 500 0 0 472560 x86_64 vib Verifying the Version of the Installed Driver ESXi 5 x Only Verify the installed package in the system using the following command esxcli software vib list grep i driver version driv...

Page 49: ... install mv offline bundle zip install cd install b Unzip the driver bundle in the temporary directory unzip offline bundle zip c Run one of the following commands For ESX 6 x esxcli software vib install n qlnativefc d install To use the driver VIB 1 Copy the driver VIB for ESX 6 0 qlnativefc driver version 0 0 esx build x86_64 vib to this ESXi host 2 Install the driver VIB using the following esx...

Page 50: ...l mv offline bundle zip install cd install b Unzip the driver bundle in the temporary directory unzip offline bundle zip c Run one of the following commands For ESX 6 x esxcli software vib install n scsi qla4xxx d install To use the driver VIB 1 Copy the driver VIB for ESX 6 0 scsi qla4xxx_ driver version esx build vib to this ESXi host 2 Install the driver VIB using the following esxcli commands ...

Page 51: ...sole VMware vCenter Server Plug in Installation on page 37 Installation Package Contents The latest version of the QLogic Adapter CIM Provider and QConvergeConsole VMware vCenter Server Plug in package contains the files needed to install both the Plug in and the CIM Provider The files are as follows x_x_x is the version number QLogic_Adapter_VI_Plugin_x_x_x exe This file is the QConvergeConsole V...

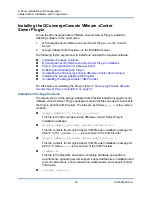
Page 52: ...ailed information on installing the CIM Provider refer to Installing the QLogic Adapter CIM Provider on page 44 QConvergeConsole VMware vCenter Server Plug in Installation To install the QConvergeConsole VMware vCenter Server Plug in 1 Download the QLogic_Adapter_VI_Plugin_x_x_x exe file where x_x_x is the version number 2 Run the installation by double clicking the exe file by typing the name of ...

Page 53: ...02 00 L 4 The Plug in Registration Wizard opens as shown in Figure 2 10 Click Next Figure 2 10 QConvergeConsole VMware vCenter Server Plug in Registration Wizard 5 Wait while the wizard configures the plug in see Figure 2 11 Figure 2 11 QConvergeConsole VMware vCenter Server Plug in Configuration ...

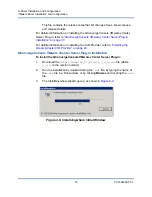
Page 54: ...ation and Configuration 39 CU0354602 00 L 6 Select the installation directory and then click Install see Figure 2 12 Figure 2 12 Select the Installation Directory 7 Wait while the wizard performs the installation see Figure 2 13 Figure 2 13 Installing the Plug In ...

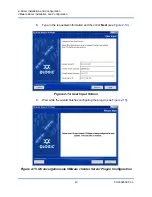
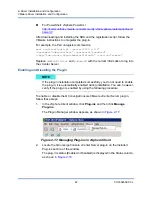
Page 55: ...figuration 40 CU0354602 00 L 8 Type in the requested information and then click Next see Figure 2 14 Figure 2 14 User Input Screen 9 Wait while the wizard finishes configuring the plug in see Figure 2 15 Figure 2 15 QConvergeConsole VMware vCenter Server Plug in Configuration ...

Page 56: ...restart the Apache TomcatTM service Plug in Unregistration from a Manual Install If you have performed a manual install of the QConvergeConsole VMware vCenter Server plug in you must perform a manual uninstall before running the plug in Installation Wizard VMware provides two type of scripts for plug in registration and unregistration For PowerShell scripting http communities vmware com docs DOC 4...

Page 57: ...mation to log into the vCenter Server Enabling and Disabling the Plug in To enable or disable the QConvergeConsole VMware vCenter Server plug in follow these steps 1 In the vSphere Client window click Plug ins and then click Manage Plug ins The Plug in Manager window appears as shown in Figure 2 17 Figure 2 17 Managing Plug ins in vSphere Client 2 Locate the QConvergeConsole vCenter Server plug in...

Page 58: ...Center Server in Plug in Manager 3 If you want to enable or disable the QConvergeConsole plug in right click on the plug in and select Enabled or Disabled the status toggles between the two as shown in Figure 2 19 4 Click Close to close the Plug in Manager window Figure 2 19 Toggling the QConvergeConsole vCenter Server Plug in Status ...

Page 59: ...e QLogic Adapter CIM Provider for VMware ESX and ESXi There is more than one zip package so make sure that you pick the zip package that matches your environment ESXi 5 0 and ESXi 5 1 Initial Installation Methods Initial installation methods for the CIM Provider include the following Online Refer to Installing the CIM Provider on an ESXi 5 x Host on page 45 or Installing the CIM Provider on an ESX...

Page 60: ...file qlogic adapter provider zip maintenance mode no sig check 3 Reboot the system as required Existing ESX ESXi Installation Using VMware Update Manager An existing ESX ESXi host has asynchronous drivers installed using VMware Update Manager For more information see Using vSphere ESX ESXi Image Builder CLI in the vSphere Installation and Setup Guide To install the asynchronous drivers 1 Extract t...

Page 61: ...fter completing the VIB removal use the same steps in Initial Installation Methods on page 44 to install the new VIB Starting the QLogic Adapter CIM Provider After a system startup the Small Footprint CIM Broker SFCB CIM object manager CIMOM in the ESX system starts automatically and loads the QLogic Adapter CIM Provider when necessary If the CIM Provider does not start automatically you can manua...

Page 62: ...ew the VIB list esxcli software vib list 2 Type the following command to remove the QLogic Adapter CIM Provider esxcli software vib remove vibname qlogic adapter provider maintenance mode f Uninstalling the CIM Provider from a Remote Host 1 From a console on the host where the vSphere CLI package is installed or vMA is hosted query and find the Bulletin ID of the existing provider vihostupdate pl ...

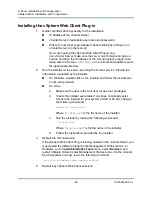
Page 63: ... Windows double click on the installer and follow the instructions on the GUI provided On Linux a Make sure the user is the root user or has root privileges b Create the installer executable if one does not already exist Choose the installer for your system 32 bit or 64 bit and type the following command chmod x installer Where installer is the file name of the installer c Run the installer by iss...

Page 64: ... init d vsphere client restart Uninstalling the vSphere Web Client Plug in Uninstalling the vSphere Web Client Plug in on Windows is initiated through the Windows Uninstall Programs control panel Follow the uninstaller user interface to uninstall the plug in Uninstalling the vSphere Web Client Plug in on Linux is initiated by the following command line command opt qlogic QLogic Adapter Web Client ...

Page 65: ...view This chapter describes the following adapter management applications General Management with QConvergeConsole Switch Independent Partitioning refer to Chapter 4 Windows Management Applications Linux Management Applications VMware Management Applications ...

Page 66: ...on configuring iSCSI using the QConvergeConsole GUI refer to the QConvergeConsole GUI Help System see Related Materials on page xii and select Managing iSCSI Ports For information on configuring iSCSI using the QConvergeConsole CLI refer to the following Configuring FCoE with QConvergeConsole Configuring iSCSI Initiators with QConvergeConsole Enabling CHAP Authentication with QConvergeConsole All ...

Page 67: ...he QConvergeConsole CLI refer to the procedures in this section to display and modify the following Adapter Level iSCSI Parameters Port Level iSCSI Parameters Summary of Target Sessions Target Session Level iSCSI Negotiated Parameters Target Session Level Persistent iSCSI Parameters Adapter Level iSCSI Parameters This section shows the commands used to display and to modify adapter level iSCSI par...

Page 68: ... value config_name config_alias value Example qaucli pr iscsi nh HBA_ALIAS AccountingHBA Or qaucli iscsi nh HBA_ALIAS AccountingHBA HBA adapter Parameters The following table lists the parameters that may be configured using the nh option in non interactive mode Full Parameter Name Alias Name Allowable Values HBA_Alias HBAALIAS Character string Port Level iSCSI Parameters This section shows the co...

Page 69: ...4 2 2 Type Fibre IP Address 192 168 105 208 Alias iSCSI Name iqn 2000 04 com qlogic isp8214 000e1e031685 5 User Defined IP Address IPv4 Address 192 168 105 208 Gateway 192 168 105 178 Subnet Mask 255 255 255 0 IPv6 Protocol is currently disabled iSNS Disabled Displaying ISCSI Settings inst 0 Force_Negotiate_Main_iSCSI_Keys off iSCSI_Send_Markers off iSCSI_Header_Digests off iSCSI_Data_Digests off ...

Page 70: ...SCSI_Discovery_Logout on iSCSI_Strict_Login off TCP_DHCP off TCP_Nagle off iSCSI_Alias IP_Address 192 168 105 208 IP_Subnet_Mask 255 255 255 0 IP_Gateway 192 168 105 178 Secondary_DNS Secondary_IP_Address Task_Management_Timeout 10 ENABLE_IPV4 on ENABLE_IPV6 off LOC_LINK_AUTO off ROUTABLE_AUTO off LDROUTER_AUTO off IPv6_Addr_Local_link fe80 ENABLE_4022IPV4 on Displaying Advanced Settings inst 0 FW...

Page 71: ...MaxRxDataSegmentLen 128 Port 3260 TCP_Timer_Scale 0 TCP_Time_Stamp on TCP_Window_Scale 0 iSCSI_Name iqn 2000 04 com qlogic isp8214 000e1e031685 5 ZIO 0 IPv4TOS 0 IPv4TTL 64 IPV6_TCP_Timer_Scale 3 IPv6_TCP_Time_Stamp on IPv6_TCP_Window_Scale 0 IPv6_VLAN_ID 0 IPv6_VLAN_User_Priority 0 IPv6_VLAN_Enable off IPv6_Traffic_Class 0 IPv6_Hop_Limit 64 IPv6_ND_Reachable_Timer 100 IPv6_ND_Retransmit_Timer 100...

Page 72: ...t instance is 0 and the parameter change is to turn on iSCSI header digests qaucli pr iscsi n 0 iSCSI_Header_Digests on Or qaucli iscsi n 0 iSCSI_Header_Digests on Port Parameters The following table lists the parameters that may be configured using the n option in non interactive mode Full Parameter Name Alias Name Allowable Values AFW_Device_Timeouts AFWDT on or off AFW_Delayed_Ack AFDACK on or ...

Page 73: ...LE_IPV6 EIPV6 on or off LOC_LINK_AUTO LOCLA on or off ROUTABLE_AUTO RAUTO on or off LDROUTER_AUTO LDRA on or off IPv6_Addr_Local_link IPLL IPv6 address format IPv6_Addr_Routable0 IPR0 IPv6 address format IPv6_Addr_Routable1 IPR1 IPv6 address format Default_IPv6_Router IPRR IPv6 address format IPv4TOS IPV4TOS 0 255 IPv4_TOS_ENABLE TOS_ENABLE on or off IPv4TTL IPV4TTL 0 255 IPv6_Port IPV6PORT 0 6553...

Page 74: ... If the optional target_id keyword is entered only information on the specified target is displayed Command line options ts hba_port_inst target_id Example qaucli pr iscsi ts Or qaucli iscsi ts Target ID 2 hba_no 0 IP 192 168 105 247 Port 3260 TGT Instance 2 ISCSI Name Alias State No Connection Target ID 3 hba_no 0 IP 192 168 105 247 Port 3260 TGT Instance 3 ISCSI Name iqn 2003 05 com stringbeanso...

Page 75: ... t 0 3 Or qaucli iscsi t 0 3 Target ID 3 hba_no 0 IP 192 168 105 247 Port 3260 TGT Instance 3 ISCSI Name iqn 2003 05 com stringbeansoftware apptester starblazer248 target Alias State Session Active TGT_iSCSI_Name iqn 2003 05 com stringbeansoftware apptester starblazer248 target TGT_Target_ID 3 TGTO_Active off TGTO_Access_Granted off TGTO_Target_Entry on TGTO_Initiator_Entry off TGT_RetryCount 0 TG...

Page 76: ...e_Enable on TGT_Rx_Window_Scale 0 TGT_Tx_Window_Scale 0 TGT_TimeStamp_Enable 64 TGT_DDB_IPv6 off TGT_IPv6_Address c0a8 69f7 15 0 0 TGT_IPv6_iSCSIName iqn 2003 05 com stringbeansoftware apptester starblazer248 target TGT_IPv6_Port 3260 TGT_DIF_Enable off TGT_Max_Segment_Size 1448 TGT_Local_TCP_Port 29912 TGT_Type_of_Service 0 TGT_Traffic_Class 0 TGT_Local_IPv6_Address c0a8 69d0 TGT_Perm_Redirect_Op...

Page 77: ... the target ID is 3 qaucli pr iscsi tp 0 3 Or qaucli iscsi TP 0 3 Target ID 3 hba_no 0 IP 192 168 105 247 Port 3260 TGT Instance 3 ISCSI Name iqn 2003 05 com stringbeansoftware apptester starblazer248 target Alias State Session Active TGT_iSCSI_Name iqn 2003 05 com stringbeansoftware apptester starblazer248 target TGT_Target_ID 3 TGTO_Active off TGTO_Access_Granted off TGTO_Target_Entry on TGTO_In...

Page 78: ...ssID 0x000e1e031685 TGT_TargetSessID 9 TGT_TargetIPAddress 192 168 105 247 TGT_Window_Scale_Enable on TGT_Rx_Window_Scale 0 TGT_Tx_Window_Scale 0 TGT_TimeStamp_Enable 64 TGT_DDB_IPv6 off TGT_IPv6_Address c0a8 69f7 15 0 0 TGT_IPv6_iSCSIName iqn 2003 05 com stringbeansoftware apptester starblazer248 target TGT_IPv6_Port 3260 TGT_DIF_Enable off TGT_Max_Segment_Size 1448 TGT_Local_TCP_Port 29912 TGT_T...

Page 79: ...to 32767 TGT_FirstBurstLen TGTFB 0 to 32767 TGTISCSIO_Header_Digests TGTIHD on or off TGTISCSIO_Data_Digests TGTIDD on or off TGTISCSIO_Immediate_Data TGTIID on or off TGTISCSIO_Initial_R2T TGTIIR2T on or off TGTISCSIO_Snack TGTISNACK on or off TGTISCSIO_Discovery_Logout TGTLDS on or off TGTISCSIO_Strict_Login TGTIS on or off TGT_KeepAliveTimeout TGTKATO 0 to 32767 TGT_DefaultTimeout TGTDTO 0 to 3...

Page 80: ...e Configuration Selection menu select 1 CNA Configuration 4 On the Converged Network Adapter CNA Protocol Type Selection menu select CNA iSCSI Configuration either 1 or 2 depending on how many drivers are loaded 5 On the Converged Network Adapter CNA iSCSI Configuration menu select 3 Port IP Settings 6 Select the Converged Network Port you want to configure 7 Select 2 Configure IP Settings 8 Compl...

Page 81: ...v6 Target off Press ENTER to accept the default b TGT_iSCSI_Name Type the iSCSI Qualified Name IQN of the iSCSI target to connect to and then press ENTER c TGT_Port 3260 Press ENTER to accept the default d TGT_TargetIPAddress 0 0 0 0 Type the IP address of the target and then press ENTER 16 On the options menu that appears select 12 Save Target CHAP Changes The iSCSI initiator is now configured to...

Page 82: ...rn to the Converged Network Adapter CNA iSCSI Configuration menu type P and press ENTER and then type P and press ENTER again 12 On the Converged Network Adapter CNA iSCSI Configuration menu select 4 Target Configuration 13 Select the same Converged Network Port you selected in Step 6 14 Select 6 Add a Target 15 Complete the interactive list of settings as follows a IPv6 Target off Press ENTER to ...

Page 83: ...ware iSCSI initiator 9 To save your changes click OK Enabling CHAP Authentication with QConvergeConsole You can enable CHAP authentication with either the interactive mode or non interactive mode of QConvergeConsole CLI For details on the interactive mode refer to the QConvergeConsole CLI User s Guide For the non interactive mode of the QConvergeConsole CLI the following sections describe how to e...

Page 84: ...1 k9Q038iaZwlqPplq012 Or qaucli iscsi addchap 0 chapdbserver1 k9Q038iaZwlqPplq012 2 To add a peer and BIDI CHAP entry name and secret issue the addchap command to add a CHAP entry to the persistent CHAP table The positional parameters are hba_port_inst CHAP name and CHAP secret The optional parameter is BIDI indicating the CHAP entry is a BIDI entry default is local CHAP The adapter is reset after...

Page 85: ...arameters are PORT port_num and INAME name If the optional port number is not specified it defaults to 3260 If the optional INAME iSCSI name is not specified it defaults to an empty string Command line options pa hba_port_inst ip address PORT port_num INAME name Example In the following examples the HBA port instance is 0 and the Send Target IP is 10 14 64 154 qaucli pr iscsi pa 0 10 14 64 154 Or ...

Page 86: ...BCA value In the following examples the HBA port instance is 0 the CHAP number is 1 and the Target ID is 2 qaucli pr iscsi linkchap 0 1 2 Or qaucli iscsi linkchap 0 1 2 Linking to a CHAP Target You can link CHAP to a target with active bidirectional BIDI CHAP authentication TGTBCA is an optional parameter to turn BIDI CHAP authentication on or off for this target connection To link a CHAP target 1...

Page 87: ...pr iscsi chapmap 0 Or qaucli iscsi chapmap 0 Targets configured for CHAP Target ID 2 IP 10 14 64 154 Port 3260 ISCSI Name Alias Name chapdbserver1 Secret k9Q038iaZwlqPplq012 Target ID 64 IP 10 14 64 154 Port 3260 ISCSI Name iqn 1987 05 com cisco 00 ba6d7ea87bba chap1 Alias chap1 Name chapdbserver1 Secret k9Q038iaZwlqPplq012 Target ID 65 IP 10 14 64 154 Port 3260 ISCSI Name iqn 1987 05 com cisco 00...

Page 88: ...suing the qaucli nt zvt command The qaucli is an installation option available when you install the Windows drivers see Windows Driver Installation and Configuration on page 5 Viewing and Changing Adapter Properties This section provides information on using the QConvergeConsole CLI Viewing Adapter Properties Changing Adapter Properties Viewing Adapter Properties Issue the following commands to vi...

Page 89: ... that is teamed or an adapter with VLANs do not directly modify the adapter properties To ensure that the properties of all teamed adapters and adapters with VLANs remain synchronized with the team properties make property changes only on the Team Management page see Modifying a Team on page 87 Table 3 1 Port Adapter Variables and Values Variable Values Checksum_Offload_Enable on off IPv4_Checksum...

Page 90: ... driver in addition to the basic NIC Team MAC Address At initialization the teaming driver selects the team s MAC address to be the MAC of one of the teamed adapters In general the first adapter to come up is chosen to be the preferred primary adapter The preferred primary s MAC address is assigned to the MAC address of the team Alternately you can choose any valid MAC address as the team s static...

Page 91: ...d requires switch ports configured for LACP Failsafe Mode The failsafe mode provides Layer 2 fault tolerance The failsafe mode provides high reliability through redundancy in the event of port failure When the primary network connection is down data traffic is automatically transferred to a secondary standby connection The preferred primary adapter can be specified either by the system administrat...

Page 92: ...ch agnostic Switch Independent Load Balancing Mode Switch independent load balancing mode provides a failsafe feature and supports transmit load balancing For receive load balancing use the 802 3ad modes In this mode the outbound traffic is efficiently distributed across the member adapters to increase the transmit bandwidth Traffic load balancing is connection based to avoid out of order packet d...

Page 93: ... virtual adapter In SLA the ports on the switch are active by default There is no negotiation between the switch and the intermediate driver to decide on adapters participating in a LAG In SLA mode the protocol stack responds to ARP requests with a single advertised MAC address and an IP address corresponding to the LAG Each physical adapter in the team uses the same team MAC address during transm...

Page 94: ...ased on LACP state information Auto Select indicates that the load is distributed based on the target IP address and port number This option ensures a one to one correspondence between a traffic flow and a team adapter MAC address based indicates that the load is distributed based on the target MAC address Using the CLI for Teaming You can view create configure and delete teams using QConvergeCons...

Page 95: ... 1 In Windows access the Computer Management dialog box and then click Device Manager in the left pane 2 Under Network adapters right click the QLogic 10 Gigabit Ethernet adapter and then select Properties 3 Click the Team Management tab to bring that page to the front see Figure 3 1 and perform teaming related management NOTE The following applies to configuring teaming and VLAN using the QConver...

Page 96: ...vendor adapters Procedures for creating a team adding virtual adapters and more are provided in the How to box on the bottom of the Team Management page Teaming Configuration Teaming configuration includes creating modifying and deleting teams and viewing team statistics on the Team Management property page To launch the Team Management property page see Using the Team Management GUI on page 80 In...

Page 97: ...ck Create Team see Figure 3 2 Figure 3 2 Creating a Team 2 The software automatically picks a unique team name or you can enter your own team name Team names must be unique on a system 3 On the Create Team dialog box specify the following see the message pane at the bottom of the dialog box for more details and then click OK to return to the adapter properties Name Type a name for the new team ...

Page 98: ...box to have the driver assign a MAC address or clear the check box to select a locally administered MAC address from the list Failback Delay Type the failback delay in seconds Select Preferred Primary Adapter Choose a preferred primary adapter for the team from the list of teamed adapters or None to allow the driver to assign the preferred primary adapter Failback Type If this is a Failsafe Team s...

Page 99: ...3 Adapter Management Applications Windows Management Applications 84 CU0354602 00 L Figure 3 3 Creating a Failsafe Team Figure 3 4 Creating a Switch Independent Load Balancing Team ...

Page 100: ...3 Adapter Management Applications Windows Management Applications 85 CU0354602 00 L Figure 3 5 Creating an 802 3ad Static Team Figure 3 6 Creating an 802 3ad Dynamic Team ...

Page 101: ...m has been successfully created view the Team and Adapters pane on the Team Management page Figure 3 8 shows an example of a newly formed team The Team Data pane on the right shows the properties information and status of the team or adapter that is currently selected in the Teams and Adapters pane on the left Figure 3 8 Confirming New Team Creation ...

Page 102: ...ying the team properties To add team members 1 On the Team Management property page right click the unteamed adapter to add to a team 2 On the shortcut menu point to Add to Team and then click the team to which you want to add the adapter see Figure 3 9 Figure 3 9 Adding a Team NOTE You cannot add an adapter to a team that is already a member of another team Teaming of teams nested teams is not su...

Page 103: ...synchronized with the team properties Ensure that you change the properties of a team and an adapter with VLANs only on the Team Management page 1 On the Team Management page in the right pane under Team Data expand the Properties list 2 Double click the team property you need to change 3 In the Advanced Team Properties dialog box see Figure 3 10 specify a new Property Value and then click OK Figu...

Page 104: ...dialog box change the team parameters as needed and then click OK NOTE To ensure that the properties of all teamed adapters and adapters with VLANs remain synchronized with the team properties do not directly modify the adapter properties on the Advanced page If an adapter property becomes unsynchronized with its team properties change either the team or adapter property so that they are the same ...

Page 105: ...Figure 3 12 Modifying Failsafe Team Properties Example 2 You can change the team type and the corresponding team attributes For example you can change from failsafe to switch independent load balancing or from 802 3ad static team to 802 3ad dynamic team Figure 3 13 shows a failsafe team modification which shows the new team type and default values for team attributes You can manually change attrib...

Page 106: ...Management page under Teams and Adapters right click the Teams folder 2 On the shortcut menu click Save to File 3 Enter a location to save the configuration To restore a configuration 1 On the Team Management page under Teams and Adapters right click the Teams folder 2 On the shortcut menu click Restore From File 3 Select a previously saved configuration file Viewing Teaming Statistics You can vie...

Page 107: ...s VLAN tagging is done according to the IEEE 802 1q protocol and the process is the same whether it is a single port or a team Multiple VLANs can be configured over a single port or a team of ports up to a maximum of 64 VLANs Each VLAN is represented by a virtual network interface that is bound to the protocols Using the CLI for VLANs Use the QConvergeConsole CLI utility to view add and delete VLA...

Page 108: ... command qaucli nic vtsave state_cfg_file To restore VLAN and teaming state configuration issue the following command qaucli nic vtrestore state_cfg_file Using the GUI for VLANs You can use the Team Management GUI to perform the following VLAN activities Adding and Configuring a VLAN Deleting a VLAN Viewing VLAN Statistics Adding and Configuring a VLAN Use the Team Management page to add VLAN on a...

Page 109: ... page under Teams and Adapters right click either a team or an unteamed adapter 2 On the shortcut menu click Add VLAN see Figure 3 14 Figure 3 14 Adding a VLAN 3 On the Configure VLAN dialog box see Figure 3 15 type values in the VLAN Name and VLAN ID boxes click an appropriate VLAN Type and then click OK Figure 3 15 Configuring a VLAN ...

Page 110: ...ms and Adapters 4 Click the added virtual adapter to view all the properties information and status of the virtual adapter in the VLAN Data pane see Figure 3 16 Figure 3 16 Viewing VLAN Data Properties Deleting a VLAN If VLAN is not needed on a team you can delete it To delete a VLAN 1 On the Team Management page right click the VLAN that you want to remove 2 On the shortcut menu click Remove from...

Page 111: ...t Descriptions Windows Diagnostic Test Messages Running Windows User Diagnostics You can run user diagnostics using either the GUI or the CLI To run user diagnostics in the GUI 1 Access the Windows Control Panel and then open the Device Manager 2 In the Device Manager right click the QLogic 10Gb Ethernet adapter and then on the shortcut menu click Properties 3 On the adapter properties page click ...

Page 112: ...ws 4 Under Diagnostic Tests select one or more check boxes indicating the tests you want to run Hardware Test Register Test Interrupt Test Internal Loopback Test External Loopback Test and Link Test Windows Diagnostic Test Descriptions on page 101 describes each test type 5 Click Run Tests NOTE Only one test can run at a time Multiple tests can run sequentially ...

Page 113: ...ecting a Protocol in Menu Mode Command Description qaucli Start QConvergeConsole CLI in interactive mode qaucli pr nic options Issue NIC command line options qaucli pr iscsi options Issue iSCSI command line options qaucli pr fc options Issue Fibre Channel and FCoE command line options qaucli npar options Issue NIC partitioning NPAR Switch Independent Partitioning command line options Table 3 4 Sel...

Page 114: ... then exit Table 3 6 Miscellaneous Commands Command Description qaucli v Print version number and then exit qaucli h Print usage and then exit Table 3 7 Diagnostic Test Commands Commanda Description i interface Specifies the interface type NX_NIC NX_NIC1 and so on a all Perform all test regardless of default D default Perform only default test R CRegs Test all control registers default I IRQS Test...

Page 115: ...All commands must be prefaced by qaucli pr nic qldiag For example to view the help issue the following commands qaucli pr nic qldiag help Table 3 8 Running Windows Diagnostic Tests in the CLI Test Type Command External Loopback qaucli nic extloopback cna_port_inst tests_num on_error where tests_num specifies the number of tests 1 65535 and on_error is either 0 Ignore or 1 Abort NOTE This test requ...

Page 116: ... predetermined number of interrupts The test succeeds if the device generates the interrupts and the driver processes all interrupts expected External Loopback Test The external loopback test verifies the transmit and receive path by sending a packet out onto an external loopback cable Internal Loopback Test The internal loopback test verifies the capability of the ProductLine to internally loop b...

Page 117: ...he firmware NOTE Loopback tests are enabled only when the 8200 and 3200 Series Adapters are running firmware version 4 09 24 or later When the loopback tests are running at the same time Fibre Channel or iSCSI protocols are running refresh messages may appear To avoid these messages either click Cancel to ignore the messages or stop the qlremote and iqlremote agents while running the loopback test...

Page 118: ...ck LB_DATA_ERR Looped data corrupted Loopback LB_ERR_CNT Looped error count Register CR_TEST_OK Control register test passed Register CR_NIU_MODE Network interface unit NIU error Register CR_PHY Physical layer PHY error Register CR_ERRCNT Control register error count Hardware HW_TEST_OK Hardware test has passed Hardware HW_DMA_BZ_0 DMA channel 0 is busy Hardware HW_DMA_BZ_1 DMA channel 1 is busy H...

Page 119: ..._HDR FM message header error previously detected Hardware HW_FM_MSG FM message error previously detected Hardware HW_EPG_CTRL_Q Egress packet generator EPG control queue is backed up Hardware HW_EPG_MSG_BUF EPG message buffer error Hardware HW_EPG_QREAD_TOUT EPG read queue time out Hardware HW_EPG_QWRITE_TOUT EPG write queue time out Hardware HW_EPG_CQ_W_FULL EPG completion queue write full Hardwa...

Page 120: ...k Test for 3 CNA Port Index Function is not supported by this hardware driver api stack Link Test for 4 CNA Port Index Function is not supported by this hardware driver api stack Link Test for 5 CNA Port Index Link Test Starts Test Status Passed Passed 1 Failed 0 ErrorCode 0 Register Test Results Status Passed Passed 1 Failed 0 ErrorCode 0 Link Test for 6 CNA Port Index Link Test Starts Test Statu...

Page 121: ...lities Viewing and Changing Adapter Properties on Linux Use the following Linux utilities to view and change adapter properties QConvergeConsole CLI qaucli Utility ethtool Utility QConvergeConsole CLI qaucli Utility Install QConvergeConsole CLI qaucli from the following packages supplied by QLogic Package file QConvergeConsoleCLI version _linux_ arch install tar gz RPM installer package file QConv...

Page 122: ...col interface to update the Flash memory For example qaucli pr nic updimages cna_instance image_file To have the QConvergeConsole CLI automatically select a protocol interface to update the Flash memory issue the following command qaucli nic updimages cna_instance image_file ethtool Utility Use the ethtool utility to view adapter statistics and configure interface options For additional details re...

Page 123: ...E Supported link modes Supports auto negotiation No Advertised link modes 10000baseT Full Advertised auto negotiation No Speed 10000Mb s Duplex Full Port FIBRE PHYAD 1 Transceiver external Auto negotiation off Supports Wake on g Wake on g Current message level 0x00000000 0 Link detected yes User Diagnostics for Linux NIC Driver Management Applications This section covers the following information ...

Page 124: ...iagnostics and ethtool diagnostics QConvergeConsole Diagnostics NOTE For information on installing and starting the QConvergeConsole GUI refer to the QConvergeConsole GUI Installation Guide for download instructions see Related Materials on page xii All procedural information for the QConvergeConsole GUI is covered in the QConvergeConsole GUI s online help system ...

Page 125: ...d qaucli pr nic testhw cna_port_inst To perform an interrupt test issue the following command qaucli pr nic testinterrupt cna_port_inst To perform a link test issue the following command qaucli pr nic testlink cna_port_inst To perform a register test issue the following command qaucli pr nic testregister cna_port_inst To display transceiver DMI data issue the following command qaucli pr nic trans ...

Page 126: ...rk device such as a switch The register test verifies the NIC register read and write Linux Diagnostic Test Messages Test information and PASS or FAIL messages are displayed for each of the tests listed in Linux Diagnostic Test Descriptions on page 111 VMware Management Applications VMware management applications for the adapter include the following VMware NIC Driver Management Applications User ...

Page 127: ...tch on the adapter switches packets when packets are sent by a VM on a NIC partition destined to another VM that is connected to a vSwitch on a different NIC partition belonging to the same physical port If the two NIC partitions are associated with different physical ports the external switch forwards packets between them Perform vSwitch configuration using either standard service console command...

Page 128: ... multi boot image It includes following sections UEFI Package Contents Supported Features Fibre Channel Adapter Configuration Updating the UEFI EfiUtilx64 UEFI Package Contents Files in the UEFI driver package include the following p3pxxxxx bin is a combined binary file which includes the binaries for BIOS FCode UEFI driver and reduced instruction set computer RISC firmware EfiUtil EFI or EfiUtilx...

Page 129: ...lease package in the EFI directory Updating the UEFI EfiUtilx64 For systems that do not include a built in UEFI Shell obtain the UEFI Shell program from an open source site For example https www tianocore org EfiUtilx64 is a QLogic Flash programming utility for UEFI To run the utility boot the UEFI Shell Do not run this utility from a drive connected to a Converged Network Adapter Make sure update...

Page 130: ...fer to the information in the efiutil pdf file To write read or verify the multi boot image on the adapter use EfiUtilx64 Configuring iSCSI over DCBX This section describes the configuration of iSCSI over DCBX on a Converged Enhanced Ethernet CEE switch port on a Brocade 8000 Series FCoE switch This configuration enables an iSCSI VLAN on a QLogic iSCSI Host Bus Adapter It also enables iSCSI over D...

Page 131: ...I Host Bus Adapter It does not apply to iBFT SW or an iSCSI function type on a NIC port configured with Switch Independent Partitioning When bandwidth settings exist for both Switch Independent Partitioning and DCBX DCBX takes precedence over Switch Independent Partitioning DCBX sets the bandwidth for iSCSI and NIC traffic and then Switch Independent Partitioning sets the bandwidth for the NIC par...

Page 132: ...n 6 4 1 For instructions on updating the firmware refer to the switch s documentation Create and Configure the iSCSI VLAN on the Switch Issue the following commands to create the iSCSI VLAN on the switch admin cmsh configure terminal swd77 config interface vlan 99 swd77 conf if vl 99 exit The preceding commands create a VLAN with VLAN ID 99 on the switch Create and Configure the CEE Map for iSCSI ...

Page 133: ...y the adapter firmware and the driver capability has the DCBX_CAP_LLDP_MANAGED flag the LLDP Agent Daemon lldpad reads local values from its config file rather than from the driver This misread causes lldpad to send different values than the adapter firmware sends The incorrect values lead to a multiple LLDP neighbors condition and according to the DCB Capability Exchange Protocol Base Specificati...

Page 134: ...trol tx on rx on 5 Configure cos 7 for iSCSI on this switch port swd77 conf if te 0 16 qos cos 7 6 Configure previously created CEE map on this switch port swd77 conf if te 0 16 cee iscsi dcbx 7 Apply LLDP iSCSI priority bits to interface swd77 conf if te 0 16 lldp iscsi priority bits 0x80 8 Bring up the link for the port swd77 conf if te 0 16 no shutdown swd77 conf if te 0 16 exit Verifying Adapt...

Page 135: ...ID TTL IEEE DCBx DCBx FCoE App DCBx FCoE Logical Link Link Prim Brocade Link DCB x iSCSI App DCBx FCoE Priority Bits 0x8 DCBx iSCSI Priority Bits 0x80 swd77 config do show cee maps iscsi dcbx CEE Map iscsi dcbx Precedence 1 Priority Group Table 6 Weight 10 PFC Disabled TrafficClass 6 BW 10 7 Weight 90 PFC Enabled TrafficClass 7 BW 90 15 0 PFC Disabled 15 1 PFC Disabled 15 2 PFC Disabled 15 3 PFC D...

Page 136: ...een the NIC partitions If Switch Independent Partitioning allocates 75 percent to NIC partition 1 and 25 percent to NIC partition 2 then NIC partition 1 is allocated 30 percent of the total bandwidth 40 percent x 75 percent and NIC partition 2 is allocated 10 percent of the total bandwidth 40 percent x 25 percent Choosing DCBX or Switch Independent Partitioning The choice of DCBX or Switch Indepen...

Page 137: ...ing nor DCBX needs to be used iSCSI traffic only no NIC traffic Neither Switch Independent Partitioning nor DCBX needs to be used Table 3 10 summarizes these guidelines Table 3 10 Choosing DCBX and Switch Independent Partitioning for Bandwidth Settings To run these types of traffic Use these tools iSCSI NIC DCBX Switch Independent Partitioning Unpartitioned Partitioned X X X X X X X X X X X ...

Page 138: ...des the following information about the QLogic Switch Independent Partitioning feature Switch Independent Partitioning Setup Requirements Switch Independent Partitioning Configuration Switch Independent Partitioning Setup and Management Options Switch Independent Partitioning Setup ...

Page 139: ...hes M620 M820 QLE8262a Monolithic Server 10GbE Standup Card T420 T620 R320 R420 R520 R620 R715 R720 R815 R820 R910 QME8262 k 10GbE Blade Mezzanine Card M420 M520 M610 M620 M710HD M720 M820 M910 M915 Table 4 2 Operating System Requirements Operating Systems Platforms Linux RHEL 6 5 x64 only SLES 11 SP3 SLES 12 VMware ESX ESXi 5 0 5 1 5 5 Windows Windows Server 2008 SP2 Windows Server 2008 R2 SP1 Hy...

Page 140: ...the latest System Setup BIOS Chassis Management Controller CMC and iDrac available from support dell com especially if users are using the FlexAddress feature File Names and Download Locations Management Tools Dell System Setup Lifecycle Controller or other human interface infrastructure HII browser http support dell com QLogic OptionROM Pre installed written on the adapter s Flash memory at Dell ...

Page 141: ...pters allows you to partition a single 10GbE NIC port into up to four individual partitions with user configurable bandwidth and interface type personality The partitioning options are not limited to NIC they extend to converged fabric partitioning by enabling you to assign iSCSI or FCoE protocols to certain partitions For example each partition can be either native Ethernet NIC or configured to s...

Page 142: ...itioning functionality is disabled on the adapters having only two Ethernet functions enabled Depending on the feature personality mapping supported on the adapter you can enable additional Ethernet or storage functions The PCI function number assignment is as follows Functions 0 and 1 are always NIC function 0 for port 1 and function 1 for port 2 any of the other functions can be individually ena...

Page 143: ... four NIC partitions two NIC partitions per physical port each NIC partition gets 16 filters 64 4 16 The available number of MAC address filters per partition determines the number of VMs that can communicate to other VMs through the eSwitch without the eSwitch having to forward the traffic to an external switch The VLAN and teaming solutions on partitioned NIC functions have the following restric...

Page 144: ... Configuration NIC FCoE and iSCSI NOTE In NPAR configurations with teaming on ESXi 5 1 and ESXi 5 5 QLogic recommends setting the driver module parameter defq_filters to 0 by issuing the following command and then rebooting the system for the setting to take effect esxcfg module s defq_filters 0 This setting enables the driver provided MAC learning to be used rather than the vmkernel provided call...

Page 145: ...ange or disable PCI functions on either physical port Using this feature lets you divide each physical port into up to four partitions configured to support one of the following PCI function types NIC FCoE or iSCSI Table 4 4 shows the port identifications and the possible Switch Independent Partitioning configurations NOTE This document uses the terms personality and function type interchangeably ...

Page 146: ...n QoS can resolve bottlenecks that exist when VMs contend for port bandwidth 2 Disabled NIC 1 0 3 Disabled NIC 2 1 4 iSCSI NIC Disabled 1 0 5 iSCSI NIC Disabled 2 1 6 FCoE NIC Disabled 1 0 7 FCoE NIC Disabled 2 1 a The physical port number is displayed as Port 1 or Port 2 on the adapter s port s label b The physical port number is displayed as Phy Port 0 or Phy Port 1 on the Switch Independent Par...

Page 147: ...endent Partitioning QoS minimum bandwidth settings so that they equal less than 100 percent For example A Switch Independent Partitioning enabled port has two NIC partitions one iSCSI partition and one FCoE partition ETS allocates 50 percent of the network bandwidth to FCoE traffic and 50 percent to non FCoE traffic The Switch Independent Partitioning QoS minimum bandwidth setting for each NIC par...

Page 148: ...inistrators of 11th and 12th generation Dell PowerEdge servers can use the server s embedded Dell System Setup to set up switch independent partitions and view eSwitch statistics on installed adapters The System Setup function provides OS independent management functionality It includes the following Updates Hardware configuration OS deployment System diagnostics This tool is especially helpful fo...

Page 149: ...ters and connected storage devices within the network In addition to the configuration and management tools available through the QConvergeConsole GUI QConvergeConsole enables you to partition and configure NIC ports and eSwitch parameters on the adapters Follow the procedures in Installing the QConvergeConsole GUI on page 238 to install the QConvergeConsole GUI application on a Windows or Linux s...

Page 150: ...rating system Windows or Linux to install the Fibre Channel FCoE NIC and iSCSI drivers To download the installers and drivers go to http support dell com For procedures on setting up Switch Independent Partitioning and eSwitch parameters using the QConvergeConsole CLI see QConvergeConsole CLI on page 154 Windows Device Manager Dell PowerEdge servers that run on supported Windows operating systems ...

Page 151: ...n belonging to the same physical port If the two NIC partitions are associated with different physical ports the external switch forwards packets between them Perform vSwitch configuration using either standard service console commands or RCLI commands For specific command options refer to the VMware documentation To download the QLogic VMware ESX ESXi vCenter Plug in and vSphere Web Client Plug i...

Page 152: ...cribed in this section to set up NIC partitions on QLogic adapter ports to meet your system s networking requirements When you first start the Dell PowerEdge server that contains QLogic adapters the POST starts Running POST gives you access to two of the configuration tools you can use to set up NIC partitions on QLogic adapter ports Dell System Setup and the QLogic OptionROM The QConvergeConsole ...

Page 153: ...p Switch Independent Partitioning using the Dell System Setup 1 While running POST press F2 The Main menu for the Dell System Setup opens NOTE When bandwidth settings exist for both Switch Independent Partitioning and DCBX DCBX takes precedence over Switch Independent Partitioning DCBX sets the bandwidth for iSCSI and NIC traffic and then Switch Independent Partitioning sets the bandwidth for the ...

Page 154: ...4 Switch Independent Partitioning Switch Independent Partitioning Setup and Management Options 139 CU0354602 00 L 2 Select Device Settings as shown in Figure 4 3 Figure 4 3 Main Menu Page ...

Page 155: ...itioning Switch Independent Partitioning Setup and Management Options 140 CU0354602 00 L 3 In the Device Settings screen select the adapter that you want to configure see Figure 4 4 Figure 4 4 Selecting the Device to Configure ...

Page 156: ...tioning Setup and Management Options 141 CU0354602 00 L The next screen that appears see Figure 4 5 is the Main Configuration page which lists information about the selected adapter and the available setup options for the adapter Figure 4 5 Main Configuration ...

Page 157: ...itch Independent Partitioning Configuration from the Main Configuration page The NIC Partitioning Configuration page opens see Figure 4 6 Figure 4 6 NIC Partitioning Switch Independent Partitioning Configuration Page NOTE For a list of Switch Independent Partitioning configuration options see Switch Independent Partitioning Setup on page 172 ...

Page 158: ...ach partition The relative bandwidth setting guarantees that at least this much bandwidth is available to the partition The cumulative relative bandwidth settings per port partitions 1 4 must not exceed 100 percent This is software enforced The maximum bandwidth setting enforces a bandwidth ceiling over which the partition cannot subscribe The adapter supports oversubscription Oversubscription all...

Page 159: ...sume all unused bandwidth Setting the vMotion partition to a maximum bandwidth of 100 percent ensures that the vMotion port dynamically consumes all bandwidth not being used by the other functions 7 Return to the NIC Partitioning Configuration page 8 For each partition use the Partition drop down list to enable disable or change the function type You can only enable one function type on each parti...

Page 160: ...OST gives you access to the OptionROM utility To set up Switch Independent Partitioning using OptionROM 1 When the screen prompts you to enter the setup menu see Figure 4 8 during the POST press CTRL Q to enter OptionROM setup Figure 4 8 POST Test Screen Prompt to Enter Setup Menu 2 Select the adapter you want to manage on the QLogic CNA Function Configuration screen see Figure 4 9 Figure 4 9 Sele...

Page 161: ... the selected adapter see Figure 4 10 Figure 4 10 Function Configuration Screen 3 Move your cursor to the Type column for any function type you want to change see Figure 4 11 and Figure 4 12 Figure 4 11 Selecting NIC Function Type to Change NOTE For a list of Switch Independent Partitioning configuration options see Switch Independent Partitioning Setup on page 172 ...

Page 162: ...etup and Management Options 147 CU0354602 00 L Figure 4 12 Selecting FCOE Function Type to Change 4 Move your cursor to the MinBW column to adjust the minimum bandwidth see Figure 4 13 on each partition between 0 100 percent Figure 4 13 Adjusting the Minimum Bandwidth ...

Page 163: ...the Dell System Setup The MaxBW field is read only in this utility To adjust the maximum bandwidth use a different utility such as the Dell System Setup When bandwidth settings exist for both Switch Independent Partitioning and DCBX DCBX takes precedence over Switch Independent Partitioning DCBX sets the bandwidth for iSCSI and NIC traffic and then Switch Independent Partitioning sets the bandwidt...

Page 164: ...e QConvergeConsole online help system To set up NIC partitions using the QConvergeConsole GUI 1 Configure NIC Partitions 2 Set Up QoS 3 View eSwitch Configuration Configure NIC Partitions You can use QConvergeConsole to configure and manage Switch Independent Partitioning functions for both physical ports through the NIC Partitioning tab You can enable or disable Switch Independent Partitioning fu...

Page 165: ...ersonality options see Figure 4 15 Figure 4 15 NIC Partitioning Switch Independent Partitioning Configuration Page 4 Select the physical port you want to configure from the Physical Port drop down list 5 If you want to change its function type select the NIC partition and select the appropriate protocol from the Function Type drop down list 6 Click Save to save any changes The Security Check dialo...

Page 166: ...o set the QoS 1 Expand a QLogic adapter node in the QConvergeConsole system tree 2 Expand the physical Port 1 node and select the NIC port The content pane displays two additional tabs that are not available on NIC ports for physical Port 2 3 Select the NIC Partitioning tab and then click the Management subtab The NIC Partitioning Management General page displays configuration details that apply t...

Page 167: ...idth to five percent guarantees sending and receiving data over the selected port at 500Mbps Maximum Bandwidth The maximum allowed bandwidth is specified as a percentage of the link speed Use the up and down arrows to scroll between 0 percent to 100 percent to set the maximum bandwidth for data sent over the selected partition Each additional percent increments the bandwidth by 100Mbps For example...

Page 168: ...er time To view the eSwitch configuration 1 Expand a QLogic adapter node in the QConvergeConsole system tree 2 Expand the physical port 1 node and select the NIC port The content pane displays tabs that are not available on NIC ports for physical port 2 3 Select the NIC Partitioning tab 4 Select the eSwitch subtab The NIC Partitioning eSwitch Management page displays offload configuration settings...

Page 169: ...es management and configuration of QLogic adapters within the entire network LAN and SAN You can use the QConvergeConsole CLI tool in either interactive or non interactive mode to configure and manage QLogic adapters installed on either Linux or Windows host servers This section outlines the steps for setting up NIC partitions using the QConvergeConsole CLI in interactive mode The displayed comman...

Page 170: ...set up NIC partitions using the QConvergeConsole CLI 1 Start the QConvergeConsole CLI interface and select 6 NIC Partitioning NPAR Information see Figure 4 18 Figure 4 18 Selecting 6 to View NPAR Information Options 2 Select 2 NPAR Port Information see Figure 4 19 Figure 4 19 Selecting 2 to View NPAR Port Information ...

Page 171: ...igure 4 20 NPAR Configuration Selection Screen 3 Return to the main menu after viewing the Switch Independent Partitioning information and select 7 NIC Partitioning NPAR Configuration see Figure 4 21 Figure 4 21 Selecting NPAR Configuration 4 Select 1 NPAR Configuration to display the NPAR Configuration menu which provides the following options 1 Bandwidth Configuration 2 Change PCI Function Perso...

Page 172: ...he prompt enter the percent value of bandwidth you want committed to the selected function e Enter the percent value of bandwidth you want to limit the selected function to NOTE When bandwidth settings exist for both Switch Independent Partitioning and DCBX DCBX takes precedence over Switch Independent Partitioning DCBX sets the bandwidth for iSCSI and NIC traffic and then Switch Independent Parti...

Page 173: ...ct 2 Change PCI Function Personality b Select the port number 1 or 2 c Select the function number The command line displays a list of options with choices that apply to the selected function number This mode prevents you from assigning a function type that does not apply to a given function number d Set the personality type by selecting the option number that identifies the appropriate function ty...

Page 174: ...tics Navigate through the menu selections to view eSwitch statistics 9 After you have finished setting the NIC partitions as needed you must reboot the host server for the changes to take effect Windows Device Manager On a Windows server that hosts QLogic adapters you can use the Windows Device Manager to set up NIC partitions You can also use it to view eSwitch statistics To set up Switch Indepen...

Page 175: ...e the 10GbE physical port into a multifunction storage and networking port To set up Switch Independent Partitioning on a QLogic adapter port 1 Log in to the server that contains installed QLogic adapters 2 Open the Server Manager and select Diagnostics then select Device Manager and then select Network Adapters 3 Right click on the first QLogic 10GbE 2P model device and select Properties from the...

Page 176: ...etup and Management Options 161 CU0354602 00 L 4 From the Adapter Properties page do the following a Select the NIC Partition Management tab b Right click on the function number you want to enable c Select Enable Partition see Figure 4 26 Figure 4 26 Enabling Partition ...

Page 177: ...requires a reboot Proceed 6 Click OK to close the message box that displays the following information Please reboot the system now 7 Reboot the host server to make the changes take effect Change Personalities To change function types personalities as needed for your network 1 From the Server Manager select Diagnostics then select Device Manager and then select Network Adapters 2 Right click on the...

Page 178: ...2 00 L 3 On the NIC Partition Management tab right click on one of the enabled functions select Change Function Type then select Convert to Protocol from the shortcut menu see Figure 4 28 Figure 4 28 Selecting Convert to NIC from Shortcut Menu 4 Repeat these procedures to change the function types as needed ...

Page 179: ...the port you want to configure and select Configure Function from the shortcut menu see Figure 4 29 Figure 4 29 Selecting Configure Function for Function 0 NOTE When bandwidth settings exist for both Switch Independent Partitioning and DCBX DCBX takes precedence over Switch Independent Partitioning DCBX sets the bandwidth for iSCSI and NIC traffic and then Switch Independent Partitioning sets the ...

Page 180: ... allocated to the NIC or iSCSI partitions When the switch sets ETS values the ETS bandwidth parameters take precedence The FCoE partition is allocated the bandwidth specified for FCoE in the ETS parameters The non FCoE bandwidth is divided between the NIC and iSCSI partitions in the proportion specified by the Switch Independent Partitioning management user interface In other words when ETS is in ...

Page 181: ...tup and Management Options 166 CU0354602 00 L The new bandwidth values appear in the right pane of the NIC Partition Management property sheet see Figure 4 31 Figure 4 31 NIC Partition Management Property Sheet 6 Click OK at the bottom of the Properties page to close it ...

Page 182: ...s for enabled partitions To display eSwitch statistics 1 From the QLogic Adapter Properties page select the NIC Partition Management tab 2 Right click the function number for the port you want to review and select eSwitch Statistics from the shortcut menu A pop up window displays the statistics see Figure 4 32 Figure 4 32 eSwitch Statistics for Function 0 3 After reviewing the statistics click OK ...

Page 183: ...ing Enable or disable functions Configure function personalities Configure the relative bandwidth of NIC functions View the eSwitch statistics The default configuration of a QLogic adapter is a NIC function iSCSI function and FCoE function There is an additional NIC function that is disabled by default but that you can enable as an option To configure Switch Independent Partitioning called NPAR or...

Page 184: ...function type For detailed information refer to Function Type on page 170 Bandwidth Allocation Selecting the Bandwidth option displays the current bandwidth allocation settings in the content pane and allows you to change the settings as you require as shown in Figure 4 34 Figure 4 34 Bandwidth Configuration The content window is divided into four sections Assign Function Bandwidth This section co...

Page 185: ...e in parentheses has not been saved yet To save your changes click Save Configuration Function Type Selecting the Type option displays the current function type NIC and allows you to change the function type as shown in Figure 4 35 and Figure 4 36 To change the function type select the new type and click Save Configuration The new type takes effect upon the next system reboot Figure 4 35 Converged...

Page 186: ...4 Switch Independent Partitioning Switch Independent Partitioning Setup and Management Options 171 CU0354602 00 L Figure 4 36 Converged Network Adapter NIC Function 2 or 3 Function Type ...

Page 187: ...efault Settings Configuration Options Switch Independent Partitioning Configuration Parameters and Setup Tools Default Settings Before configuring NIC partitions the adapter appears as a simple dual port 10GbE adapter with Switch Independent Partitioning settings shown in Table 4 5 Table 4 5 Default Configuration Function Number Function Type Physical Port Number Minimum Bandwidth Maximum Bandwidt...

Page 188: ...total across all partitions will add up to less than the maximum link bandwidth The queue s rate is allowed to exceed the specified value up to the maximum rate if excess bandwidth is available on the physical port link Maximum b b Maximum bandwidth Maximum allowed bandwidth specified as a percentage of the link speed The queue s rate is not allowed to exceed the specified value even if excess ban...

Page 189: ...ed bandwidth overwrites the manually configured bandwidth Dell System Setup Lifecycle Controller or other HII browser Yes Yes configurable Yes configurable QLogic NIC OptionROM Hot Key CTRL Q during POST Yes Yes configurable Not configurable read only QLogic QConvergeConsole GUI CLI for supported Windows and Linux operating systems Yes Yes configurable but only for NIC partitions not for storage i...

Page 190: ... 4 8 applies to QME8262 k only Table 4 8 Switch Independent Partitioning Wake on LAN WoL and PXE Boot Support Switch Independent Partitioning Function WoL PXE Boot Function 0 Yes Yes Function 1 Yes Yes Function 2 No No Function 3 No No Function 4 No No Function 5 No No Function 6 No No Function 7 No No ...

Page 191: ...work adapter PXE Boot Setup The PXE allows a workstation to boot from a server on a network before booting the operating system on the local hard drive iSCSI Configuration Using Fast UTIL Fast UTIL is the QLogic iSCSI BIOS Configuration utility used to configure the adapter for iSCSI iBFT Boot Setup iBFT is a component of the Advanced Configuration and Power Interface Specification ACPI 3 0b stand...

Page 192: ...8262 QME8262 k port configurations for redundancy only one adapter port should be connected to the SAN during installation The same recommendation applies to the storage controller ports 3 Enable the adapter port BIOS 4 Specify a boot LUN from the QLogic adapter Fast UTIL BIOS configuration utility Windows Boot from SAN This section provides the following procedures Creating a Driver Disk Windows ...

Page 193: ... Load Driver window insert the USB Flash drive in a USB port and then click OK 5 To continue with the standard installation procedure click Next Linux Boot from SAN This section provides the following procedures Red Hat Enterprise Linux Boot from SAN SUSE Linux Enterprise Server Novell Boot from SAN Red Hat Enterprise Linux Boot from SAN Follow these steps to install boot from SAN for Red Hat Ente...

Page 194: ...D drive remove the iso dd kit CD first if necessary and then press ENTER 9 Follow the on screen instructions to complete the installation SUSE Linux Enterprise Server Novell Boot from SAN Follow these steps to install boot from SAN for SUSE Linux Enterprise Server Novell all supported versions 1 Insert the SLES CD 1 in the CD drive and then boot the system 2 On the main installation window press o...

Page 195: ...lace the ESX installation DVD in the host DVD drive 2 Restart the host 3 Read and accept the terms of the license agreement 4 Select a keyboard type 5 When prompted for custom drivers select Yes to install custom drivers 6 To eject the ESX installation DVD click Add 7 Place the driver CD in the ESX host DVD drive 8 Select the driver module from which to import drivers to the ESX host and then clic...

Page 196: ...Independent Partitioning Configuration Global Bandwidth Allocation Partition 1 Configuration Partition 2 Configuration Partition 3 Configuration Partition 4 Configuration NIC Configuration iSCSI Configuration iSCSI General Parameters iSCSI Initiator Parameters iSCSI First Target Parameters iSCSI Second Target Parameters FCoE Configuration The first three pages are used to access the Dell System Se...

Page 197: ...T starts Running POST gives you access to the Dell System Setup To access the Dell System Setup 1 While running POST press F2 The Main menu for the Dell System Setup opens 2 Select Device Settings see Figure 5 1 Figure 5 1 System Setup Main Menu Page NOTE Depending on your server model and System Setup version the screens you see might differ from those shown ...

Page 198: ...en select the adapter that you want to configure or display information about see Figure 5 2 Figure 5 2 Selecting the Device to Configure The next screen that appears see Figure 5 3 is the Main Configuration page for the selected adapter Figure 5 3 Main Configuration for Selected Adapter ...

Page 199: ...ning Switch Independent Partitioning Configuration Device and Firmware Image Information This page displays device and firmware image information see Figure 5 4 The information on this page is read only and cannot be modified by the user The page displays the following information Device Name This file is the model number of the adapter Chip Type This file identifies the type of chip in the adapte...

Page 200: ...ocol Select PXE iSCSI or None to control the network boot protocol The configuration and enablement of iSCSI and FCoE are controlled separately Wake on LAN This option enables or disables server power on using an in band magic packet Link Speed This option is the link speed of the NIC This field is read only and cannot be modified by the user Figure 5 5 NIC Configuration ...

Page 201: ...SCSI Configuration The iSCSI Configuration page see Figure 5 6 provides the following choices for iSCSI configuration iSCSI General Parameters iSCSI Initiator Parameters iSCSI First Target Parameters iSCSI Second Target Parameters Figure 5 6 iSCSI Configuration ...

Page 202: ...ecified on the DHCP server This setting requires advanced users to manually input vendor specific information on the DHCP server and in the DHCP Vendor ID field of the iSCSI General Parameters CHAP Authentication Select Disabled to disable CHAP authentication Select Target or Target Initiator to enable CHAP or bidirectional CHAP and to configure the CHAP name and CHAP secret CHAP Mutual Authentica...

Page 203: ... assignment of the IPv6 link local address The default is Disabled Manual assignment IPv6 Link Local Address When IPv6 Link Local Address Auto Mode is Disabled this field must contain the IPv6 link local address of the iSCSI initiator IPv6 Auto Configuration This option is specific to IPv6 It controls the source of the initiator IP address DHCP if Enabled or Static assignment if Disabled IPv6 Rout...

Page 204: ...5 Boot Configuration Dell System Setup 189 CU0354602 00 L Figure 5 8 iSCSI Initiator Parameters Start of Page Figure 5 9 iSCSI Initiator Parameters End of Page ...

Page 205: ...get Target Port This field lets you specify the port used by the target It must be set to 3260 By default iSCSI uses port 3260 Do not modify this field unless it is necessary Boot LUN This field lets you specify the LUN of the boot device Target Name This field lets you specify the iSCSI target name of an intended boot target CHAP ID This field lets you configure the CHAP name This field is depend...

Page 206: ...get Target Port This field lets you specify the port used by the target It must be set to 3260 By default iSCSI uses port 3260 Do not modify this field unless it is necessary Boot LUN This field lets you specify the LUN of the boot device Target Name This field lets you specify the iSCSI target name of an intended boot target CHAP ID This field lets you configure the CHAP name This field is depend...

Page 207: ... an FCoE storage device or Disabled to disable OS boot from an FCoE storage device Boot from LUN The boot device LUN This is a 16 bit value This parameter is selectable only if the Boot parameter is set to Enabled Boot from Target The boot device worldwide port name This is a 64 bit value This parameter is selectable only if the Boot parameter is set to Enabled Figure 5 12 FCoE Configuration ...

Page 208: ...h Independent Partitioning Configuration page see Figure 5 13 provides the following choices for Switch Independent Partitioning configuration Global Bandwidth Allocation Partition 1 Configuration Partition 2 Configuration Partition 3 Configuration Partition 4 Configuration Figure 5 13 NIC Partitioning Switch Independent Partitioning Configuration ...

Page 209: ...n The Global Bandwidth Allocation page see Figure 5 14 lets you change a partition s relative bandwidth weighting and maximum bandwidth if it has been enabled For more information on bandwidth allocation refer to Configuration Options on page 173 Figure 5 14 Global Bandwidth Allocation ...

Page 210: ...Configuration Dell System Setup 195 CU0354602 00 L Partition 1 Configuration The Partition 1 Configuration page see Figure 5 15 has only one selection Enabled for NIC Mode Figure 5 15 Partition 1 Configuration ...

Page 211: ...onfiguration Dell System Setup 196 CU0354602 00 L Partition 2 Configuration The Partition 2 Configuration page see Figure 5 16 lets you set NIC Mode to Enabled or Disabled Figure 5 16 Partition 2 Configuration ...

Page 212: ... L Partition 3 Configuration The Partition 3 Configuration page see Figure 5 17 lets you set NIC Mode to Enabled or Disabled If you select Disabled for NIC Mode you can select Enabled or Disabled for iSCSI Offload Mode Figure 5 17 Partition 3 Configuration ...

Page 213: ...on 4 Configuration page see Figure 5 18 and Figure 5 19 lets you set NIC Mode to Enabled or Disabled If you select Disabled for NIC Mode you can select Enabled or Disabled for iSCSI Offload Mode Figure 5 18 Partition 4 Configuration Start of Page Figure 5 19 Partition 4 Configuration End of Page ...

Page 214: ... 1 During POST press the CTRL Q keys to enter the QLogic 8200 Series CNA Function Configuration window 2 On the CNA Function Configuration main window ensure that Protocol is set to PXE Figure 5 20 Figure 5 20 QLogic 82xx CNA Function Configuration 3 Press the ESC key to exit 4 Select Save changes to save your edits exit and reboot the system 5 During POST press the F1 or F2 key to enter the BIOS ...

Page 215: ... installation of OS of your choice The system attempts to boot from the PXE For example Attempting Boot From NIC QLogic PXE v2 0 x x PCI x x Px Copyright C 2009 2014 QLogic Corporation Initializing CLIENT MAC ADDR xx xx xx xx xx xx CLIENT IP xx xx xx xx MASK xx xx xx xx DHCP IP xx xx xx xx NOTE Ensure that the 8200 Series Adapters drivers are added in the OS image from the PXE server to complete t...

Page 216: ... Scan iSCSI Devices iSCSI Disk Utility Ping Utility Loopback Test Reinit Adapter Select Host Adapter Exit Fast UTIL Fast UTIL prompts you to select the adapter you want to configure After changing the settings exit and reboot your system to load the new Fast UTIL parameters Configuring Host Adapter Settings On the Fast UTIL Options menu select Configuration Settings and then select Host Adapter Se...

Page 217: ...ption to specify an IQN other than the default Initiator CHAP Name Press ENTER to configure the bidirectional BIDI CHAP name Initiator CHAP Secret Press ENTER to configure the BIDI CHAP secret Configuring iSCSI Boot Settings On the Fast UTIL Options menu select Configuration Settings to access the iSCSI Boot Settings and specify the drive you want to boot from Press C to clear the boot device info...

Page 218: ...k When DHCP is set to No this field must contain a valid subnet mask Gateway IP Address When DHCP is set to No this field must contain a valid gateway IP address Initiator iSCSI Name Press ENTER to configure the iSCSI name of the initiator By default the iSCSI name containing two parts the standard product model and serial number is used If you change the iSCSI name you need to write to the adapte...

Page 219: ...eters for an iSCSI target if the boot parameters are specified on the DHCP server This setting requires advanced users to manually input vendor specific information on the DHCP server and in the Vendor ID field of the DHCP Boot Settings area Vendor ID is the identification string sent to DHCP server Alternate Client ID provides an alternative for DHCP clients to use instead of the dhcp client iden...

Page 220: ...o not boot from a volume for some other system After the target storage system is reached these fields are populated after a rescan 8 Save your changes 9 From the iSCSI Boot Settings menu select the primary boot device An auto rescan of the host bus adapter finds new target LUNs 10 Select the iSCSI target 11 Change the value of Boot LUN to the LUN ID you want 12 Save your changes and restart the s...

Page 221: ... Fast UTIL BIOS to configure static iSCSI boot parameters Refer to Configuring the iSCSI Boot Parameters on page 204 Dynamic iSCSI Boot Configuration Dynamic iSCSI boot configuration primary and alternate boot device settings include the following Security Settings Press ENTER to access Primary Boot Security Settings Press ENTER to enable or disable CHAP and bidirectional CHAP and to configure the...

Page 222: ...n their configuration iSCSI ports can reside on physical interfaces and may exist on separate adapters When any combination of these adapters QMD8262 k QLE8262 or QME8262 k are present in a system Fast UTIL lists all of the iSCSI interface ports Select a specific port of a secondary adapter to configure its parameters Configuring QLogic iSCSI Boot To configure QLogic iSCSI boot 1 During POST press...

Page 223: ...uration Settings The Configuration Settings window opens as shown in Figure 5 22 Figure 5 22 Fast UTIL Configuration Settings Window 3 On the Configuration Settings menu select Host Adapter Settings The Host Adapter Settings window opens as shown in Figure 5 23 Figure 5 23 Fast UTIL Host Adapter Settings Window ...

Page 224: ...v6 as needed you can enable IPv4 only IPv6 only or both and then specify additional information as needed for the selected IP version s For IPv4 Initiator IP address subnet and gateway For IPv6 Initiator link local and routable addresses and default router address When you are finished updating the settings return to the Host Adapter Settings window see Figure 5 23 6 Optional On the Host Adapter S...

Page 225: ...settings shown in Figure 5 25 Figure 5 25 Fast UTIL iSCSI Boot Settings Window a On the iSCSI Boot Settings window select Adapter Boot Mode and set it to Manual b On the iSCSI Boot Settings window select Primary Boot Device Settings 8 On the Primary Boot Device Settings window see Figure 5 26 specify the target parameters Figure 5 26 Fast UTIL Primary Boot Device Settings Window ...

Page 226: ...d targets on the Select iSCSI Device window as shown in Figure 5 27 Figure 5 27 Fast UTIL Select iSCSI Device Window c On the Select LUN window select the LUN to set the target as the primary iSCSI boot device 9 Press ESC and then select Save changes 10 Press ESC again and then select Reboot System After rebooting the iSCSI BIOS loads for the target configured previously in the QLogic iSCSI Fast U...

Page 227: ...press F2 to enter the Dell System Setup menu as shown in Figure 5 28 Figure 5 28 Dell System Setup 12 Select System BIOS Settings then select Boot Settings then select BIOS Boot Settings and then select Hard Disk Drive Sequence as shown in Figure 5 29 Figure 5 29 Selecting iSCSI Boot Sequence ...

Page 228: ...ave changes and exit 15 Follow the manufacturer s OS installation instructions Booting The iSCSI Fast UTIL BIOS includes an iSCSI Boot Settings option which is accessed from the Configuration Settings menu When you enable this option you can specify the drive from which you want to boot After this is enabled the option forces the system to boot from the selected iSCSI drive subject to the settings...

Page 229: ... iSCSI protocol To view the iBFT specification visit the following URL http www microsoft com whdc system platform firmware ibft mspx This section provides details for setting up the adapter using iBFT including Enabling iBFT Boot Booting to a Target Disk Enabling iBFT Boot Follow these steps to enable iBFT boot in the Dell BIOS system 1 Boot the server and when the NIC boot code banner appears pr...

Page 230: ... CU0354602 00 L 2 Check that the protocol for functions 0 and 1 is set to iBFT If necessary change the setting s as shown in Figure 5 32 and then press ENTER Figure 5 32 Enabling iBFT Boot 3 Press ESC and save the settings 4 Reboot the system ...

Page 231: ...U0354602 00 L Booting to a Target Disk To boot to the target disk see the boot target vendor s instructions for the hardware setup 1 During POST press F2 to enter the Dell System Setup menu as shown in Figure 5 33 Figure 5 33 Dell System Setup ...

Page 232: ...ect Hard Disk Drive Sequence as shown in Figure 5 34 Figure 5 34 Selecting iSCSI Boot Sequence 3 In the pop up window use the UP ARROW and DOWN ARROW or the and buttons to move the iSCSI target to the top of the list as shown in Figure 5 35 where the iSCSI target is configured on Port 1 Partition 3 Then click OK Figure 5 35 Setting the iSCSI Boot Sequence ...

Page 233: ...4602 00 L 4 Select Save changes and exit 5 Reboot the system 6 The Option Rom shows the iSCSI target login information as shown in Figure 5 36 Figure 5 36 Connecting to the iSCSI Target 7 Continue with OS installation refer to the OS documentation ...

Page 234: ...server 4 Press ENTER If both ports are to be configured perform the following steps for the first port complete its configuration and then repeat the steps for the second port 5 On the Fast UTIL Options screen select Configuration Settings and then press ENTER 6 On the Configuration Settings screen select iSCSI Boot Settings and then press ENTER 7 On the iSCSI Boot Settings screen select Adapter B...

Page 235: ...HCP option 17 specifies the path name that contains the client s root disk The path is formatted as a character string consisting of characters from the network virtual terminal NVT ASCII character set The data is formatted as a string using the DHCP Root Path Option Option 17 iscsi servername serveripaddress protocol port LUN targetname DHCP Option 43 Adding Vendor Options Define a vendor class c...

Page 236: ...string using the DHCP vendor defined Secondary Boot Target IQN and Boot Parameters Option Option 202 iscsi serveripaddress protocol port LUN targetname Example string value no spaces iscsi 192 168 95 109 6 3260 9 iqn 1992 01 com lsi 1535 600a0b80006 7fe9a000000004b9fd854 DHCP Vendor Class Option 203 Initiator IQN Format the data as a string using the DHCP vendor defined Initiator IQN Option Option...

Page 237: ...I Troubleshooting FCoE Troubleshooting ESX Troubleshooting Diagnosing Problems Network activity indicators and diagnostic utilities help you to verify that the hardware and software are working properly If the installed adapter cannot communicate over the network the flowcharts shown in this appendix can help diagnose the problem with the adapter ...

Page 238: ...A Troubleshooting NIC Troubleshooting 223 CU0354602 00 L NIC Troubleshooting Figure A 1 NIC Diagnostics Flowchart ...

Page 239: ...A Troubleshooting iSCSI Troubleshooting 224 CU0354602 00 L iSCSI Troubleshooting Figure A 2 iSCSI Diagnostics Flowchart ...

Page 240: ...leshooting FCoE Troubleshooting 225 CU0354602 00 L FCoE Troubleshooting NOTE If most of the IP packet traffic is not TCP or UDP the FCoE FIP session might be dropped If you experience this problem turn off RSS ...

Page 241: ...A Troubleshooting FCoE Troubleshooting 226 CU0354602 00 L Figure A 3 FCoE Diagnostics Flowchart ...

Page 242: ...o the VMware document VI3 Networking Advanced Troubleshooting located here http www vmware com files pdf technology vi_networking_adv_troubleshooting pdf If the troubleshooting procedures in this document do not resolve the problem please contact Dell for technical assistance refer to the Getting Help section in your Dell system documentation ...

Page 243: ...228 CU0354602 00 L B Specifications This appendix provides specifications for the following products QMD8262 k Specifications QLE8262 Specifications QME8262 k Specifications ...

Page 244: ... 802 3ad Link Aggregation IEEE 802 1p Priority Encoding IEEE 802 3x Flow Control IEEE 802 1Qbb Priority Based Flow Control IEEE 802 1Qaz Enhanced Transmission Selection IPv4 Specification RFC791 IPv6 Specification RFC2460 TCP UDP Specification RFC793 768 ARP Specification RFC826 SCSI 3 Fibre Channel Protocol SCSI FCP Table B 1 Physical Characteristics Adapter Description Type Blade network daughte...

Page 245: ... Tape FC TAPE Profile SCSI Fibre Channel Protocol 2 FCP 2 Second Generation FC Generic Services FC GS 2 Third Generation FC Generic Services FC GS 3 Interface Specifications Table B 3 Interface Specifications Port Type Media 10G BASE KR Dell PE M1000e KR Midplane Revision 1 1 ...

Page 246: ...ate the maximum operating temperature in F for a specific altitude Use the first formula if the altitude is stated in meters and the second formula if the altitude is stated in feet or 40 C to 65 C 40 F to 149 F Temperature Gradient Max per 60 min 10 C 20 C Humidity Percent Ranges Noncondensing 20 to 80 Max Wet bulb temp 29 C c c Maximum corrosive contaminant levels measured at 50 relative humidit...

Page 247: ...dapter refer to Standards Specifications on page 229 Interface Specifications Environmental Specifications For the environmental specifications for the QLE8262 adapter refer to Table B 4 on page 231 Table B 5 Physical Characteristics Adapter Description Type Low profile PCIe card Length 6 6 inches Width 2 54 inches Table B 6 Power Requirements Voltage Rail Voltage Current 12V 12V 1 4A 3 3V 3 3V 0A...

Page 248: ...62 k adapter refer to Standards Specifications on page 229 Interface Specifications Environmental Specifications For the environmental specifications for the QME8262 k adapter refer to Table B 4 on page 231 Table B 8 Physical Characteristics Adapter Description Type Mezzanine card Length 3 307 inches Width 3 465 inches Table B 9 Power Requirements Voltage Rail Voltage Current 12V 12V 1 3A 3 3V 3 3...

Page 249: ...ergeConsole Documentation Downloading and Installing Management Agents Installing the QConvergeConsole GUI What Is in the QConvergeConsole Help System NOTE For information on installing the QConvergeConsole GUI refer to the QConvergeConsole GUI Installation Guide All procedural information for the QConvergeConsole GUI utility is covered in the utility s online help system ...

Page 250: ... QLogic adapters 4Gb and 8Gb Fibre Channel Adapters QLx24xx and QLx25xx 8Gb Fibre Channel to PCIe Mezzanine Card QME2572 16Gb Fibre Channel Adapters QLE266x DEL 16Gb Fibre Channel Mezzanine Card QME2662 DEL 10Gb Converged Network Adapter QLE8152 10GbE Blade Network Daughter Card QMD8262 10GbE Monolithic Server Standup Card QLE8262 10GbE Blade Mezzanine Card QME8262 k FabricCache Adapters QLE10000 ...

Page 251: ...management agent used by any of the host s adapters must be installed and running on the host Only protocols whose agents are installed and running are shown under the host s system tree node The management agents are netqlremote for Ethernet Networking NIC qlremote for Fibre Channel and FCoE iqlremote for iSCSI qlremote_fca for FabricCache Adapter The management agents are not automatically insta...

Page 252: ...ler Readme and Release Notes 2 Install the agents by running the SuperInstaller Refer to the Readme and Release Notes for detailed information on running the SuperInstaller Installing the Agents Using the Built in Agent Installer To access the Agent Installer within QConvergeConsole 1 Click Help in the QConvergeConsole menu bar and then select Download Agent Installers 2 Follow the on screen promp...

Page 253: ...omcat Port Number Setup dialog box enter a valid port number in the range 1025 65536 or accept the default port number 8080 Then click Next to continue 4 In the next dialog box select Yes if you want a localhost only installation If you do not want a localhost only installation select No 5 On the Pre Installation Summary dialog box verify that the information is correct and then click Install to p...

Page 254: ...the directory containing the installer file one of the following QConvergeConsole_Installer_Linux_x32_ bin QConvergeConsole_Installer_Linux_x64_ bin 2 In the terminal window verify that the installer file has permission to execute by issuing the ls lt command at the prompt 3 To install QConvergeConsole double click the QConvergeConsole bin file A message box prompts whether you want to run or view...

Page 255: ...lled QConvergeConsole on your server Installing QConvergeConsole in Silent Mode You can install the QConvergeConsole from a command prompt in silent mode To run the installer in silent mode issue the following command installer_file_name i silent DUSER_INPUT_PORT_NUMBER A_NUMBER NOTE The localhost only option installs QConvergeConsole locally so that you must run it locally remote connection is no...

Page 256: ...escribes the different types of reports and how to generate view and save them using QConvergeConsole s report facility Managing Fibre Channel and FCoE Adapters describes how to do the following for a Fibre Channel Adapter 2400 2500 2600 Series or Converged Network Adapter 8100 8200 8300 Series Display and edit adapter specific information for the selected adapter View and modify adapter configura...

Page 257: ...d how to configure LUN caching Using the Wizards describes how to use QConvergeConsole s wizards to update the following Flash drivers NIC parameters Fibre Channel FCoE parameters parameters files passwords and agents Troubleshooting describes tools you can use to resolve the problems that can occur when installing and using the adapter It also provides the procedures for tracing QConvergeConsole ...

Page 258: ...uct has been designed and manufactured according to IEC60825 1 on the safety label of laser product Class 1 Laser Product Caution Class 1 laser radiation when open Do not view directly with optical instruments Appareil laser de classe 1 Attention Radiation laser de classe 1 Ne pas regarder directement avec des instruments optiques Produkt der Laser Klasse 1 Vorsicht Laserstrahlung der Klasse 1 bei...

Page 259: ...terference and 2 this device must accept any interference received including interference that may cause undesired operation ICES 003 compliance Class A This Class A digital apparatus complies with Canadian ICES 003 Cet appareil numériqué de la classe A est conformé à la norme NMB 003 du Canada CE Mark 2004 108 EC EMC Directive compliance EN55022 2010 Class A EN55024 2010 EN61000 3 2 Harmonic Curr...

Page 260: ...ty ProductLine UL60950 1 2nd Edition 2007 03 3 27 UL CSA C22 2 60950 1 07 2nd Edition Use only with listed ITE or equivalent Complies with 21 CFR 1040 10 and 1040 11 2006 95 EC low voltage directive ProductLine TUV TUV EN60950 1 2006 A11 A1 A12 CB Certified to IEC 60950 1 2nd Edition A class equipment Business purpose info telecom munications equipment As this equipment has undergone EMC registrat...

Page 261: ...gistered trademarks of Dell Inc InstallShield is a registered trademark of Flexera Software LLC Google and Chrome are registered trademarks of Google Inc Intel is a registered trademark of Intel Corporation Linux is a registered trademark of Linus Torvalds Microsoft Hyper V Internet Explorer Windows Windows Server Windows Vista and Windows XP are registered trademarks of Microsoft Corporation Mozi...

Reviews: