Installing Drives 3-11
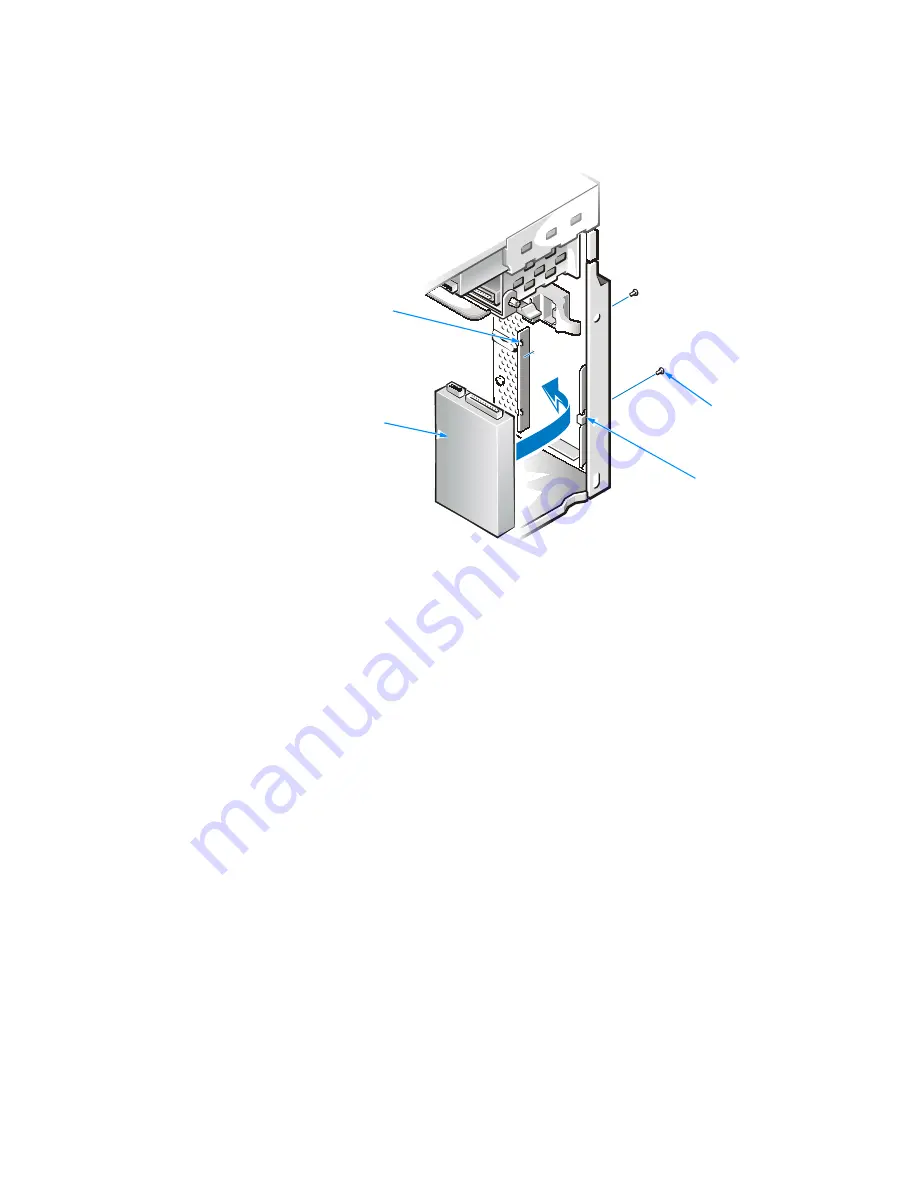
)LJXUH,QVWDODUG'LVN'ULYH
5. Install the new drive in the bay.
Orient the new drive with its circuit board facing the front of the chassis. Press
the drive between the two brackets until the drive is secured by the clip. Secure
the drive to the front of the chassis with the two screws you removed in step 4.
127,&(0DWFKWKHFRORUHGVWULSRQWKHLQWHUIDFHFDEOHZLWKSLQRQWKH
GULYHVLQWHUIDFHFRQQHFWRU
6. Connect a DC power cable and the EIDE cable to the new drive as described ear-
lier in Connecting Drive Cables.
7.
If necessary, connect the EIDE cable to the PRI IDE connector on the system
board.
8. Replace the bezel.
9. Make sure that no cable connections were loosened during the procedure.
Arrange cables so that they will not interfere with replacing the power supply and
computer cover.
10. Rotate the power supply back into place, and replace the computer cover.
11. Reconnect your computer and devices to their electrical outlets, and turn them
on.
tabs (2)
drive
screws (2)
clip
Summary of Contents for Dimension L c Series
Page 1: ... HOO LPHQVLRQ F 6 VWHPV 5 5 1 1 7528 6 227 1 8 5 7 ZZZ GHOO FRP ...
Page 18: ...xx ...
Page 26: ...1 8 Dell DimensionLxxxc Systems Reference and Troubleshooting Guide ...
Page 44: ...2 18 Dell DimensionLxxxc Systems Reference and Troubleshooting Guide ...
Page 84: ...5 14 Dell DimensionLxxxc S ystems Reference and Troubleshooting Guide ...
Page 96: ...6 12 Dell DimensionLxxxc S ystems Reference and Troubleshooting Guide ...
Page 116: ...7 20 Dell DimensionLxxxc Systems Reference and Troubleshooting Guide ...
Page 122: ...A 6 Dell DimensionLxxxc S ystems Reference and Troubleshooting Guide ...
Page 142: ...B 20 Dell DimensionLxxxc Systems Reference and Troubleshooting Guide ...
Page 150: ...C 8 Dell DimensionLxxxc S ystems Reference and Troubleshooting Guide ...
Page 166: ...E 8 Dell Dimension Lxxxc Systems Reference and Troubleshooting Guide ...


