vii
:KHQ:RUNLQJ,QVLGH<RXU&RPSXWHU
Before you remove the computer cover, perform the following steps in the sequence
indicated.
127,&('RQRWDWWHPSWWRVHUYLFHWKHFRPSXWHUV\VWHP\RXUVHOIH[FHSWDV
H[SODLQHGLQWKLVJXLGHDQGHOVHZKHUHLQ'HOOGRFXPHQWDWLRQ$OZD\VIRO
ORZLQVWDOODWLRQDQGVHUYLFHLQVWUXFWLRQVFORVHO\
127,&(7RKHOSDYRLGSRVVLEOHGDPDJHWRWKHV\VWHPERDUGZDLWVHF
RQGVDIWHUWXUQLQJRIIWKHV\VWHPEHIRUHGLVFRQQHFWLQJRUUHPRYLQJD
FRPSRQHQWIURPWKHV\VWHPERDUG
1.
Turn off your computer and any devices.
2. Ground yourself by touching
an unpainted metal surface on the chassis, such as
the metal around the card-slot openings at the back of the computer, before
touching anything inside your computer.
While you work, periodically touch an unpainted metal surface on the computer
chassis to dissipate any static electricity that might harm internal components.
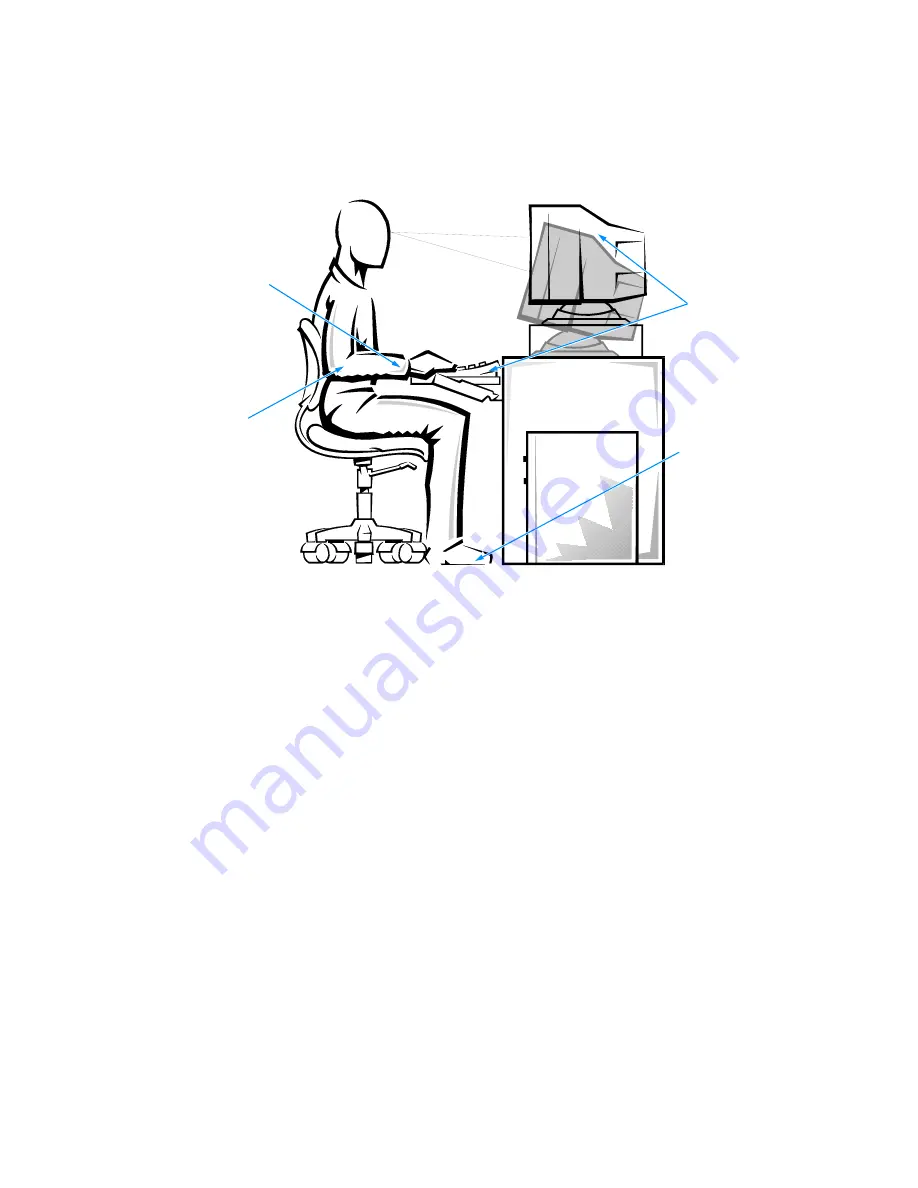
monitor screen at or below eye level
wrists relaxed and flat
arms at desk level
monitor and
keyboard
positioned
directly
in front of user
feet flat on the floo
Summary of Contents for Dimension L c Series
Page 1: ... HOO LPHQVLRQ F 6 VWHPV 5 5 1 1 7528 6 227 1 8 5 7 ZZZ GHOO FRP ...
Page 18: ...xx ...
Page 26: ...1 8 Dell DimensionLxxxc Systems Reference and Troubleshooting Guide ...
Page 44: ...2 18 Dell DimensionLxxxc Systems Reference and Troubleshooting Guide ...
Page 84: ...5 14 Dell DimensionLxxxc S ystems Reference and Troubleshooting Guide ...
Page 96: ...6 12 Dell DimensionLxxxc S ystems Reference and Troubleshooting Guide ...
Page 116: ...7 20 Dell DimensionLxxxc Systems Reference and Troubleshooting Guide ...
Page 122: ...A 6 Dell DimensionLxxxc S ystems Reference and Troubleshooting Guide ...
Page 142: ...B 20 Dell DimensionLxxxc Systems Reference and Troubleshooting Guide ...
Page 150: ...C 8 Dell DimensionLxxxc S ystems Reference and Troubleshooting Guide ...
Page 166: ...E 8 Dell Dimension Lxxxc Systems Reference and Troubleshooting Guide ...


