Accessories
A-8
Pegaso™ Industrial PDA with Windows
®
CE
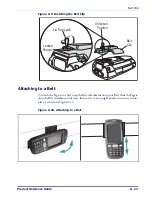
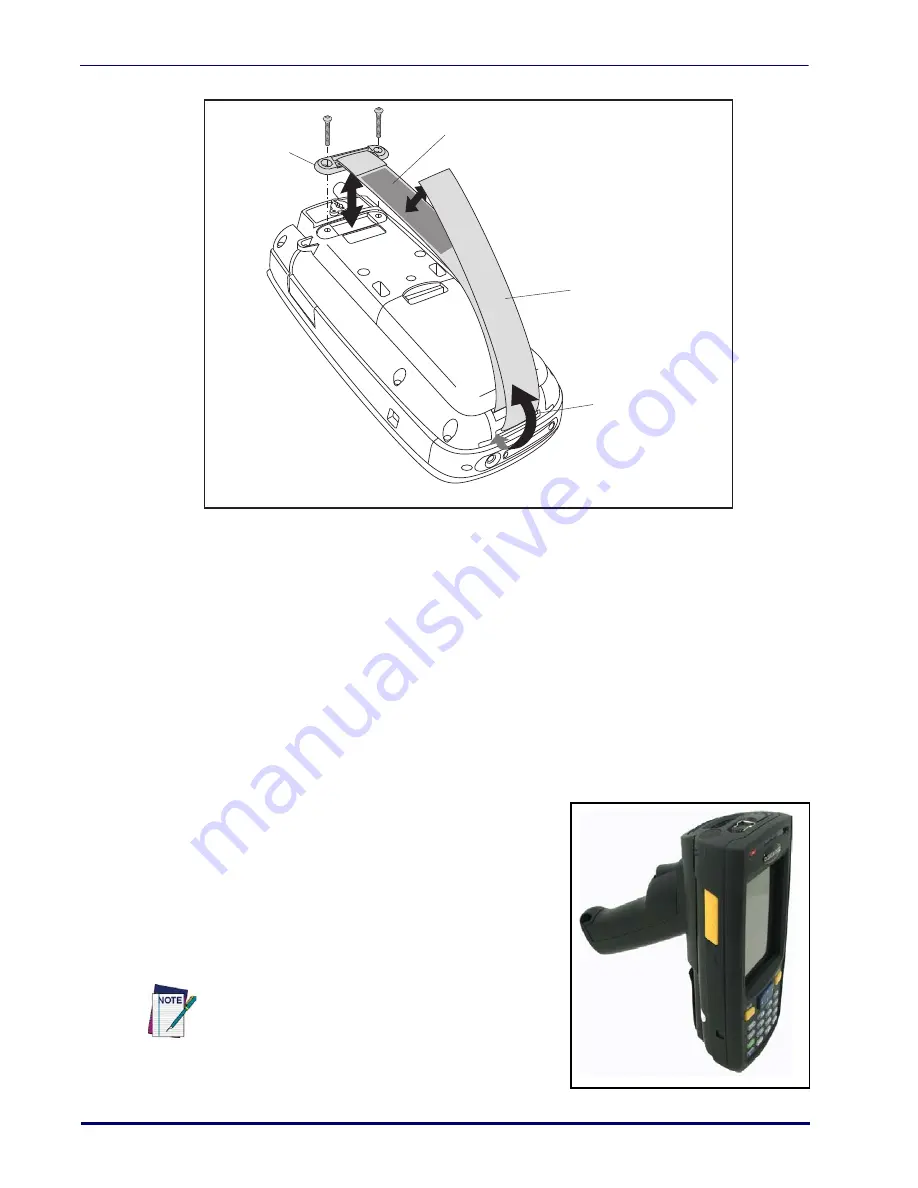
Figure A-8. Removing/Replacing the Handstrap
Installing the Handstrap
To install a Handstrap on the Pegaso, follow the steps described below.
1. Feed the strap end of the handstrap down through the Back Enclosure Handstrap
Holder slot as shown in Figure
and loop it up to engage the closure area at the
desired position.
2. Attach the Upper Handstrap Assembly to the unit using the two Phillips screws.
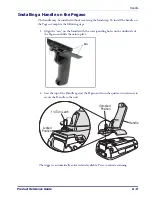
Handle
The Pegaso is available with an attachable handle
which provides an additional trigger for scanning.
When you remove the handle, you lose the ability
to press the trigger on the handle and must use the
<Scan>
key on the keypad or Scan triggers on the
Pegaso instead.
To install a handle, refer to the following sections.
Reverse the instructions to remove the handle.
Handstrap
Back Enclosure
Handstrap Holder
Closure Area
Upper
Handstrap
Assembly
The Handstrap can be left on when installing the
Handle.
Summary of Contents for Pegaso
Page 1: ...Industrial PDA with Windows CE Product Reference Guide ...
Page 10: ...Preface About this Guide viii Pegaso Industrial PDA with Windows CE NOTES ...
Page 14: ...Batteries and Power 1 4 Pegaso Industrial PDA with Windows CE NOTES ...
Page 46: ...Configuring the Pegaso 2 32 Pegaso Industrial PDA with Windows CE NOTES ...
Page 72: ...Networks Communications and Connections 4 10 Pegaso Industrial PDA with Windows CE NOTES ...
Page 98: ...Falcon Desktop Utility for Windows CE B 14 Pegaso Industrial PDA with Windows CE NOTES ...
Page 104: ...Configuring the Web Server C 6 Pegaso Industrial PDA with Windows CE NOTES ...
Page 156: ...Programming Bar Codes G 32 Pegaso Industrial PDA with Windows CE NOTES ...
Page 170: ...I 8 Pegaso Industrial PDA with Windows CE Index NOTES ...
Page 171: ......


