


4 Web-based Switch Configuration
D-Link DGS-2000 Series Ethernet Switch User Manual
3
3
0
0
SNMP Status:
Click
Settings
to link to SNMP > SNMP > SNMP Global Settings. Default is disabled.
802.1X Status:
Click
Settings
to link to AAA > 802.1X > 802.1X Settings. Default is disabled.
DHCP Client:
Click
Settings
to link to System > System Settings. Default is disabled.
Jumbo Frame:
Click
Settings
to link to L2 Functions > Jumbo Frame. Default is disabled.
Port Mirroring:
Click
Settings
to link to L2 Functions > Port Mirroring. Default is disabled.
QinQ Setting:
Click
Settings
to link to Configuration > QinQ > QinQ Settings. Default is disabled.
IGMP Snooping:
Click
Settings
to link to L2 Functions > Multicast > IGMP Snooping. Default is disabled.
Power Saving:
Click
Settings
to link to System > Power Saving. Default is disabled
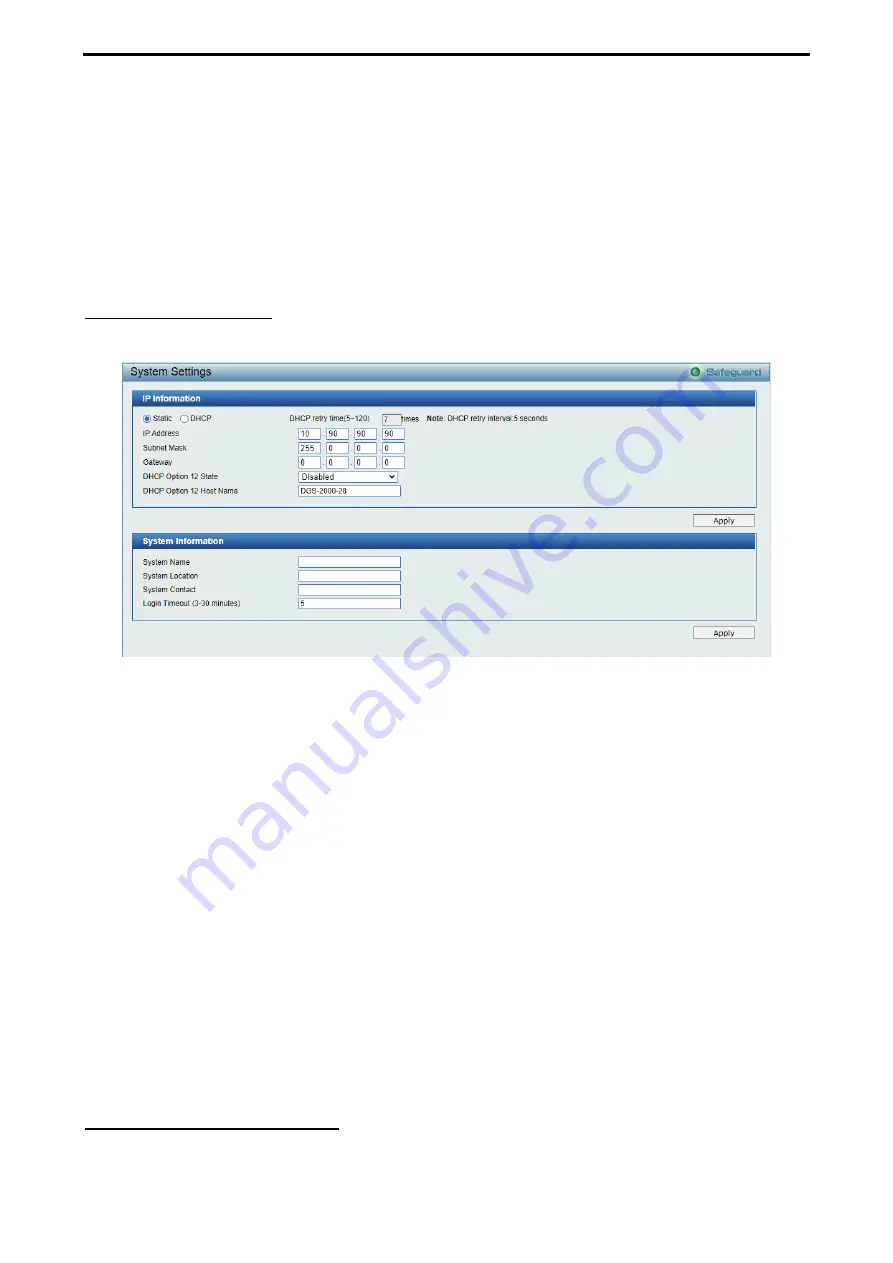
System > System Settings
The System Setting allows the user to configure the IP address and the basic system information of the
Switch.
Figure 4.16 – System > System Settings
IPv4 Information:
There are three ways for the switch to obtain an IP address: Static, DHCP (Dynamic Host
Configuration Protocol) and BOOTP.
When using static mode, the
Interface Name
,
VLAN Name
,
Interface Admin State
,
IPv4 Address
,
NetMask
and
Gateway
can be manually configured. When using DHCP mode, the Switch will first look for a
DHCP server to provide it with an IP address (including network mask and default gateway) before using the
default or previously entered settings. By default the IP setting is static mode with IP address is
10.90.90.90
and subnet mask is
255.0.0.0
.
DHCP Option 12 State:
Specifies the DHCP option 12 state is enabled or disabled.
DHCP Option 12 Host Name:
Specifies the host name for DHCP.
DHCP Retry Times:
Specifies the retry time of DHCP.
System Information:
The fields for
System Name
and
System Location
which provide network
administrator unique identification information for different switches. Also, system information can be read
and printed on SmartConsole utility.
Login Timeout:
The Login Timeout controls the idle time-out period for security purposes, and when there is
no action for a specific time span in the Web-based Management. If the current session times out (expires),
the user is required a re-login before using the Web-based Management again. Selective range is from 3 to
30 minutes, and the default setting is 5 minutes.
System > DHCP Auto Configuration
The DHCP Auto Configuration page allows user to enable the DHCP Auto Configuration feature on the
Switch. When enabled, the Switch becomes a DHCP client and gets the configuration file from a TFTP


