10
F.
Move boiler to permanent location
by sliding or
walking. Do not drop.
G.
Confirm that one (1) Flue Baffle is properly
positioned in each Boiler Flueway.
Tabs at the top
of each Flue Baffle should be resting on top row of Flue
Pins on each adjoining section.
H.
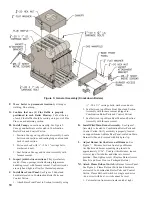
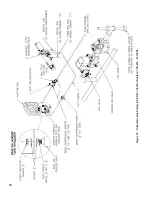
Install Canopy
on section assembly. See Figure 5.
Canopy and hardware are located in Combination
Boiler Parts and Control Carton.
1. Position Canopy on top of Section Assembly. Locate
between end sections and sealing ledge on front and
back of each section.
2. Fasten each end with ¼” - 20 x 1” carriage bolts,
washers and nuts.
3. Seal between Canopy and Section Assembly with
furnace cement.
I.
Inspect joints between sections.
They were factory
sealed. If any openings resulted during shipment or
handling, reseal with furnace cement. Confirm tie rods
are only hand tight to allow for thermal expansion.
J.
Install Base Front Panel.
See Figure 5. Panel and
hardware located in Combination Boiler Parts and
Control Carton.
1. Attach Base Front Panel to Section Assembly using
¼” - 20 x 1¼” carriage bolts, washers and nuts.
2. Seal between top of Base Front Panel and Section
Assembly with furnace cement (shipped in
Combination Boiler Parts and Control Carton).
3. Seal between top of Base Rear Panel and Section
Assembly with furnace cement.
K.
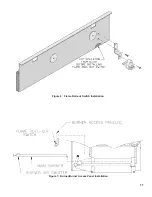
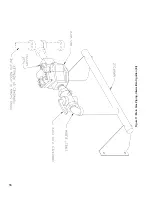
Install Pilot/Main Burner Assembly.
See Figure 7.
Assembly is located in Combination Boiler Parts and
Control Carton. Verify assembly is properly located
on support bracket in Base Rear Panel, seated on Main
Burner Orifice, and secured with hitch pin clip.
L.
Adjust Burner Air Shutters on all Burners.
See
Figure 7. Distance between front edge of Burner
Air Shutter and burner mounting ring should be
approximately 11/16”. To adjust this distance, loosen
screw at top of air shutter and slide into correct
position. Then tighten screw. (Replace Burner Access
Panel(s) and Front Door on Packaged Boilers.)
M.
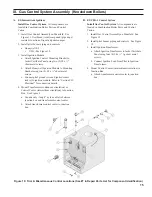
Attach Flame Roll-out Switch
to Burner Access Panel.
See Figure 6. Flame Roll-out Switch and hardware
are located in Combination Boiler Parts and Control
Carton. Flame Roll-out Switch is a single use device
- do not test with heat - switch cannot be reset.
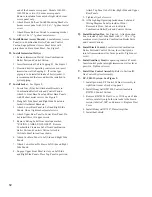
1. Cut insulation from semicircular notch at right
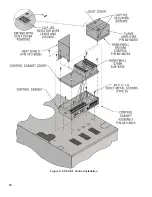
Figure 5: General Assembly (Knockdown Boilers)
Summary of Contents for 16H-340
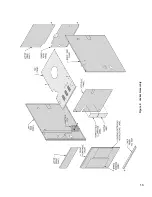
Page 13: ...13 Figure 8 Jacket Assembly ...
Page 14: ...14 Figure 9 EP CSD 1 Control Installation ...
Page 16: ...16 Figure 11 Main Gas Piping Intermittent Ignition EI ...
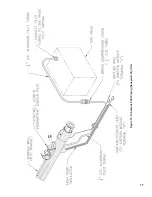
Page 17: ...17 Figure 12 Schematic Pilot Piping Honeywell EI USA ...
Page 18: ...18 Figure 15 Schematic Gas Piping EP CSD 1 Control System 16H 410 16H 505 ...
Page 37: ...37 Figure 41 Operating Instructions EI ...
Page 47: ...47 Honeywell EI Trouble Shooting Guide ...
Page 48: ...48 THIS PAGE LEFT BLANK INTENTIONALLY ...
Page 58: ...58 ...
Page 60: ...60 ...

