Installation Procedures
51
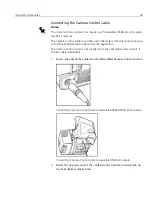
Connecting the Camera-to-Back Sync Cable
1.
Insert one end of the Camera-to-Back Sync cable into the Mamiya
Lens Flash jack.
2.
Insert the other end of the cable into the Camera-to-Back Sync jack
on the adaptor plate.
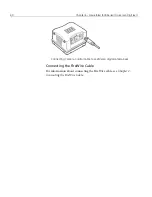
Connecting Camera-to-Back Sync cable to Leaf digital camera back
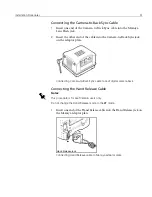
Connecting the Hand Release Cable
1.
Insert one end of the Hand Release cable into the Hand Release jack on
the Mamiya adaptor plate.
Connecting Hand Release cable to Mamiya adaptor plate
Notes:
This procedure is for Leaf Valeo 6 users only.
Do not change the Hand Release mode to the
LT
mode.
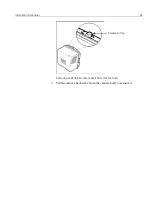
Hand Release jack
Summary of Contents for Leaf Valeo
Page 1: ...www creo com leaf Installation Guide 653 00683B EN Rev A Leaf Valeo...
Page 2: ......
Page 9: ......
Page 13: ......
Page 17: ......
Page 21: ......
Page 25: ......
Page 29: ......
Page 33: ......
Page 37: ......
Page 38: ...YL HDI 9DOHR YLL YLL YLL...
Page 40: ...HDI 9DOHR xxxvii HDI 9DOHR HDI 5 3URWHFWLYH 5 LOWHU ODVV...
Page 41: ......
Page 42: ...ZN GCH 8CNGQ ZNK ZNK ZNK...
Page 44: ...GCH 8CNGQ xli GCH 8CNGQ GCH 8CNGQ 4 HDI 5 5 Protective IR Filter Glass...
Page 45: ......
Page 46: ...xliv Leaf Valeo Digital Camera Back xlv xlv xlv...
Page 49: ......
Page 50: ...Introduction About This Document 2 Product Overview 2...
Page 52: ...Connecting the FireWire Cable Connecting the FireWire Cable 4 Attaching the Repeater 5...
Page 55: ......
Page 71: ......
Page 79: ......
Page 91: ......
Page 103: ......
Page 119: ......
Page 135: ......
Page 136: ...Diffusion Filter Attaching the Diffusion Filter to the Camera 88...
Page 142: ......
Page 143: ...www creo com...


