


64
6. Back Up
6-1. Still Image backup onto USB flash Drive
A still image backup is enabled both in live display and playback mode.
Insert USB memory stick into the USB port on the front panel.
1. In live display mode, click “
” icon to back up.
2. In playback mode, press “BACKUP” button on the remote control or click
button on the screen with mouse.
Back up in the following order
1. In live display mode, click “
”
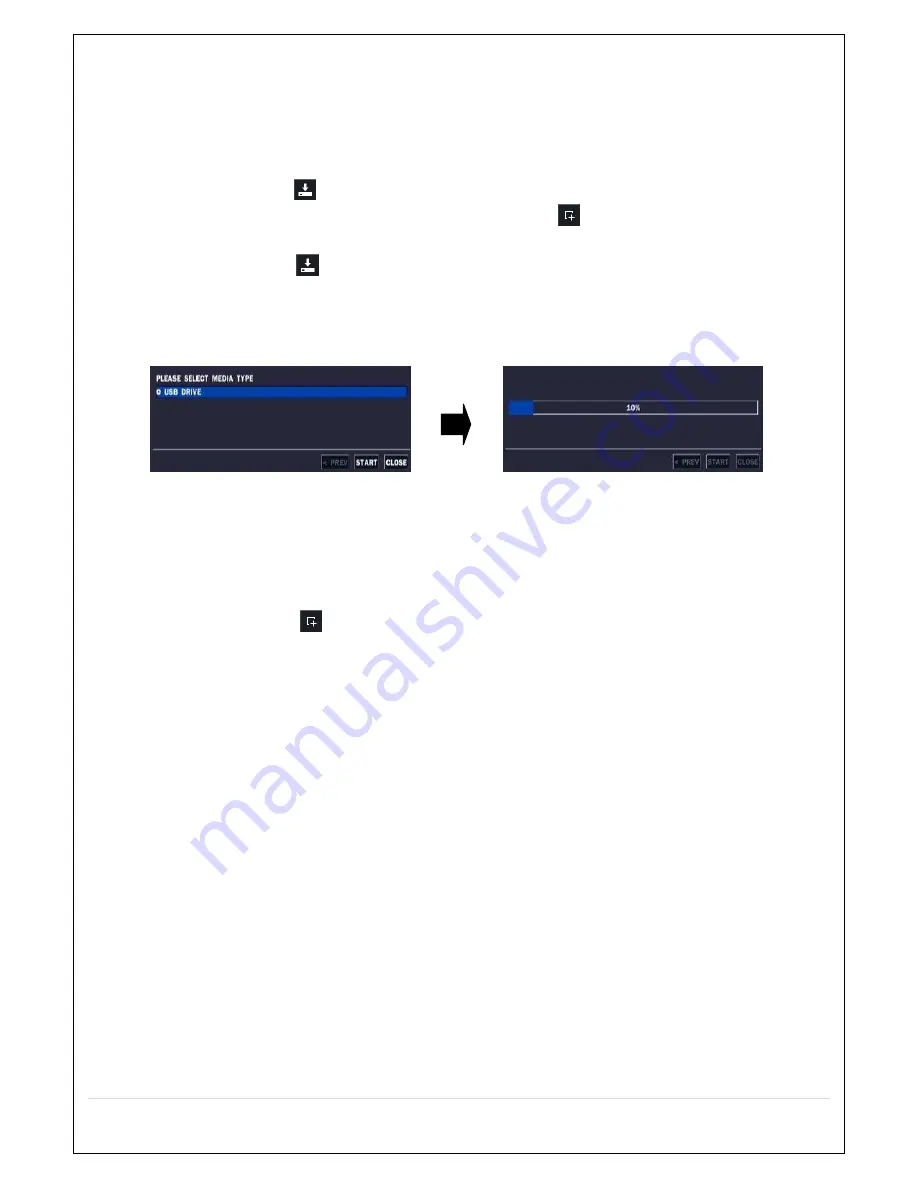
button at the bottom of the screen and select media type as shown in Fig. 6.1.1 or press
“BACKUP” button on the front panel of DVR.
2. The data backup is done onto the media selected.
To cancel press “ESC” button. In “ARCHIVE” of SEARCH Mode, the backup is enabled.
Fig. 6.1.1. Still Image Backup screenshot
6-2. Video backup
A video backup is enabled in playback mode.
First insert a DVD-RW media (optional) or USB memory stick into USB port on the front panel
1. In playback mode, click on “
” button or press “Backup” button on the front panel at the video scene that is to backup.
2. Select STILL IMAGE, NSF (video in proprietary format), AVI (INTEGRATED SUBTITLE), or AVI (SEPARATED SUBTITLE,
MAC COMPATIBLE).
.STILL IMAGE: Still image in BMP format
. NSF: Proprietary format that requires a proprietary player which is automatically included at the time of backup.
. AVI-INTEGRATED SUBTITLE: It can be played in AVI Players in general (subtitle not included).
. AVI-SEPARATED SUBTITLE: It can be played in AVI Players in general. Video file and Subtitle file (in SMI format) are
saved.
3. Select media type.
– USB STICK: USB memory stick inserted into USB port on the front panel of DVR.
– USB HDD: For large amount of data backup
– DVD-RW: DVD-RW backup (supported if DVD-RW is available in the DVR, optional)
4. Select the channels and the duration and click “START” to start backup (1 minute to maximum 60 minutes).
5. Or, press “SEL” button on the front panel of DVR to start backup.
6. The data backup is done onto the corresponding media.
Summary of Contents for CVN-0430F
Page 1: ......
Page 19: ...19 2 Go to SETUP SYSTEM DATE TIME SETUP 3 Select ON from the DAYLIGHT SAVING dropdown menu ...
Page 25: ...25 Figure 3 5 1 PoE Port ...
Page 82: ...82 8 7 7 NETWORK Settings Change setup values for NETWORK ...
Page 101: ...101 EVENT To select event to record LOG EVENT Search Search recorded event ...
Page 106: ...106 4 Remote setup for STORAGE Settings 5 Remote setup for SYSTEM Settings ...
Page 107: ...107 6 Remote setup forSECURITY Settings 7 Remote setup for NETWORK Settings ...
Page 122: ...122 ...