


Sterilizers Bravo G4
- TECHNICAL MANUAL
EN
TECHNICAL SHEETS
93
Replacing the door closed microswitch
-
With the door open, disconnect the microswitch connectors (note down the position of connections).
-
Remove the 2 screws and the retaining washers.
-
Position the new microswitch, fixing the 2 screws and washers, connect the wiring.
Replacing the door ajar microswitch
-
With the door open, disconnect the microswitch connectors (note down the position of connections).
-
Remove the 2 screws and the retaining washers.
-
Position the new microswitch, fixing the 2 screws and washers; connect the wiring.
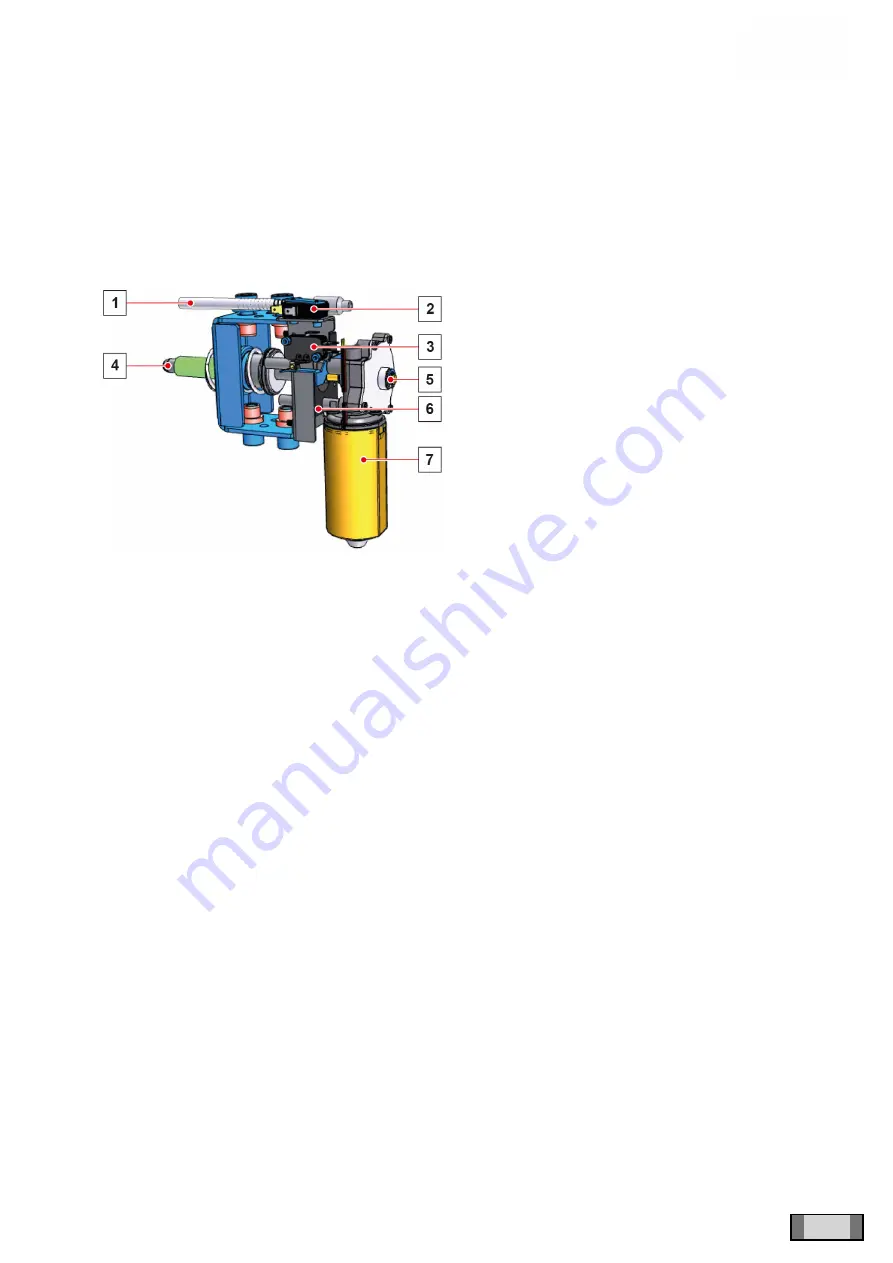
1
Servomotor actuator pin
2
Door ajar microswitch
3
Closed door microswitch
4
Shaft with worm screw
5
Rear spring ring
6
Servomotor sliding plate
7
24Vdc gearmotor
Summary of Contents for SciCan BRAVO G4
Page 2: ......
Page 4: ...Sterilizers Bravo G4 TECHNICAL MANUAL 2 CONTENTS EN ITALIANO Page left blank intentionally...
Page 23: ...Sterilizers Bravo G4 TECHNICAL MANUAL EN FUNCTIONING 21...
Page 25: ...Sterilizers Bravo G4 TECHNICAL MANUAL EN FUNCTIONING 23...
Page 27: ...Sterilizers Bravo G4 TECHNICAL MANUAL EN FUNCTIONING 25...
Page 29: ...Sterilizers Bravo G4 TECHNICAL MANUAL EN FUNCTIONING 27...
Page 33: ...Sterilizers Bravo G4 TECHNICAL MANUAL EN FUNCTIONING 31...
Page 35: ...Sterilizers Bravo G4 TECHNICAL MANUAL EN FUNCTIONING 33...
Page 39: ...Sterilizers Bravo G4 TECHNICAL MANUAL EN FUNCTIONING 37...
Page 98: ...Sterilizers Bravo G4 TECHNICAL MANUAL 96 TECHNICAL SHEETS EN 1 PCB 2 Pressure transducer...
Page 116: ......


