Upgrading The Computer
6 - 6 Upgrading the Hard Disk Drive
6
4.
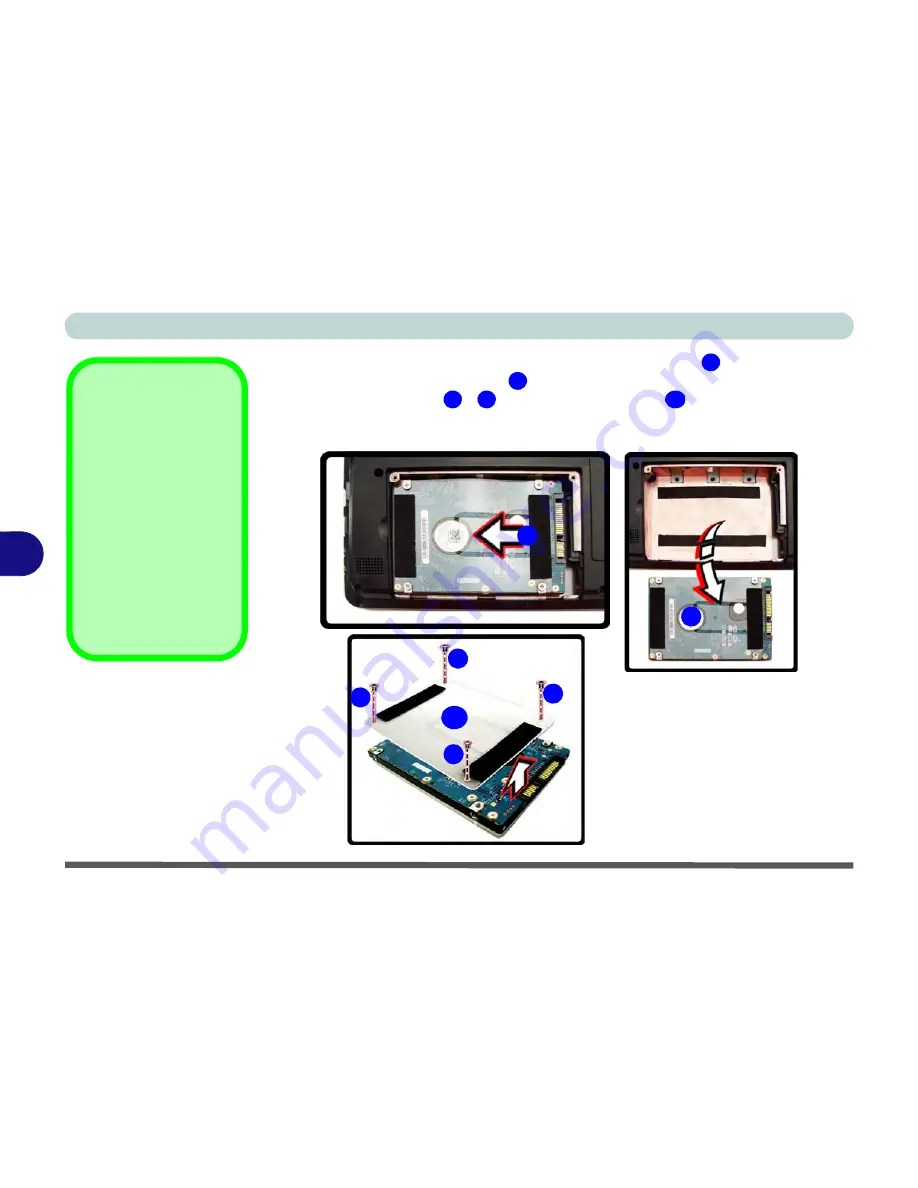
Grip the tab and slide the hard disk in the direction of arrow
.
5.
Lift the hard disk out of the bay
.
6.
Remove the screw(s)
-
and the adhesive cover
.
7.
Reverse the process to install a new hard disk drive (do not forget to replace all the
screws and covers)
.
Hard Disk Screws &
Cover
The hard disks and cov-
ers pictured here may
appear slightly different
from your model design
(these designs are sub-
ject to change and up-
grade without notice).
Pay careful attention to
the screws (if included)
and cover orientation.
Figure 6 - 3
Hard Disk Removal
4
5
6
9
10
4
5
6
7
8
9
10
Summary of Contents for C4505
Page 1: ...V10 1 00 ...
Page 2: ......
Page 18: ...XVI Preface ...
Page 23: ...XXI Preface Operating System C 4 Environmental Spec C 4 Dimensions Weight C 4 ...
Page 24: ...XXII Preface ...
Page 54: ...Features Components 2 14 2 ...
Page 82: ...Drivers Utilities 4 10 4 ...
Page 96: ...BIOS Utilities 5 14 5 ...
Page 108: ...Upgrading The Computer 6 12 6 ...
Page 118: ...Modules Options 7 10 PC Camera Module 7 Figure 7 5 Audio Setup for PC Camera Right click ...
Page 148: ...Modules Options 7 40 7 ...
Page 168: ...Troubleshooting 8 20 8 ...
Page 172: ...Interface Ports Jacks A 4 A ...


